
10 Roof Problems That Could Cost You Thousands (And How to Prevent Them)
Plumbing leaks might seem like a minor issue at first, but trust me, they can quickly spiral into a major problem. Whether it’s a dripping faucet or a slow, unseen pipe leak, the damage they cause over time can be expensive—leading to water damage, mold growth, and increased utility bills. You might think a small leak isn’t a big deal, but in reality, even the smallest crack can lead to big trouble if ignored.
This isn’t just about fixing the leak; it’s about preventing the bigger issues down the line. In this article, we’ll dive into the most common plumbing leaks you might face in your home and how to fix them—before they get out of hand. Let’s tackle those leaks together, so your home stays dry, safe, and cost-effective.
1. Fix Leaky Faucets with Simple Tools
Faucet leaks are one of the most common plumbing problems you’ll encounter at home. The reason behind these leaks? Worn-out washers. Over time, washers wear down, which leads to the faucet not sealing properly, causing that annoying drip-drip sound you can’t ignore. But don’t worry—it’s an easy fix you can do yourself with just a few basic tools.
Here’s a step-by-step guide on how to replace the washers, O-rings, and seals in your faucet:
- Turn off the water supply: Start by shutting off the water supply to the faucet to avoid any mess or water waste.
- Disassemble the faucet: Use a wrench or pliers to remove the handle and the valve stem. This may require unscrewing some parts, depending on the type of faucet.
- Inspect the parts: Check the washer, O-ring, and seal for signs of wear. These are typically the culprits behind the leak.
- Replace the parts: Purchase the correct replacement parts (you can find these in any hardware store) and install them, making sure everything fits snugly.
- Reassemble the faucet: Put the faucet back together and turn the water supply back on. Test the faucet to make sure the leak is gone.
Why This is Important for You: Not only will this fix save you from listening to that constant drip-drip sound, but it will also help you avoid wasting water. To prevent leaks from becoming an issue in the colder months, check out our guide on 10 Ways to Winter-Proof Your Home Without Hiring a Pro for tips on how to keep your faucets and plumbing safe from freezing temperatures. Leaky faucets can add up to hundreds of gallons of water per year, increasing your water bills. By fixing this issue yourself, you’re saving both time and money.
2. Use Plumber’s Tape to Temporarily Seal Pipe Leaks
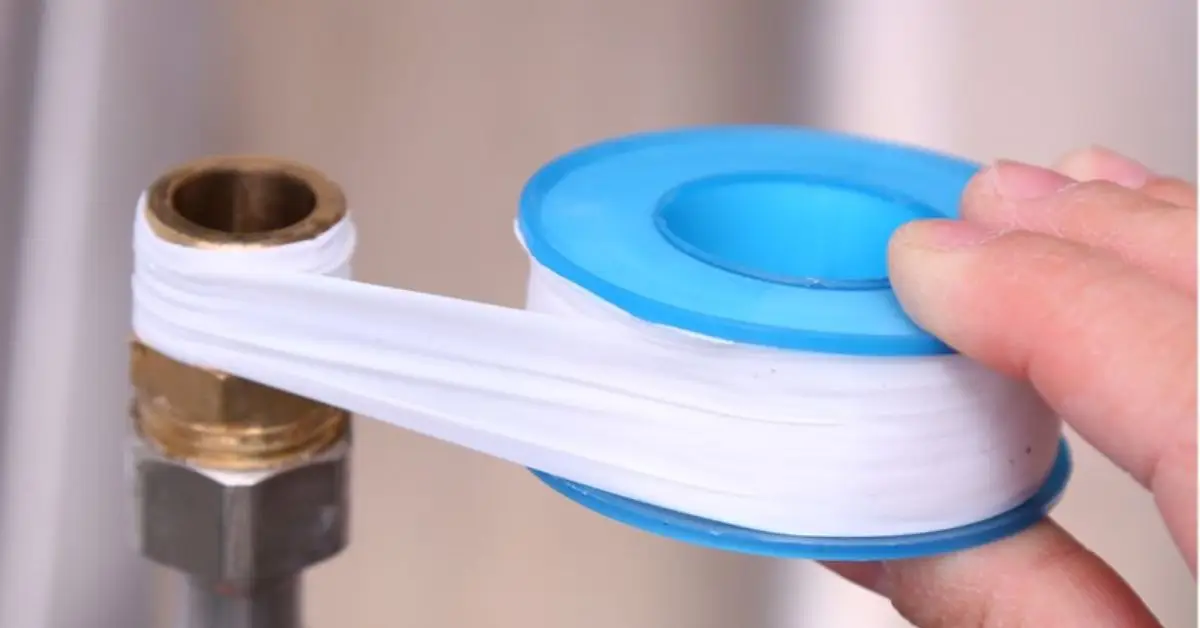
Got a small pipe leak and can’t call a professional right away? Plumber’s tape (also known as Teflon tape) can come to your rescue. It’s an excellent temporary solution for sealing small leaks in pipes until you can arrange for a permanent fix.
Here’s how you can use plumber’s tape to seal the leak:
- Identify the leak: Locate the leaking area of the pipe. You’ll likely find small drips or wet spots around the pipe.
- Clean the area: Before applying plumber’s tape, clean the area around the leak to ensure the tape sticks well.
- Wrap the tape around the leak: Start wrapping the plumber’s tape around the pipe, overlapping slightly as you go. Apply several layers to ensure a tight seal.
- Check for leaks: Once the tape is in place, turn the water supply back on and check if the leak is sealed.
How Long Will This Fix Last? Plumber’s tape is a short-term fix. It can last for a few hours or days, depending on the size of the leak and water pressure. It’s ideal for emergencies, but you’ll want to call a professional plumber to properly repair the pipe soon.
Why This is Important for You: This is a quick, low-cost fix that prevents further damage. If you’ve got a small pipe leak and you need some time to figure out the best long-term solution, plumber’s tape is your best friend. You’re avoiding water damage to your walls or floor while waiting for a professional repair.
3. Seal Leaks with Epoxy Putty for Pipe Cracks
Sometimes, pipes develop cracks, and if left untreated, those cracks can lead to major leaks. But you don’t always have to replace the whole pipe. Epoxy putty is a fantastic, cost-effective way to seal small cracks in pipes, and it can be a lifesaver in an emergency.
Here’s how to apply epoxy putty to fix cracks in pipes:
- Turn off the water supply: Always shut off the water supply to avoid flooding the area while you work.
- Clean the cracked area: Use a clean rag to wipe away any dirt, moisture, or rust around the crack.
- Mix the epoxy: Follow the manufacturer’s instructions to mix the epoxy putty. Typically, it comes in two parts that you knead together until it’s a uniform color.
- Apply the putty: Press the putty into the crack and smooth it out, making sure it covers the crack completely. Hold it in place for a few minutes to ensure a firm seal.
- Allow the putty to harden: Let the epoxy cure for the recommended time (usually a few hours) before turning the water back on.
When to Use Epoxy Putty: Epoxy putty is ideal for small cracks in metal or PVC pipes. It’s a quick and durable fix for minor leaks, but if the crack is too large, or if you’re unsure about the integrity of the pipe, you should contact a professional.
Epoxy putty is a great temporary solution that’s durable and affordable. It gives you enough time to schedule a proper pipe replacement or to decide the next steps without worrying about water damage. Plus, it saves you the cost of calling a plumber for a small crack.
For more expert tips on fixing leaks and improving your plumbing system, check out this helpful guide from This Old House.
These methods can save you a lot of hassle and money. Have you ever tried fixing a leak yourself? Share your experience or ask any questions in the comments below—I’d love to hear how you’ve tackled your plumbing issues!
4. Replace Damaged Faucet Cartridges to Prevent Leaks
Faucet cartridges are the unsung heroes behind a smooth water flow in your kitchen or bathroom. Over time, they can wear out, especially in older faucets, leading to constant leaks or poor water flow. The good news? Replacing a faulty faucet cartridge is a simple and effective way to restore your faucet to working order without calling in a plumber.
Here’s how to identify a faulty cartridge and replace it:
- How to identify a faulty faucet cartridge: If your faucet is leaking even when it’s turned off or the water pressure is weak or inconsistent, the cartridge might be the culprit. You’ll notice water pooling around the base of the faucet handle or continuous dripping.
- Step-by-step guide to replacing faucet cartridges:
- Turn off the water supply: Before you do anything, make sure you turn off the water supply to the faucet.
- Remove the handle: Unscrew the faucet handle using a wrench or screwdriver to access the cartridge.
- Extract the old cartridge: Depending on your faucet type, you may need a special tool to pull the cartridge out. Use pliers if necessary.
- Install the new cartridge: Place the new cartridge into the faucet assembly. Be sure it’s seated properly.
- Reassemble the faucet: Tighten everything back in place, and turn the water supply back on. Test the faucet to ensure it’s functioning correctly.
Why This is Important for You: Replacing the cartridge stops the constant leaks that waste water, which is a huge win for both your water bill and the environment. Plus, it improves the water flow, restoring the pressure you’re used to and preventing further wear on the faucet components.
5. Fix Leaking Toilets with a Wax Ring Replacement
Toilet leaks can be sneaky, and often the source is something simple: a worn-out wax ring. This rubbery ring sits between the base of the toilet and the drain pipe, creating a watertight seal. Over time, however, it can break down, causing leaks around the base of your toilet. Let’s look at how you can replace it and stop the leaks.
Here’s a guide on replacing the wax ring and identifying when your toilet is leaking:
- Guide on replacing a wax ring under the toilet:
- Turn off the water supply: Start by shutting off the water supply to the toilet and draining the tank.
- Remove the toilet: Carefully remove the bolts holding the toilet to the floor. You may need a helper to lift the toilet off the base.
- Replace the wax ring: Once the toilet is lifted, scrape off the old wax ring and place a new one onto the flange.
- Reinstall the toilet: Carefully place the toilet back onto the flange, making sure it’s level and the bolts are tightened.
- Common signs of a leaking toilet:
- Water pooling around the base of the toilet
- A musty smell from the bathroom (a sign of mold or water damage)
- Constant dampness on the bathroom floor around the toilet
Why This is Important for You: Fixing a leaking toilet at the root cause (the wax ring) prevents water from seeping into your floors, which could lead to serious water damage. A properly sealed toilet helps protect your bathroom floor and foundation, saving you from expensive repairs.
6. Tighten Loose Connections Under the Sink

It’s easy to overlook, but loose connections under your sink are often the cause of slow, persistent leaks. These leaks are typically small but can cause major issues if not addressed. Fortunately, this is a quick and easy fix.
Here’s how you can tighten the connections and stop the leaks:
- How loose connections under sinks can cause leaks:
- Over time, water pressure and regular use can loosen the nuts and bolts connecting your plumbing under the sink. This leads to drips or a steady stream of water that you might not notice until the damage starts to show.
- Tips on tightening the connections and checking for leaks:
- Turn off the water supply: Always start by turning off the water supply to avoid flooding.
- Inspect the connections: Check the pipes under the sink for any loose connections or signs of wear.
- Tighten the connections: Use a wrench or pliers to tighten the nuts around the pipe connections, ensuring a snug fit.
- Test for leaks: Once everything is tight, turn the water back on and check for leaks by running water through the sink.
Why This is Important for You: Tightening loose connections can prevent water damage that’s often hidden behind the cabinets. It’s a small, often overlooked fix that can save you from bigger plumbing problems later on. For more home improvement tips, check out this helpful article on The Family Handyman.
These fixes are simple yet impactful. Have you experienced any plumbing issues around your sink or toilet? What DIY fixes worked for you? Drop your thoughts or questions in the comments below—I’d love to hear about your experience!
7. Use Compression Fittings to Repair Leaks in Copper Pipes
Copper pipes are reliable, but over time, they can develop leaks, especially at the joints. Instead of replacing an entire section of pipe, compression fittings provide an excellent solution to seal leaks without the need for soldering. This method is fast, effective, and doesn’t require professional experience, making it perfect for DIY enthusiasts.
Here’s how you can use compression fittings to fix leaks in copper pipes:
- When to use compression fittings:
- Compression fittings are ideal for small to medium leaks, especially where the pipe is damaged but the section is still usable.
- They are perfect when you need a fast repair without removing the pipe entirely.
- How to install compression fittings correctly:
- Turn off the water supply: Always start by shutting off the water supply to the area you’re working on.
- Cut the pipe: If the pipe is damaged, cut out the affected section with a pipe cutter.
- Install the compression fitting: Slide the compression nut and ring onto the pipe. Then, insert the pipe into the fitting and tighten the nut. Make sure the seal is tight and secure.
- Test for leaks: Once the compression fitting is in place, turn the water back on and check for leaks.
Why This is Important for You: Compression fittings are a quick, reliable fix for copper pipe leaks. You don’t need to worry about soldering, and you’ll save time and money on more expensive professional repairs. Plus, they create a strong seal that can hold up for years.
8. Stop Leaks in Water Supply Lines with a Pipe Clamp
A leaking water supply line can cause havoc, but if you need a temporary fix before you can replace the damaged pipe, a pipe clamp can help seal the leak. This method is simple, inexpensive, and will help you avoid serious water damage until you can get a permanent solution.
Here’s how to use a pipe clamp:
- How to use a pipe clamp to temporarily seal a leaking water supply line:
- Locate the leak: Identify the leak in the water supply line.
- Prepare the pipe: Clean the area around the leak so the clamp adheres better.
- Apply the clamp: Position the pipe clamp over the leaking section and tighten it to stop the water flow.
- Test the repair: Turn the water supply back on and check to ensure the leak has stopped.
- When to use this as a short-term solution:
- Pipe clamps are best used as a temporary fix while you arrange for a full replacement of the damaged pipe. They are ideal for smaller leaks but should be replaced with a more permanent repair as soon as possible.
Why This is Important for You: Pipe clamps are an ideal quick fix that can prevent extensive water damage while you plan the long-term repair. This method is affordable and easy for any homeowner to execute, giving you time to call a professional when necessary.
9. Replace Faulty Hose Bibs to Prevent Outdoor Leaks
Leaking outdoor hose bibs can waste a lot of water and cause damage to your garden, lawn, or the surrounding areas. Leaks can occur due to frozen pipes or worn rubber washers, both of which are common culprits, especially during extreme weather.
Here’s how to replace a faulty hose bib:
- Identify when outdoor hose bibs are leaking:
- A frozen pipe during the winter months can cause hose bibs to crack, leading to leaks. To ensure your outdoor areas are safe from water damage, take a look at our guide on Wildfire-Proofing Your Home: 5 Must-Do Steps Before It’s Too Late. This will help you protect your outdoor plumbing and garden structures from other extreme conditions.
- Worn-out rubber washers inside the bib can also lead to slow leaks around the faucet.
- Step-by-step guide on replacing a hose bib:
- Turn off the water supply: Locate the shutoff valve that controls water flow to the hose bib and turn it off.
- Remove the old hose bib: Use a wrench to unscrew the old hose bib from the pipe.
- Install the new hose bib: Screw the new hose bib onto the pipe and tighten it.
- Check for leaks: Once the hose bib is securely installed, turn the water back on and check for any signs of leakage.
Why This is Important for You: Replacing a faulty hose bib is essential to preventing water waste and protecting your outdoor areas from damage. It’s an easy fix that prevents bigger issues down the road, especially during colder months when frozen pipes can cause more severe damage.
If you’re dealing with faucet leaks due to frozen pipes this winter, it’s also worth reading our article on Avoid Ice Dams & Leaks: 10 Expert Roof Protection Tips for Winters to protect your roof from the same winter damage that can affect plumbing.
10. Invest in Smart Leak Detectors for Early Leak Detection
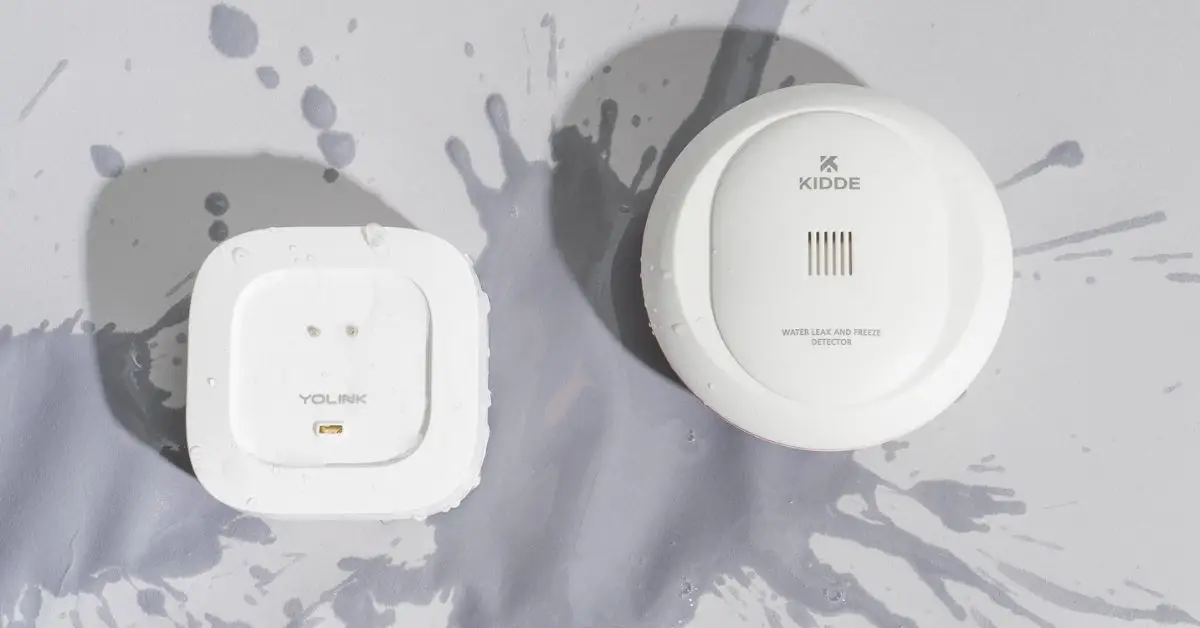
Plumbing leaks aren’t always visible right away, but small, hidden leaks can cause major damage if left undetected. That’s where smart leak detectors come in. These devices can alert you to leaks early, helping you avoid costly repairs and water damage to your home.
Here’s an introduction to how smart leak detectors work:
- How smart leak detectors work:
- These devices are placed in key areas, such as under sinks, near water supply lines, or around toilets. They can detect any unusual moisture levels and send an alert to your phone or email.
- Some advanced detectors even have automatic shutoff valves to stop the flow of water when a leak is detected.
- Benefits of using these detectors:
- Early detection of hidden leaks, like those behind walls or under floors.
- Saves money by preventing major water damage and costly repairs.
- Provides peace of mind, especially if you’re frequently away from home.
Why This is Important for You: Smart leak detectors are an investment that can catch leaks early, saving you from major repair costs in the future. They’re perfect for homeowners who want to stay proactive about home maintenance and prevent major plumbing disasters.
For more expert advice on fixing home problems, check out this Roof Problem Areas guide.
Final Thoughts – Taking Action to Prevent Plumbing Leaks
Plumbing leaks may seem small, but they can quickly lead to serious water damage and costly repairs. The 10 fixes we’ve covered, from replacing faucet cartridges to using smart leak detectors, are all simple ways to prevent bigger problems and save money on repairs.
Acting early is key. Fixing leaks as soon as they appear, whether by tightening connections or applying a temporary seal, can save you from expensive repairs down the line. A little effort now goes a long way in protecting your home and your wallet.
Have you dealt with a plumbing leak? Share your experience in the comments below. For more home improvement tips, visit Build Like New today!
Disclaimer: The tips provided are for general informational purposes. For severe plumbing issues or when in doubt, it’s always best to consult a professional plumber.

