
10 Areas in Your Home That Leak Heat — and How to Seal Them for Good
Last winter, I couldn’t figure out why my living room felt colder than the rest of the house. The thermostat read 72°F, but the air near the couch had that unmistakable chill — the kind that creeps in quietly and makes you reach for a blanket even when the heat’s running. I checked the windows. I checked the doors. Nothing obvious. Still, that cold draft lingered.
If you’ve ever felt the same — one room freezing while the others feel fine — you’re not imagining it. Drafts have a sneaky way of slipping through tiny cracks and hidden gaps most homeowners never think to check. They don’t just make you uncomfortable; they waste energy, raise your heating bills, and can even lead to moisture issues down the line.
Over the years, I’ve inspected dozens of homes and found that the real culprits aren’t always where you expect. It’s rarely just “old windows.” Sometimes it’s the attic hatch, recessed lighting, or even an outlet you’d never suspect. Once you learn where these leaks hide, sealing them up is surprisingly quick — and the payoff is instant: warmer rooms, lower bills, and a home that finally feels airtight.
In this guide, I’ll walk you through the 10 most overlooked spots where cold drafts love to sneak in — plus how to find and fix them fast without spending a fortune.
So tell me — where in your home do you feel that stubborn cold spot every winter?
How Cold Air Sneaks In: The Science of Air Movement in Your Home
Before you start sealing every window and door, it helps to know why your house gets drafty in the first place. I’ve seen many homeowners waste time fixing the wrong spots simply because they didn’t understand how air actually moves through a home. Let’s break it down in plain English.
The Stack Effect: When Your Home Becomes a Giant Chimney
Here’s what’s really happening inside your walls every winter: warm air naturally rises toward your ceiling and attic. As it escapes through small gaps up top — like attic hatches, vents, or recessed lights — it creates suction that pulls cold air in from lower parts of your home.
That invisible upward pull is called the stack effect, and it’s the biggest reason you feel cold air at your feet even when your furnace is working overtime.
Think of it like this:
- Warm air leaks out through the attic and upper floors.
- Cold air rushes in through basements, crawl spaces, and wall cracks to replace it.
- The bigger the temperature difference outside, the stronger the pull.
So if you only focus on sealing windows, you’re fighting half the battle. To really stop drafts, you have to plug both the “exits” and the “entrances” of your home’s air system.
Air Leaks vs. Insulation Gaps: The Hidden Energy Thieves
A lot of people confuse insulation problems with air leaks — but they’re not the same.
- Insulation slows down heat transfer.
- Air leaks are actual openings that let air move in or out.
Even a hole the size of a dime can leak enough air to chill a small room. The U.S. Department of Energy points out that sealing these leaks can cut energy costs by up to 20%.
So if you’ve added insulation but still feel cold spots, the problem isn’t how much insulation you have — it’s where air is sneaking through.
Quick tip: When you feel a sudden draft, it’s not always from a wall that lacks insulation. It might be a tiny gap near an outlet, a plumbing line, or the attic door pulling cold air in.
Why New Windows and Doors Don’t Always Solve It
Many homeowners spend thousands replacing windows, only to find their homes still feel drafty. The truth is, air doesn’t just slip through glass or frames — it finds pathways all over your house: around trim, under thresholds, through recessed lights, and into unfinished attic corners.
If your home still feels cold after an expensive window upgrade, it’s not your imagination — it’s likely those unseen openings above or below doing the damage.
In short:
- Warm air escapes up high → cold air gets sucked in down low.
- Insulation slows heat loss but doesn’t stop airflow.
- Real comfort comes when you control both leaks and insulation.
Once you understand this invisible airflow pattern, you’ll start looking at your home differently — and you’ll know exactly where to hunt for the cold spots that everyone else misses.
The 10 Sneaky Draft-Points in Your Home
If your house still feels cold even after sealing windows and doors, you’re not alone. Most of the time, the real culprits hide in plain sight — behind outlets, light fixtures, or small gaps you’d never think to check. Over the years, I’ve found that these hidden spots can leak more air than a cracked window. Let’s walk through the ten places I always inspect first when tracking down stubborn drafts.
1. Recessed Ceiling Lights and Fixtures
These are one of the biggest offenders because they punch straight through to your attic. Warm air escapes upward through tiny gaps around the fixture, pulling cold air down from above.
How to test: Light a stick of incense and slowly move it around the fixture edge — if the smoke wavers, air’s moving.
How to fix: Add an airtight recessed-light cover in the attic, then caulk around the fixture trim from below.
2. Electrical Outlets, Switches, and Wall Boxes on Exterior Walls
Most people never think about these, but the gaps behind wall plates act like little chimneys. When multiplied across a dozen outlets, they leak a surprising amount of air.
How to test: On a windy day, run your hand along the edges of outlets on outside walls — you’ll feel the draft.
How to fix: Install pre-cut foam gaskets behind the covers and apply a thin bead of caulk where the box meets drywall.
3. Attic Access Hatch, Knee-Walls, and Plumbing Vent Stacks
Your attic hatch is basically a big hole into unheated space. When it isn’t insulated or sealed properly, warm air escapes, dragging cold air into your living areas.
How to test: Step into your attic and look for light or dust trails around the hatch — that’s air leakage.
How to fix: Add weather-stripping to the lid and glue rigid foam board to the top for insulation.
4. Rim Joists and Basement or Crawlspace Edges
This area — where the wood frame of your house meets the concrete foundation — is a major source of infiltration. Cold air creeps in through the seams and seeps upward through the floors.
How to test: Walk around the basement perimeter with a flashlight and feel for cold air or cobwebs moving.
How to fix: Seal with expanding foam around gaps and add rigid foam board insulation over rim joists.
5. Chimneys and Fireplaces
Even with the damper closed, chimneys often act like an open window. Warm air escapes up the flue while cold air sneaks down the sides. According to BobVila.com, the stack pressure in tall chimneys can draw cold air in even when the fireplace isn’t used.
How to test: Hold a tissue near the fireplace opening — if it moves, air’s flowing.
How to fix: Install a tight-fitting chimney balloon or flue plug when not in use, and check the damper seal.
6. Attic Eaves, Soffits, and Overhang Vents
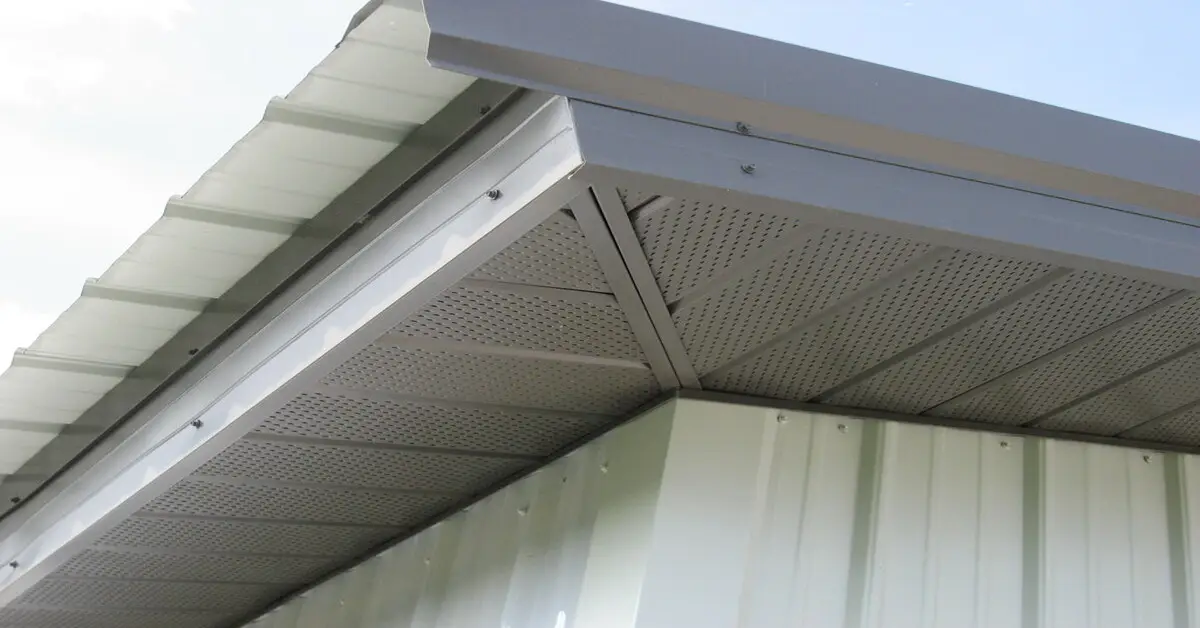
Air often leaks through the upper edge of the attic floor, where insulation doesn’t meet the roofline perfectly. This lets heat escape and strengthens the stack effect.
How to test: Look for dark insulation edges or dusty streaks — signs air is passing through.
How to fix: Seal the top plate with spray foam and ensure soffit vents are baffle-protected but not blocked.
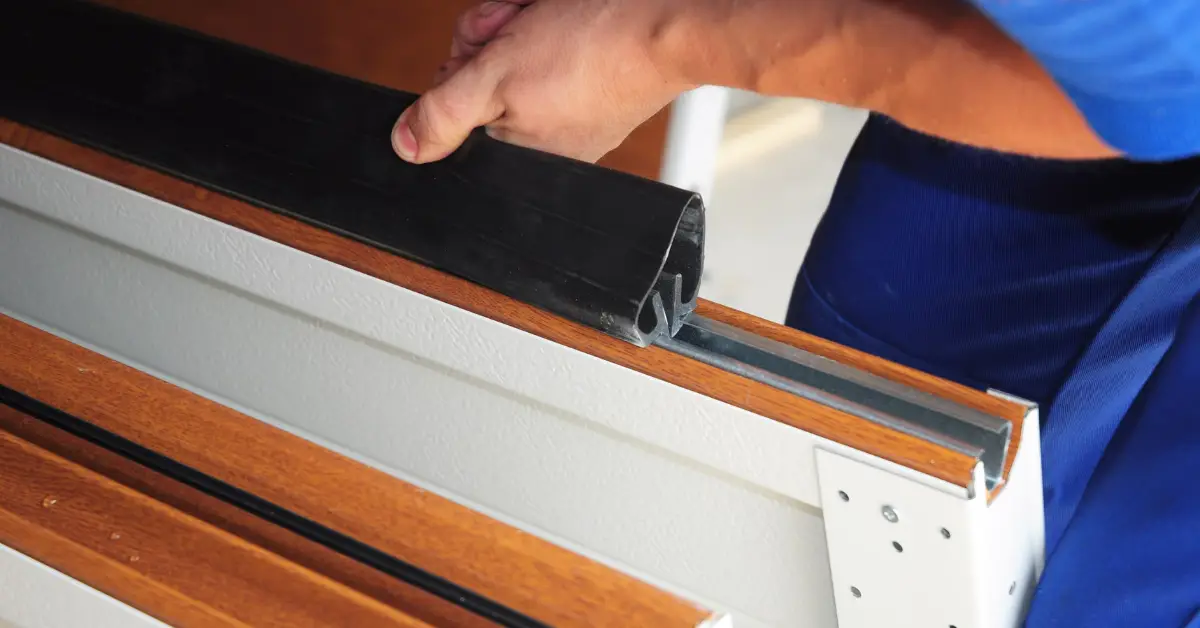
7. Door Bottoms, Thresholds, and Garage-to-House Connections
You probably expect drafts here, but degraded sweeps or uneven thresholds make them worse. The garage-house door is another common leak zone since it’s rarely insulated.
How to test: Step outside on a bright day — if you see light under or around a door, air is leaking.
How to fix: Replace worn sweeps, tighten hinges, and add self-adhesive weather-stripping.
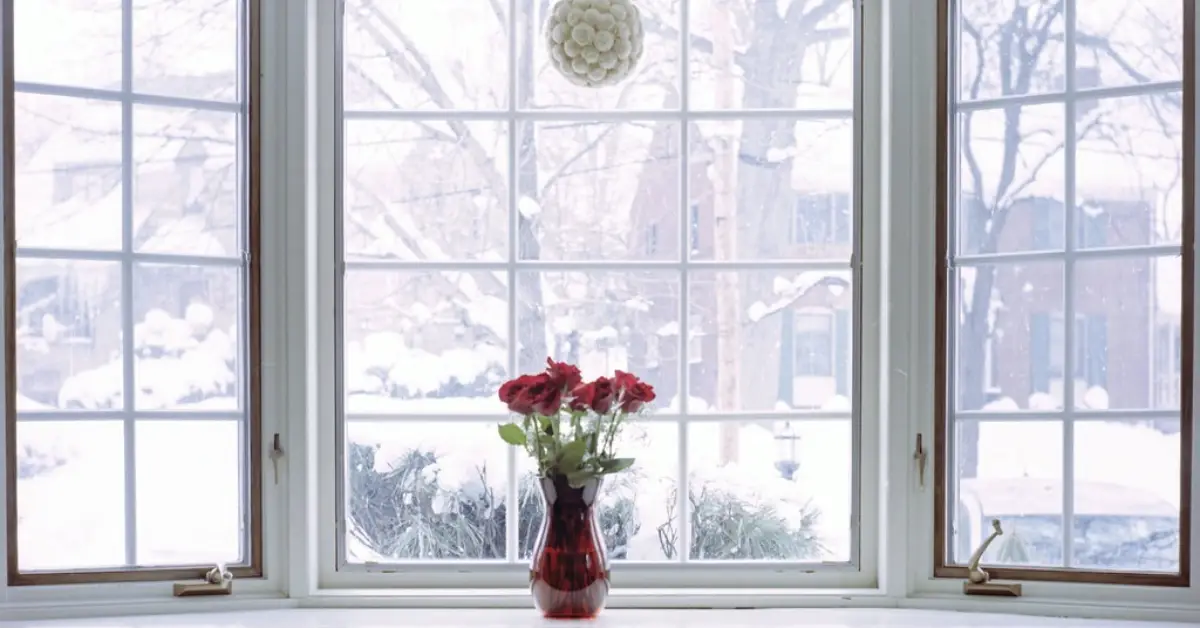
8. Windows: Beyond the Glass
Old frames, dried caulk, and even weep holes can leak cold air. But new windows aren’t a guaranteed fix if the gaps between the frame and wall weren’t sealed properly during installation.
How to test: On a breezy day, run a candle or tissue around the frame edges.
How to fix: Use removable weather-stripping for temporary sealing or low-expansion foam between frame and drywall if the trim is removable.
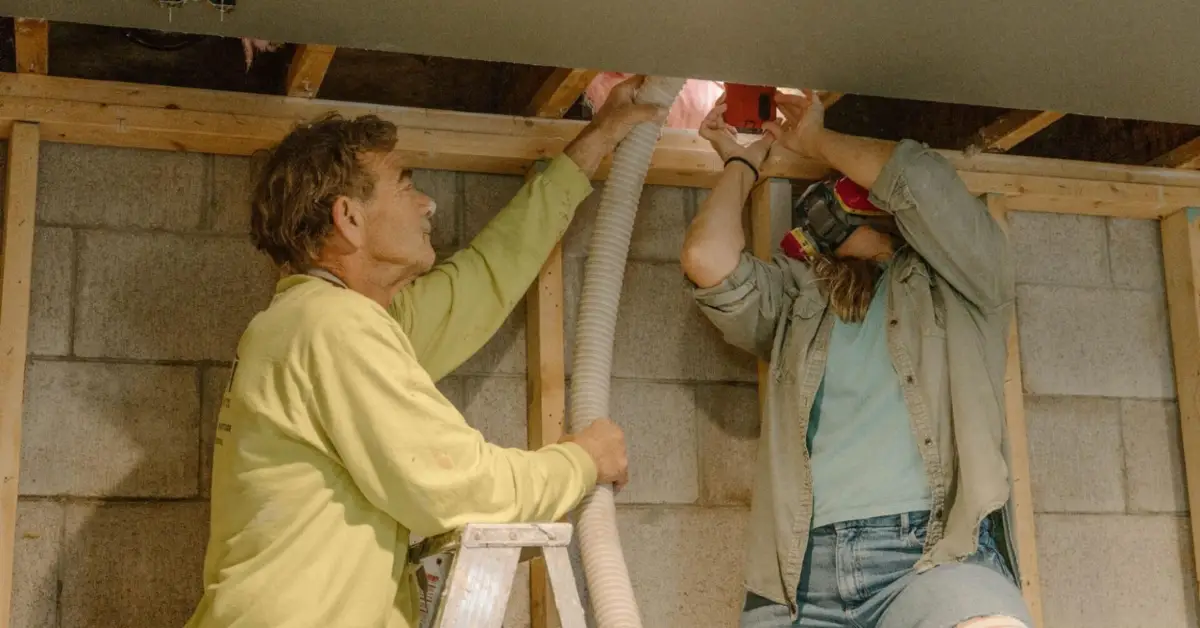
9. Ductwork and HVAC Returns in Unconditioned Spaces
If ducts run through cold basements, crawlspaces, or attics, leaks in the joints pull in frigid air and waste heated air before it reaches your rooms.
How to test: Feel along duct seams while the system runs; cold drafts signal leaks.
How to fix: Use foil-backed HVAC tape (not cloth duct tape) and mastic sealant on joints.
10. Floor Joints and Crawlspace Gaps
Cold air seeps upward through floorboards, especially in older homes or those with vented crawlspaces. The floor may feel icy even if your thermostat says it’s warm.
How to test: Place your hand on the floor near exterior walls — a noticeable chill means air is entering from below.
How to fix: Seal rim joists and subfloor gaps with spray foam, then insulate the crawlspace ceiling or convert it to a sealed, conditioned area. Seal rim joists and subfloor gaps with spray foam, then insulate the crawlspace ceiling or convert it to a sealed, conditioned area. You’ll be surprised — even tiny air leaks can invite unwanted guests, so it’s worth learning how small leaks and gaps can attract pests too.
When you check these ten spots, you’ll realize how much “invisible air movement” happens inside your home every day. Seal even a few of them, and you’ll feel the difference almost immediately — warmer rooms, lower bills, and finally, no mystery drafts sneaking up on you.
Step-by-Step Inspection & Detection Plan
Finding where drafts come from isn’t guesswork — it’s detective work. You don’t need fancy gear or years of experience to do it right; you just need patience, a few simple tools, and a plan. Here’s how I recommend approaching a full-home draft inspection.
Basic DIY Tools You’ll Need
You can’t fix what you can’t see, and drafts are sneaky. The good news is you can see them — with smoke, light, or temperature changes. Here’s what to keep on hand:
- Incense stick or smoke ribbon: Move it slowly around windows, outlets, and attic hatches. If the smoke wavers, air’s leaking.
- Candle or lighter: Works the same way for quick checks — the flame flickers where air sneaks through.
- Thermal leak detector or infrared thermometer: These handheld tools highlight cold spots on walls and ceilings. Great for locating hidden gaps behind insulation.
- Flashlight & notepad: Document what you find — small leaks add up fast when you total them across a whole house.
Your Walk-Through Checklist (Outside → Inside)
To catch every leak, move systematically. Start outside, circle the home, and then move in.
- Exterior:
- Check door frames, siding seams, and utility penetrations (wires, pipes, vents).
- Look for old caulk or gaps around window trim.
- Attic:
- Inspect the access hatch, plumbing stacks, recessed lights, and roof vents.
- If you see dusty insulation or cobwebs waving — air is moving.
- Basement or Crawlspace:
- Feel along the rim joists and sill plates where wood meets concrete.
- Shine a flashlight at night — if light from outside shows through, that’s a leak.
- Living Spaces:
- Test around outlets, switches, baseboards, and flooring edges.
- Move from room to room, marking cold zones or airflow spots.
A full inspection might take an hour, but once you’ve mapped your leaks, fixing them becomes ten times easier.
When to Call a Professional
Sometimes DIY detection isn’t enough. If your energy bills stay high despite sealing obvious leaks, it’s worth getting a blower-door test — a professional tool that measures exactly how much air escapes your home. Many local HVAC companies or energy auditors offer this service for under $300.
If your insulation is outdated or patchy, a contractor can perform an air-sealing and insulation upgrade in one visit, targeting problem zones you’d never reach yourself. Home Improvement Stack Exchange discussions confirm that combining both air sealing and insulation yields far better comfort than either alone.
Fixing the Drafts — Priorities & Cost-Effectiveness
Now that you know where drafts come from, the next step is deciding what to fix first. Not every leak deserves the same amount of time or money — and some simple fixes give massive returns.
Quick Wins (Low Cost, Big Impact)
These are the fixes I always recommend starting with:
- Add weather-stripping around doors and windows.
- Install door sweeps or draft stoppers on exterior doors.
- Caulk or foam small gaps around outlets, window trim, and floor edges.
Each of these costs under $30 and can make an immediate difference in comfort.
Medium Efforts (Higher Cost, Longer Lifespan)
Once you’ve handled the basics, tackle the bigger but still manageable upgrades:
- Seal and insulate attic hatches and rim joists. Seal and insulate attic hatches and rim joists. If your basement still feels cold after sealing, here’s a detailed guide on how to insulate a basement properly to prevent heat loss from below.
- Add storm doors or windows for extra protection.
- Use rigid foam or spray foam to close basement or crawlspace leaks.
These upgrades often pay for themselves within a year through energy savings.
Major Upgrades & When They’re Justified
Some homes need deeper intervention, especially if you’ve got older construction or severe insulation gaps. Consider:
- Whole-house air sealing and insulation by a certified energy contractor.
- HVAC upgrades — inefficient or leaky ducts waste a huge portion of heated air.
- Full window replacement — but only if your existing ones are beyond repair.
Big-ticket projects are best timed during renovations or before winter to maximize return.
US Incentives & Rebates
You don’t have to shoulder the cost alone. Many state and federal programs offer tax credits and rebates for air sealing and insulation under the Energy Efficient Home Improvement Credit (25C). Local utilities also run rebate programs for energy audits and weatherization.
Pro Tip: Check your state’s program directory on energy.gov/save before starting any major project — you might get back up to 30% of what you spend.
Maintenance & Seasonal Checks
Even the best sealing work won’t last forever. Weather, house movement, and daily use gradually wear out seals and caulk. That’s why draft control should become part of your seasonal home routine.
Here’s a simple maintenance checklist:
- Before winter: Inspect all weather-stripping, door sweeps, and attic hatches. Re-seal if you feel airflow.
- After heavy storms: Check for new gaps or water intrusion around windows and foundation joints.
- When heating bills spike: Revisit cold spots — sometimes insulation has shifted or dried out.
- Once a year: Peek into the attic and crawlspace. Dusty insulation or spider webs waving = new leaks forming.
By checking these a few times a year, you’ll stay ahead of the drafts — and your home will stay as warm and efficient as the day you sealed it.
By checking these a few times a year, you’ll stay ahead of the drafts — and your home will stay as warm and efficient as the day you sealed it. Before winter sets in, make sure you also complete these 5 must-do home tasks this November to stay winter-ready for extra protection and peace of mind.
Beyond Comfort — Why Drafts Cost You More Than a Chill
Most people think of drafts as just a comfort issue — that one cold spot in the living room or a chilly floor in the morning. But the truth is, those sneaky leaks are silently costing you every single month. Let’s break down why ignoring them hits both your wallet and your home’s health.
The Real Energy Cost of Drafts
Every gap, no matter how small, lets your heated or cooled air escape — and that means your HVAC system has to run longer and harder to maintain temperature. According to The Spruce, even a quarter-inch crack around a window can waste as much energy as leaving a small window open year-round.
Think about it:
- Your furnace or AC cycles more often, using more energy.
- Leaks throw off the home’s air pressure balance, pulling in cold (or hot) outside air through other gaps.
- Over time, that extra workload shortens your HVAC system’s lifespan.
A typical U.S. homeowner can lose up to 20–30% of their heating and cooling efficiency to air leaks — money literally leaking through the walls.
Health and Comfort Implications
Drafts don’t just make rooms uncomfortable — they mess with your home’s internal environment:
- Cold spots and uneven heating: You crank the thermostat, but one corner of the room always feels colder. That’s uneven airflow, not a faulty heater.
- Dry air and allergies: Drafts pull in outdoor dust and allergens, which can aggravate breathing problems.
- Moisture and mold: When warm, humid indoor air hits cold surfaces near leaks, condensation forms — perfect for mold growth.
- Overworked HVAC systems: The constant cycling wears down parts faster, increasing repair and replacement costs.
When you fix drafts, you’re not just sealing cracks — you’re improving indoor air quality, extending your HVAC’s life, and making your home genuinely healthier.
Final Wrap & Next Steps
Now that you know where drafts come from, how to find them, and which fixes matter most, you’ve got everything you need to take action. Remember: even small steps — like sealing outlets or weather-stripping a door — can make a huge difference in comfort and energy savings.
Here’s your quick recap:
- 10 sneaky spots: From recessed lights to crawlspaces — check each one.
- Inspection plan: Use incense, smoke, or a thermal detector to locate leaks.
- Fix priorities: Start with quick wins, then move up to insulation or HVAC upgrades if needed.
Don’t wait for your next utility bill to remind you. Start your inspection today — grab a candle or incense stick and walk your rooms. If you discover more leaks than you expected, set aside a small weekend budget for sealing, or book a professional home energy audit to pinpoint major losses.
Start today — visit Build Like New to get your printable inspection guide, expert-approved sealing tips, and rebates list for your state. Because comfort shouldn’t come with a higher bill.
Disclaimer: The information in this article is for general educational purposes only and should not replace professional home energy or safety advice. Always follow manufacturer instructions and local building codes when performing DIY sealing or insulation work. For major drafts, moisture issues, or HVAC concerns, consult a licensed contractor or certified energy auditor.

