
13 Home Makeover Projects You Can Do Yourself
The first time I decided to tackle a home project on my own, it wasn’t anything fancy—I just wanted to repaint the small hallway that always felt too dark. I figured it would be quick and easy, but by the time I finished sanding, taping, and rolling on the second coat, I realized something bigger: these little projects don’t just change the way your house looks, they change how you feel in it. You save money, you build confidence, and you start to notice other corners of your home that could use the same kind of care.
If you’ve ever put off fixing a dripping faucet or thought about refreshing your kitchen but didn’t want to spend thousands on a remodel, you’re not alone. Contractors are expensive, and even small renovations can take weeks to schedule. That’s why more homeowners are turning to DIY home improvement projects—not only because they’re affordable, but because you can start them right now with just a trip to Home Depot or Lowe’s.
In this guide, I’m going to walk you through 13 step-by-step projects that you can actually do yourself. Each one includes what you’ll need, how long it takes, and why it’s worth your time—whether your goal is saving on bills, boosting resale value, or simply making your space feel more like home. By the end, you’ll have a list of projects that fit your budget, your skill level, and your weekend plans.
1. Paint an Accent Wall to Refresh Your Living Space
The first time I tried this, I thought, “It’s just paint—how hard can it be?” By the end of the day, my living room felt brand new, and I realized this is one of the cheapest ways to transform a space.
Here’s how you can do it too:
- Pick one wall that draws the eye (behind a couch or bed works best).
- Choose a color—neutral shades like gray, beige, or navy work great if you’re thinking about resale.
- Prep properly: clean the wall, tape the edges, and put down a drop cloth.
- Roll on two coats of paint for a smooth, even finish.
Time: 3–4 hours
Cost: Around $50 (1 gallon of paint + roller kit + tape)
Quick Tip: Always test a sample patch before committing to a full wall.
An accent wall is the fastest way to add character without overwhelming the room. It works whether you own your home or rent.
2. Swap Out Cabinet Hardware for a Kitchen Upgrade
When I swapped out my old brass cabinet handles for matte black pulls, the kitchen instantly felt modern. The best part? It cost me less than a dinner out.
Here’s your game plan:
- Remove old handles with a screwdriver.
- Use a template (or the old holes) to mark where the new hardware will go.
- Drill carefully, making sure you don’t split the cabinet wood.
- Install new knobs or pulls and tighten screws.
Time: 1–2 hours
Cost: $40–$100 (depending on style and how many cabinets)
Tools: Screwdriver, drill
Where to shop: You’ll find tons of affordable options at places like Home Depot, Lowe’s, or even Target.
Cabinet hardware is like jewelry for your kitchen. Swap it out, and you get a facelift without spending thousands on a remodel.
3. Install Floating Shelves for Storage & Style
I’ll be honest—my first set of floating shelves wasn’t perfectly level. But once I got it right, the space went from cluttered to curated. Floating shelves not only give you extra storage but also let you show off books, plants, or travel souvenirs.
Steps you can follow:
- Measure your wall and mark shelf placement with a level.
- Use anchors if you’re not drilling into studs (shelves need to hold weight safely).
- Drill brackets into place, then slide or screw the shelf on.
- Style with books, framed photos, or greenery.
Time: Half a day
Cost: $60–$120 (depending on size and material)
Tools: Level, drill, anchors, measuring tape
Shelves add both form and function. In small apartments especially, they give you storage without eating up floor space.
4. Add Peel-and-Stick Backsplash in the Kitchen
The first time I tried peel-and-stick tiles, I thought it might look cheap. But once I stepped back, the kitchen had a designer feel—without me touching grout or calling a contractor.
Here’s how you can do it:
- Clean and dry the wall surface so the adhesive sticks properly.
- Measure carefully and cut the sheets with a utility knife.
- Start from the bottom center and work your way out for symmetry.
- Press firmly, smoothing out air bubbles as you go.
Time: 1 full day
Cost: $100–$200
Tools: Utility knife, measuring tape, straight edge
This project instantly upgrades your kitchen, adds resale value, and is renter-friendly since most tiles peel off without damage.
5. Refresh Your Front Door with Paint & Hardware
I can’t forget the reaction of my neighbor when I painted my front door navy and swapped in a new handle set. Suddenly the whole house felt welcoming.
Steps to follow:
- Sand the old door lightly to remove dirt and peeling paint.
- Apply primer, then two coats of exterior paint (navy, red, and black are popular).
- Replace the old lockset with a new one for both style and security.
- Add a new doormat or house numbers for an extra touch.
Time: 1 day
Cost: ~$150
Tools: Sander, brush, new lockset
Curb appeal matters a lot in the housing market. A front door refresh is one of the highest ROI projects you can do in a weekend. If you’re already working on boosting curb appeal, it’s also the perfect time to think about safety. Check out these DIY security upgrades that can lower your home insurance premium—they’re simple, affordable, and add peace of mind along with style.
6. Build a Raised Garden Bed for Outdoor Space
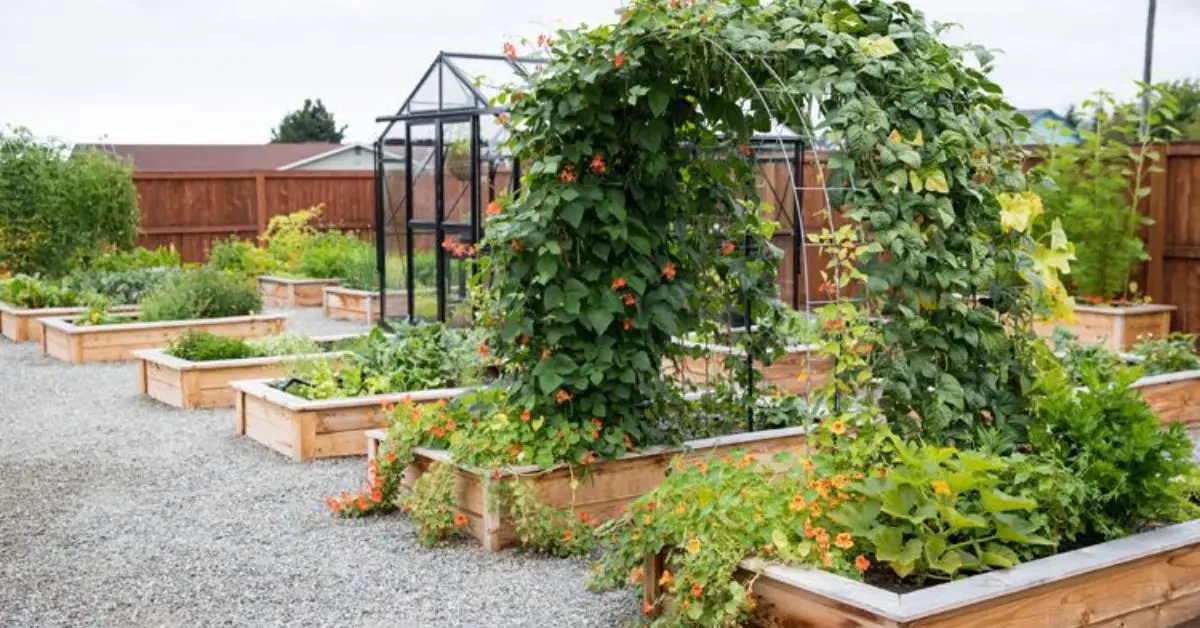
When I built my first raised bed, I didn’t expect to spend so much time outside—but it quickly became my favorite spot in the yard. You’ll get fresh veggies, flowers, or herbs right outside your door.
How to get started:
- Pick a sunny spot in your yard.
- Cut cedar boards or buy a pre-made kit.
- Screw the boards together to form a rectangle.
- Fill with soil and compost, then start planting.
Time: One weekend
Cost: $100–$250
Tools: Saw, drill, screws
Materials: Cedar kits available at Lowe’s or Menards.
Gardening isn’t just trendy—it boosts property appeal and gives you fresh food, saving grocery money in the long run.
7. Install Smart Lighting for Energy Efficiency
The first time I set up smart bulbs, I couldn’t believe I could dim the lights or change the mood just from my phone. It felt futuristic, but it also lowered my energy bills.
Here’s how to do it:
- Choose a starter kit (Philips Hue, LIFX, or TP-Link are popular brands).
- Screw in the bulbs like normal and connect them to Wi-Fi.
- Use the app to adjust brightness, color, or set schedules.
- Consider adding motion sensors or voice control through Alexa/Google.
Time: 2–3 hours
Cost: Around $80 for a starter kit
Tools: Smartphone, Wi-Fi connection
Smart lighting is convenient, energy-efficient, and modernizes your home instantly.
8. Deep Clean & Re-Grout Bathroom Tiles
The first time I re-grouted my bathroom, I couldn’t believe how much cleaner and newer the space looked. Years of soap scum and mold stains disappeared with a little elbow grease.
Here’s what you can do:
- Scrape out old, crumbling grout with a grout saw.
- Clean the lines with a sponge and mild cleaner.
- Apply new grout evenly and let it cure.
- For a budget-friendly shortcut, try a grout pen to refresh surface lines.
Time: 1 day
Cost: $50–$100
Tools: Grout saw, sponge, sealant
Bathrooms are one of the most-used spaces in any home. Clean grout doesn’t just look better, it prevents mold and boosts hygiene. After refreshing your bathroom tiles, don’t forget the finishing touch—fresh air. Try these DIY natural air fresheners to keep your home smelling clean and inviting without harsh chemicals.
9. Refinish Hardwood Floors (Small Area)
When I first refinished the worn-out spot by my front door, I was shocked at how much it lifted the whole room. You don’t have to redo the entire floor to see a difference.
Steps to follow:
- Clear the area of furniture and rugs.
- Rent a floor sander and gently sand the surface.
- Apply varnish or polyurethane in even coats.
- Let it dry completely before moving furniture back.
Time: One weekend
Cost: Around $200 (including sander rental)
Tools: Sander, varnish, applicator brush
Even a small floor refresh can add thousands in resale value. Focus on high-traffic zones like entryways and hallways.
10. Seal Windows & Doors to Cut Energy Bills
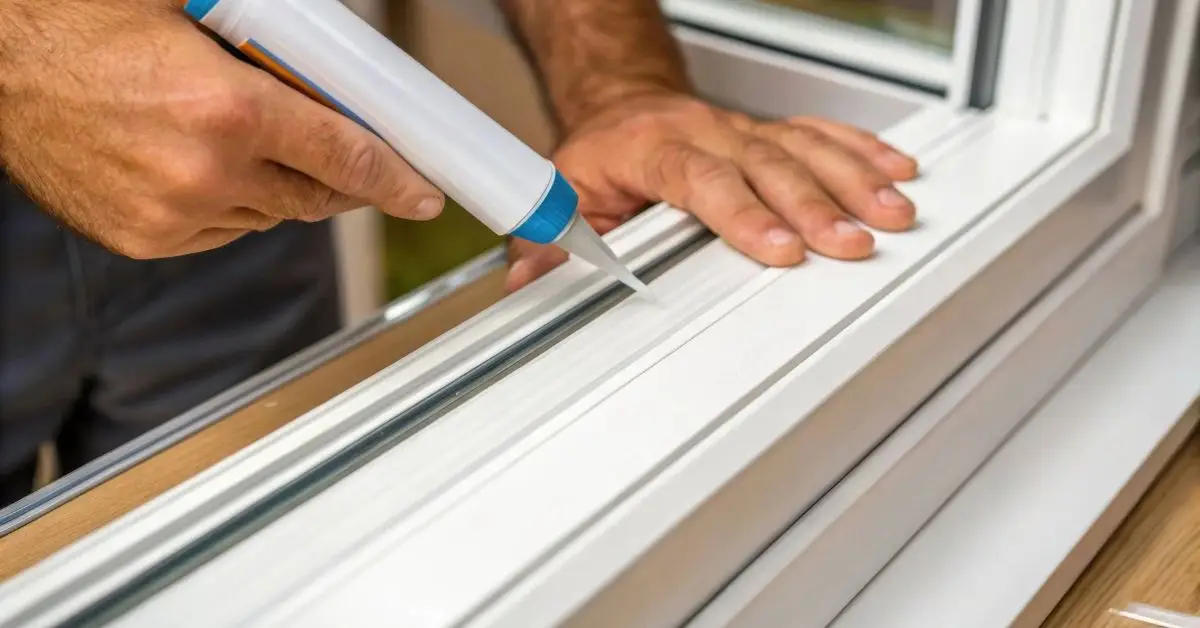
I learned this the hard way—one winter, my heating bill skyrocketed because of drafty windows. A couple of tubes of caulk later, the difference was clear.
How you can do it:
- Check for gaps around window and door frames.
- Apply weatherstripping to seal the edges.
- Use a caulk gun to fill in visible cracks.
- Test by holding a candle near the frame—if the flame flickers, there’s a draft.
Time: 2–3 hours
Cost: $40–$80
Tools: Caulk gun, weatherstripping, utility knife
Heating and cooling make up a huge chunk of energy bills. Sealing drafts keeps your home comfortable and saves money year-round.
11. Upgrade Bathroom Vanity & Fixtures
When I swapped out my old vanity for a sleek modern one, the whole bathroom felt like it belonged in a new house. And it didn’t require a full remodel.
Steps to follow:
- Disconnect plumbing before removing the old vanity.
- Assemble the new vanity and position it in place.
- Reconnect sink, faucet, and plumbing lines.
- Upgrade fixtures like faucets or mirrors for a cohesive look.
Time: One weekend
Cost: $250–$400
Tools: Wrench, drill, plumber’s tape
Where to shop: Affordable options can be found at Menards, IKEA, or Wayfair.
Bathroom updates give one of the highest returns on investment in the housing market. A new vanity instantly makes the space feel polished.
12. Power Wash Driveway, Patio & Siding
The first time I rented a power washer, I thought it was overkill. But within an hour, my concrete driveway looked ten years younger. The satisfaction of blasting away dirt is worth every penny.
Here’s how you can do it:
- Rent a power washer from your local hardware store.
- Clear the area of furniture, plants, or vehicles.
- Spray in even strokes, keeping the nozzle about 12 inches from the surface.
- Don’t forget the siding—it’ll shine like new.
Time: 1 day
Cost: Around $75 (rental)
Tools: Power washer, garden hose
This project is the fastest way to boost curb appeal before selling—or just to enjoy a fresher-looking home.
13. Create a Gallery Wall for Personal Touch

When I finally put up my own gallery wall, it turned a plain living room into a space that felt truly mine. It doesn’t need to be perfect—your story is what makes it special.
How to build yours:
- Gather frames of different sizes for photos, prints, or posters.
- Lay them out on the floor first to plan your arrangement.
- Use a level to keep frames straight as you hang them.
- Mix personal memories with art for balance.
Time: 2–3 hours
Cost: ~$50
Tools: Level, nails, hammer, frames
A gallery wall adds personality and warmth, and it’s renter-friendly since you can take it down anytime. Once you’ve built your gallery wall, you might want to take it further. Here are 8 DIY large wall décor ideas that look expensive but are easy to recreate on a budget.
Safety, Permits & Planning
Before you dive into any DIY, it’s worth pausing for safety and planning. I’ve learned that rushing can cost more than it saves.
- Protect yourself: Always wear gloves, goggles, and a mask when sanding, painting, or working with chemicals.
- Permits: In the US, projects that touch electrical wiring, plumbing, or structural walls may require a city permit. Check local codes before you start.
- Ladder safety: Ladder falls are one of the top DIY-related injuries every year. Take your time, use stabilizers, and don’t stretch beyond your reach.
- Plan your budget & timeline: Add 20% extra to both—you’ll thank yourself later.
Money-Saving Hacks in the US
If there’s one thing I’ve learned from years of DIY, it’s that saving money on materials makes the projects even sweeter. You don’t always need brand-new supplies to get great results.
Here are some ways to stretch your budget:
- Habitat for Humanity ReStores: These nonprofit shops sell donated furniture, fixtures, and building materials at a fraction of the cost. You’ll often find vanities, sinks, doors, and lighting for less than half retail.
- Seasonal sales: Keep an eye out for Memorial Day, Labor Day, and Black Friday discounts at Home Depot, Lowe’s, and Ace Hardware. Tools and paint supplies are especially marked down during these times.
- Federal tax credits: If you’re installing energy-efficient upgrades like smart thermostats, new windows, or LED lighting, check if you qualify for tax credits under energy-saving programs.
These hacks make your projects more affordable and help you get the most out of your hard-earned money.
Conclusion – Start Small, Build Confidence
I’ve seen it over and over again—when you finish just one project, no matter how small, your confidence grows. Suddenly, the next project doesn’t feel so intimidating. Maybe today it’s a gallery wall, and tomorrow you’re refinishing a floor.
The truth is, every project you complete makes your home feel more like yours. And when you take that first step, you’ll wonder why you waited so long.
Now I’d love to hear from you: Which DIY project are you most excited to try first? Drop a comment below—I want to know what’s on your list.
And if you’re looking for more practical home tips, guides, and fresh ideas, check out Build Like New for inspiration you can put to work today.
Disclaimer: The DIY projects and tips shared here are for informational purposes only. Always follow safety guidelines and check local building codes before starting. For electrical, plumbing, or structural work, consult a licensed professional.

