
Kitchen Cabinets a Mess? Try These 15 Game-Changing Fixes
If you’re constantly digging through mismatched Tupperware, hunting for spices that keep disappearing, or just sick of the clutter every time you open a cabinet—you’re not alone. I’ve worked in enough kitchens to know one thing for sure: most of us aren’t short on space. We’re short on strategy.
The truth is, a cluttered cabinet doesn’t just slow you down while cooking. It messes with your head. It makes you feel disorganized in other areas of life too. But here’s the good news: organizing your kitchen cabinets doesn’t have to mean spending a fortune or pulling an all-nighter.
In this article, I’m sharing 15 tried-and-tested tricks that real experts and real people swear by. These aren’t fluff ideas like “get a basket.” They’re smart, doable changes that actually work — whether you’re living in a tiny apartment or running a full house.
Some of these tips come from pro organizers. Others are hacks I’ve seen people use in their homes for years. Either way, they’re all built around one goal: making your kitchen less chaotic and a lot more livable.
Let’s dive in — and by the end, I want you to have at least three ideas you’re ready to try today.
What’s the one kitchen cabinet that stresses you out the most? (Let me know in the comments — or send a quick photo. I’d love to help.)
1. Start With a Ruthless Declutter Session
Let’s be real—most kitchens don’t have a space problem. They have a stuff problem.
Before you even think about buying organizers or labeling bins, pull everything out of your cabinets. Then, take a good look. If something hasn’t been used in the last two weeks, it probably doesn’t belong there. I call it the “Two-Week Use Rule.” If it’s just sitting there collecting dust (looking at you, single-use gadgets and souvenir mugs), it’s time to donate, toss, or relocate.
What helps? Set up three boxes: Keep, Toss, and Donate. It keeps the decision-making simple and fast.
Trust me, organizing clutter is just moving junk from one shelf to another. A solid decluttering session is the foundation of every organized kitchen.
2. Divide Cabinets Into Functional Zones
This is one of the tricks most people skip, and it makes all the difference. Think like a chef: everything should live close to where it’s used.
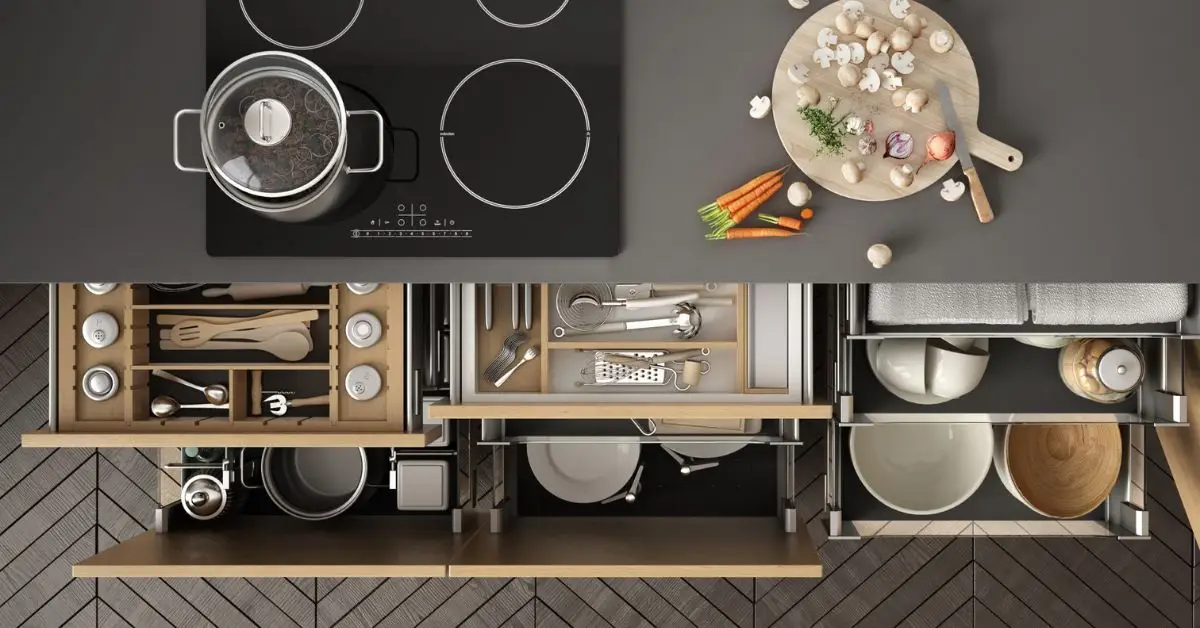
Here’s what functional zoning looks like:
- Prep zone: cutting boards, knives, mixing bowls near the counter
- Cooking zone: spices, oils, pans near the stove
- Baking zone: measuring cups, baking sheets together
- Coffee station: mugs, sugar, filters near the coffee maker
You’re not just making it look neat—you’re saving steps. Fewer back-and-forth trips means a smoother flow (and less mess).
3. Use Stackable Shelf Risers to Double Your Space
Most cabinet shelves are tall but underused. You’ll stack bowls and mugs on top of each other, and before you know it—clutter.
That’s where stackable shelf risers come in. Just pop one onto your shelf, and suddenly you’ve got two levels instead of one. No tools. No drama. They’re perfect for dishes, canned food, or snacks. Working with older cabinetry styles? You can still make things look fresh—here’s how to modernize a kitchen with honey oak cabinets without a full remodel.
And you don’t need to spend big: I’ve used $4 risers from Dollar Tree and $6 versions from Amazon Basics. They work just as well as the fancier options from The Container Store.
These were even recommended in The Kitchn’s expert-backed cabinet organizing guide—and for good reason.
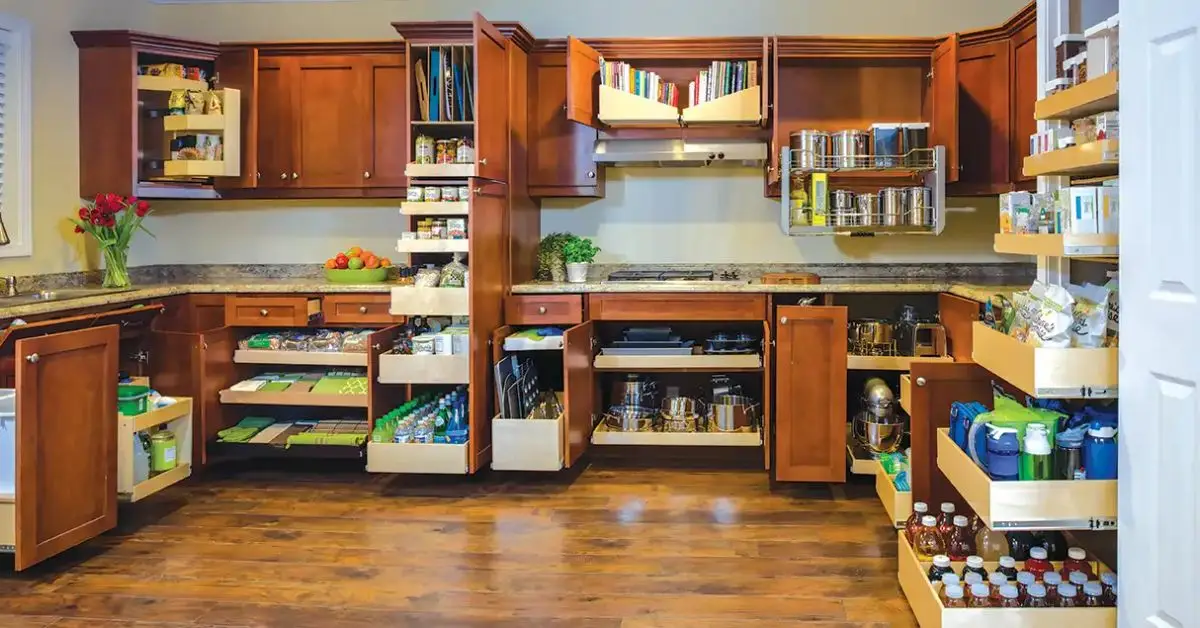
4. Install Roll-Out Shelves or Sliding Baskets
Let’s face it—deep cabinets are like black holes. You reach in for a pot and end up knocking over three pans and a forgotten box of crackers. That’s why I always recommend roll-out shelves or sliding baskets. These pull-out trays let you see and grab what you need without crouching or unloading half your cabinet.
They’re especially helpful for older adults or anyone with mobility issues. I’ve seen families install them just to make things easier for kids too.
According to a survey from Redfin, 42% of kitchen renovators said adding pull-outs was their most worthwhile upgrade—and I fully agree. Whether you go with a pre-made system like Rev-A-Shelf or build your own, this is one update that’s worth every penny. If you’re planning a bigger kitchen revamp, make sure you’re not falling into common traps—these renovation mistakes could blow your budget if you’re not careful.
5. Put Lazy Susans in Corners & Spice Racks
Corner cabinets might look spacious, but most of that space is dead unless you use it smartly. A Lazy Susan spins that awkward zone into prime storage real estate.
Perfect for spices, condiments, oils—you’ll finally be able to see what you own instead of accidentally buying five bottles of cumin.
The double-tier ones are great for taller cabinets, and you can even use them in the fridge if you’re feeling extra efficient.
6. Use Cabinet Doors: Hooks, Clips & Racks
The back of a cabinet door is like secret storage gold. Most people ignore it—don’t.
Add a few smart tools like:
- Adhesive clips for measuring spoons
- Pan lid holders
- A magazine file turned on its side to hold foil or cling wrap
If you’re renting or don’t want to drill, Command hooks are a safe bet. I’ve even used them to hang scissors, pot holders, and small cleaning tools.
Keep it minimal—just one or two items per door so it doesn’t become chaotic. It’s a small upgrade with a big impact on your daily flow.
7. Add Pull-Out Trash & Recycling Bins
Trash bins sitting out in the open? That’s just wasted floor space.
Instead, tuck them inside a lower cabinet using a pull-out dual-bin system. It looks cleaner, smells better, and encourages proper sorting of trash and recyclables—especially if you label them clearly.
Systems like IKEA’s UTRUSTA bin kits or simple two-bin setups from Amazon make it easy to install in most standard cabinets. It’s one of those upgrades that instantly makes your kitchen feel more modern—and more hygienic.
8. Label Everything for Visual Clarity
Let’s be honest—labels aren’t just cute. They keep your whole household on the same page.
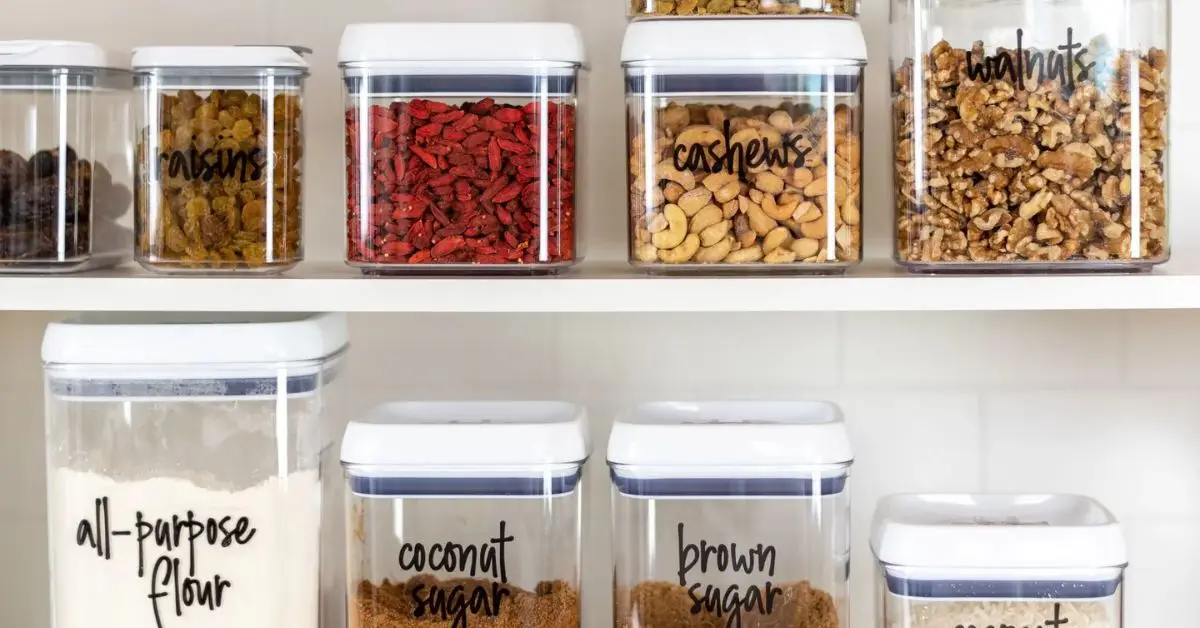
Labeling containers and shelves makes it easier to find what you need and to put things back in the right place. It’s especially helpful if you live with roommates, kids, or a partner who doesn’t instinctively know where the brown sugar goes.
I use a mix of label makers, chalkboard tape, and sometimes just a Sharpie and masking tape (no shame in that game). Bonus: if you love a good Pinterest-style aesthetic, this step brings the visual magic.
9. Use Clear Bins to Group Similar Items
This is one of those tips that sounds obvious, but most people skip it: group like with like using clear storage bins.
When snacks, baking ingredients, or tea bags are spread out across shelves, they get lost—and you end up rebuying what you already have. Clear bins give you a quick visual inventory at a glance.
Keep bins open-top for easy access, and label them by category: Snacks, Baking, Kids’ Lunches, etc.
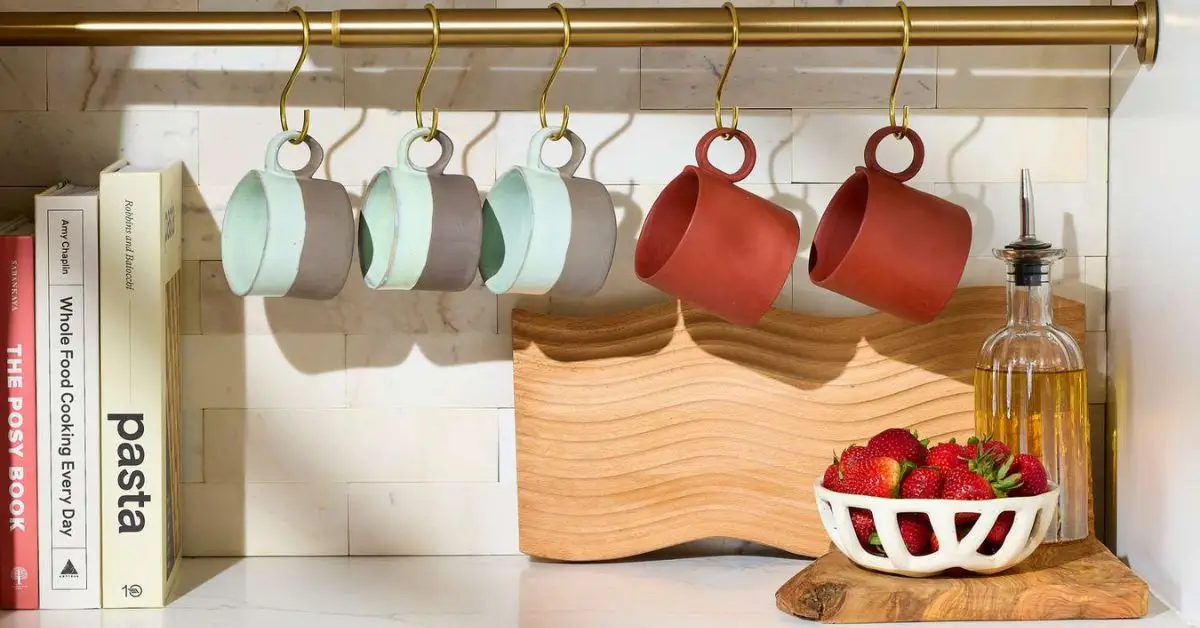
10. Hang Mugs & Utensils Using Under-Shelf Hooks
You know that gap between your shelf and the stuff on it? That’s prime space going to waste.
With under-shelf hooks, you can hang coffee mugs, spatulas, measuring cups—even small pots—right below a shelf. It’s a neat trick that opens up an entire “air zone” of storage, especially helpful if your kitchen lacks deep cabinets.
All you need are clip-on or screw-in hooks. I’ve used cheap ones from IKEA and Amazon (under $10), and they’ve held up just fine.
This hack is especially golden in small kitchens or apartments where every square inch counts. Suddenly, your shelves aren’t just surfaces—they’re systems.
11. Create a Built-In Recycling Zone (Sustainability FTW)
Organizing isn’t just about looking tidy—it’s about making everyday habits easier. And that includes recycling.

Set up a built-in recycling station under your sink or inside a lower cabinet. Use dual pull-out bins, labeled jute baskets, or even just a simple compost caddy on the counter for food scraps. Once the system is there, sorting waste becomes second nature.
I found this idea from Better Homes & Gardens, and their take on cabinet-based recycling zones totally changed how I manage kitchen waste:
You’re not just making your kitchen more organized—you’re making it part of a cleaner lifestyle. One that feels good to live in.
12. Design a “Drop Zone” Cabinet for Daily Essentials
You walk into the kitchen, toss your keys on the counter, drop your sunglasses next to the bananas, and… yeah. It builds up fast.
Instead, create a “drop zone” cabinet—a dedicated space for the stuff that always ends up scattered. Use a small cabinet or drawer to stash:
- Keys
- Chargers
- Notepads
- Vitamins or meds
- Daily mail
I love the family-friendly version too: assign one shelf or basket per person. Everyone gets their own tiny command center, and the rest of your kitchen stays blissfully clutter-free.
13. Group Items by Use, Not Just Type
We’re used to storing “like with like”—mugs with mugs, snacks with snacks. But in real life, it’s often smarter to group things by how you use them.
For example: instead of putting tea bags in one cabinet and honey in another, build a tea station. Keep your favorite mug, tea bags, honey, and spoon all together—right near the kettle. It saves steps and just feels more natural.
Think morning routines, baking moments, kid lunches. When your storage matches your habits, your kitchen works with you—not against you.
14. Use Tension Rods as Dividers
If you’ve ever had a cabinet full of collapsing cookie sheets or cutting boards, this hack’s for you.
Tension rods—yes, the kind used for curtains—make incredible vertical dividers. Just pop a few in a lower cabinet or deep drawer to stand up:
- Baking sheets
- Pan lids
- Trays
- Cutting boards
What’s great? No tools. No screws. Just press-to-fit.
All you need is 15 minutes and about $8. Instant upgrade.
15. Set a Monthly 15-Minute Cabinet Reset Ritual
Even the best organizing systems fall apart without upkeep. That’s why I started doing a monthly cabinet reset—and it’s a total game-changer.
Here’s the formula:
- Pick a day (I do the first Sunday)
- Set a 15-minute timer
- Toss anything expired or empty
- Restock essentials
- Reorganize anything that’s drifted
That’s it. No big haul-outs or Marie Kondo drama—just light maintenance. I got the idea from a minimalist blogger who said it keeps her from ever “deep cleaning” again.
Trust me: you’ll be shocked what a difference this tiny monthly reset makes.
Customize, Apply, Repeat
Let’s be real—no two kitchens (or lives) are the same. You might not need all 15 tricks right now, and that’s okay.
What matters is this: start small, pick 2–3 hacks that match how you live, and build from there. Maybe that’s a Lazy Susan today, a pull-out bin next week, and a monthly reset a few Sundays from now.
The goal isn’t perfection—it’s flow. A kitchen that works for you, not against you. Once your cabinets are organized, you’ll love how much calmer your kitchen feels—try adding one or two kitchen-friendly houseplants to complete the vibe.
And hey, I’d love to see your progress.
Tried one of these? Share your before/after photos or favorite hack with us! Tag us or drop your tip in the comments—your smart solution might inspire someone else’s sanity.
Happy organizing!
Want more practical home tips like these? Visit Build Like New for smart, doable ideas that make everyday living easier.
Disclaimer: The information shared in this article is for general home organization and lifestyle purposes only. Product recommendations and tips are based on expert opinions, user experiences, and publicly available resources. Always assess what works best for your specific kitchen layout, household needs, and safety considerations. Build Like New is not responsible for individual outcomes or third-party product performance.

