
From Minor Scuffs to Deep Cuts: 5 Proven Ways to Repair Hardwood Floor Damage
I still remember the first time I noticed that long, thin scratch glinting across my living room floor. The light caught it just right, and suddenly, the entire space felt less warm — like that one flaw had stolen the shine from everything around it. I grabbed a rag, tried buffing it out, even whispered a few hopeful words, but nothing worked. The mark stayed, sharp and obvious.
If you’ve ever owned hardwood floors, you know that feeling. One tiny scuff can make a whole room look tired, no matter how clean it is. For a while, I thought fixing it meant sanding the entire surface or calling in a professional. But over the years, I’ve learned that most scratches don’t need heavy tools — just the right technique, a little patience, and some everyday items you probably already have at home.
In this guide, I’ll share the five simplest ways I’ve found to make those scratches disappear — or at least blend so well you’ll have to squint to see them. Each one’s been tried, tested, and proven to bring back that quiet, polished glow that makes hardwood floors feel like new again.
Understanding the Type of Scratch You’re Dealing With
Before you rush to grab polish or a repair kit, it helps to know what kind of scratch you’re actually dealing with. Not every mark on a hardwood floor needs the same fix — some just scuff the surface, while others cut deep enough to expose lighter wood underneath. I learned this the hard way after over-buffing one spot until it looked worse than when I started.
A quick test I use now: run your fingernail lightly across the scratch.
- If your nail slides over smoothly, it’s probably a surface-level mark — the kind you can buff out with a mild cleaner or polish.
- If your nail catches or feels a groove, that’s a deeper scratch that might need filler or touch-up stain.
As flooring experts often explain on Avalon Flooring, deep scratches usually expose the lighter wood beneath the finish — that’s your clue that simple cleaning won’t be enough. Knowing this upfront saves time, money, and a lot of unnecessary scrubbing.
Surface vs. Deep Scratches — What’s the Difference?
Think of it this way: surface scratches are like scuffs on your car’s clear coat — mostly cosmetic. Deep scratches, on the other hand, cut through the finish and into the wood itself. The first type can disappear in minutes; the second needs a bit more work and precision. Once you can tell them apart, you’ll always know exactly which method to use next.
Method #1 — Buff It Out with Baking Soda or Vinegar
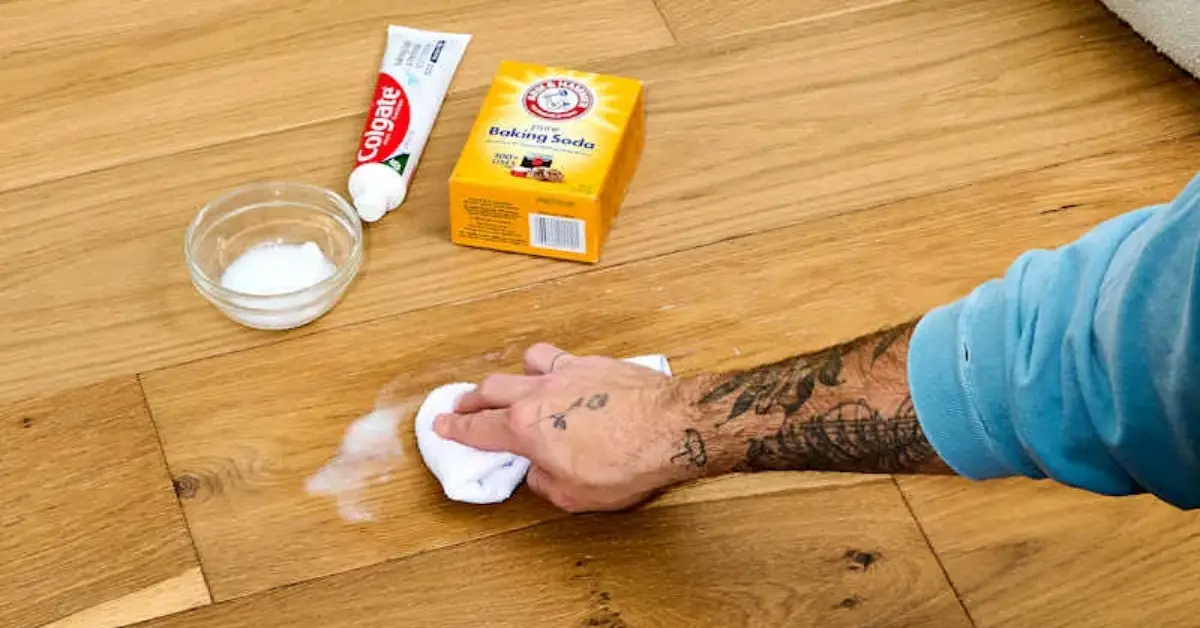
When I first started fixing scratches, this was my go-to trick — and honestly, it still works wonders for light marks. Baking soda and vinegar are gentle abrasives that help lift scuffs without damaging the finish.
Here’s how I do it:
- Mix a paste — 1 tablespoon of baking soda with a few drops of water.
- Apply gently to the scratch using a soft microfiber cloth.
- Buff in small circles, keeping pressure light and even.
- Wipe clean with a damp cloth, then dry thoroughly.
If you prefer vinegar, mix ½ cup white vinegar with ½ cup olive oil, dab it on a cloth, and rub the spot gently. The oil nourishes the wood while the vinegar lifts the mark.
If you’re already refreshing your floors, it might be worth learning a few grout-safe cleaning tricks too — I recently shared 7 easy ways to remove tile grout without damaging your floors that pair perfectly with these scratch-fixing methods.
Method #2 — Use a Crayon or Wood Filler Stick for Shallow Scratches
For those slightly deeper scratches — the ones that show lighter streaks — a wood filler stick or even a matching crayon can do the job surprisingly well. I used to think this sounded too easy, but once I tried it, I realized how well it hides small imperfections.
Here’s what to do:
- Pick a color that’s as close as possible to your floor’s tone. Test it on a hidden corner first.
- Rub the filler or crayon firmly into the scratch, letting it fill the groove completely.
- Wipe the excess off with a soft cloth, and buff the area lightly to even the shine.
If the colour doesn’t match perfectly, you can blend shades — start light, then go darker until it disappears. Flooring pros at Family Handyman suggest using a clean cloth to buff in small circles afterward to merge the repair with the original finish.
This quick touch-up doesn’t just cover the flaw — it helps seal the wood, keeping moisture out and preventing the scratch from expanding. It’s a tiny repair that can make your whole floor look cared for again, without sanding or spending a dime on new boards.
Method #3 — Rub in Coconut Oil or Olive Oil for Light Buffing
When you’re dealing with faint surface scratches or dull patches, sometimes the best fix isn’t a chemical one — it’s a bit of natural nourishment. I’ve found that coconut oil or olive oil can bring back a subtle shine and make minor scratches blend beautifully into the grain. It’s the kind of fix that feels too simple to work, but it really does.
Here’s what I usually do:
- Clean the area with a soft, dry cloth to remove any dust or debris.
- Apply a few drops of coconut or olive oil directly on the scratch.
- Rub gently in the direction of the wood grain using circular motions.
- Let it sit for 10–15 minutes to absorb, then buff the surface with a clean, dry cloth.
The oil fills tiny gaps in the finish and hydrates the wood fibers, which helps the mark fade into the natural pattern. Olive oil’s conditioning properties make it ideal for restoring surfaces — whether it’s your skin or your flooring. Just remember to use small amounts; too much oil can leave residue that attracts dust.
This gentle, natural method is perfect for weekly touch-ups, especially in high-traffic areas like hallways or kitchen floors where the finish tends to wear down faster. And if you’re thinking long-term about sustainable flooring, you might love my breakdown on why cork flooring is one of the best eco-friendly options for modern homes — it’s durable, quiet, and surprisingly scratch-resistant.
Method #4 — Apply a Wood Floor Polish or Wax Repair Kit
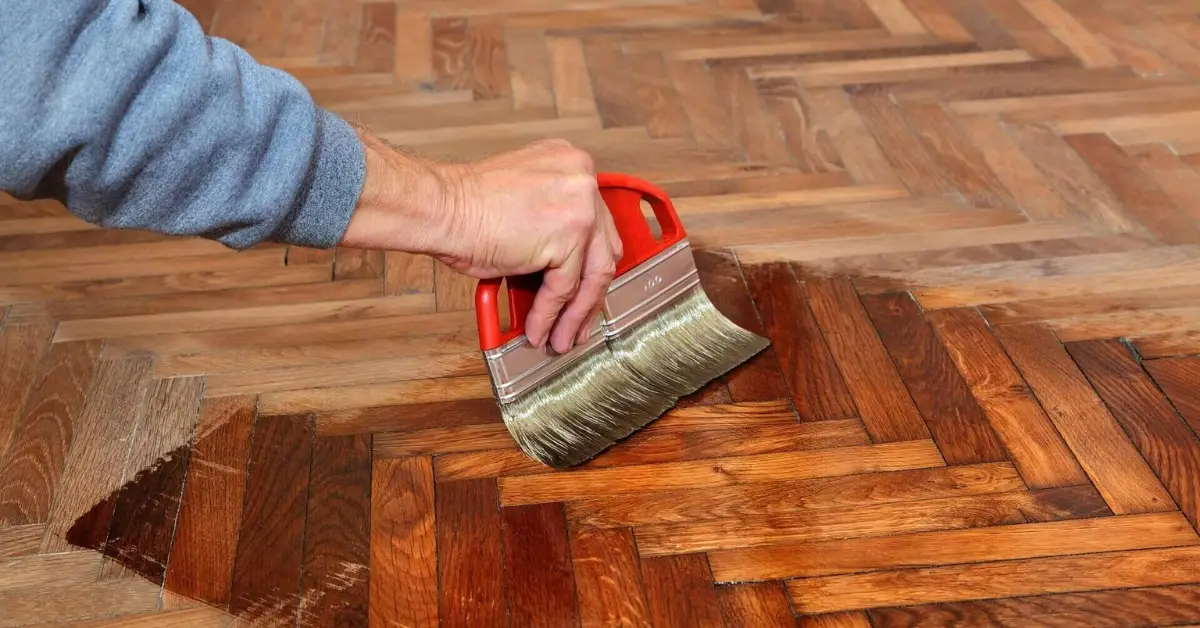
When scratches start multiplying or the overall shine looks uneven, a wood floor polish or wax repair kit can help even everything out. I usually reach for this method after a full cleaning day — when the floor’s free of dust and ready for a little refresh.
Here’s how you can get the best results:
- Choose the right finish: Satin, gloss, or matte — always match it to your existing floor finish.
- Use a microfiber mop or applicator pad for even coverage.
- Work in small sections, overlapping slightly to avoid streaks.
- Let it dry completely before walking over the area (usually 30–45 minutes).
According to Real Simple’s guide on wood floor maintenance, store-bought polishes can effectively fill hairline scratches and restore shine when applied correctly. The trick is patience — thin, even layers always perform better than one heavy coat.
This approach not only hides scratches but also adds a light protective layer, helping your floor resist future scuffs.
Method #5 — Use a Touch-Up Marker or Stain Pen for Deep Scratches
For deeper scratches — the kind that catch your eye every time you walk by — a touch-up marker or stain pen can make a huge difference. These pens are designed to mimic your wood tone and soak into the scratch, darkening the exposed area just enough to blend it in.
Here’s my process:
- Clean the area with a soft, dry cloth.
- Test the colour on a hidden spot first.
- Apply the pen directly to the scratch, tracing slowly along the groove.
- Wipe any excess with a paper towel or soft cloth before it dries.
- Once the area is dry, seal it with a dab of clear floor finish or wax to lock in the colour.
Professionals at SVB Wood Floors recommend always sealing your repair afterward to protect against moisture and prevent fading over time.
The beauty of this fix is how quick it is — just a few strokes, and that ugly white line practically disappears. It’s one of those little touches that make your floors look cared for again, without calling in a pro or spending much at all.
What NOT to Do When Fixing Scratched Hardwood Floors
When I first started learning how to fix scratches, I made every mistake in the book — from using the wrong cleaner to sanding against the grain. And I’ll be honest, some of those “quick fixes” left my floors looking worse than before. So before you dive into repair mode, here’s what not to do.
- Don’t over-sand. Light scratches don’t need aggressive sanding — that only removes more of the protective finish and can leave a visible dull patch.
- Avoid harsh cleaners like bleach or ammonia. They can strip away your finish and dry out the wood, making future scratches more likely.
- Never scrub across the grain. Always move with the grain when cleaning or polishing — that’s how you avoid adding new micro-scratches.
- Skip colored waxes unless you’ve tested them. Some leave residue or uneven tints that make floors look patchy under sunlight.
If you remember one thing, it’s this: be gentle and go slow. Hardwood floors respond best to patience, not pressure.
Pro Tips to Prevent Future Scratches

Once your floors look good again, the real goal is to keep them that way. Prevention doesn’t take much — just a few consistent habits that protect your floor’s finish year-round.
Here’s what I’ve learned :
- Use felt pads under all furniture legs. Replace them every few months when they flatten or peel.
- Sweep or vacuum daily to remove grit that acts like sandpaper underfoot.
- Apply a protective sealant every six months to refresh the top coat and prevent moisture from seeping into fine scratches.
- Keep humidity stable. Wood expands and contracts with weather, which can deepen existing marks. A small humidifier in winter helps a lot.
These small actions create a noticeable difference. Your floor will stay glossier longer, resist dents, and look freshly polished even years after installation.
Bonus: When to Call a Professional
If you’ve tried the gentle fixes and those deep gouges still stand out, it might be time to bring in help. Professional wood repair technicians can refinish sections instead of entire floors, matching color and grain with precision tools most of us don’t have.
Here’s when I’d suggest calling a pro:
- When scratches run across multiple planks or follow heavy traffic paths.
- If water damage has darkened the wood.
- When the topcoat is worn down beyond simple polishing.
But if you’re confident handling bigger repairs yourself, I’ve outlined 11 easy steps to replace your subfloor without calling a contractor — a complete guide for homeowners ready to take on deeper structural fixes.
Key Takeaways
- Identify the scratch depth before choosing a method.
- Use natural or simple DIY fixes first — baking soda, oils, crayons, and touch-up markers work wonders.
- Avoid over-sanding and harsh cleaners.
- Maintain your floors regularly with pads, sweeping, and sealing.
- Know your limits — deep damage deserves professional repair.
A few thoughtful steps can restore your hardwood floors and keep them shining for years.
If you’ve tried any of these methods, I’d love to hear how they worked for you — share your results in the comments below! For more home improvement guides and practical DIY fixes, visit Build Like New — where smart homeowners turn small repairs into lasting results.
Disclaimer: The information in this article is for general home maintenance guidance only. Always test any cleaning or repair method on a small, hidden area first. For deep or extensive damage, consult a certified flooring professional to avoid voiding your floor’s warranty or causing further harm.

