
5 Easy Tricks to Get Rid of That Pink Stain in Your Sink — For Good!
If you’ve ever looked into your bathroom sink and spotted that faint pink ring creeping around the drain, you know the feeling — a mix of disgust and frustration. You scrub it off, think it’s gone, and then a week later… it’s back. That’s not just bad luck or a dirty sink. It’s a recurring problem almost every homeowner faces at some point, and it happens for specific, fixable reasons.
I’ve seen countless people waste money on expensive cleaners or “miracle hacks” that don’t last because they treat the surface but ignore what’s feeding the stain underneath. That light pink film isn’t mold, as many believe — it’s usually a bacteria called Serratia marcescens, thriving on soap scum and dampness. Sometimes, it’s also tied to water quality or iron buildup, depending on where you live.
In this guide, I’ll walk you through five proven methods that actually stop it from coming back — not just wipe it away for a few days. These are the same steps I’ve tested in homes, rentals, and older sinks that seemed permanently stained. You’ll see why it happens, how to tackle it properly, and what simple habits keep your sink spotless for good.
Let’s start by understanding why that pink stain keeps showing up, even after you think you’ve cleaned it for the last time.
Why That Pink Stain Keeps Coming Back (and What It Really Is)
If you’ve ever cleaned that stubborn pink film off your sink, only to see it creep back days later, you’re not alone. It’s one of those household mysteries that makes you question if your cleaning routine even works. The truth is, most people treat the symptom — not the source. Once you understand what’s actually behind that stain, you can stop it from ever showing up again.
What Is the “Pink” Stain?
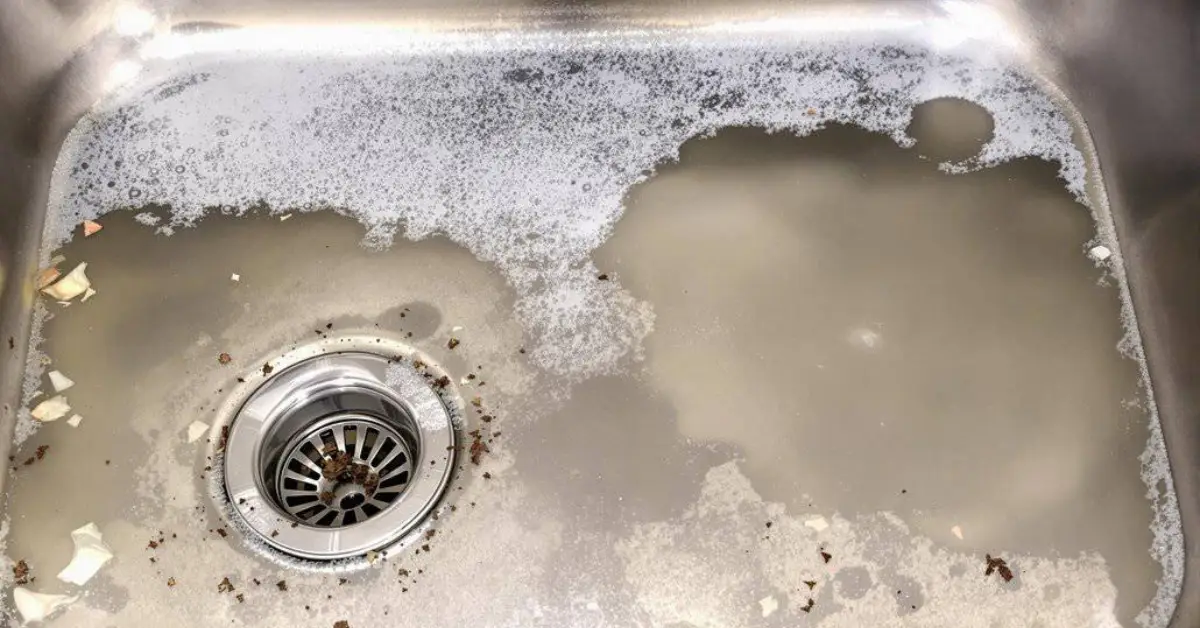
That pinkish residue isn’t mold like many assume. In most homes, it’s caused by a bacteria called Serratia marcescens. This bacteria feeds on soap scum, toothpaste residue, and the moisture that collects around drains or faucet bases. When the area stays damp, it forms a thin biofilm — that slippery, slightly pink coating that refuses to stay gone.
Sometimes, the cause is different. If your water has a high iron content or you’re on well water, those pink or rust-orange stains might actually be mineral deposits instead of bacteria. You can usually tell by texture: bacterial film feels slimy; mineral stains feel rough or chalky.
And here’s the catch — both thrive in places that never fully dry out. So even after a good scrub, if the environment stays the same, it’ll be back.
Conditions That Allow It to Thrive
The pink stain survives because our sinks give it the perfect home. Here’s what keeps it alive and growing:
- Dampness that never fully dries out – water splashes or condensation that sits overnight.
- Poor ventilation – no airflow to keep humidity down, especially in bathrooms without windows.
- Soap and shampoo residue – leftover film is bacteria food.
- Surface scratches or worn enamel – micro-pits hold moisture and allow biofilm to stick.
- Inconsistent cleaning – wiping occasionally but not sanitizing lets bacteria recolonize fast.
Even if you’re a clean person, the wrong surface or a few lazy rinses can undo all your work. It’s not about being spotless; it’s about breaking the cycle that lets this stuff regrow.
Why Ignoring It Might Matter
Sure, that pink ring looks harmless — and in most cases, it is. But letting it linger isn’t risk-free. The same bacteria behind the stain (Serratia marcescens) has been linked to minor infections in people with weakened immune systems or open cuts. If it’s growing in your sink, it’s also circulating through your faucet area and sometimes even the air when water splashes.
You don’t need to panic — this isn’t a hospital emergency — but you also shouldn’t ignore it. Think of it like mold: if it’s visible, it’s a signal something deeper needs attention.
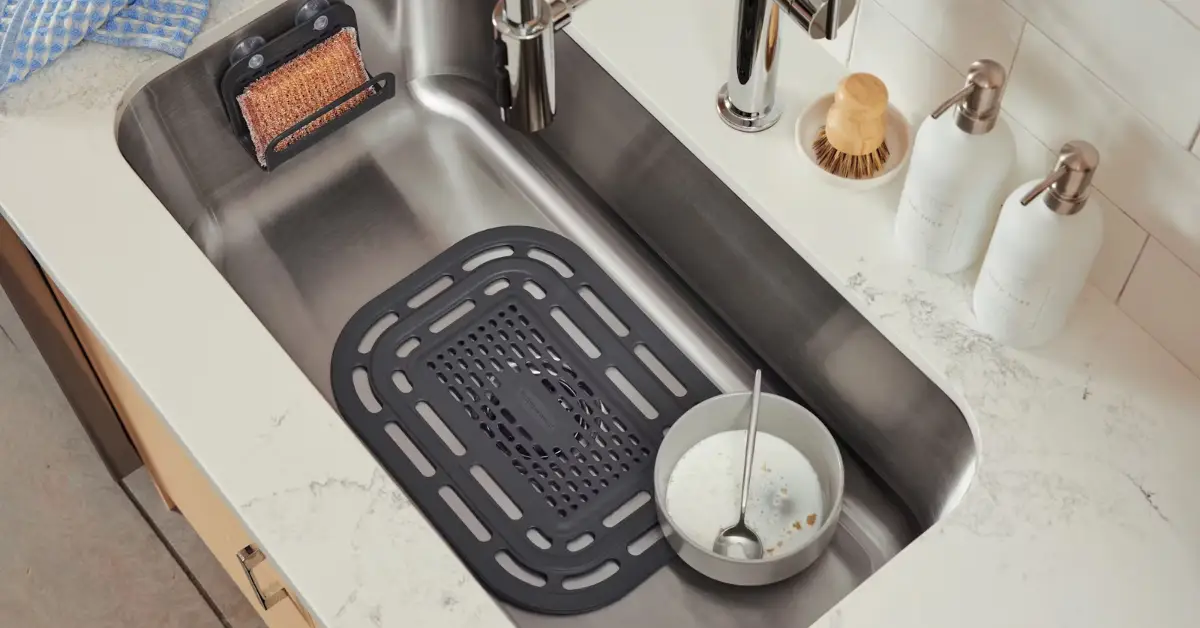
Fix #1 – Strip & Deep-Clean the Affected Area
Before you change products, routines, or blame your water, start here. A deep clean resets everything — stripping out the bacteria, residue, and grime it feeds on. Once the surface is truly clean, your preventive steps will finally work.
Materials & Tools You’ll Need
You don’t need fancy products — just the right combo of simple tools and safe cleaners. Here’s what I always keep handy:
- Gloves – protect your skin from harsh cleaners.
- Nylon-bristle brush or old toothbrush – tough enough to scrub, gentle enough not to scratch.
- Cleaner of choice – a mild bleach solution, white vinegar, or a baking-soda paste works great, according to The Spruce’s guide on removing pink mold.
- Microfiber cloth – for drying afterward to prevent new moisture buildup.
Step-by-Step Method
- Clear the area – remove soap, toothpaste tubes, and anything cluttering the sink rim.
- Apply your cleaner – spray or spread it over the pink areas and let it sit for 5–10 minutes.
- Scrub thoroughly – use the nylon brush to work the cleaner into corners and around the drain.
- Rinse well – hot water helps lift off loosened film.
- Dry completely – use a microfiber cloth to wipe down every wet spot.
The goal here isn’t just to make it look clean — it’s to kill and remove the film entirely so nothing’s left to regrow.
Tips + Cautions
- Skip harsh scouring pads; they’ll scratch your sink and give bacteria new hiding spots.
- Always check your sink material before using bleach — some surfaces (like granite or colored porcelain) can discolor.
- If stains keep returning fast, you may have a water-quality issue or poor drainage that needs attention.
Once you’ve done this deep clean properly, you’ll have a blank slate — and the next steps will finally stick.
Fix #2 – Address the Underlying Moisture & Ventilation Issue
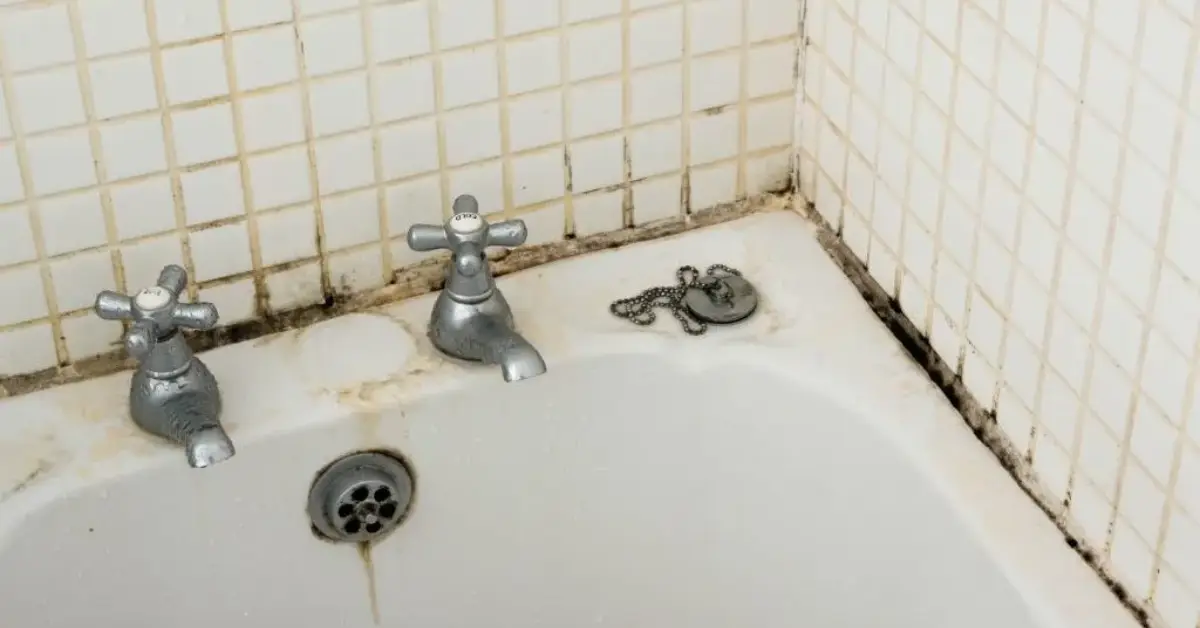
You can clean your sink perfectly today, but if the area stays damp and stuffy, that pink film will sneak right back. The bacteria and minerals causing it don’t need much — just moisture and still air. So before you grab another cleaner, take a minute to look at your bathroom environment. The solution might be simpler than you think.
Identify Trouble-Spots
Start by observing what happens a few hours after you use the sink. Does water collect around the faucet base? Does the counter stay wet long after use? Are the walls damp or the mirror foggy even when you haven’t showered?
These are all clues that moisture is trapped. Common trouble areas include:
- Sink rims that never dry out because of slow drainage or splashes
- Hidden leaks under the faucet or drain seal
- Bathrooms without open windows or proper vents
- Corners where air barely moves
Once you identify these spots, you can start controlling them before they feed another round of stains.
Simple Fixes
You don’t need to remodel your bathroom — just a few habit tweaks can change everything:
- Run the exhaust fan for at least 10–15 minutes after washing up.
- Open the window to let humidity escape if weather allows.
- Wipe down the sink and faucet area after use — a quick swipe goes a long way.
- Fix leaks immediately before they soak into the counter or wall. Keeping your bathroom air fresh and moisture-free also helps prevent recurring pink or mold stains — check out 7 Genius Ways to Keep Your Bathroom Fresh and Musty-Free for simple, long-lasting freshness tips.
- Keep the drain clear to prevent standing water where bacteria love to grow.
It’s all about consistency. Once your sink stays dry between uses, that pink layer loses its favorite home.
Fix #3 – Adjust Your Cleaning Routine & Habits
Here’s the truth — a one-time scrub won’t win this battle. The key is a simple, steady routine. Once you make cleaning part of your daily rhythm, you’ll spend less time scrubbing and more time enjoying a spotless sink. If you’re already refreshing your cleaning routine, it might be time to toss products that do more harm than good — here’s a quick guide on 10 Bathroom Items You Should Throw Out Right Now.
Daily / Weekly Maintenance Checklist
Make your cleaning habits easy and automatic:
- After every use: Wipe down the sink and faucet with a dry cloth.
- Every few days: Rinse away soap or shampoo residue.
- Weekly: Pour a mix of vinegar and water down the drain to kill bacteria.
- Every two weeks: Use a small amount of diluted bleach for a deeper disinfect.
A user on Reddit’s CleaningTips forum even shared that a quick vinegar rinse after brushing teeth completely stopped the pink film from forming — proof that consistency beats any expensive cleaner.
Products or DIY You Can Choose
You don’t need special chemicals. Here are simple, reliable options:
- Baking soda + dish soap paste – gently lifts grime and residue.
- White vinegar spray – disinfects and dissolves biofilm naturally.
- Diluted bleach – for stubborn build-up (just test your surface first).
Switching between these gives you flexibility and prevents surface damage over time.
Fix #4 – Tackle Water Quality or Surface Material Issues
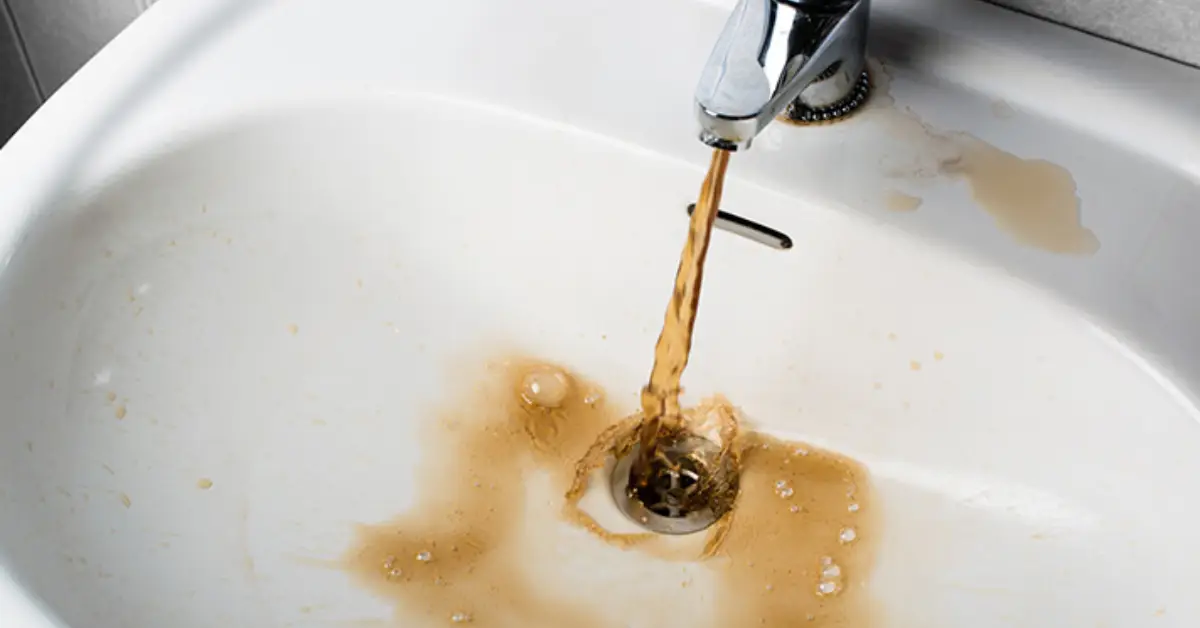
If you’ve deep-cleaned, improved ventilation, and kept up a routine — yet the pink film keeps returning — your water or sink material might be the hidden culprit.
Water Supply Issues to Check
In some areas, especially with well water, high iron or mineral levels cause pink or orange staining that looks just like bacterial growth. If you notice rusty tones or residue that feels gritty, it could be mineral buildup instead of bacteria.
You can learn how to test and confirm this from BioCleanCT’s explanation of pink stains and water quality. They break down how iron bacteria differ from the usual Serratia growth — and why filtration or softeners may be the long-term answer.
Surface Material Considerations
Certain sink materials are more prone to trapping bacteria or minerals:
- Porous stone or older porcelain holds moisture and stains faster.
- Scratched enamel or damaged finishes allow biofilm to cling.
- Stainless steel with hard-water marks can mask pink residue until it thickens.
If your sink has visible wear, resealing or refinishing might be worth it.
When to Call a Professional
If the pink film returns within days despite cleaning and moisture control, it’s time to call in a plumber or water-quality specialist. They can:
- Test your water for iron bacteria or high mineral content.
- Inspect for slow leaks, stagnant pipes, or drainage issues.
- Recommend filters or surface treatments that stop the problem permanently.
This step separates a quick fix from a true, lasting solution.
Fix #5 – Prevent Recurrence: Long-Term Strategy & Monitoring
The real win isn’t just getting rid of the pink stain — it’s keeping it from ever showing up again. Once your sink looks spotless, it’s tempting to stop paying attention, but that’s when the problem quietly starts to return. A little monitoring and prevention now saves hours of scrubbing later.
Set Up a Monitoring Routine
Think of this like a quick monthly “health check” for your sink:
- Once a month, look closely around the faucet base, drain, and corners for the first hint of pink.
- Lightly scrub any small spots with a baking soda paste before they spread. Consistent moisture control goes hand-in-hand with preventing mold and pink film — here’s a helpful guide on 7 Simple Ways to Prevent Mold in Your Bathroom Before It Spreads.
- Note patterns — does it appear after certain weeks, or only on one side of the sink?
- Record changes if you adjust cleaning products or routines — this helps pinpoint what really works long-term.
This quick five-minute step keeps you in control instead of reacting to surprise stains later.
Use Preventive Products or Coatings (Optional)
If you’ve had stubborn pink stains before, a few preventive upgrades can make a real difference:
- Antimicrobial sink mats or drain inserts to stop bacterial buildup in moist spots.
- Regular vinegar misting (once a week) to keep the surface acidic and less hospitable for bacteria.
- Seal or refinish older sinks with tiny surface cracks where moisture hides.
You don’t need all of these — even one small change can extend your clean streak for months.
What to Do if It Reappears Rapidly
If that pink hue creeps back sooner than expected, don’t panic. Just retrace your steps in order:
- Re-clean the affected spot thoroughly.
- Check moisture levels — is the area still staying damp?
- Review your habits — are you wiping and ventilating regularly?
- Look into water quality — high iron or bacteria may need filtration.
By moving through this checklist, you’ll identify exactly which part of your system needs a tweak instead of starting over from scratch.
Quick Troubleshooting Table
Here’s a simple table you can reference whenever you spot a stain. It helps you quickly figure out what’s going wrong — and what to do next.
| Symptom | Possible Cause | Suggested Fix |
|---|---|---|
| Pink film only near drain | Standing water or soap residue trapped in the drain area | Deep-clean the drain and ensure it dries after use |
| Pink/orange rust-like stain across sink | High iron or rust in water supply | Test water; consider installing a filter or water softener |
| Pink streaks along faucet base | Leaky faucet or poor drainage | Tighten fittings, dry area after use |
| Pink spots returning within days | Poor ventilation or damp bathroom environment | Improve airflow, run exhaust fan, and wipe sink dry |
| Patchy film that spreads unevenly | Surface scratches or worn sink finish | Reseal or refinish surface; avoid harsh scrubbing |
This quick diagnostic chart makes it easy for anyone to identify the type of pink stain they’re dealing with — saving time, frustration, and unnecessary cleaning products.
When to Call a Professional (and What to Expect)
Even the best DIY methods have limits. Sometimes, those pink stains keep returning no matter how carefully you clean or dry the sink. That’s your signal that something deeper — inside the plumbing or water system — might be feeding the problem. Knowing when to call in a pro saves you time, money, and endless scrubbing.
Signs You Should Call a Pro
If you notice any of these patterns, it’s time to bring in professional help:
- Persistent re-growth within weeks, even after deep cleaning and drying.
- Pink streaks or stains inside the drain or pipes, where you can’t physically reach.
- Water discoloration, rust tint, or metallic taste, suggesting iron or bacteria in your supply.
- Someone in your household is immunocompromised, and bacterial exposure poses a health concern.
These are all signs that the issue is no longer just surface-level — it’s systemic.
What a Professional Will Do
A qualified plumber or water specialist can identify exactly what’s happening and fix it from the root. Expect them to:
- Test your water for iron, mineral content, or bacterial contamination.
- Inspect plumbing lines for slow drainage, hidden leaks, or areas where water stagnates.
- Check for iron bacteria that thrive inside pipes and create recurring stains.
- Resurface or seal your sink if scratches and pores are allowing bacteria to cling.
- Recommend filtration systems or maintenance schedules suited to your water type.
By calling in a professional early, you prevent minor staining from turning into a recurring maintenance headache.
Final Word on Stopping That Pink Stain for Good
If there’s one thing to take away, it’s that lasting results come from a complete approach, not a quick scrub. When you combine the five fixes — deep cleaning, moisture control, better habits, addressing water or surface issues, and ongoing prevention — that pink film finally stops winning.
You don’t need expensive products or harsh chemicals. You just need a plan and consistency. Start small:
- Pick one fix to do today — maybe wiping down the sink every night.
- Schedule your next step for the weekend — a deeper clean or leak check.
- Keep monitoring monthly, and you’ll see how much longer your sink stays spotless.
If this guide helped, leave a comment below — I’d love to hear which fix made the biggest difference for you.
And if you want more smart, practical home-care tips like this, visit Build Like New and subscribe for free maintenance checklists, cleaning guides, and home improvement advice that actually works.
You’ve got this — a cleaner, brighter, and pink-free sink is completely within reach.
Disclaimer: The information in this article is for general home maintenance guidance only. Always test any cleaning method on a small area first, and follow manufacturer instructions for your sink material. If stains persist or health concerns exist, consult a licensed plumber or water-quality professional.

