
5 Weatherproofing Projects That Instantly Add Home Value
Every year I see the same story play out: a quick summer storm, a tiny leak, and then a repair bill that wipes out months of savings. I’ve been that homeowner—mopping floors at midnight and wondering why my “solid” house still loses the fight to wind, rain, and heat.
If you’re tired of surprise repairs and rising energy bills, you don’t need a full remodel. You need the right five upgrades—done in the right order. That’s the difference between spending money and saving thousands over the next decade.
Most guides throw a laundry list at you. I won’t. I’ll show you which upgrades actually pay back, how to pick them for your climate, and how to stack them so one improvement boosts the next. No fluff—just clear payback, expected lifespan, and where hidden risks drain cash.
By the end, you’ll have a simple plan: what to do first, what can wait, and how to cut both damage and energy waste without overspending. Ready to stop patching problems and start building resilience?
What’s the one weather problem that hits your home hardest—water, wind, heat, or outages?
How to Judge a Weatherproofing Upgrade (Before You Commit)
I’ve learned the hard way that not every “home upgrade” is worth your money. Some projects give back in energy savings and peace of mind, while others just look good on a contractor’s invoice. Before you commit to anything, you need a way to judge whether an upgrade will actually pay off for you. Think of it as your personal checklist—because spending smart is just as important as protecting your home.
Key Metrics to Compare (Payback, Lifespan, Risk Reduction)
Whenever I look at an upgrade, I run it through three filters:
- Payback period: How many years before the upgrade saves enough to cover its own cost?
- Lifespan: Will it last 5 years, 15 years, or 30 years? A shorter payback plus a long lifespan is the sweet spot.
- Risk reduction: Beyond energy savings, does it lower the chance of floods, mold, roof leaks, or insurance claims?
A simple example: upgrading attic insulation might save you 15% on energy bills every year (short payback), last 20+ years (long lifespan), and reduce the chance of mold from trapped moisture (risk reduction). That’s a triple win.
Map to Your Climate / Risk Zone
Your house doesn’t face the same challenges as mine. Maybe you deal with coastal storms, while I’m worried about freezing pipes. That’s why every upgrade should be filtered through your climate risk map:
- Hot/dry regions: Focus on insulation that keeps heat out, reflective roofing, and sealed windows.
- Cold/snow-heavy areas: Attic insulation, storm doors, and pipe protection are non-negotiable.
- Flood-prone zones: Foundation sealing, sump pumps, and landscape grading matter more than fancy windows.
- Storm or hurricane belts: Reinforced roofing, impact windows, and secure doors pay off fastest.
If you’re unsure where your home falls, tools like FEMA’s Flood Map Service can give you a quick look at your risk profile.
Synergy & Stacking Effects (Upgrades Amplify Each Other)
One thing most guides skip: upgrades don’t work in isolation. When you combine them, the effect multiplies.
- Sealing leaks + new insulation = a tighter envelope that makes your HVAC work less.
- Impact windows + proper roofing = double defense against storms, meaning fewer repair claims.
- Smart leak detectors + a sump pump = not just prevention but early alerts, reducing water damage costs.
Think of it like building layers of armor—each piece is good, but stacked together they make your house nearly bulletproof.
Pitfalls & Over-investing Risks
Not every project deserves your money. Some sound good but won’t pay back in your situation.
- Over-improving for resale: Spending $20,000 on impact windows in a mild-climate town may never add resale value.
- Ignoring sequencing: Installing expensive windows before fixing foundation leaks is like putting a Band-Aid on the wrong wound.
- Falling for contractor upsells: Just because something is “eco-friendly” doesn’t mean it makes sense for your risk zone.
Here’s my rule: if an upgrade doesn’t improve comfort, save energy, or reduce real risks, it’s probably not worth it.
Top 5 Weatherproofing Upgrades with Real ROI
I’ve narrowed the list down to the five upgrades that consistently deliver savings, comfort, and long-term protection. Each one does a different job, but together they can transform your home from vulnerable to resilient.
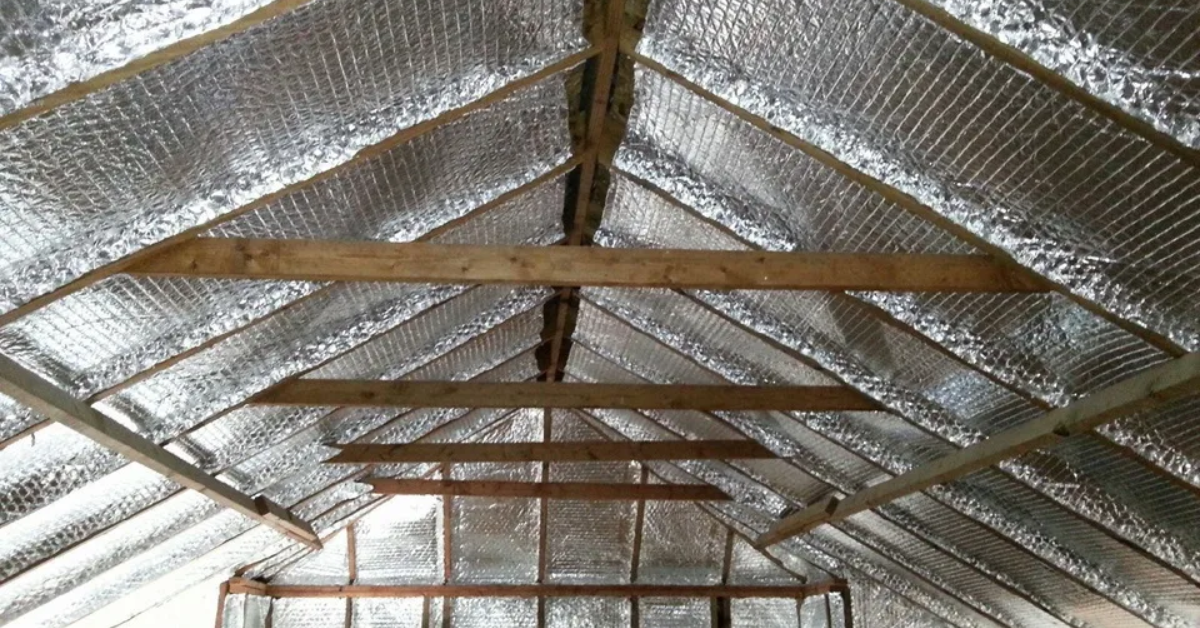
1. Advanced Air Sealing & Insulation (Envelope Upgrades)
Why air leaks drain thousands
Tiny gaps around windows, doors, and attics may not look like much, but they’re the silent culprits behind ballooning energy bills. Warm air slips out in winter, cool air escapes in summer, and your HVAC runs overtime. Over a decade, those leaks can easily waste thousands of dollars.
Best insulation types & where to install (attic, walls, crawlspaces)
- Attic: Fiberglass batts or blown-in cellulose—biggest ROI because heat rises.
- Walls: Spray foam or dense-pack cellulose for older homes.
- Crawlspaces: Rigid foam boards or closed-cell spray foam to stop ground moisture and cold air seepage.
Payback estimates + tax/incentive tips
Insulation pays for itself in 3–7 years on average, with a lifespan of 20+ years. U.S. homeowners can also tap into the Energy Efficient Home Improvement Credit that covers up to 30% of the cost. That’s free money you don’t want to leave on the table.
Beyond savings, better insulation is also a core step toward living greener—our guide on how to make your home eco-friendly shows how small changes like this reduce your footprint year-round.
2. High-Performance Windows & Impact Doors / Storm Shutters
Glass technologies (low-e, double/triple pane, laminated)
Low-emissivity (low-e) coatings reflect heat, laminated panes resist shattering, and double or triple panes trap air for insulation. The upfront cost is higher, but so are the savings.
When to choose impact-resistant vs storm shutters
- Impact-resistant glass: Best for hurricane or tornado zones—protects year-round.
- Storm shutters: More affordable option; deploy only when storms are near.
Energy + damage mitigation + insurance angle
Better windows cut drafts and noise, reduce HVAC strain, and can drop insurance premiums in storm-prone areas. Plus, new doors and windows immediately boost curb appeal—a bonus if you’re eyeing resale.
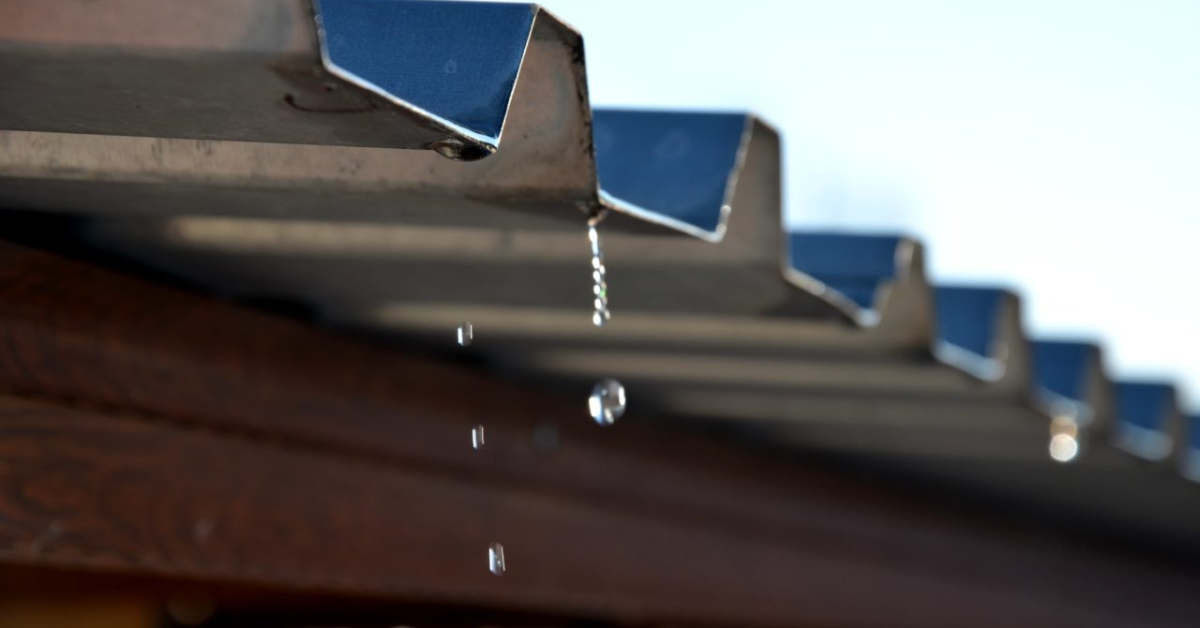
3. Roofing & Rainwater Management (Overhangs, Flashing, Gutter Systems)
Storm-resistant roofing materials & underlayments
Metal, architectural shingles, or clay tiles reinforced with synthetic underlayment give you better storm resistance than basic asphalt shingles.
Flashing, house wrap, roof-to-wall interfaces (critical leak zones)
Most roof leaks don’t come from the surface—they sneak in through weak spots like flashing around chimneys and vents. A professional install makes or breaks this upgrade.
Smart gutter design, gutter guards, drainage away from foundation
Gutters aren’t glamorous, but they protect your foundation from water pooling. Add guards to stop clogs, and make sure downspouts push water 5–10 feet away from the house. One clogged gutter can cause thousands in basement repairs.
4. Flood & Moisture Defense (Sump Pumps, Foundation Sealing, Drainage Systems)
Crack repair, sealants, foundation barriers
Sealing cracks and applying waterproof coatings are your first line of defense against water intrusion. Skipping this step means water will always find its way back.
Sump pumps + battery backups
In flood-prone areas, a sump pump is non-negotiable. Pair it with a battery backup so you’re protected during power outages—the exact time floods usually hit hardest.
Landscape grading & French drains
Sometimes it’s not the house—it’s the yard. Proper grading and a French drain redirect rainwater before it even reaches your foundation. Small landscaping work today prevents big repair bills tomorrow.
5. Smart Systems & Backup Power (Leak Detectors, Surge Protectors, Generators)
Water leak sensors + auto shutoff valves
Imagine catching a pipe leak the minute it starts. These sensors ping your phone and shut off water automatically, stopping thousands in damage before it happens.
Surge protectors / smart electrical panels
Storm surges can fry expensive appliances. A whole-home surge protector shields your electronics and HVAC systems.
Whole-home backup power / solar + battery options
A generator or solar battery keeps your essentials running when the grid fails. Refrigerators, medical devices, and even sump pumps stay powered—peace of mind you can’t put a price on.
How to Plan & Sequence Your Upgrades?
I’ve seen it too often—people get excited about shiny new windows or solar panels, only to realize later they ignored a leaking roof or poor drainage. That’s money wasted. Planning your upgrades in the right order is what separates smart homeowners from frustrated ones.
Prioritize Based on Urgency, Budget & Risk
Think about upgrades like a doctor handles patients—treat the most urgent issues first.
- High urgency: Roof leaks, foundation cracks, clogged gutters (can spiral into huge repair bills fast).
- Medium urgency: Drafty windows, thin attic insulation (they bleed money over time).
- Low urgency: Smart sensors, solar batteries (worth it, but only once basics are done).
Quick wins vs long-horizon upgrades
- Quick wins (cheap, instant impact): Air sealing, weatherstripping doors, cleaning gutters.
- Long horizon (big investment, long protection): Roof replacement, impact windows, sump pumps.
This way, you keep making progress without draining your budget all at once.
Dependency map (you need air sealing before windows, etc.)
Upgrades aren’t stand-alone—they build on each other.
- Seal leaks before new windows.
- Fix drainage before finishing a basement.
- Reinforce roofing before adding solar panels.
This order makes sure every dollar you spend counts.
Maintenance & re-inspection schedule tips
Weatherproofing only works if you maintain it. I tell homeowners:
- Check gutters in spring and fall.
- Re-seal caulk every 2–3 years.
- Inspect flashing around chimneys yearly.
- Test sump pumps before rainy season.
Regular checkups protect the investments you’ve already made. If you want a structured way to stay on top of seasonal checkups, use our seasonal home maintenance checklist so you never miss an inspection that keeps upgrades working.
Incentives, Rebates & Local Support You Shouldn’t Miss
Here’s the part too many people skip: financial help. You don’t always have to shoulder the full cost of upgrades—rebates and credits can cover a surprising amount.
U.S. / National-level programs & tax credits

One of the easiest tools is the ENERGY STAR Rebate Finder. Plug in your zip code and you’ll see rebates for everything from insulation to HVAC upgrades. It’s like a coupon book for weatherproofing.
State / local rebates & municipality grants
- Utility companies often pay you to do energy audits.
- Some cities subsidize rain barrels, gutter guards, or foundation sealing.
- Certain states run programs that cover part of the cost for impact windows or roofing.
A five-minute search with “your state + energy rebate” could save you hundreds.
Insurance discounts for resilience upgrades
Insurers love homes that are harder to damage. Things like impact-resistant roofs, flood mitigation, and leak sensors can lower your premium—sometimes enough to cover the cost of the device itself. Always ask your provider before starting a project.
Financing options (green loans, PACE, on-bill financing)
If upfront costs are your biggest barrier, financing options can help:
- Green loans: Low-interest loans designed for energy upgrades.
- PACE financing: Pay through property taxes.
- On-bill financing: Spread costs across your utility bill, often offset by savings.
Your Decision Matrix & Upgrade Roadmap
By now you’ve seen the upgrades that save money and protect your home, but the big question is: where do you start? You don’t need to do everything at once—just pick the two or three upgrades that make the most sense for your budget, climate, and risk level.
Budget vs Risk vs Climate: Which 2–3 Upgrades to Start With
Think of it like building your own starter combo.
- Tight budget, cold climate: Air sealing + attic insulation + sump pump check.
- Moderate budget, flood risk: Foundation sealing + sump pump with backup + gutter redesign.
- Higher budget, storm belt: Impact windows + reinforced roofing + smart leak detectors.
Every home is different, but when you match upgrades to your biggest risks, you see faster payback and fewer surprises.
Decision table
| Climate Zone / Home Type | Key Risk | Best Starter Upgrades |
|---|---|---|
| Cold / Snow-heavy, 20+ yr old | Heat loss & ice dams | Attic insulation, air sealing, roof flashing |
| Hot / Dry, newer homes | HVAC strain | Reflective roof, low-e windows, smart thermostat |
| Flood-prone, 30+ yr old | Basement seepage | Foundation sealing, sump pump + backup, grading |
| Coastal / Hurricane areas | Wind & storm surge | Impact windows, storm shutters, reinforced roof |
This table is your cheat sheet—pick your row and start there.
5-step action plan
- Audit: Get an energy + risk audit (DIY or pro).
- Prioritize: Rank upgrades by urgency and budget.
- Install: Start with quick wins, then scale to bigger projects.
- Monitor: Track bills, check leaks, log maintenance.
- Maintain: Inspect seasonally so upgrades keep paying off. Not sure how to get moving? Check out these step-by-step home improvement projects you can start right away to build momentum.
Checklist
Before starting, make a simple printable checklist:
- Fix leaks and seal gaps
- Inspect gutters & drainage
- Review insulation levels
- Check roof condition
- Ask insurer about discounts
- Research rebates & financing
This keeps you on track and avoids shiny-object distractions.
Final Thoughts
The best part of weatherproofing is that it doesn’t have to be overwhelming. Even a single upgrade can start saving you money this year. Stack a few smart ones, and the savings compound for decades.
Every sealed crack lowers your bills. Every reinforced roof shaves insurance risk. Together, these small moves snowball into thousands saved—not just in avoided damage but in everyday comfort.
If you’re not sure where to begin, book a professional home energy or risk audit. A two-hour inspection can point you to your top three priorities, saving you from guesswork.
What to avoid / red flags
- Don’t overspend on upgrades that don’t match your climate.
- Avoid contractors who push one-size-fits-all solutions.
- Never skip maintenance—it’s what keeps upgrades working.
You’ve got the roadmap now. The only question left is: which upgrade will you tackle first? Drop your thoughts in the comments—I’d love to hear what’s top of your list.
And if you want more practical guides on making your home smarter, safer, and more cost-efficient, check out Build Like New for tips that actually pay off.
Disclaimer: This article is for informational purposes only. Weatherproofing needs vary by home, climate, and budget. Always consult licensed professionals and check local codes before making upgrades. Build Like New is not liable for individual outcomes.

