6 Storm-Damaged Roof Flashing Issues That Could Drain Your Wallet This Winter
Winter storms aren’t just cold—they can quietly turn your roof into a ticking time bomb. I’ve seen homeowners shrug off a small leak or a bit of rusted flashing, thinking it’s harmless, only to face thousands of dollars in damage once the snow piles up or ice dams form. You might not notice it now, but storm-damaged flashing can let water creep under shingles, rot your attic, or even compromise your walls before you know it.
In this article, I want to walk you through the six most common flashing problems that really bite during winter, how to spot them early, and what you can do to protect your home—because ignoring them isn’t just risky, it’s expensive.
Here’s the next section written in a natural, first-person tone with clear bullets, elaboration, and one natural external link:
What Is Roof Flashing and Why Winter Storms Turn It Into a Critical Weak Point
If you’ve ever looked at your roof and noticed the metal strips around chimneys, vents, or valleys, those are your roof’s first line of defense against water. That’s flashing. I’ve spent years inspecting winter storm damage, and I can tell you—flashing is often the unsung hero of your roof. Its job is simple: direct water away from vulnerable spots so it doesn’t seep under shingles or into your attic.
Good flashing is snug, properly sealed, and shows no signs of rust or gaps. Compromised flashing, on the other hand, can lift, crack, or corrode—especially when winter storms hit. That small gap you ignore in November? By February, it could be a channel for ice-dammed water, leading to leaks, rot, or even structural damage.
Here’s what I always check when I inspect flashing:
- Chimneys and skylights: Make sure the metal is tightly sealed and overlaps correctly.
- Roof valleys: These are natural water funnels—any weakness here can quickly become a leak.
- Vents and pipes: Rubber boots or metal collars should be intact, not brittle or rusted.
- Edges and eaves: Flashing here takes the first hit from snow, wind, and ice; even a small lift is risky.
If you want a deeper look at why winter storms make flashing so vulnerable, Premier Group Roofing explains how freeze-thaw cycles and ice dams can destroy poorly installed flashing.
Understanding flashing is important because it’s the foundation for spotting real problems later. Once you know what healthy flashing looks like, you’ll immediately see the warning signs before winter turns a minor issue into a costly repair. For homeowners thinking long-term, exploring sustainable options like green roofs can not only improve insulation but also reduce winter water stress on flashing.
How Winter Weather Physically Attacks Flashing

I’ve seen firsthand how winter storms aren’t just cold—they actively sabotage roof flashing in ways most homeowners never notice until it’s too late. Understanding these mechanisms is key because it helps you catch problems early, before water gets in and causes thousands in damage.
Freeze‑Thaw and Ice Dam Forces
- Freeze‑thaw cycles: Water expands by roughly 9% when it freezes. Even tiny amounts of trapped water under your flashing can pry apart seals and fasteners over repeated cycles.
- Ice dams: When snow melts during the day and refreezes at the roof edge, it forms a dam. This trapped water can back up under shingles and flashing, forcing water into directions your roof was never designed to handle.
- Real-world impact: I’ve seen flashing lifted along valleys and chimney bases simply because ice pushed water under metal that looked perfectly fine in the fall.
Thermal Expansion and Contraction Fatigue
- Metal flashing isn’t immune to temperature swings. It expands in the sun and contracts in the freezing night, slowly loosening nails and breaking down sealants.
- Over time, these tiny movements accumulate. A flashing strip that was secure last summer can start to buckle or crack once winter hits.
Wind, Snow Load & Storm Impact
- Strong gusts can pry at flashing edges, especially along eaves and roof ridges.
- Heavy snow and ice add extra weight, sometimes bending or separating the metal.
- Debris blown around during storms can puncture or scratch flashing, creating weak points that water exploits.
When you combine freeze-thaw cycles, thermal fatigue, and the physical force of winter storms, it’s no wonder flashing failures spike in cold months. The good news is that spotting these vulnerabilities early—like lifted edges, rust streaks, or small gaps—can save you thousands in repairs.
Problem #1: Ice Dam‑Driven Flashing Separation
I’ve seen ice dams quietly ruin perfectly good flashing. They form when melting snow refreezes at the roof’s edge, creating a barrier that traps water. This backed-up water finds the smallest gap under your flashing and sneaks inside, slowly compromising your roof.
Here’s where ice dams hit hardest:
- Roof edges and eaves: The first line where ice dams form. Even a small lip can push water under flashing.
- Valleys: Natural funnels for snowmelt—any weak flashing here is a high-risk spot.
- Skylights and chimneys: The seams are prone to water intrusion if ice dams form nearby.
Ignoring ice dams isn’t harmless. They’re subtle, but by the time you see interior leaks or water stains, the flashing—and possibly the roof deck—could already be damaged.
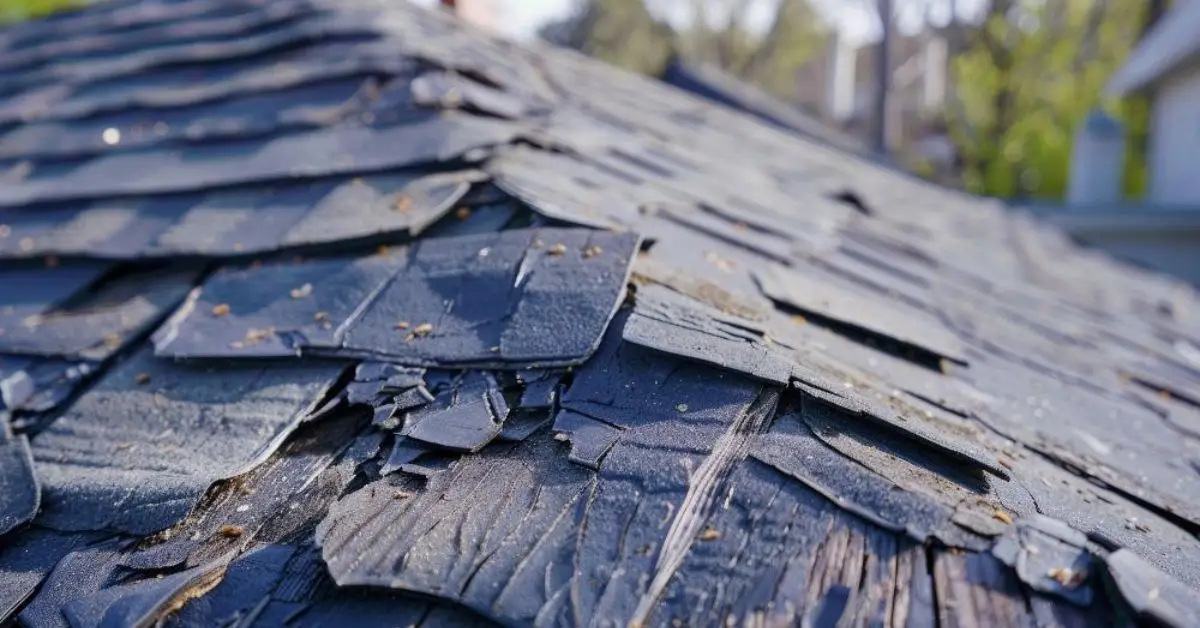
Problem #2: Flashing Corrosion, Rust and Weakening Over Time
Winter moisture accelerates corrosion, and combined with atmospheric pollution or salt exposure in certain areas, metal flashing can degrade fast. I always check for early warning signs:
- Rust streaks running down the roof or near seams.
- Pitting or holes in metal strips.
- Discoloration around fasteners or overlaps.
Even small rust spots can expand under winter storms, eventually letting water breach your roof. Corrosion may be mentioned briefly on many sites, but few connect it directly to winter risk and potential repair costs.
Problem #3: Failed Sealants, Caulk Fatigue & Brittleness
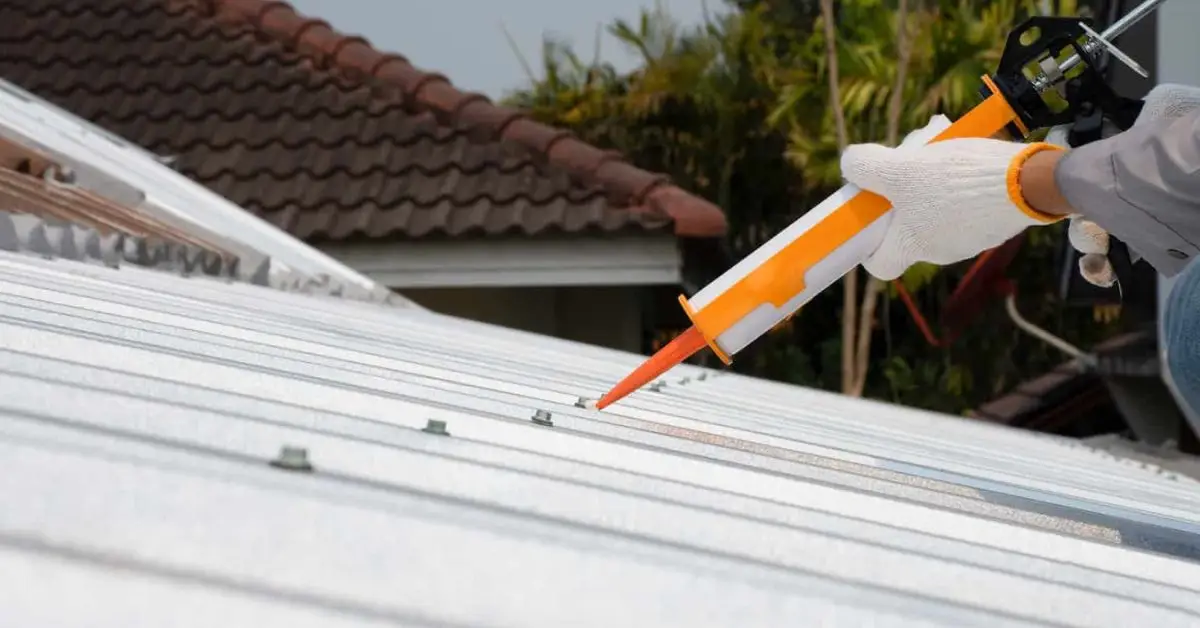
I can’t stress enough how often sealant failure leads to bigger flashing problems. Most caulks and sealants become brittle below 40°F. On top of that, winter UV exposure—even on cloudy days—breaks down the chemicals faster.
Watch out for these signs:
- Cracked or crumbling caulk along flashing edges.
- Gaps forming where the sealant pulled away from metal.
- Discoloration or powdery residue indicating UV breakdown.
Sealant issues are usually the first clue that flashing is about to fail. Addressing them early can prevent leaks and expensive structural damage later.
For a professional perspective on how winter moisture and seasonal stress accelerate flashing failure, Guardian Roofing explains common winter damage mechanisms and preventative tips.
Problem #4: Improper Installation that Shows Up in Winter
Sometimes flashing problems aren’t about weather—they’re about how it was installed. I’ve seen roofs that looked perfect in summer suddenly leak after the first winter storm because of basic installation errors. Snow and ice exploit these weaknesses, making small mistakes costly.
Step Flashing Not Seated Right
- If step flashing around chimneys or walls isn’t tucked correctly under shingles, water finds its way under the metal.
- Ice dams make this worse by pushing water upward into the gap.
Counter Flashing Gaps at Chimneys
- Missing or poorly sealed counter flashing allows water to seep behind the chimney base.
- Snow melt pools at the base, forcing water into areas that should be protected.
Missing or Incorrect Drip Edge
- Drip edges guide water off the roof; if they’re absent or misaligned, water can get under shingles and flashing.
- Winter storms amplify the problem, as snow piles and ice push water where it shouldn’t go.
Pay attention to these mistakes—they’re the kind of details that separate minor winter issues from major repairs.
Problem #5: Vent & Pipe Boot Flashing Failures
Roof penetrations like vents and pipes are flashing weak spots. Rubber boots dry out and crack faster in freezing temperatures, and even metal collars can loosen under ice weight.
- Brittle rubber: Small cracks quickly turn into leaks when snow melts.
- Hidden water paths: Leaks often start here and go unnoticed until your attic or ceiling shows water damage.
This is a detail other articles miss, but it comes up repeatedly in real homeowner reports. A small check now can save big repairs later.
Problem #6: Hidden Valleys & Low Slope Areas That Trap Water
Roof valleys are natural water channels. During winter, they become hotspots for snow accumulation and concentrated meltwater. If flashing here isn’t solid:
- Snow piles add pressure on metal flashing seams.
- Meltwater seeks the path of least resistance, often under flashing instead of off the roof.
- Low-slope areas can hold water longer, increasing the chance of leaks and rot.
Valleys may seem harmless in summer, but winter exposure reveals hidden weaknesses. Addressing them early is key to avoiding expensive damage.
9 Warning Signs Flashing Is Failing This Winter
Here’s what I tell homeowners to look for before winter really hits:
- Rust streaks along seams or edges
- Water stains on ceilings or walls
- Musty odors in the attic
- Ice forming in unusual spots
- Visible gaps at chimney bases
- Loose or lifted flashing
- Warped or bubbled shingles around flashing
- Water pooling near vent boots
- Cracked or missing sealant along edges
Recognizing these red flags early gives you the chance to prevent serious damage. For a detailed checklist and professional insights, Fortified Roofing has a practical guide on spotting winter roof flashing problems.
What Happens If You Ignore It: Dollars and Damage
I’ve seen it too many times: a homeowner delays fixing flashing problems, thinking “it’s just a little leak,” and ends up paying thousands. Here’s the reality:
- Minor flashing repair: Could cost a few hundred dollars if caught early.
- Extensive structural rot: Once water reaches the decking, rafters, or interior walls, repairs can run into the thousands, sometimes requiring partial roof replacement.
- Insurance pitfalls: If insurers determine the damage was caused by neglect rather than a sudden storm, they may deny your claim.
Facing this reality isn’t fun, but it’s the reason I always tell people to check their flashing before winter hits. A small upfront fix saves major headaches later. In addition to repairing flashing, you should also consider 5 weatherproofing upgrades that save you thousands long-term, which protect your home against future winter damage and costly repairs.
Proactive Prep Before Winter Storms

Here’s what I do and recommend to every homeowner to avoid winter flashing disasters:
- Schedule a professional inspection: Early fall is perfect to spot weak flashing before snow arrives.
- Refresh sealants: Replace cracked or brittle caulk around chimneys, vents, and valleys.
- Check attic ventilation: Proper airflow prevents ice dams from forming.
- Clean gutters and downspouts: Ensures snowmelt drains properly.
- Use a snow rake carefully: Remove heavy snow to reduce pressure on flashing and roof valleys. If you want to take winter-proofing further, I also recommend checking out my guide on 7 winter-proof home fixes you can’t ignore this season—it covers small but crucial updates that prevent leaks and ice dam issues.
Taking these steps shifts you from worrying about disaster to actively preventing it. I can’t stress enough—early action pays off.
Conclusion
Winter storms are predictable, but flashing failures don’t have to be. I’ve walked you through the six biggest problems, warning signs, costs, and practical steps you can take. The key is awareness and timely action—you now know what to look for and how to protect your home.
If you’ve dealt with flashing issues or have questions about winter-proofing your roof, drop a comment below—I’d love to hear your experiences. And for more detailed guides, tips, and inspections, visit Build Like New to keep your home safe, sound, and storm-ready.
Disclaimer: This article is for informational purposes only. Always consult a licensed roofing professional for inspections, repairs, or advice specific to your home. Build Like New is not responsible for any damage or loss resulting from following the guidance here.