
7 Quick Steps to Patch Massive Drywall Damage at Home
You’re staring at a fist-sized hole in the wall and thinking, “This is a pro job.” It isn’t. You can fix a big drywall hole cleanly, and you don’t need expensive tools or special skills—just the right order of steps.
Most guides throw a shopping list at you and skip why patches fail: jagged edges, no solid backing, heavy coats of mud, and zero primer. I’ve seen those mistakes turn a simple repair into a lumpy eye-sore that cracks in a week.
Here’s the plan we’ll follow: square the hole, add a sturdy backing, fit a patch that matches thickness, tape right (mesh or paper—used for the right reason), build thin coats of compound, sand without choking the room, then prime and blend paint so the fix disappears.
I’ll also give you low-cost swaps if you don’t own a saw, plus quick checks that stop bulges, cracks, and ridges before they start. The goal isn’t “good enough”—it’s invisible.
Before we dive in, tell me: how big is your hole (rough inches), and do you already have joint compound or primer on hand?
Before You Start: Know What You’re Fixing
What counts as a “big hole”
When I say big hole, I don’t mean the tiny nail pops you can cover with spackle. I’m talking about anything in the 2–6 inch range—the kind of damage left after moving furniture, a doorknob smash, or an accidental kick. Once a hole gets larger than your hand, you can’t rely on lightweight filler. That’s where patches, backing, and a proper step-by-step repair come in.
If your wall damage is bigger than 6 inches, it edges into “extra-large” territory. That often means more support, sometimes cutting back to studs, and definitely more time. But for most of us, the mid-sized holes are the headache—and that’s what I’ll show you how to fix.
Before patching, it’s smart to make sure the hole wasn’t caused by hidden water damage—leaks inside walls are sneaky and can ruin your repair. Here are 7 easy ways to find hidden leaks in your home before they ruin your walls.
Tools & materials checklist (with low-cost alternatives)
You don’t need a contractor’s toolkit. Here’s the lean list that works:
- Drywall patch piece (same thickness as your wall, usually ½”)
- Utility knife (instead of buying a drywall saw, if you’re careful)
- Wood strip / scrap plywood (cheap backing support)
- Drywall screws and a screwdriver or drill
- Joint tape (mesh is easiest for beginners)
- Joint compound / spackle
- Sandpaper or sanding sponge (medium + fine grit)
- Primer + paint to match wall
Low-cost swap: If you don’t want to buy a full drywall sheet, you can grab a patch kit from your local store. Even Home Depot notes that repair kits are a budget-friendly shortcut for DIYers.
Average cost & time estimate
Most people think a repair like this will swallow their weekend. Truth is, you can handle it in about 2–3 hours spread over a day (drying time included).
- Cost: $15–$40 total (patch, screws, tape, mud, sandpaper)
- Time: 20–30 minutes of hands-on work per step, with drying gaps in between
This upfront picture matters because nothing kills motivation faster than realizing you’re short on tools or cash halfway through.
Step 1: Clean and Square the Hole
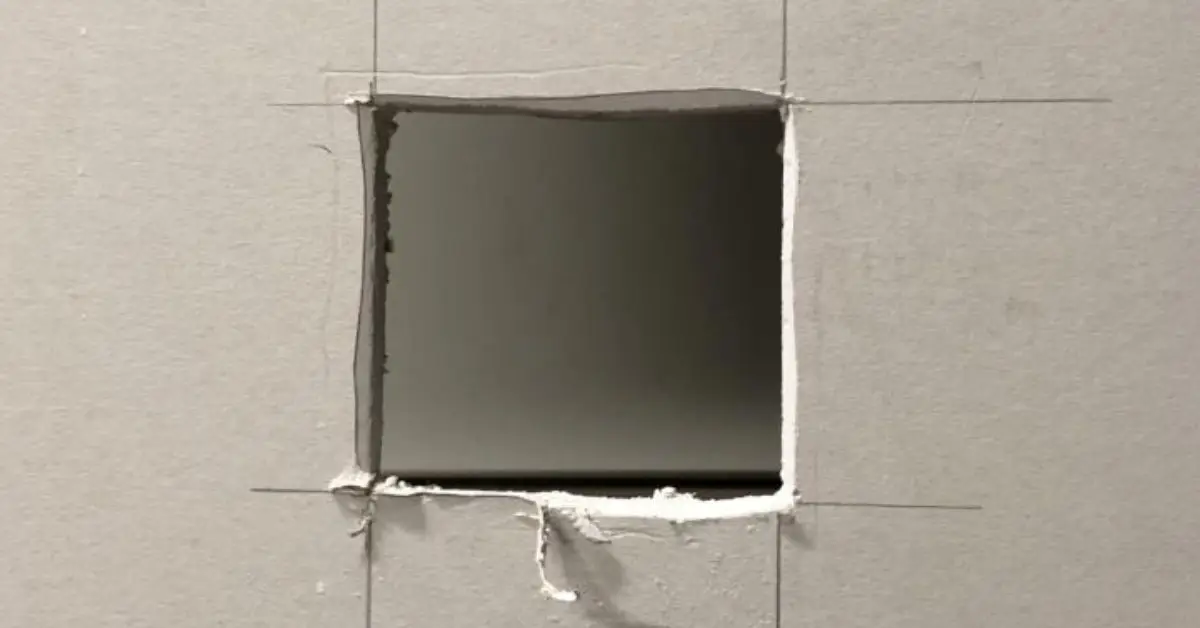
Why irregular edges cause patch failures
If you try to patch over a jagged hole, the edges crumble and the patch won’t sit flush. That’s why the first thing I do is cut a clean square or rectangle around the hole. Straight edges give your patch something solid to lock onto. Without this, you’ll end up with cracks or a bump that screams “repair job.”
Pro tip: use a utility knife if budget is tight
You don’t need a power saw here. A sharp utility knife works fine for most drywall. Score it, apply a little pressure, and the piece will snap along your cut. It’s slower than a saw but saves you money and reduces dust flying around the room.
Step 2: Add a Backing Support (The Hidden Hero)
Wooden cleats or scrap plywood method
Think of backing as the brace behind your patch. I like to slide a strip of wood or scrap plywood behind the hole, then screw it into place through the existing drywall. This gives you a firm anchor, so your new drywall patch won’t sink in or pop out.
Steps look like this:
- Cut a strip of wood a few inches longer than the hole’s width
- Slip it behind the wall, hold it steady
- Drive two screws through the existing drywall to secure it
Now you’ve got a strong shelf for your patch.
Alternative: pre-made clips (with cost)
If you’d rather skip the woodwork, you can buy drywall repair clips. They’re small metal brackets that grip both the old wall and new patch. They cost a bit more—usually around $6–$10 per pack—but they save time if you’re nervous about cutting and screwing wood inside the wall.
Step 3: Cut and Place the Drywall Patch
Matching thickness to existing drywall (½” vs ⅝”)
Here’s the mistake I see most often—grabbing whatever drywall scrap is lying around and hoping it fits. Walls aren’t all the same. Most homes use ½-inch drywall, but some ceilings and newer builds use ⅝-inch. If your patch is thinner, it’ll sink in; if it’s thicker, it’ll bulge out. Always measure the thickness of your wall first before cutting your patch.
Quick measuring trick to avoid gaps
The fastest way? Place your drywall patch directly over the squared hole, trace its outline with a pencil, and then cut. That way you’re cutting to size instead of eyeballing. If you leave even a small gap, mud tends to crack there. A snug fit means your repair will actually blend in instead of standing out.
Step 4: Secure the Patch Like a Pro
Screwing into the backing support (spacing tips)
Once your patch is cut, line it up with the hole and backer. Use drywall screws every 4–6 inches along the edges. This spacing keeps the patch flush without stressing the board. If you use fewer screws, the patch might flex; too many, and you weaken the drywall.
What not to do: over-screw (causes crumbling)
Don’t drive the screw head so deep it rips through the paper surface of the drywall. That kills its holding power and creates weak spots. You want screws just barely dimpled into the surface—enough to cover with mud later, not cratered in.
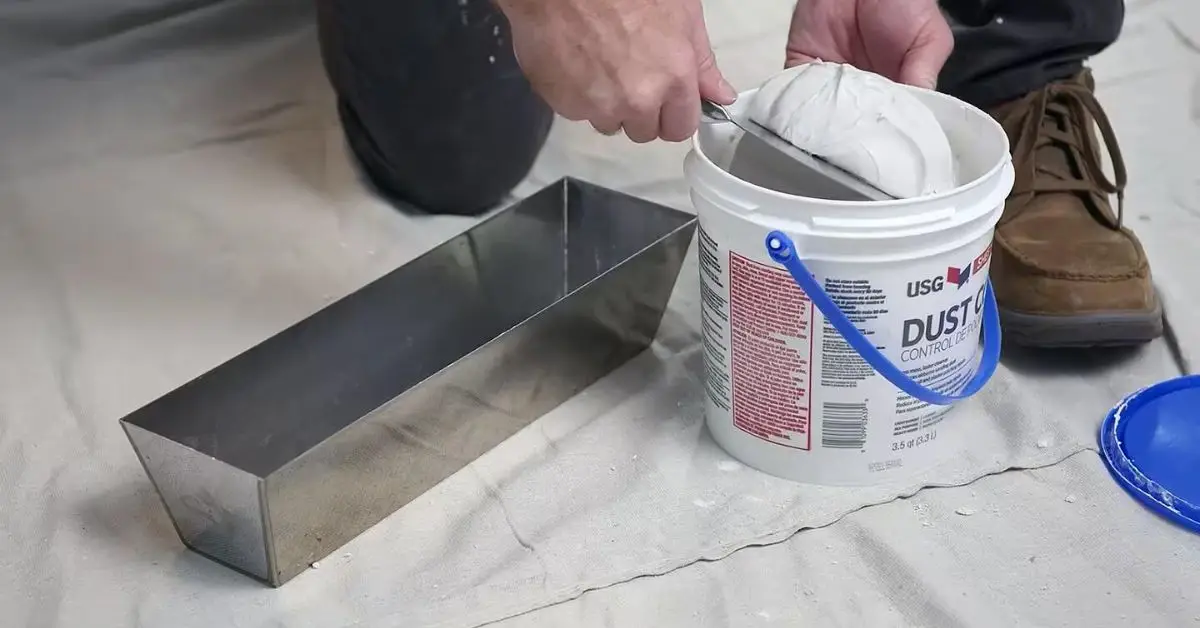
Step 5: Tape and Mud for Strength
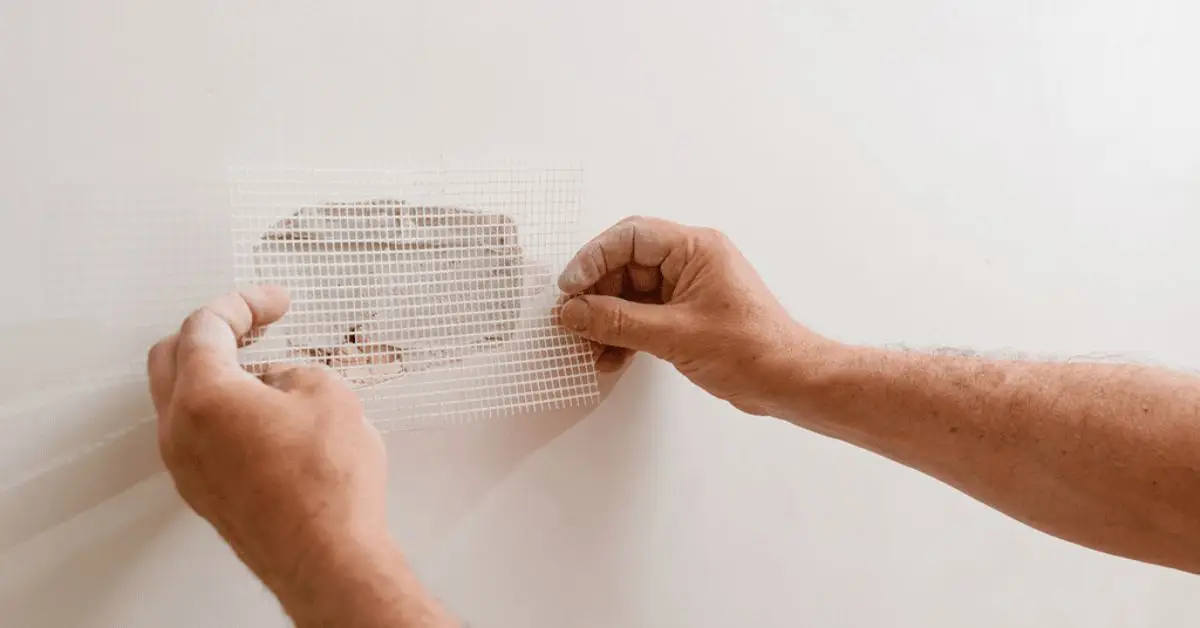
Mesh vs paper tape (when to use each)
Both tapes work, but they’re not equal. Mesh tape is beginner-friendly—it sticks directly to the drywall, no pre-coat needed. Paper tape is stronger for long seams but trickier to apply. For a single patch, I’d recommend mesh unless you’re experienced.
First coat technique (thin layers)
Spread a thin layer of joint compound over the seams, press the tape in, then skim a second light coat over the top. Think butter on toast, not icing on cake. Thin coats dry faster and sand smoother.
Common failure: too much mud → cracking
I’ve seen people slap on thick globs thinking it’ll cover faster. Instead, it dries unevenly, shrinks, and cracks. Three thin coats beat one heavy coat every time.
Better Homes & Gardens explains why mesh tape is often easier for beginners and helps prevent cracks—good reassurance if you’re unsure which to choose.
Step 6: Sand Without Making a Mess
Sanding blocks vs pole sanders
Once your mud is fully dry, sanding is what makes or breaks the finish. A sanding block works great for small patches—you’ve got more control and it’s easy to get right up to the edges. For ceiling repairs or bigger wall areas, a pole sander saves your back and keeps the surface more even.
Pro trick: damp sponge sanding for less dust
Here’s a cleanup hack most guides skip: instead of sanding dry, use a slightly damp sponge. Rub in gentle circles and you’ll smooth the compound without filling the room with dust. It takes a little longer, but it’s perfect if you’re working in a small space or don’t want to cover everything in plastic.
Step 7: Prime and Paint to Blend Seamlessly
Why primer is non-negotiable
I’ve seen too many patches fail because someone went straight to paint. Fresh joint compound is porous—it soaks up paint unevenly and leaves blotches. Primer seals the patch, evens the surface, and makes sure the paint coat matches the rest of the wall. Skipping it almost guarantees your patch will scream “repair.”
Feathering paint edges for invisible finish
When you paint, don’t just cover the patch in a square. Instead, feather the edges—start heavy in the center and lightly blend outwards. This softens the transition so your eye doesn’t catch a sharp paint line. Two thin coats usually do the trick.
If your patch is in a wallpapered room, remove the paper around the repair first. Here’s a simple guide on steaming away wallpaper in 6 steps.
Mistakes That Ruin Drywall Patches (and How to Avoid Them)
- Overloading mud: Thick coats shrink and crack as they dry. Stick to multiple thin layers.
- Skipping primer: Leads to blotchy, obvious repairs.
- Rushing sanding: If you don’t smooth it properly, the patch will always show under light.
Real Costs vs Hiring a Pro (Mini Breakdown)
- DIY cost estimate: $15–$40 for materials (patch, mud, screws, tape, sandpaper).
- Pro repair cost: $150–$400 depending on hole size and local rates.
- Time trade-off: DIY takes a few hours with drying time; hiring out saves time but costs 10x more.
According to HomeAdvisor, the national average for hiring a professional drywall repair service lands between $150 and $400—so fixing it yourself can easily save you a few hundred dollars.
Quick Fixes If You’re in a Hurry (Not Perfect, But Works)
Sometimes you don’t have the time or patience for a full repair, and that’s okay. These shortcuts won’t give you a flawless finish, but they’ll keep the hole from standing out until you can do it right.
- Adhesive patches: These are metal mesh squares with sticky backing. You peel, stick, and cover with compound. They’re fast and don’t require cutting or backing, but they can leave a slight bump if not sanded carefully.
- Spackling shortcuts: For holes under 3 inches, you can use heavy-duty spackle. It’s quick, dries fast, and is paintable within hours. Just know it won’t be as durable as a true drywall patch.
Handy Checklist: Repair Big Holes in Drywall in 7 Steps
Here’s the process in quick form—you can print or save this for reference:
- Square the hole with a utility knife.
- Insert backing support (wood strip or clip).
- Cut a drywall patch that matches thickness.
- Screw the patch into the backing securely.
- Tape and mud the seams with thin layers.
- Sand smooth with a block or damp sponge.
- Prime and paint to blend it seamlessly.
Wrap-Up: You Don’t Need a Pro for This One
Big drywall holes look intimidating, but they’re not beyond you. With a $20 kit and an afternoon, you can patch the damage, smooth it out, and repaint so no one ever knows it happened. The key is patience—thin coats, good sanding, and never skipping primer.
Once your repair is finished, why stop there? Take your wall from “fixed” to “fantastic” with these DIY large wall décor ideas that look expensive.
If you liked this guide, check out more home improvement and painting tips on Build Like New. They’ll help you handle the little repairs that keep your home looking fresh without draining your wallet.
What about you—have you tried fixing a drywall hole before? Share your experience or any repair hacks in the comments below.
Disclaimer: The information in this guide is for general DIY purposes only. Always follow manufacturer instructions for tools and materials, wear proper safety gear, and consult a licensed contractor if you’re unsure or dealing with structural damage.

