
7 Easy Steps to Deep-Clean Your Bathroom Exhaust Fan in Minutes
If you’re like most people, you probably don’t think about your bathroom exhaust fan until something feels off — the mirror takes forever to clear, the room smells musty, or the fan starts making that tired rattling sound. I’ve seen this happen in so many homes, and it’s almost always the same cause: a fan that hasn’t been cleaned in a long time.
What most folks don’t realize is that this simple little fan does a big job. It pulls out steam, moisture, and odors every single day. But once dust, lint, and grime start choking the blades and motor, it can’t move air the way it should. That’s when moisture hangs around, mold settles in, and your energy bill quietly creeps up.
The good news? Cleaning it isn’t complicated. You don’t need special tools, expensive sprays, or years of DIY experience. You just need a clear, simple process — the same steps I’ve used for years in home audits and maintenance walkthroughs. And once you do it the right way, your bathroom will feel fresher, your fan will run smoother, and you’ll extend the life of a device most people replace too soon.
Before we jump into the steps, let me ask you this: When was the last time you actually looked up at your bathroom fan and noticed the dust sitting on it?
Why Cleaning Your Bathroom Exhaust Fan Actually Matters
If you’ve ever stepped out of the shower and noticed the mirror fogging for way too long or a damp smell that just won’t go away, your bathroom fan is probably struggling. I’ve inspected a lot of homes over the years, and the pattern is almost always the same: the fan isn’t broken — it’s just packed with dust and moisture build-up.
A dirty fan can’t pull air the way it should. When that happens, all the moisture stays trapped inside the bathroom. That extra humidity becomes the perfect setup for mold, peeling paint, and even damage to drywall. According to the EPA, excess indoor moisture is one of the biggest triggers for mold growth, and bathrooms are usually the first place it shows up.
But the hidden costs don’t stop there.
When the fan is clogged:
- It uses more energy to do the same job
- It runs louder because the motor is straining
- It loses most of its airflow power
- It shortens its own lifespan
I’ve seen fans burn out years earlier just because they were never cleaned. A quick 10–15 minutes every few months can save you from repairs you don’t need.
When You Should Clean It
Most people wait until the fan gets noisy or stops clearing steam. By the time you reach that point, the dust build-up is already thick. The truth is, you don’t need to wait for a problem.
Here’s what I tell homeowners:
- Small bathrooms used daily: clean every 3–4 months
- Larger or well-ventilated bathrooms: every 6 months
- High-humidity homes or homes with kids: every 2–3 months
- If you see dust on the cover: clean immediately
If you live in a humid state or run long hot showers, your timeline shortens. Moisture is the enemy here, and you want to stay ahead of it instead of reacting later.
Safety First: Preparation Before You Start
Before you grab a vacuum or start pulling on anything, I want you to slow down for one minute. These fans sit on your ceiling, and they’re connected to electrical wiring. Cleaning them is simple, but doing it safely makes all the difference.
Turn Off Power Safely
You have two options, and I always go with the safer one.
1. Wall switch: You can switch off the fan at the wall, but keep in mind there’s still power running to the fixture.
2. Circuit breaker (the safer choice): If you want zero risk, flip the breaker that controls the bathroom. It takes an extra thirty seconds, and you won’t have to worry about unexpected starts or exposed wiring.
If you’re unsure which breaker controls the bathroom, turn the fan on first so you can hear when it turns off as you test.
Tools & Supplies You’ll Need
You don’t need expensive products. Most of what you need is already at home. Each tool has a purpose, and using the right ones makes the job smoother. If you’re trying to improve your overall cleaning routine, you may want to avoid a few habits that actually make your home dirtier — I broke those down here in my guide on old cleaning habits you should stop now.
- Vacuum with brush attachment: Helps remove loose dust without blowing debris deeper into the motor.
- Soft brush or old toothbrush: Gets into corners and fan blades where dust sticks.
- Microfiber cloth: Wipes off grime without scratching plastic parts.
- Mild cleaner or soapy water: Safe for the fan cover and housing. Avoid anything strong or acidic.
- Screwdriver: Some covers snap off, but many require a single screw removed.
- Step stool or ladder: Keeps you stable and avoids leaning or stretching.
If you want a simple breakdown of duct and fan cleaning basics, the EPA has a helpful general overview on indoor air and moisture.
Step-by-Step Cleaning Process (Your 7 Steps)
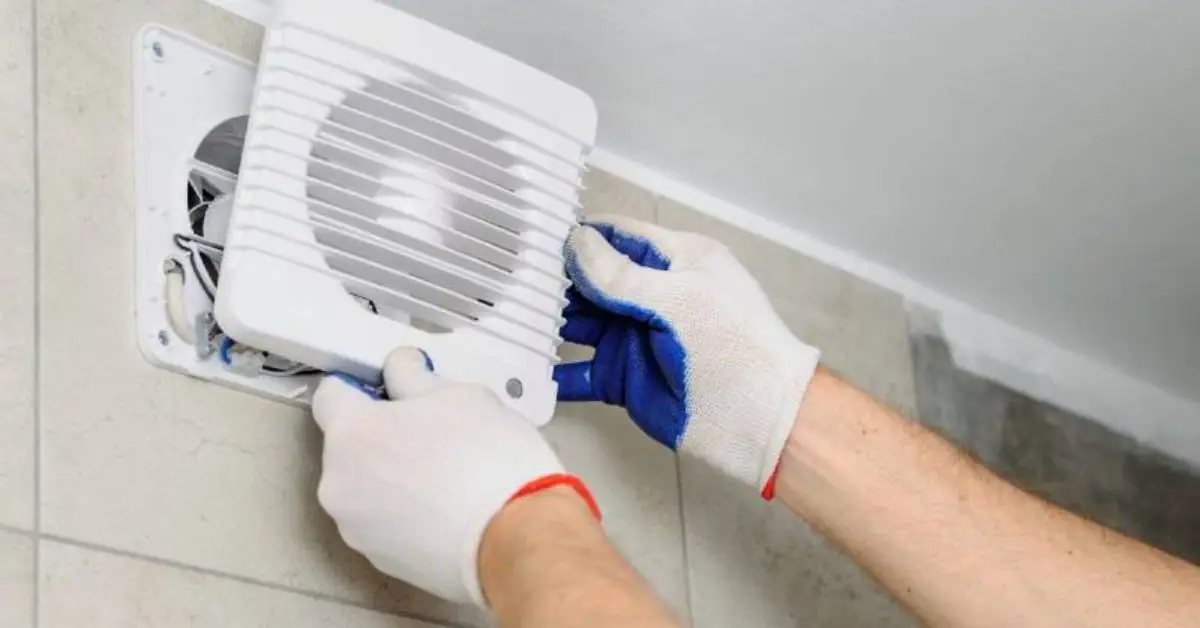
Step 1: Remove the Fan Cover
Most covers come off in two ways: either they have small metal spring clips you squeeze, or a single screw holding the grille in place. I always start by gently pulling the cover downward to see which type it is. Once you spot the mechanism, release it slowly so the plastic doesn’t crack — older covers get brittle.
How to Handle Fragile Grilles
If the cover feels stiff or looks yellowed with age, support it with one hand while you release the clips or screw with the other. This keeps pressure off the plastic and prevents snapping.
Step 2: Vacuum the Cover & Housing
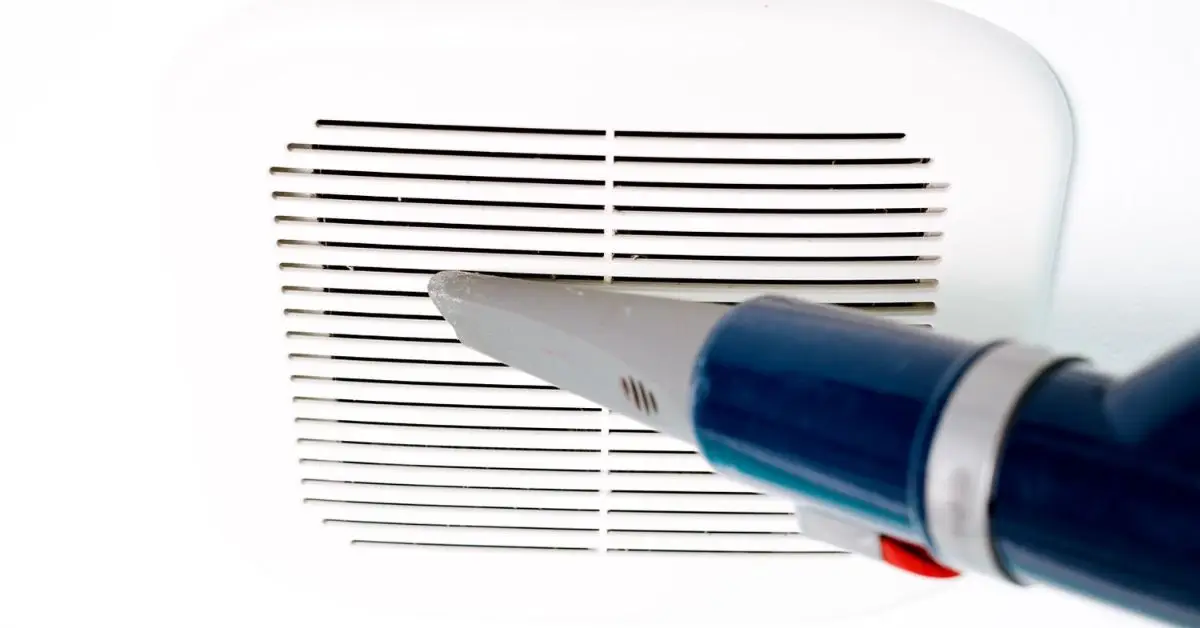
Once the cover is off, you’ll see dust packed around the edges and inside the fan housing. A vacuum with a soft brush attachment works best here. Start with the cover, then move to the housing so you don’t push dirt into the motor.
Best Suction Techniques for Dust & Lint
Here’s what works well:
- Use short, light passes instead of pressing the nozzle into the fan
- Angle the brush so it lifts dust outward
- Keep the nozzle away from wiring and the motor mount
This clears out most of the debris so the deeper cleaning is easier.
Step 3: Deep Clean the Fan Blades
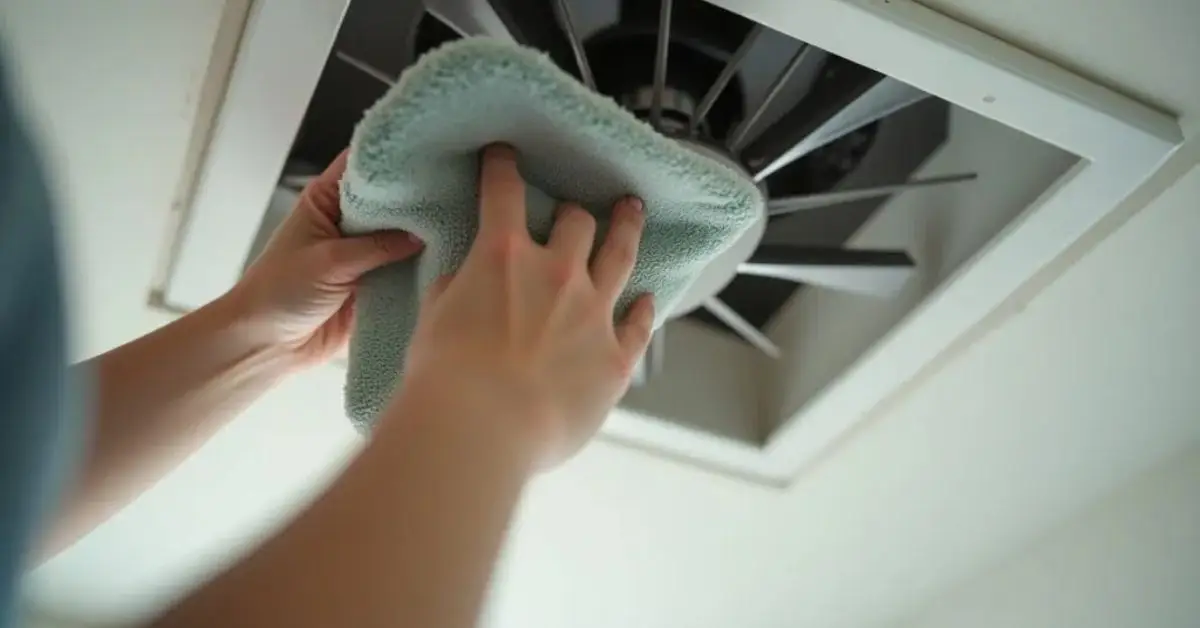
Bathroom fan blades collect a sticky mix of moisture and dust. I start with a soft brush to loosen the buildup, then wipe each blade with a slightly damp microfiber cloth. Even a small amount of grime can slow the fan down, so it’s worth taking your time on each blade.
Tools That Actually Work
Over the years, these have been the most reliable:
- A soft paintbrush for loosening dust
- Microfiber cloths for wiping without scratching
- Compressed air for corners you can’t reach easily
Simple tools, big difference.
Step 4: Clean the Motor & Wiring Area
This is the part where you want to be gentle. The goal is to remove loose dust without touching the wiring or saturating anything. A light vacuum pass or a dry cloth is all you need here.
What to Avoid
Here are the things I avoid every single time:
- No sprays or liquid cleaners
- No wet cloths near wiring
- No metal tools around wires
- No aggressive brushing that could pull a connector
Keeping it dry and light is the safest approach.
Step 5: Wipe the Duct Opening & Vent
The duct opening is where all the air travels, and dust often settles right at the rim. Wipe whatever you can reach with a dry or slightly damp cloth. You don’t need to go deep into the duct — the main goal is to remove buildup that slows airflow at the entrance.
Step 6: Sanitize Mold/Grime Build-Up
Bathrooms stay damp, so light mold or grime around the housing isn’t unusual. You don’t need strong chemicals. A simple soap-and-water cloth works well. Just wipe gently and avoid letting moisture drip toward the motor or wiring.
If you want a solid reference that mirrors this approach, this cleaning guide from Lowes breaks down when and how to sanitize these areas safely without overdoing it.
Focus on visible surfaces, wipe instead of spraying, and make sure everything dries before the fan goes back together.
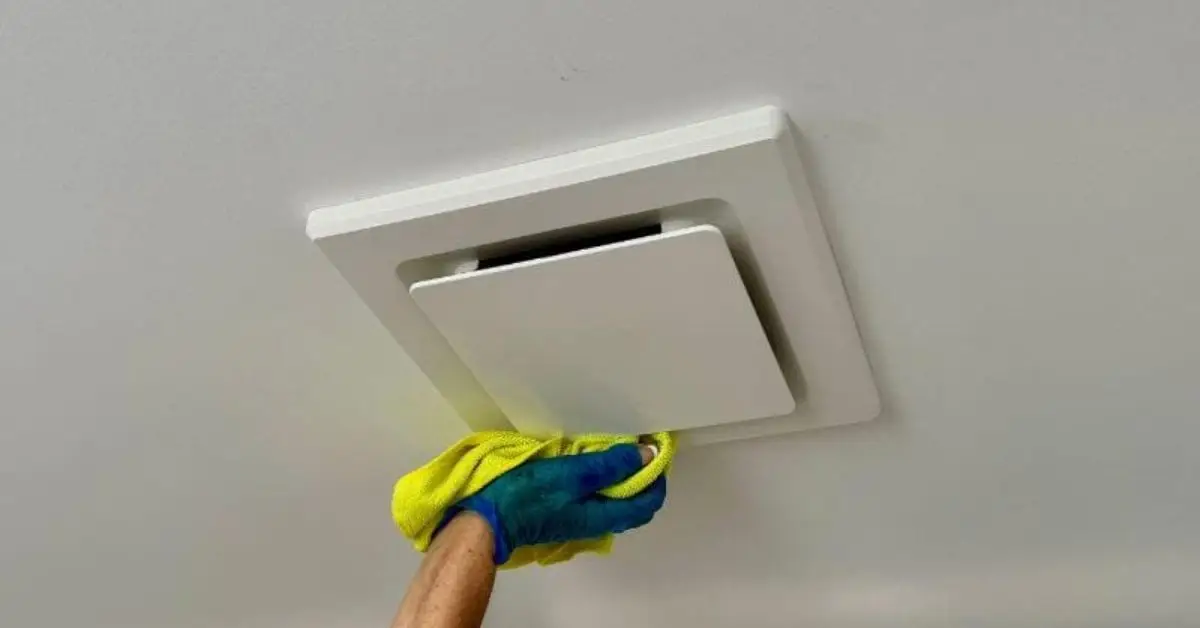
Step 7: Reassemble & Test
Once everything is clean and dry, snap the cover back into place or tighten the screw again. Turn the power back on and run the fan.
You should notice:
- Smoother airflow
- Less lingering steam
- A quieter, healthier fan overall
If it still sounds rough, it usually means it needed this cleaning much earlier — but at least now you know how to stay ahead of it.
Best Cleaning Tools & Products
Budget vs Premium Tools (What to Buy)
When you’re cleaning a bathroom exhaust fan, having the right tools doesn’t mean spending a lot. Most of the work can be handled with basics, and I’ve relied on the same handful of tools for years.
If you’re on a budget, start with:
- A soft-bristle brush
- A handheld vacuum with a brush attachment
- Microfiber cloths
- A stable step stool
If you want a smoother, quicker cleaning experience, premium tools like a compact shop vac, multi-angle detailing brushes, and a lightweight step ladder make a real difference. They save time, especially if you clean more than one bathroom.
Vacuum Attachments That Matter
These small add-ons give you the best reach and control:
- Soft dusting brush — safe on plastic and housings
- Crevice tool — pulls lint from corners and edges
- Flexible hose — lets you stay stable while reaching overhead
Just these three can turn a basic vacuum into the perfect cleaning tool.
Brushes & Compressed Air: Pros/Cons
Brushes
- Pros: inexpensive, reusable, great for stuck-on dust
- Cons: can scatter debris if you scrub too aggressively
Compressed Air
- Pros: ideal for motor vents and tight gaps
- Cons: can blow dust deeper inside if you’re not careful
I usually brush first, then use compressed air only for areas a cloth can’t reach.
Household Cleaners That Work
You don’t need strong chemicals for this job. Mild cleaners protect the fan’s finish and remove grime without causing damage. These work well:
- Warm water with a drop of dish soap
- Non-solvent all-purpose cleaners
- Vinegar-based solutions for light residue
If you want a deeper explanation of why cleaning your bathroom ducts matters — especially for airflow and moisture control — this breakdown on bathroom duct cleanliness from Star Quality Duct Cleaning lines up with the same approach I use. It’s a good reference on how buildup affects ventilation and overall air quality.
What Not to Use
Certain products can discolor plastic, corrode metal, or leave residue that attracts more dust. I avoid:
- Bleach
- Heavy degreasers
- Abrasive powders
- “Industrial strength” sprays
- Soaking-wet cloths on or near wiring
Mild cleaners keep the fan looking new and protect the components long-term. This matters because most people don’t just want steps — they want to know exactly which products are safe.
Common Problems You’ll Encounter & How to Fix Them
Fan Still Noisy After Cleaning
If the fan keeps rattling or buzzing after cleaning, the issue might not be dirt.
Loose Mounts vs Worn Bearings
- Check the mounting screws inside the housing. Even one loose screw can cause loud vibration.
- Spin the fan manually. If it feels rough, wobbly, or gritty, the motor bearings may be worn. Cleaning won’t fix worn bearings — they usually need a replacement motor or full unit upgrade.
Fan Still Doesn’t Pull Smell or Moisture
If your bathroom still fogs up after showers, the problem is usually airflow, not cleanliness.
Check Duct Clogs & Roof Vent Issues
Things I check right away:
- The exterior vent flap may be stuck shut
- The duct could be sagging or pinched
- Insulation might have slipped and blocked airflow
- The roof or side vent may have lint or debris buildup
Your fan can be spotless, but if the exit path is blocked, it won’t ventilate properly. If you’ve been noticing other signs of shifting humidity around the house — like doors sticking in colder weather — this breakdown on why doors get sticky in winter explains what’s going on and how airflow issues play a role.
Cover Won’t Snap Back On
This happens more often than people admit. Most of the time, it’s a simple alignment issue.
Try this:
- Make sure the metal spring clips aren’t twisted
- Line up the screw mount before tightening
- Push evenly on both sides rather than forcing one corner
- If the cover seems warped, warm it slightly with your hands to help it flex
Once everything is lined up, the cover usually snaps in easily.
How Often to Clean (Clear Schedules)
Quick Rules of Thumb (Based on Bathroom Size and Use)
Cleaning frequency isn’t the same for everyone, and that’s the part most articles skip. I’ve always broken it down by how the bathroom is actually used:
- Small bathroom + daily hot showers: clean every 3–4 months
- Medium-sized bathroom with moderate use: clean every 4–6 months
- Guest bathrooms or rarely used spaces: clean every 6–12 months
- Bathrooms with no window ventilation: clean every 3 months—moisture lingers longer
- Homes in humid climates: bump your schedule up by one extra cleaning per year
A bathroom fan works harder than most people realize, and moisture is what shortens its life. The more steam you produce, the more often you should clean it. If your home tends to collect more dust in the colder months — which affects how often you should be cleaning your exhaust fan — take a look at this simple winter HVAC checklist that helps keep airflow steady through the season.
Signs It’s Time to Clean Again
You don’t have to wait for a calendar reminder. Your fan usually tells you when it’s struggling.
You’ll know it’s time when:
- The fan sounds louder or rattles
- The cover has visible dust buildup
- The bathroom fogs up faster than usual
- The room smells damp after showers
- Airflow feels weak when you hold a tissue near the grille
These small signals are your early warnings. Cleaning before the fan gets choked up keeps your home quieter, drier, and healthier.
When to Call a Professional
DIY helps a lot, but there are moments when you should hand it over to someone trained for the job. This isn’t just about convenience — it’s about safety and long-term reliability.
Electrical Issues or Motor Damage
If you cleaned the fan properly and it still:
- Smells like something is burning
- Makes grinding noises
- Doesn’t spin freely by hand
- Trips the breaker
…that’s not normal. That’s motor or wiring trouble, and it’s better handled by a licensed electrician or HVAC tech. Fans are inexpensive, but damaged wiring is not something you gamble with.
Ductwork Problems
When airflow is still weak after cleaning, the problem usually isn’t the fan — it’s the duct. A pro can inspect:
- Roof vent blockages
- Crushed or sagging flexible ducts
- Birds’ nests in exterior vents
- Moisture pooling inside duct lines
- Mold growth deep inside the airflow path
These are issues you can’t fix with basic tools, and trying to reach them without training often causes more damage.
Warranty & Service Options
If your fan is newer, you may still be under warranty — especially for motor issues. Many brands offer:
- Replacement motors
- Full unit swaps
- Free inspections
- Discounted parts
Check your warranty card or the brand’s website before you spend money on repairs. A lot of homeowners don’t realize they’re covered.
Conclusion
A bathroom exhaust fan might look like a small part of your home, but it plays a huge role in controlling moisture, preventing mold, and keeping the air fresh. Once you clean it the right way, you’ll see the difference immediately — quieter operation, faster defogging, and a bathroom that actually feels dry after showers.
I hope this guide helped you understand not just how to clean, but why each step matters. If something still feels unclear, or if you want me to walk you through a specific issue you’re seeing, tell me in the comments — I answer every question personally.
And if you want more practical home-care guides written in the same clear, simple style, visit Build Like New for more real-world tips that actually work.
What part of your bathroom fan gave you the most trouble?
Disclaimer: The information in this guide is for general home maintenance only. Always follow your fan manufacturer’s instructions and shut off power before working on any electrical fixture. If you’re unsure, uncomfortable, or notice signs of wiring or motor damage, contact a licensed professional.

