
Stop Wood Rot Fast: 7 Easy Home Fixes You Can Do Yourself
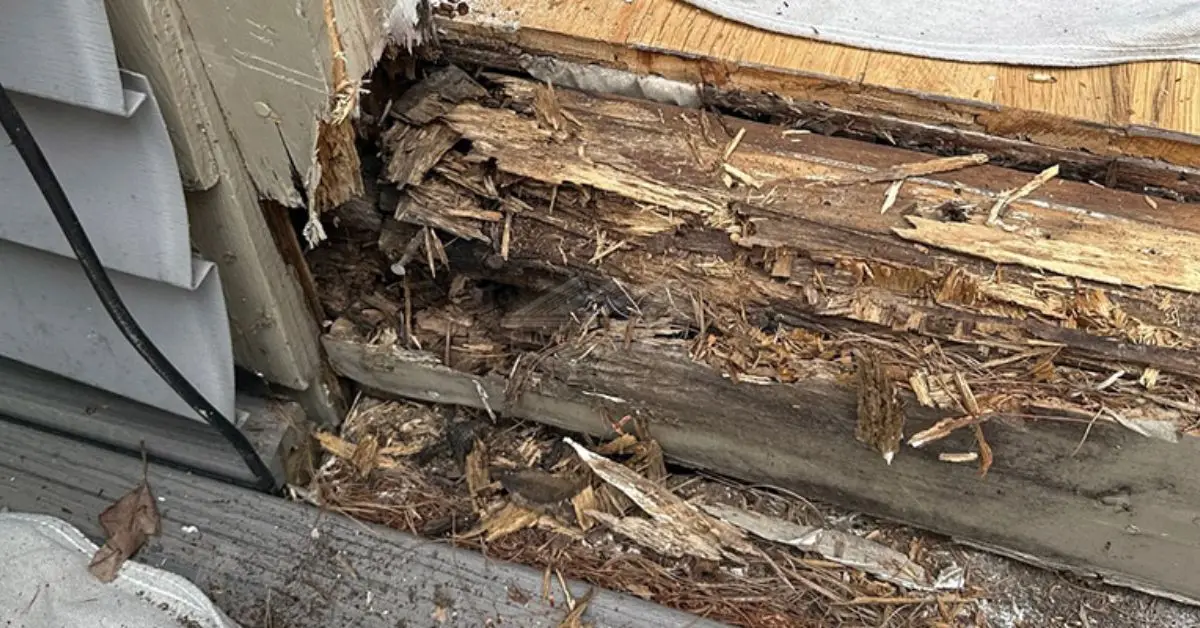
The first time I spotted rotted wood in my own home, it looked harmless—a soft corner on a window frame that I thought I could ignore. Within months, that tiny patch spread like wildfire, and I ended up paying more for repairs than I care to admit. That’s the thing about rot: it doesn’t just sit there quietly. It eats away at the structure, invites mold, and if left long enough, it can compromise the safety of your house.
If you’ve ever pressed your finger against a door frame and felt it sink in, you already know the sinking feeling that follows. The good news is, you don’t need to be a professional carpenter to stop it. With a few simple tools, the right approach, and a bit of patience, you can cut rot off at the source and protect your home before the damage snowballs.
So let me ask you—have you noticed any soft spots or musty corners around your house that you’ve been putting off fixing?
Way 1 – Identify the Early Warning Signs of Rot
I still remember the first time I tested a window sill with the tip of a screwdriver and it sank in like butter—that was my wake-up call. Rot doesn’t always show itself loudly; it sneaks up in small ways. If you can catch it early, you’ll save yourself a lot of money and headaches.
Here are the signs you should watch for:
- Discoloration – Wood turning darker or uneven in patches.
- Softness – Press your finger or a screwdriver into the surface; if it gives easily, that’s rot.
- Musty smell – A damp, earthy odor often means decay is setting in.
- Crumbly texture – Edges breaking apart when touched.
One key thing to understand: not every dark patch is rot. Surface mold usually sits on top of the wood and can be scrubbed off, while deep rot breaks down the wood fibers from within. The poke test is your best friend here—if the tool goes in more than a few millimeters, you’re likely dealing with rot. If you’re also dealing with surface mold along with rot, check out these DIY cleaning tricks for mold on wood to safely clean and protect your surfaces.
By spotting these warning signs early, you can fix a small section instead of replacing an entire frame later.
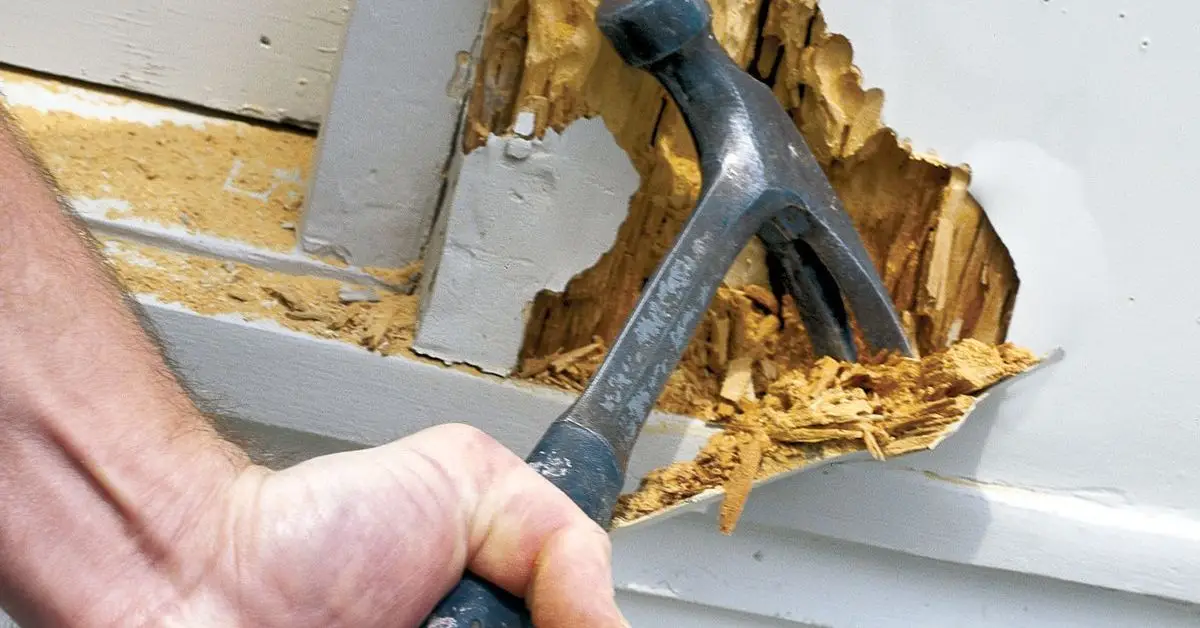
Way 2 – Remove Every Bit of Damaged Wood
Once you know you’ve got rot, the next step is to be ruthless with it. Don’t just scrape off the soft part and think you’re done. I’ve made that mistake before, and within weeks the damage was back.
Here’s how to do it right:
- Use a chisel or a sharp knife to carve out all the soft, damaged areas.
- Go beyond what you see. Rot often spreads invisibly, so remove an extra 2–3 inches past the visibly damaged section.
- Protect yourself. Always wear gloves and a mask—rotten wood can release spores that aren’t good for your lungs.
Think of it like pulling weeds: if you don’t get the roots, they’ll just grow back. The same goes for rot—leave a trace behind, and it will keep spreading.
Fully removing the rot ensures your repair actually lasts, which is where a lot of DIY guides online fall short.
Way 3 – Dry Out the Area Thoroughly
Here’s something most people skip: drying. You can’t patch damp wood. If you try, the filler or epoxy won’t stick, and you’ll be back to square one.
Your options to dry the area:
- Hair dryer or heat gun on a low setting for quicker results.
- Natural ventilation if the piece is in a sunny or breezy spot.
- Dehumidifier if you’re dealing with a basement or bathroom frame.
Take your time with this step. Even if the wood feels dry to the touch, give it an extra day. Moisture is sneaky—it hides deep inside. According to the EPA, lingering dampness is one of the biggest reasons rot and mold return, so make sure the area is bone dry before moving on.
Drying ensures your repair materials bond properly and prevents all your hard work from going to waste.
Way 4 – Treat With Fungicide or Wood Hardener
After removing and drying the damaged section, there’s one step you can’t afford to skip—treatment. Rot is caused by fungi, and if you don’t kill what’s left behind, it’ll spread again. I once skipped this step in a bathroom corner, only to see the rot creep back within weeks.
Here’s how you can do it right:
- Spray with borate or fungicide to kill any fungi hiding inside the fibers.
- Soak with wood hardener so the weakened section becomes solid again.
- For indoor jobs, stick to eco-friendly products that won’t leave heavy fumes.
Think of this like disinfecting a cut before you bandage it. Without this step, your repair is just a cover-up. For mold that keeps coming back, you can also explore these proven ways to kill mold on wood without damaging your home. The Bunnings Workshop community highlights how treating and waterproofing corners is essential to stop rot from returning.
This kills fungi at the source and strengthens what remains—something most guides online overlook.
Way 5 – Fill Small Gaps With Epoxy or Wood Filler
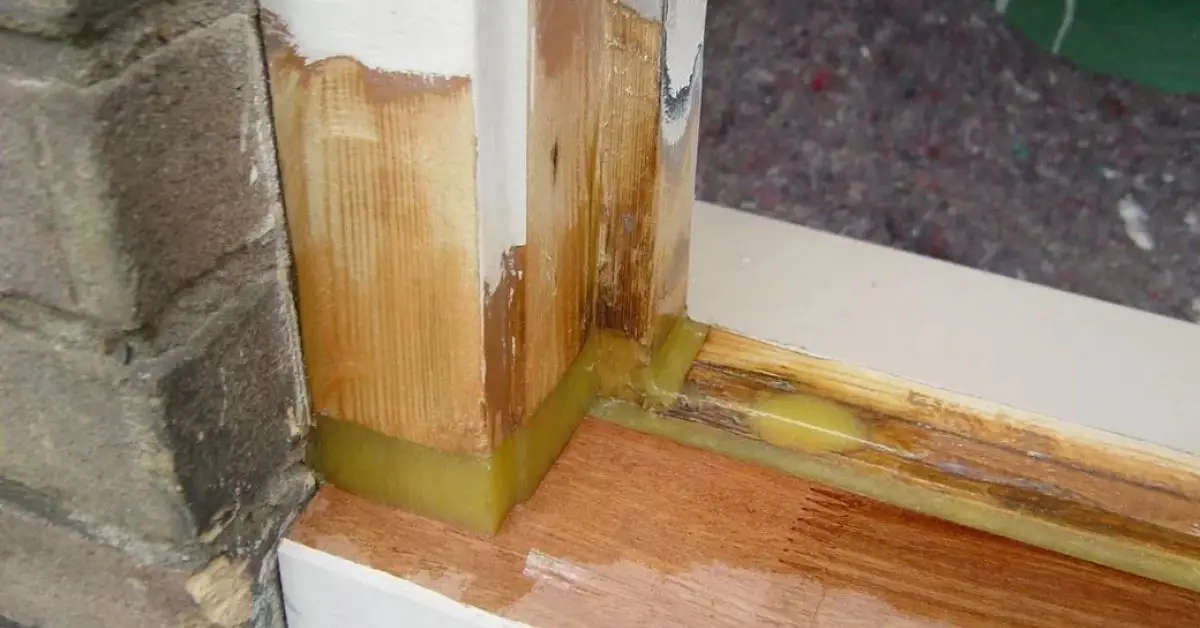
Once the wood is treated, it’s time to rebuild. For small areas of damage, you don’t need to replace the whole piece—epoxy or wood filler can do the job.
Here’s the step-by-step approach:
- Mix your epoxy or filler exactly as directed.
- Press it into the cavity in thin layers, so it bonds deep inside.
- Shape it before it sets, using a putty knife to match the surface.
- After curing, sand it smooth until it looks like part of the original wood.
In high-moisture spots like window frames or bathrooms, epoxy has the edge. It’s waterproof and often cures harder than the surrounding wood, which means your repair won’t crumble when exposed to humidity.
This step lets you save time and money while restoring strength and appearance—without pulling out and replacing the entire section.
Way 6 – Patch or Replace Severely Rotted Sections
Sometimes the damage goes beyond what epoxy or filler can handle. This is where you need to make the call: patch or replace. I’ve faced this with an old deck board—one spot could be patched, but another was so far gone that replacement was the only safe choice.
Here’s how to decide:
- Medium damage → Cut out the rotted section and patch it with a fresh, well-fitted piece of wood. Use wood glue or screws to secure it.
- Severe damage → If more than 40% of the board or beam is compromised, replacement is the safest and most cost-effective long-term solution.
- Check structural parts carefully. For joists, beams, or supports, don’t risk patching—go straight to replacement.
Many DIYers waste time patching when replacement is the only real fix. This step gives you clarity and saves future frustration.
Way 7 – Sand, Prime, and Seal for Long-Term Protection
Once the repair is done, you need to finish it properly—otherwise, the rot will creep back. Think of this step as insurance for the work you just put in.
Here’s the process:
- Sand the surface smooth to blend your repair with the original wood.
- Apply a primer—this locks out moisture and helps the sealant stick.
- Finish with waterproof paint or stain to protect against future water damage.
Pro tip: primer doesn’t just improve appearance—it can double the lifespan of your repair, especially in outdoor or damp areas. According to Angi’s repair guide, sealing properly is one of the most effective ways to stop rot from coming back.
This final step ensures all your hard work actually lasts, giving you peace of mind and fewer repeat repairs. And if your floors also need attention, here are 10 cheap and easy ways to fix wood floor scratches that you can tackle without hiring a pro.
Prevent Future Rot Before It Starts
Here’s the truth: fixing rot once is one thing, but keeping it from coming back is the real win. I learned this after repairing the same bathroom window frame twice—until I figured out the moisture problem, the rot kept returning.
Here’s what you can do to stay ahead of it:
- Fix roof or gutter leaks right away—most exterior rot starts with dripping water.
- Improve ventilation in damp spaces like bathrooms, basements, and kitchens.
- Choose treated or rot-resistant wood in areas prone to moisture.
- Do a quick annual inspection—walk around your home once a year and press on frames, sills, and trim to catch soft spots early.
Nearly 90% of wood rot issues begin with water intrusion, which means prevention is mostly about controlling moisture before it sneaks in.
When to Call a Professional
Sometimes the damage is just too big for a DIY fix—and that’s okay. I’ve seen homeowners patch a load-bearing beam with filler, only to face a massive structural repair later. Knowing when to stop and call in help can actually save you thousands.
Situations where pros are a must:
- Load-bearing beams or floor joists that support the structure.
- Extensive rot covering large boards, siding, or framing.
- Widespread mold that could affect your family’s health.
Typical repair costs range from $300 for small sections to $2,500 or more for major replacements, depending on how deep the damage goes.
Quick Recap – 7 Steps at a Glance
If you’ve read this far, you probably already see how rot can snowball into a big problem. But for the moments when you just want a quick checklist, here are the 7 simple ways to tackle rotted wood, all in one place:
- Identify the early warning signs – Watch for discoloration, musty smells, soft patches, or crumbly edges.
Pro tip: Use a screwdriver to gently poke the wood. If it sinks in, that’s rot starting. - Remove every bit of damaged wood – Don’t just scrape the surface. Cut 2–3 inches past the visibly rotted section.
Pro tip: Think of it like pulling weeds—if you leave the roots, they’ll grow back. - Dry the area completely – Never apply filler or epoxy to damp wood. Use a hair dryer, heat gun, or even a dehumidifier for basements.
Pro tip: Even if the surface feels dry, give it an extra day—moisture hides deep inside. - Treat with fungicide or wood hardener – This kills any fungi left behind and makes weakened fibers stronger.
Pro tip: For indoor repairs, go with eco-friendly products to avoid heavy fumes. - Fill small gaps with epoxy or wood filler – Perfect for minor repairs. Apply in layers, shape before it hardens, and sand once cured.
Pro tip: Epoxy often cures stronger than the original wood, especially in damp areas. - Patch or replace severely rotted sections – For medium damage, patch with fresh wood. For severe damage (40%+ gone), replacement is best.
Pro tip: Structural pieces like beams or joists should always be replaced, never patched. - Sand, prime, and seal – Blend your repair into the original surface, then protect it.
Pro tip: A good primer can double the lifespan of your repair by locking out moisture.
Closing Note
The tough thing about rot is that it doesn’t announce itself—it spreads quietly, and by the time you notice, the damage is often bigger than expected. That’s why the best time to act is now, when the problem is still manageable.
With these 7 simple steps, you’re not just patching up a spot—you’re stopping rot at its roots, protecting your home, and avoiding repair bills that can quickly spiral into the thousands. I’ve been there, and trust me, a few hours of careful work today can save you months of frustration tomorrow.
Your Turn: Have you ever discovered a hidden patch of rot in your home? Did you try a DIY fix or end up calling a professional? Drop your story in the comments—I’d love to hear how you handled it.
Want more practical, no-nonsense home repair tips? Visit Build Like New for guides that help you protect, restore, and improve your home without the guesswork.
Disclaimer: The information in this article is for general guidance only. Always assess the extent of wood damage carefully and consult a licensed professional for structural repairs or if you’re unsure about safety.

