
8 Ways Your Halloween Decorations Could Be Hurting Your Home
Every October, I see the same thing in neighborhoods—yards that try hard to look spooky but somehow end up looking messy, cheap, or even unsafe. You’ve probably spotted it too: giant inflatables sagging on the lawn, tangled cords across the walkway, or plastic cobwebs that have faded to a dull gray. Instead of creating that eerie, fun Halloween vibe, these setups just feel…off.
The truth is, outdoor Halloween decorating isn’t about how much you buy, it’s about how you do it. A few small mistakes can instantly ruin the look of your home, no matter how much time or money you’ve spent. I’ve studied what designers, homeowners, and even safety experts say, and I can tell you the biggest pitfalls most people fall into—and how to dodge them.
Before we dive into the list, ask yourself this: when neighbors or trick-or-treaters walk by your house, do you want them to smile and admire it, or quietly cringe? That answer shapes every choice you make.
Mistake 1 — Starting Too Early (Timing Blunders)
I know the temptation—you see Halloween décor on sale by late August, and your hands itch to start. But putting things up too early almost always backfires.
Here’s why:
- Weather ruins it: By the time October 31 rolls around, inflatables have sagged, fabric fades in the sun, and props start looking tired.
- People stop noticing: When neighbors pass by your house every day for six weeks, the decorations lose their magic. What should have been a surprise becomes background noise.
- You lose the build-up: Halloween works best when there’s a little anticipation. Too soon, and the excitement flatlines before the holiday even arrives.
Even style experts warn that timing matters. According to Martha Stewart’s decorating team, holding off until at least early October keeps everything looking fresh, spooky, and right on time.
So the sweet spot? The first or second week of October. That gives you plenty of days to enjoy your hard work, but not so much that it feels old when trick-or-treaters arrive.
Mistake 2 — Poor Lighting or Inadequate Showcase
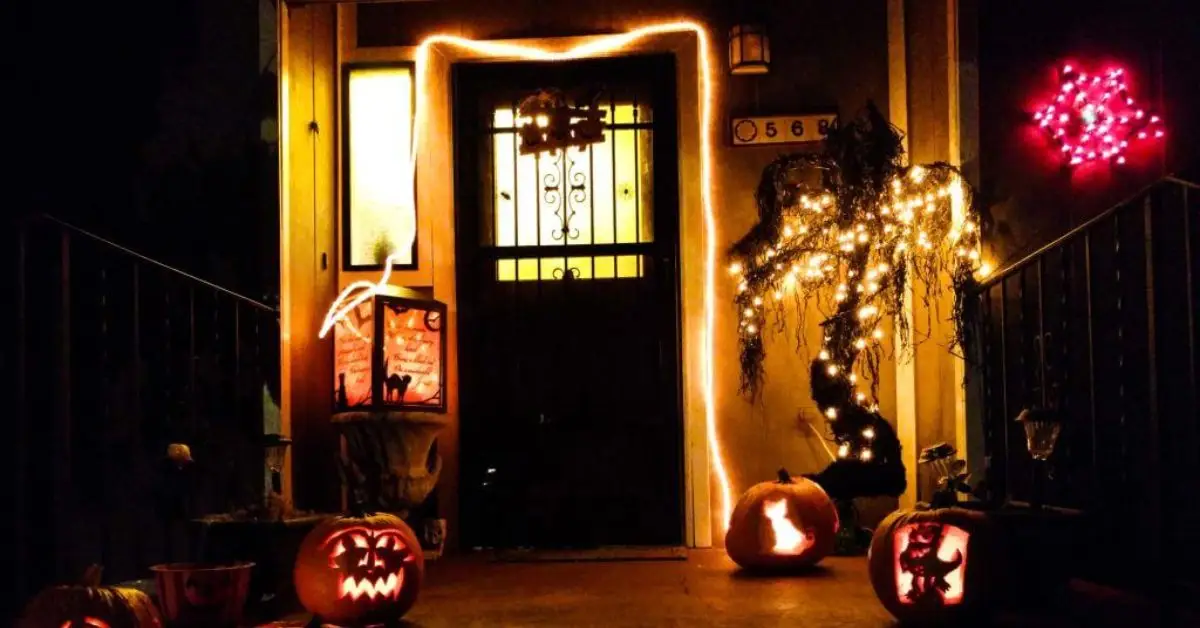
I’ve seen beautifully arranged Halloween setups vanish into the night because of one mistake: bad lighting. If people can’t see it, what’s the point?
Here are the most common lighting errors:
- Weak, dim bulbs that barely glow.
- Harsh spotlights that blind guests instead of highlighting décor.
- No directional focus—just random light spilling everywhere.
What actually works is simple:
- Uplighting: Place a light at the base of a prop to cast eerie shadows upward.
- Accent lighting: A soft glow on your walkway or porch railing makes the space inviting and safe.
- Colored washes: Amber, purple, or green lights can transform a scene instantly.
- Layered light: Combine a strong focal glow with softer background lighting to create depth.
And don’t forget the basics—use weatherproof lights and cords. Wrap connections, keep them off the ground where water gathers, and never overload one outlet. The last thing you want is for your spooky night to end with a blown fuse—or worse.
Good lighting doesn’t just make your décor visible; it turns your whole house into a stage.
Mistake 3 — Using Worn-Out or Low-Quality Décor
Here’s a tough truth: no amount of clever arranging can hide decorations that look cheap or broken. I’ve driven past houses where sagging inflatables or peeling foam gravestones killed the entire effect. It doesn’t feel spooky—it feels sloppy.
Before you put anything out, check for:
- Fading: Bright orange turning dull brown? Retire it.
- Damage: Cracked plastic, ripped fabric, half-lit strings of lights.
- Wear and tear: Props that don’t stand straight, or have missing pieces.
Sometimes you can rescue items:
- A quick coat of spray paint on weathered wood signs.
- Re-stringing new bulbs into an old frame.
- Mixing a few worn pieces with fresh items as background filler.
But when in doubt, replace it. Halloween is all about atmosphere, and the wrong piece can ruin the whole vibe. Think of it like hosting guests—would you serve candy in a cracked bowl? Same logic applies to your lawn. Sometimes, clearing out the broken or faded pieces is the easiest way to refresh your setup—just like how a clutter-free home feels calmer. If you’re not sure where to start, check out 10 things you can throw out today for a cleaner, calmer home.
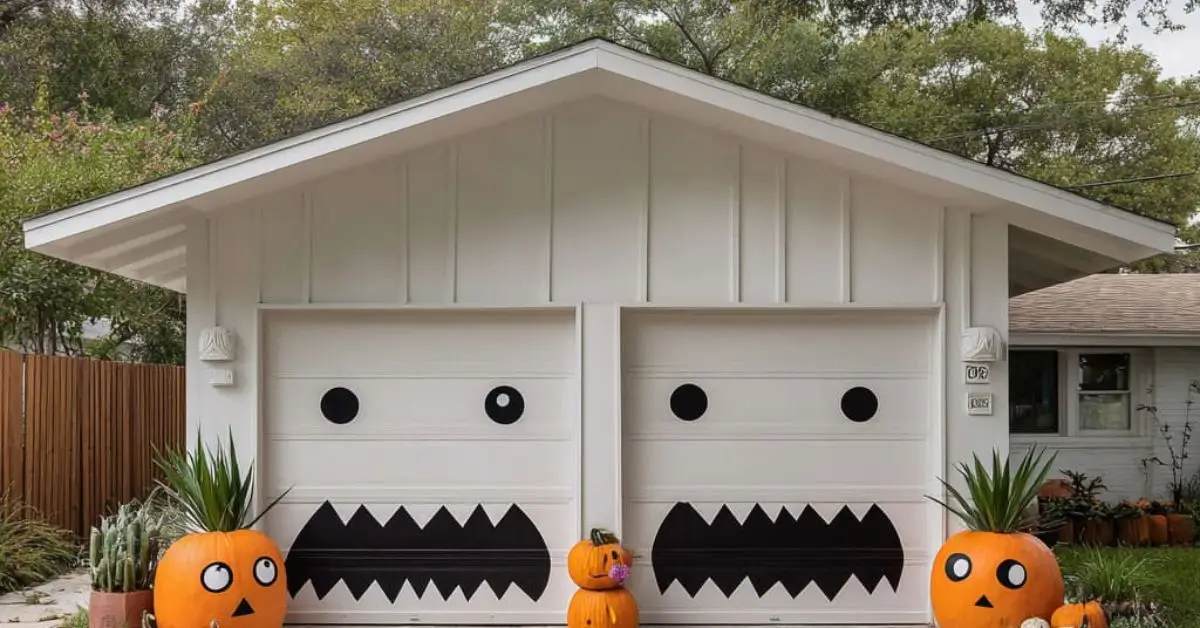
Mistake 4 — Themed Confusion & Lack of Cohesion
I get it—Halloween aisles are full of everything from cartoon pumpkins to bloody zombies, and it’s tempting to grab a bit of each. But when you put all of it together, the result often feels more like a yard sale than a haunted house.
Too many themes at once confuses the eye. One moment you’re going for spooky cemetery vibes, and the next you’ve got neon lights with kid-friendly skeletons. Instead of feeling intentional, it feels cluttered.
Here’s how to avoid that trap:
- Pick a mood: Do you want scary, sweet, minimalist, rustic, or vintage? Choose one and stick with it.
- Choose a color palette: Black and orange are classics, but purple and green can add depth, or even all-white for a ghostly feel.
- Create a focal point: One big piece (like a witch silhouette or giant pumpkin) anchors the look, and everything else should support it.
- Mix textures carefully: Hay bales, wood signs, or fabric banners can warm up the scene without competing.
A cohesive theme not only looks better but also makes your yard memorable. Trick-or-treaters should walk away with one clear impression—not a jumble of random props.
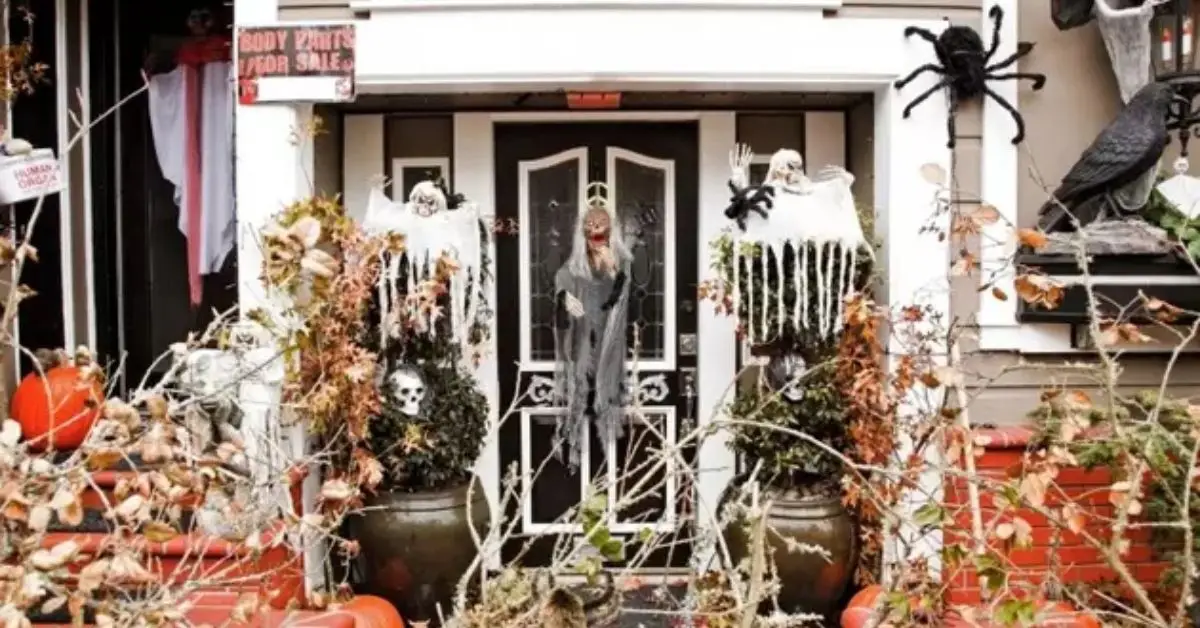
Mistake 5 — Overlooking Scale & Proportion
Nothing ruins outdoor décor faster than getting the scale wrong. I’ve seen small porches swallowed by giant inflatables, and big front lawns where tiny props practically disappear. Both make the whole effort look off.
Think about balance:
- Match size to space: A small yard doesn’t need a 12-foot skeleton. Likewise, a sprawling lawn deserves more than a few mini pumpkins.
- Use depth: Layer items at different distances—smaller pieces closer to the porch, medium ones on the lawn, taller pieces toward the back.
- Choose one star: Let one big decoration shine as the centerpiece, and support it with smaller accents.
When your decorations are in proportion to your space, the setup feels polished, not chaotic. It’s the same reason furniture has to fit the size of a room—scale matters.
Mistake 6 — Safety & Durability Oversights
Halloween excitement isn’t worth an accident. I’ve tripped over loose cords in more than one yard, and it completely kills the fun vibe. Beyond the embarrassment, it can be dangerous for kids and visitors.
Key safety and durability mistakes to watch out for:
- Exposed or tangled cords that become tripping hazards.
- Flammable materials placed near open flames or hot lights.
- Unsecured props that blow over in strong winds.
Instead, keep your setup solid and safe:
- Use stakes, ties, or weighted bases to hold decorations down during storms.
- Invest in weatherproof materials so rain, snow, or humidity doesn’t wreck everything.
- Test your lighting and cords ahead of time so nothing fails on Halloween night.
Safety experts remind homeowners that outdoor décor should always be rated for exterior use and carry proper certification (like UL-listed lights). According to Trusted Choice Insurance, using indoor products outside is one of the biggest fire and injury risks.
At the end of the day, spooky is good—but unsafe is never worth it.
Mistake 7 — Ignoring Local Climate & Maintenance
Outdoor décor doesn’t live in a bubble—it has to survive your local weather. I’ve seen inflatables collapse under heavy rain, foam gravestones warp in humidity, and plastic props crack under strong sun. If you don’t factor in climate, your display won’t even last till Halloween night.
What you can do instead:
- Rain & wind: Choose weighted bases, water-resistant fabrics, and secure props with stakes or sandbags.
- Sun exposure: Keep delicate items shaded or rotate them indoors during peak hours to avoid fading.
- Cold & frost: Avoid fragile plastics that crack easily in freezing temps.
And don’t forget maintenance:
- Wipe props clean before storage to prevent mold.
- Store items in plastic bins, not cardboard, so they’re safe from pests.
- Repair minor wear right away so it doesn’t worsen by next year.
Think of it as protecting your investment. With a little care, you can reuse pieces for years instead of replacing them every season.
Mistake 8 — Leaving Décor Up Too Long & Poor Timing for Removal
We’ve all driven past houses in mid-November with skeletons still on the lawn. Instead of spooky, it just looks neglected. Leaving décor up too long sends the wrong message about your home.
Here’s how to avoid it:
- Transition smartly: After Halloween, swap out pumpkins or hay bales into a fall-themed display for Thanksgiving.
- Set a deadline: Aim to take down Halloween items within a week of October 31.
- Check condition: As you pack away, toss broken or faded pieces so you’re not surprised next year.
Not only does this keep your home looking cared for, but in some neighborhoods, it also avoids HOA warnings or even fines. A smooth transition after Halloween can make your entryway feel just as welcoming for fall gatherings—take inspiration from these 10 must-remove items to make your entryway fall-ready.
Bonus Tips (If You Want to Go Further)
If you want to go beyond just avoiding mistakes, here are a few pro touches:
- Go wildlife-friendly: Fake cobwebs can trap birds and insects. According to Better Homes & Gardens, simple swaps like fabric banners or natural branches are safer for animals. And if you love seasonal changes outdoors, you’ll enjoy these 10 stunning fall garden ideas to transform your home instantly, which can blend beautifully with your Halloween setup once the season shifts.
- Upgrade lighting: Smart LED bulbs let you switch colors and brightness without rewiring.
- Play with textures: Metallic accents or natural wood signs add sophistication to the scene.
- Budget hacks: DIY scarecrows, painted jars, and repurposed furniture can look better than store-bought plastic.
- Know where to splurge: A single high-quality centerpiece can elevate the whole display more than a dozen cheap props.
These finishing touches aren’t about spending more—they’re about making smart choices that stand out.
Quick Checklist Before You Decorate
Here’s a simple list you can run through before putting anything outside. If you fix these, your setup will look sharp and last through Halloween:
- Mistake 1: Starting too early → Wait until early October so décor stays fresh.
- Mistake 2: Poor lighting → Use up lighting, accents, and weatherproof cords for drama and safety.
- Mistake 3: Worn-out décor → Retire faded or broken items; repair or replace as needed.
- Mistake 4: Themed confusion → Pick one mood and stick with a matching color palette.
- Mistake 5: Wrong scale → Match size of props to yard, and create depth with layers.
- Mistake 6: Safety oversights → Hide cords, secure inflatables, and only use outdoor-rated lights.
- Mistake 7: Ignoring climate → Choose weatherproof materials and store items properly after use.
- Mistake 8: Leaving décor up too long → Take down within a week of Halloween; transition into fall décor.
Which of these mistakes have you caught yourself making before? Share your experiences in the comments — I’d love to hear what worked (or didn’t) for you.
For more smart home improvement tips and seasonal guides, check out Build Like New. It’s where I dive deeper into the ideas that make your home look sharp without the stress.
Disclaimer: Halloween decoration ideas shared here are for general guidance only. Always follow local safety codes, use outdoor-rated products, and supervise children around décor and lighting.

