
7 Sneaky Air Leaks in Your Home (and How to Fix Them Quickly)
If you’ve ever felt a sudden chill near a window or noticed your energy bills creeping up for no clear reason, chances are your home has some sneaky air leaks. I’ve been there myself — those tiny gaps around doors, windows, or even outlets can quietly suck your comfort and money away.
Sealing these leaks isn’t just about keeping warm or cool air inside; it’s about taking control of your home’s energy use and making your living space more comfortable every day. When you fix air leaks, you stop drafts, reduce noise, and even improve the air quality by keeping dust and allergens out.
In this article, I’ll walk you through the seven most common spots where air leaks hide and share practical, fast ways to seal them. By the end, you’ll have the know-how to boost your home’s efficiency without breaking the bank or needing a pro on speed dial. Ready to cut those drafts and save on energy? Let’s get started.
1. Windows and Doors — Easy Draft Sources
Windows and doors are usually the first places where air sneaks in. You’ll often notice drafts around the window panes, door frames, and thresholds. These leaks can make rooms feel colder or hotter than they should be.
The good news is, sealing these spots is usually quick and affordable. Applying caulk to small cracks, installing weatherstripping on door edges, or replacing worn seals can make a big difference. When picking materials, go for ones that last long but don’t cost a fortune.
Because windows and doors are easy to access, fixing leaks here gives you instant comfort and helps lower your energy bills.
If you want detailed, step-by-step tips, check out this guide on sealing air leaks around windows and doors.
2. Attic and Ceiling Leaks — Hidden Energy Wasters
Leaks around your attic can silently drain your heating or cooling efforts. Common spots include gaps near attic hatches, vents, and wiring holes that often go unnoticed.
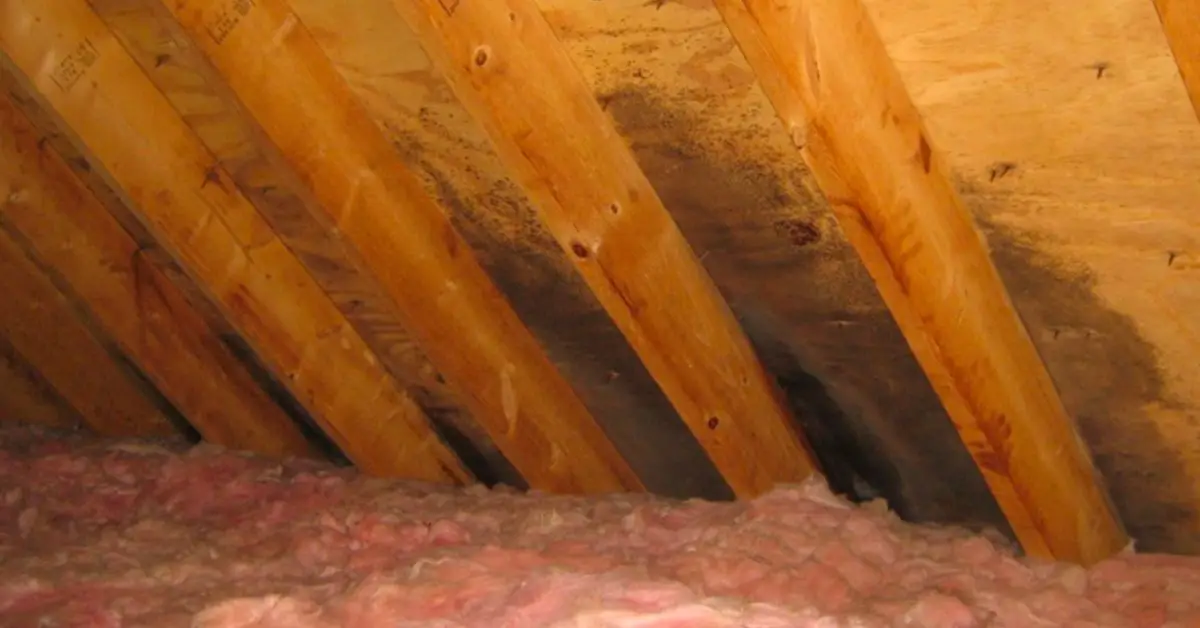
To seal these, options like spray foam, rigid insulation, or attic tents work really well. Look out for signs like uneven room temperatures or dust build-up near attic entries, which can hint at leaks.
Pro tip: On a windy day, use a smoke test with incense sticks near attic openings to spot moving air. During winter, attic leaks can also contribute to ice dam formation—check out these expert roof protection tips for winter to prevent costly damage.
The attic is a major source of heat loss and gain, so sealing it properly can greatly improve your home’s energy efficiency.
3. Electrical Outlets and Switches — Overlooked Draft Sources
You might not expect it, but electrical outlets and switches are common sneaky spots for drafts. To detect leaks here, try holding an incense stick near the outlet or switch plates — if the smoke wavers, air is moving through. Thermal imaging can also reveal these hidden drafts if you have access to one.
A quick and cost-effective fix is installing foam gaskets behind outlet covers and sealing gaps around junction boxes with caulk or spray foam. These materials are easy to find at any hardware store and don’t require special skills.
Even though these gaps are small, they add up and can cause noticeable drafts. Fixing them is a simple way to improve comfort with minimal effort.
4. Plumbing and Utility Penetrations — Small Holes, Big Leaks
Every pipe, dryer vent, and HVAC penetration is a potential leak point. Air easily slips through these small holes, making your heating or cooling work harder.

To seal these effectively, use fire-resistant caulks, spray foam, or weatherproof gaskets designed for utility penetrations. Besides stopping drafts, sealing these areas also prevents moisture buildup and pests from entering your home.
These spots are often overlooked in DIY projects, but sealing them is crucial to stop hidden energy loss and protect your home’s structure.
For more detailed advice on sealing these tricky areas, this energy-saving guide is an excellent resource.
5. Basement and Rim Joists — Foundation Drafts
Leaks often hide where your foundation walls meet the framing—these are called rim joists. You might notice cold drafts or dampness near your basement walls, which is a sign these gaps need sealing.
Common ways to seal these areas include using spray foam, rigid foam board, or caulk depending on the size of the gap. Proper basement sealing not only improves your home’s comfort but also helps control moisture, reducing risks of mold and structural damage.
Foundation leaks cause significant energy loss and discomfort, but the good news is sealing them is a cost-effective way to boost your home’s overall efficiency.
6. Recessed Lighting Fixtures — Drafty Lights?
Recessed or “can” lights are trendy but can be a hidden source of air leaks—especially if they aren’t rated airtight. Air can easily flow through gaps around these fixtures into your attic or ceiling space.
You can fix this by installing airtight covers designed specifically for recessed lights and adding insulation around the fixtures while following safety guidelines to prevent overheating.
These lights are common in modern homes and often overlooked, yet they are major culprits for drafts and wasted energy.
7. Dryer Vents and Exhaust Fans — Functional Leak Points
Dryer vents and exhaust fans are meant to move air, but they can also let unwanted drafts in if not sealed properly. Common leak spots include gaps around the vent flaps or where the ductwork passes through the wall.
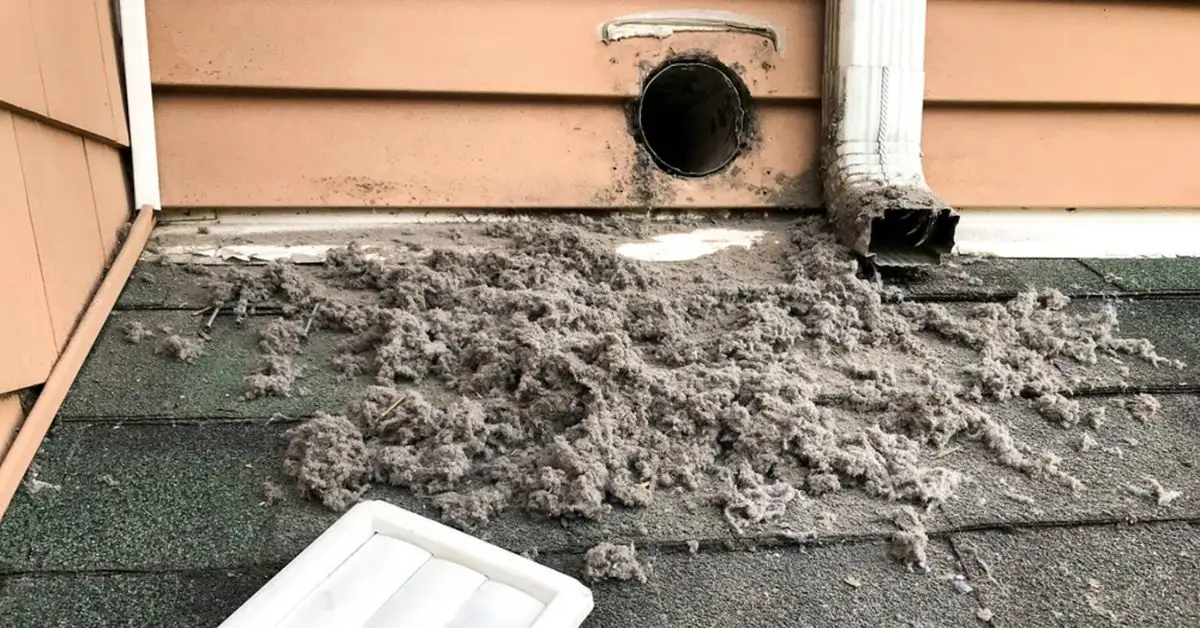
A quick fix is to use vent covers, exterior caulk, or foam tape to seal the gaps while still allowing the vent to function. Just make sure the flap closes fully when not in use.
Also, remember to keep vents clear of lint or debris. This not only improves efficiency but also prevents moisture buildup and reduces fire hazards.
Functional vents are often neglected in sealing projects, yet fixing them improves energy efficiency without blocking essential airflow.
For a step-by-step approach to sealing dryer vents safely, see this dryer vent sealing guide.
Detecting Hidden Air Leaks — Simple Techniques
Not all leaks are obvious. Sometimes they hide behind walls, ceilings, or in places you rarely check. A simple way to find them is by using an incense stick—watch for the smoke to waver near suspected spots. If you have access, thermal cameras can reveal temperature differences that point to leaks.
For a budget-friendly DIY option, you can make a smoke test using a candle or incense on a windy day with fans off and windows closed.
If you’re still unsure, consider a professional home energy audit—experts use tools like blower doors and infrared imaging to pinpoint leaks.
Finding leaks is the first step to fixing them. Once you know where air is escaping, you can take targeted action and stop wasting energy.
Tools and Materials Checklist for Effective Air Sealing
Before you start sealing, gather the right tools. Here’s a quick checklist to make the job smoother:
- Caulk and caulking gun for small gaps
- Spray foam insulation for larger cracks and holes
- Weatherstripping for windows and doors
- Foam gaskets for outlets and switches
- Thermal camera or incense sticks for leak detection
Being prepared means you won’t have to stop mid-project to buy missing supplies. Having the right tools makes your work cleaner, faster, and more effective.
Maintenance Tips — Keep Your Home Airtight Year-Round
Air sealing isn’t a “do it once and forget it” job. Over time, materials can wear out, crack, or shift. Setting a regular inspection schedule—twice a year is ideal—helps you stay ahead of problems.

Before winter, check seals around windows, doors, and attic hatches to keep warm air in. In summer, make sure vents, fans, and attic spaces are sealed to keep cool air from escaping.
Watch for signs you need to reseal: visible cracks in caulk, peeling weatherstripping, or feeling drafts where there shouldn’t be any.
Routine checks prevent recurring problems, save on energy bills, and keep your home comfortable year-round.
When to Call a Professional
Some air leaks are tricky or risky to handle yourself. Complex gaps around HVAC systems, chimneys, or large structural penetrations often require special tools and expertise. If you suspect the problem might be linked to your heating or cooling system’s performance, it’s worth learning how to know your HVAC system needs repairs fast before sealing, so you’re not covering up a bigger issue.
If the job involves electrical components or fire-rated materials, professional handling is not just safer—it’s often required by building codes.
Knowing when to bring in an expert ensures your home is sealed properly, safely, and up to standard. It also saves time and prevents costly mistakes.
Wrap-Up — Take Action Today for a Cozier, Energy-Efficient Home
We’ve covered the most common places air sneaks into (or out of) your home—windows and doors, attic gaps, outlets, plumbing penetrations, basement joints, recessed lighting, dryer vents, and a few bonus tips for detection and maintenance. Each one may seem small on its own, but together, they can add up to serious energy loss.
The sooner you seal them, the sooner you’ll enjoy a warmer winter, a cooler summer, and lower utility bills—all without sacrificing comfort.
Every day you wait is more money lost in wasted energy. If you’re upgrading your home’s efficiency, consider pairing air sealing with energy-smart systems like mini split systems for even greater comfort and savings. Start with one or two easy fixes today, and you’ll be surprised at the difference.
I’d love to hear from you: Which air leak spot do you think is the biggest problem in your home? Drop your thoughts in the comments below.
Want more practical, step-by-step guides? Visit Build Like New for more tips to make your home efficient, durable, and comfortable.
Disclaimer: The information in this article is for general guidance and educational purposes only. While every effort has been made to ensure accuracy, results may vary depending on your home’s condition and materials used. Always follow manufacturer instructions and local building codes. For complex or high-risk projects—especially those involving electrical systems, structural elements, or fire-rated assemblies—consult a licensed professional.

