
What Are Floor Transition Strips and Why Should You Care?
If you’ve ever tried to blend two different types of flooring, like wood and tile, you know how tricky it can be to make the transition look seamless. That’s where floor transition strips come in. These small but crucial pieces of flooring are designed to create a smooth, professional-looking edge between two different floor types, ensuring both aesthetics and functionality.
Installing them might seem like a simple task, but it’s easy to make mistakes that could leave your floors looking unfinished. The good news is that with just five simple steps, you can transform the look of your floors and add that polished touch. Whether you’re tackling a DIY project or just trying to update your space, I’m here to guide you through the process, step by step.
By the end of this article, you’ll know exactly how to install floor transition strips and avoid the common pitfalls most people face. Ready to get started?
Step 1: Measure and Prepare Your Flooring Edges
Proper Measurement: The First Step in Achieving a Perfect Finish
When it comes to installing floor transition strips, the first thing you need to get right is the measurements. Trust me, skipping this crucial step can lead to big mistakes—misaligned strips, gaps, or even having to redo the work. I’ve seen it happen more than once, and it’s always frustrating.
Getting accurate measurements isn’t as hard as it sounds, but it’s essential for a clean, professional finish. It’ll also make the next steps much easier. Let me walk you through how to do it right:
- Tools You’ll Need:
- Measuring Tape: Always use a measuring tape to get precise measurements.
- Square: A square will help you ensure that your cuts are straight and that your edges are perfectly aligned.
- Level: To check that the surface is even, especially if the floors are at different heights.
Before diving into your project, it’s essential to understand the type of flooring you’re working with. If you’re updating hardwood floors, you may want to check out our tips on maintaining hardwood flooring for a long-lasting finish.
- How to Measure Properly:
- Start by measuring the length and width of the space where the transition strip will go. It’s best to take at least two measurements to double-check you’re getting it right.
- Make sure you measure at the highest point if your floor heights differ. This will help you decide if you need a reducer or other specialized transition.
- Don’t forget the width of the gap between the two floors—this will determine the width of the transition strip you need.
- Preparing the Edges:
- Before installing, clean the edges where the strips will go. Dust, dirt, or debris can affect the fit and adhesion.
- If your flooring edges are uneven or chipped, use a smoothing tool or sandpaper to make them as smooth as possible. This will help the transition strip sit flush against the floor.
Taking these steps will set you up for success and save you time later on. Properly measured edges ensure the strips fit perfectly without any awkward gaps or misalignments.
Step 2: Choose the Right Type of Transition Strip
Selecting the Best Transition Strip for Your Flooring
Now that you’ve measured everything, it’s time to choose the right type of transition strip. I know it can be overwhelming with all the options out there—T-mold, reducer, threshold, and so on. Choosing the wrong one can result in an uneven finish, or worse, make your floor look out of place.
But don’t worry, I’ll help you figure out which one is best for your floors. Here’s what to consider:
- Key Factors to Consider:
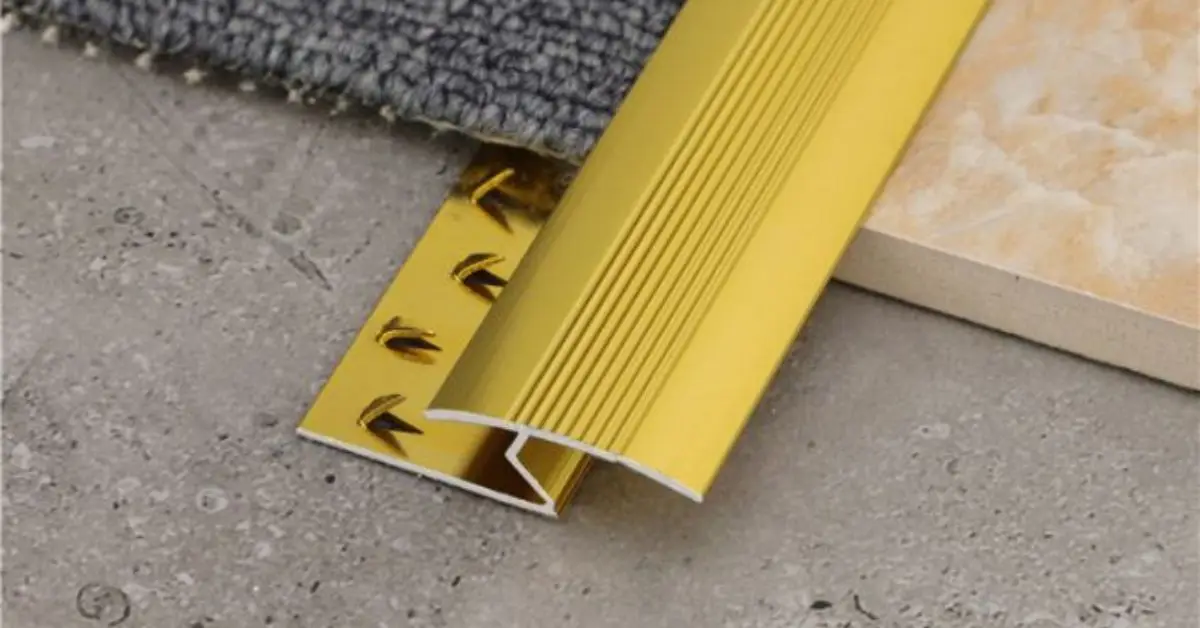
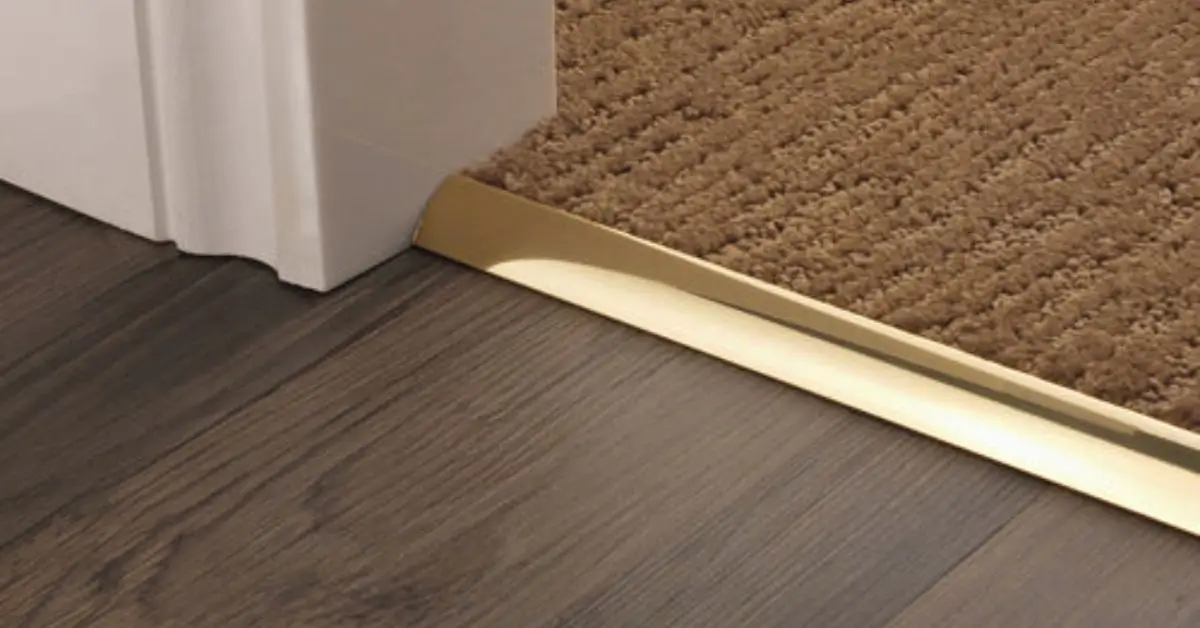
- Floor Type: The type of flooring you’re transitioning from and to is crucial. For example, if you’re moving from wood to tile, a T-mold transition strip works well. If you’re transitioning from a thick carpet to a hardwood floor, you’ll need a reducer.
- Height Difference: If your floors are at different heights, you’ll need a transition strip that can cover the gap. Reducers are great for this, as they taper down from one height to another.
- Material Compatibility: Certain strips work better with specific materials. For example, some strips are designed to handle tile better than carpet, so it’s essential to match your transition strip with your floor material.
- Visual Guide for Transition Strips:
- T-Mold: Best used between two floors of the same height (like hardwood to hardwood or laminate to laminate).
- Reducer: Ideal for situations where the two floors have different heights (such as tile to hardwood or vinyl to carpet).
- Threshold: Used for doorways or places where one flooring ends and another begins, providing a clean and safe transition.
- Different Types for Different Floors:
- Wood to Wood: T-mold works great here because it creates a smooth, seamless edge.
- Tile to Carpet: A reducer strip helps bridge the gap between the two.
- Tile to Wood: A T-mold or metal transition can help minimize the height difference.
Choosing the right transition strip depends on your floor type. If you’re dealing with scratches on wood floors, don’t worry—we’ve got an easy guide on fixing wood floor scratches without a pro.
For more detailed options and tips, you can check out this helpful guide on transition strips from The Spruce, which gives you a breakdown of various strip types based on floor materials and heights.
By now, you should have a clear idea of which transition strip is best suited for your project. Choosing the right one is essential for creating a neat, functional, and professional-looking floor transition.
Step 3: Cut the Transition Strip to Fit
Cutting the Transition Strip: Precision for a Seamless Look
Now comes the tricky part: cutting the transition strip to fit. Don’t worry—if you follow the right steps, cutting the strip can be straightforward. It’s all about precision, and with the proper tools and techniques, you’ll get that clean, seamless look you’re aiming for.
Trust me, I know how easy it is to mess up this step, especially if you’re not used to cutting flooring materials. But with a few tips, you’ll feel confident and ready to tackle it head-on.
Here’s how you can make the cut perfectly every time:
- How to Measure and Cut the Transition Strip for a Perfect Fit:
- First, make sure you’ve already measured your flooring gap accurately (as covered in Step 1). This ensures that the transition strip will be the right length.
- Lay the transition strip on the floor and mark the cutting line where it needs to fit. Double-check that the measurements are correct—measure twice, cut once!
- Use a square or straightedge to guide your cut, ensuring a straight line.
- Recommended Tools for Cutting:
- Saw: A hand saw is a good option for cutting wood or laminate transition strips. It’s simple and effective.
- Jigsaw: If you’re cutting through thicker materials like metal or PVC, a jigsaw works wonders. It’s especially helpful for making curved cuts if needed.
- Hacksaw: For metal transition strips, a hacksaw is your go-to tool. It’s easy to handle and provides a precise cut.
Cutting your transition strip is crucial for a perfect fit, but a clean workspace is just as important. If you’ve ever had to deal with spilled paint on your floors, we’ve got some quick hacks to help you clean it up. Check out our tips on cleaning paint spills.
- Tips for Smooth Edges and Clean Cuts:
- Sanding: After cutting the strip, use fine-grit sandpaper to smooth out the edges. This removes any roughness from the cut and ensures the strip will sit flush against the floor.
- Finishing: If you’re working with wood, consider applying a wood finish or sealant to the cut edges to keep them protected and give the strip a polished look.
If you’re unsure about your cutting technique, you can check out this detailed guide on cutting floor transition strips from Family Handyman for a clearer visual guide: How to Cut and Install Floor Transition Strips.
Getting the cut right is crucial for a smooth, seamless transition. It might seem intimidating at first, but with the right tools and a little patience, you’ll be able to make the perfect cut for your flooring project.
Step 4: Install the Transition Strip
Secure the Transition Strip: The Key to a Durable and Neat Finish
Now that you’ve got your transition strip measured, cut, and ready to go, it’s time to install it. This is the most crucial step because if the transition strip isn’t secured properly, it can shift, become loose, or even damage the flooring. But don’t worry—I’ll walk you through it, step by step, so it’s secure and neat.
- Step-by-Step Installation Process:
- Adhesive Method: For most DIY projects, adhesive is the easiest way to attach the transition strip. Apply a high-quality construction adhesive to the underside of the strip, making sure to cover the entire surface that will touch the floor.
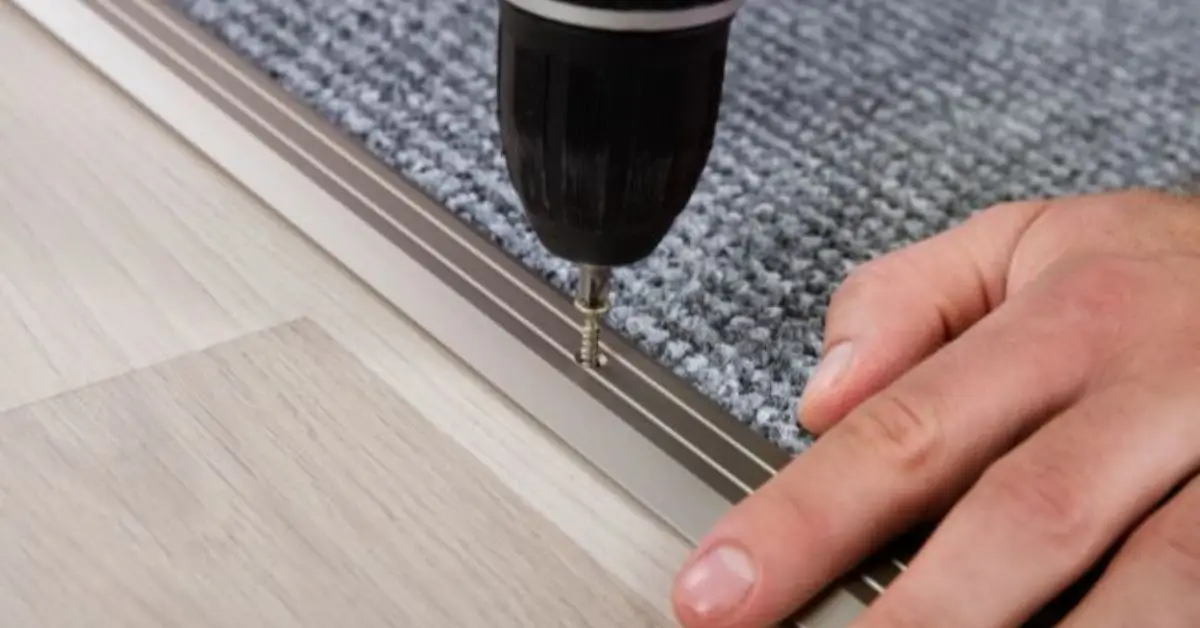
- Screw or Nail Method: If you prefer a more permanent solution or are using a thicker strip, screws or nails can be used to secure the transition. Drill pilot holes in the strip to avoid splitting and use screws or nails to attach it to the floor.
- Pressure Fit: For some types of transition strips, such as T-molds, you may just need to press the strip into place, allowing the tongue-and-groove design to hold it in.
- How to Ensure the Transition Strip Stays Securely in Place:
- After applying the adhesive or securing the strip with screws, make sure it is pressed down firmly for several seconds to ensure proper adhesion.
- Use a level to double-check that the strip sits evenly across the gap. Any misalignment at this stage can cause uneven transitions or leave noticeable gaps.
- Common Installation Mistakes to Avoid:
- Misalignment: Ensure the strip is aligned properly before securing it in place. A small misalignment can affect the entire finish, making the floors look uneven.
- Uneven Gaps: If your transition strip isn’t perfectly flush with both sides of the flooring, it could create an unsightly gap. This is especially important when transitioning between different floor types with varying heights.
Check out this visual guide from House Digest to see exactly how to install floor transition strips the right way: How to Install Floor Transition Strips between Tile and Wood.
Once you’ve installed the strip, give it some time to settle before walking on it. This will help ensure that everything stays in place and the adhesive bonds properly.
Step 5: Finishing Touches and Cleaning
Finalizing the Installation: Cleaning and Securing the Edges
After securing the transition strip, it’s time for the finishing touches. This step is all about making sure your installation looks polished and professional. It’s easy to skip the cleanup, but trust me, going the extra mile here will make a huge difference.
- How to Clean Up Adhesive Residue:
- If you used adhesive, it’s important to clean off any excess that might have squeezed out from the sides of the strip. Use a damp cloth or sponge to wipe it off before it dries.
- For stubborn adhesive, a mild solvent like rubbing alcohol can do the trick without damaging the floors.
- Tips for Maintaining Floor Transitions Over Time:
- Regularly clean the transition strip with a soft cloth to prevent dirt buildup. Avoid harsh chemicals, as they can wear down the finish.
- Check the strip periodically for signs of wear or damage, especially if you used adhesive. Over time, adhesive may loosen, so it’s good to keep an eye on the strip’s security.
- Suggestions for Sealing Edges to Prevent Wear and Tear:
- Apply a silicone sealant or caulk along the edges of the transition strip if you want to prevent water from seeping under. This is particularly useful in areas with high moisture, like kitchens or bathrooms.
- Make sure the sealant is clear to keep the appearance neat.
By following these simple steps, you’ll not only make sure the transition strip is secure but also maintain its appearance for years to come. After cleaning up, step back and admire your work—you’ve successfully upgraded your floors!
Ready to Take the Next Step? Installing Floor Transition Strips Has Never Been Easier
As you’ve seen, installing floor transition strips is a simple yet effective way to elevate the look of your floors. Whether you’re transitioning between different floor types or just looking for a more polished finish, these five easy steps will guide you through the process with ease.
Here’s a quick recap of the key steps:
- Measure and Prepare Your Flooring Edges – Ensure a perfect fit from the start.
- Choose the Right Type of Transition Strip – Select the one that suits your floor materials.
- Cut the Transition Strip – Use the right tools and techniques for a smooth cut.
- Install the Transition Strip – Secure it with precision for a long-lasting finish.
- Finish with Clean-Up and Maintenance – Keep your strips looking fresh and professional.
A clean, well-installed transition strip does more than just hide the gap—it adds a touch of professionalism that can make your entire room look more polished and thoughtfully designed.
Now that you have all the tips, it’s your turn to give it a try! Don’t be afraid to share your results. Whether it’s a simple DIY project or a complete room transformation, I’d love to hear how it went.
Share your experience in the comments below—I’d love to hear your tips or answer any questions you might have.
And for more home improvement tips, tutorials, and inspiration, be sure to visit Build Like New for all the resources you need to create the home of your dreams!
Disclaimer: The information provided in this article is for general guidance only. Always follow the manufacturer’s instructions for your specific flooring materials and transition strips. If you’re unsure about your installation, consider consulting a professional.

