
Stop Overpaying! 5 Windows Upgrades That Make Your Home Energy-Efficient
If your AC runs longer and your bill keeps creeping up, it’s probably not the fridge—it’s your windows. I’ve seen solid homes bleed cool air through tiny gaps and heat-soaked glass, and the power bill tells the story before you notice the draft.
Here’s the part most people miss: windows quietly drive a big slice of your energy use. Heat gain and loss through them can eat up a quarter or more of your cooling and heating costs.
That means you can reduce electricity bills with window upgrades that match your climate and your current setup—not just a full replacement. Sometimes a smart coating or a tight seal cuts more cost than an expensive new unit.
I’ve also learned timing and use matter. The right coverings and shading, opened and closed at the right hours, can tame solar heat before it turns your living room into an oven. Standard double-pane windows can let in a surprising amount of sunlight that becomes trapped heat.
In this guide, I’ll show you five upgrades that actually move the needle—what they cost, where they work best, and how to avoid the common traps that waste money.
Before we dive in, tell me this: what’s the one window issue you’ve noticed lately—drafts, glare, or rooms that never cool down?
The 5 Window Upgrades That Cut Electricity Bills
Upgrade #1 – Add or Improve Insulation & Weather Sealing
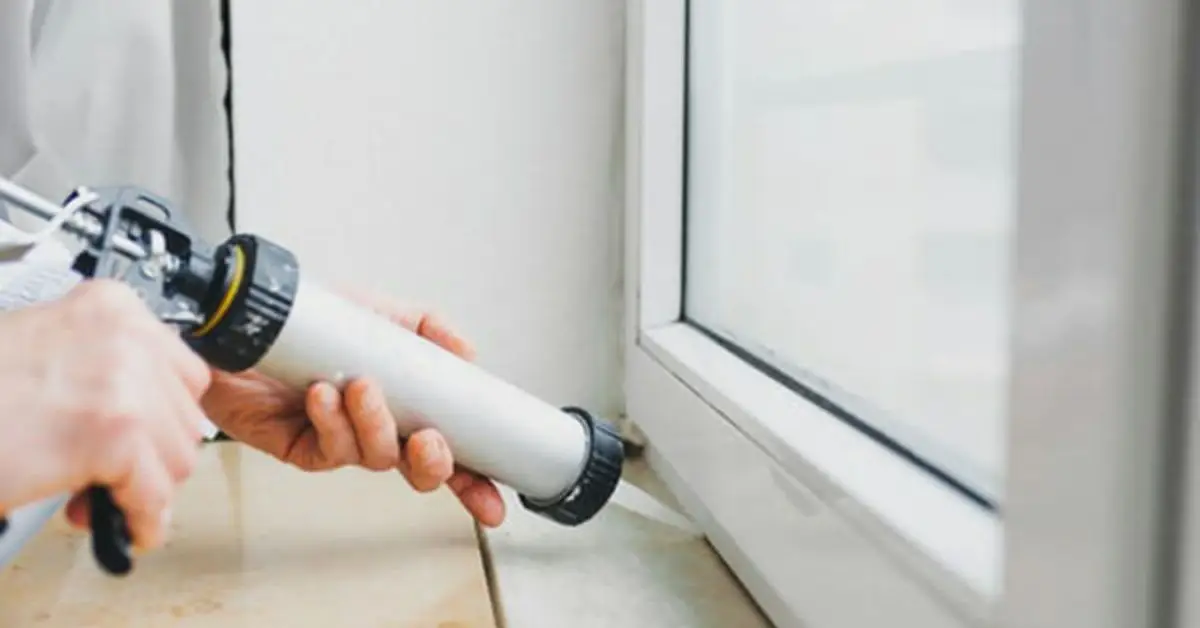
Caulking, weatherstripping, sealing air leaks
I’ll start with the easiest fix: sealing up what you already have. Even the best HVAC system can’t keep up if air is leaking around window frames. A $5 tube of caulk and a roll of weatherstripping can close those gaps in less than an afternoon.
Drafts might seem small, but they add up. Air leaks can waste 10–20% of the energy you pay for. Think of it like leaving a window cracked open all year—you’re cooling or heating the outdoors.
Cost vs benefit example
- Cost: $20–$200 depending on how many windows and materials.
- Savings: Up to 10–15% off heating and cooling bills if your home is drafty.
- Best for: Older homes, single-pane windows, or places where you can literally feel air movement near the frame.
Pros
- Inexpensive, DIY-friendly
- Quick results
- Works in all climates
Cons
- Needs re-check every year or two
- Won’t solve bigger problems like inefficient glass
This is the perfect “low-cost, high ROI” move—most homeowners skip it, but it pays for itself within a season. Once you’ve invested in new glass or coatings, it’s just as important to keep them clean and streak-free for maximum light and energy efficiency. Our guide on 5 simple steps to clean your windows without streaks using dish soap shows you how.
Upgrade #2 – Low-E / Coated / Multi-Pane Glasses
What is Low-E, what is double / triple glazing
Low-E (low-emissivity) glass has a thin, invisible coating that reflects heat. In summer, it bounces sunlight back outside; in winter, it reflects indoor heat back inside. Combine that with double or triple glazing—multiple glass layers with sealed spaces between—and you get a serious performance boost.
Inert gas fills (argon / krypton)
Between those panes is often argon or krypton gas, which slows heat transfer more than air. It’s invisible, but it’s what makes a double-pane Energy Star window so effective.
Data: savings levels, U-factor, SHGC etc.
- Cost: $300–$1,000 per window depending on size and style.
- Savings: Typically 15–25% on energy bills when replacing single-pane windows.
- Performance numbers: Lower U-factor = better insulation; lower Solar Heat Gain Coefficient (SHGC) = less unwanted solar heat.
Pros
- Major, long-term savings
- Reduces outside noise and glare
- Adds resale value to your home
Cons
- High upfront cost
- Payback time: usually 7–10 years, faster in extreme climates
This is the upgrade that confuses people the most—but when chosen correctly, it’s the one that delivers the biggest long-term difference. Energy savings are great, but no one wants pests slipping through the same windows you just sealed. Check out these 10 easy ways to bug-proof your windows this summer so your home stays cool and pest-free.
Upgrade #3 – Window Coverings & External Shading
Interior shades, insulating curtains, cellular shades etc.
Not every fix means buying new glass. Thermal curtains and cellular shades act like an extra blanket for your window. According to Energy.gov, they can reduce heat loss at night in winter and block sunlight in summer.
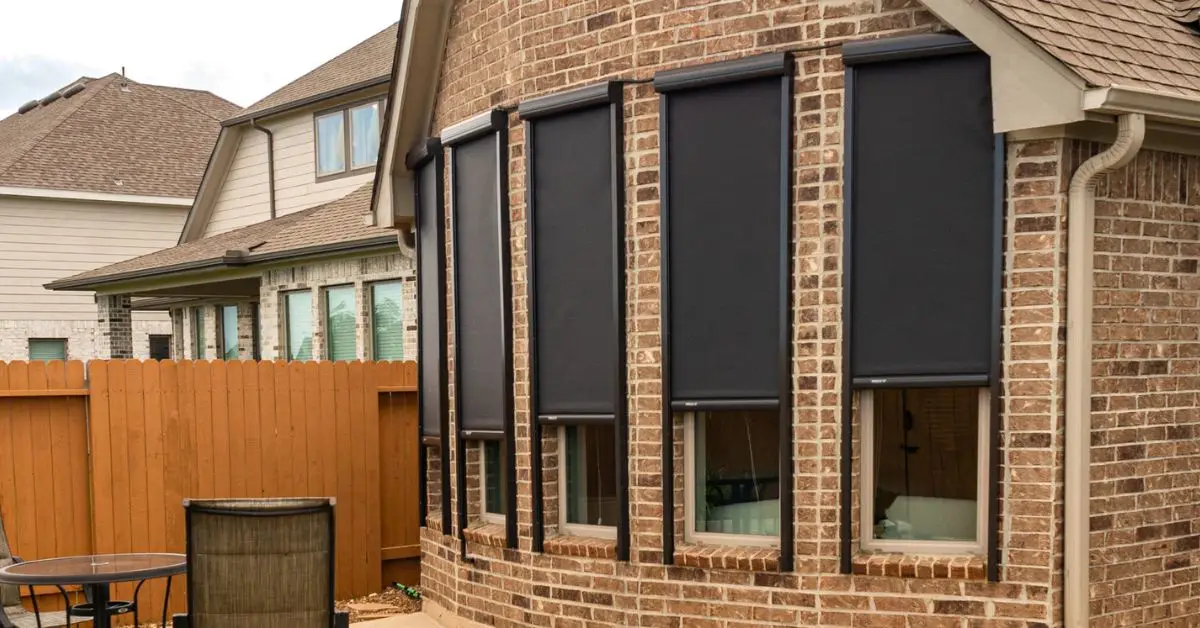
Awnings, overhangs, exterior shutters, solar screens
Outside solutions work too. A fixed awning can block up to 65% of summer heat on south-facing windows and as much as 77% on west-facing windows. Exterior shutters and solar screens do the same, cutting heat before it even hits the glass.
Smart usage: when to open/close, operate seasonally
The trick isn’t just installing coverings—it’s how you use them.
- Summer: Close blinds and shades in the afternoon to block direct sun.
- Winter: Open curtains during the day to let in solar heat, close them at night to hold it in.
Pros
- Moderate cost, flexible solutions
- Can be installed gradually
- Improves comfort and style
Cons
- Depends on daily habits for full benefit
- Won’t fully replace efficient windows
These are the flexible, lifestyle-friendly upgrades—you get both comfort and savings without committing to a full remodel.
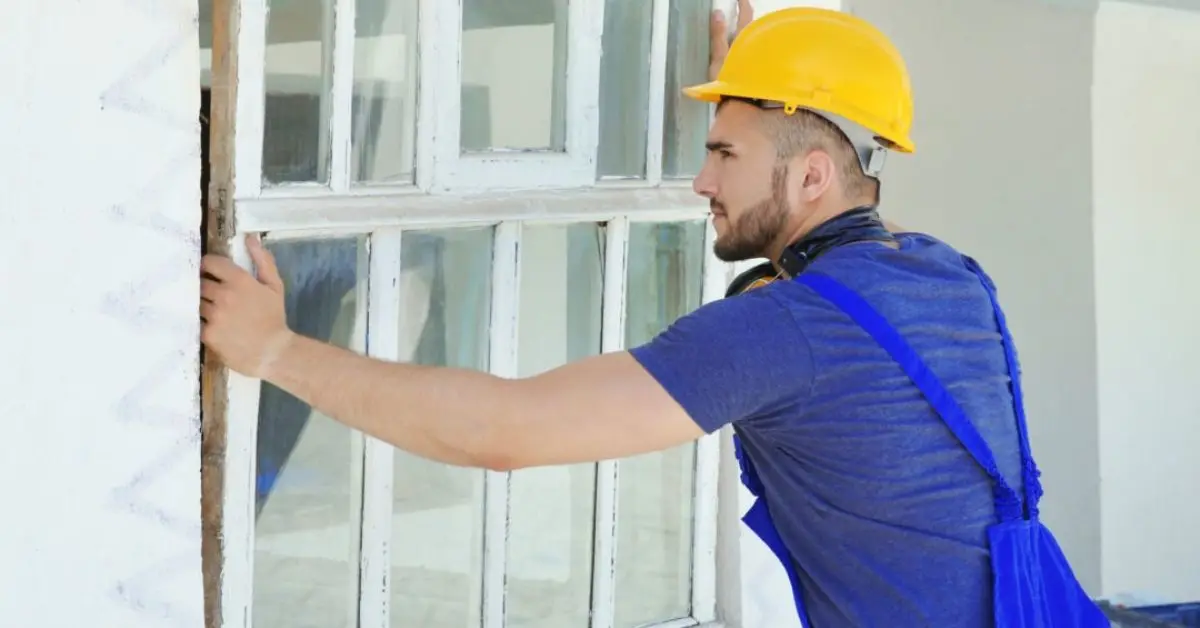
Upgrade #4 – Replace Frames & Improve Frame Materials
Comparing frame materials – wood, vinyl, fiberglass, composite, aluminum
Most homeowners focus only on the glass, but the frame is just as important. Different frame materials perform differently:
- Wood: Great insulation but needs regular painting and upkeep.
- Vinyl: Affordable, decent insulation, and low maintenance.
- Fiberglass: Strong, stable, and resists warping or cracking.
- Composite: Blends the strength of wood with the durability of vinyl.
- Aluminum: Cheap and tough but a poor insulator unless it has a thermal break.
Thermal bridging, durability, maintenance
Frames without thermal breaks conduct heat like a radiator. That means even if you have top-of-the-line Low-E glass, a poorly insulated aluminum frame can undo much of the benefit. Durability matters too—rotted wood or warped frames create gaps that leak air and water.
Installation quality: air sealing around frame
A great frame can still fail if it’s installed badly. Gaps around the frame leak air and moisture, which can lead to mold or rot. Professional installation with proper sealing foam and flashing ensures your investment actually performs.
Frames don’t get as much attention as glass, but they play a huge role in energy savings. A strong frame, well-installed, keeps your home comfortable and your bills lower.
Upgrade #5 – Add Storm Windows / External Film / Retrofit Options
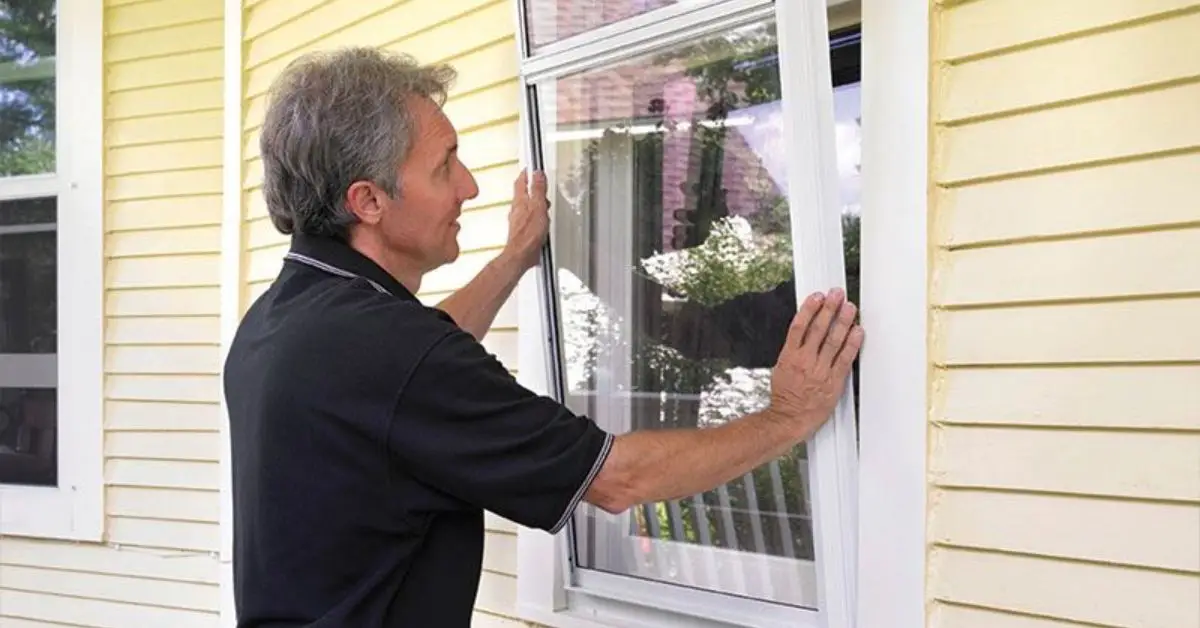
Storm windows or secondary glazing
If a full replacement feels too expensive, storm windows are a practical middle ground. They fit inside or outside your existing window and create an insulating air pocket that reduces drafts and heat loss.
Research from the U.S. General Services Administration and the National Renewable Energy Laboratory found that adding lightweight secondary windows over old single-pane glass cut air leakage by more than 90%, making them perform much closer to modern double-pane units.
Window films (solar control, UV, reflective)
Films are another budget-friendly retrofit. Applied directly to the glass, they block UV rays, reduce glare, and reflect heat. If your west-facing living room gets unbearable in the summer, a reflective film can make a noticeable difference.
Retrofits: adding panels, external shades etc.
From magnetic secondary panels to snap-on inserts or exterior shade systems, retrofit kits give old windows new life. They’re fast to install and far less costly than replacing the entire unit.
- Cost: $50–$300 per window for storm windows; $8–$12 per square foot for films.
- Savings: 10–30% on heating and cooling costs depending on window condition.
- Best for: Renters, historic homes, or homeowners delaying a full remodel.
Retrofit solutions are proof that you don’t need to spend thousands all at once. Small, smart upgrades can still slash bills and make your home far more comfortable. If you live in a coastal state, efficiency isn’t the only concern — safety matters too. Our guide on 10 smart ways to prepare your windows for hurricane season will help you protect both your home and your energy upgrades.
How Much Can You Actually Save?
Climate and Orientation Matters
Not all homes see the same results. A house in Minnesota with freezing winters benefits more from insulated frames and triple-pane glass, while a Texas home gains the most from reflective films and shading that cut cooling loads.
Orientation also plays a role:
- South-facing windows: Best for winter heat gain, but need shading in summer.
- West-facing windows: Worst offenders for late afternoon overheating — shading or films help most.
- North-facing windows: Limited sunlight, so focus on insulation and sealing.
- East-facing windows: Morning sun can be managed with light curtains or films.
Your climate and which way your windows face are as important as the upgrade itself.
Payback Time & Cost Considerations
Window upgrades are an investment, so it’s worth asking how long it takes to see returns.
- Weatherstripping & sealing: Costs $20–$200, often pays back within a single season.
- Window films: $8–$12 per square foot, payback in 1–3 years depending on energy rates.
- Storm windows: $50–$300 each, often pay back in 3–5 years.
- Energy Star replacements: $300–$1,000 per window, payback can stretch 7–10 years but delivers comfort, noise reduction, and property value boosts too.
In the U.S., federal tax credits and local incentives make a big difference. Homeowners can currently claim up to 30% of the cost (capped annually) for Energy Star certified windows under the Inflation Reduction Act. Some states and utilities add rebates for storm windows, films, and weatherization projects.
The key is to balance quick wins like sealing leaks with long-term investments like full replacements. Layering upgrades ensures both immediate comfort and steady bill reductions over the years.
Mistakes to Avoid During Window Upgrade
Cheap materials or low quality frames/glass that fail early
Going for the cheapest option often backfires. Low-quality vinyl can warp, and budget glass can fog up within a couple of years. Once that happens, the efficiency drops and you’re left paying for replacements all over again.
Poor installation or ignoring air tightness
I’ve seen homeowners spend thousands on great windows only to lose the benefits because the installer rushed the job. Air gaps around the frame cancel out the efficiency gains. Always confirm installers use proper sealing and insulation techniques.
Not accounting for maintenance (seals deteriorate, coatings lose effectiveness)
Even high-quality windows need upkeep. The gas seals inside double-pane units can fail over time, and Low-E coatings don’t last forever if neglected. Without basic checks, your investment slowly loses value.
Ignoring local climate or solar orientation
The right choice in Florida isn’t the same as in Minnesota. Hot climates need shading and reflective glass, while colder states get more benefit from multiple panes and insulated frames. Also, overlooking orientation—like those punishing west-facing windows—means you’ll still struggle with hot or drafty rooms.
Avoiding these mistakes keeps your upgrades effective for decades instead of just a few seasons.
How to Choose What’s Best for You
Assessing your current windows – checklist
Before spending money, take stock of what you already have:
- Are they single, double, or triple-pane?
- Do you notice drafts or condensation between panes?
- How old are the frames, and are they warped or rotted?
- What type of glass is it — standard clear or Low-E?
One homeowner on Reddit shared how swapping out old drafty windows instantly cut heating bills nearly in half. That kind of drastic change only happens when your current windows are really underperforming.
Calculating potential savings – tools and metrics
When comparing options, check for these ratings:
- U-factor: lower is better for insulation.
- SHGC: lower blocks more unwanted heat from the sun.
- R-value: higher means stronger resistance to heat flow.
- Energy Star / NFRC labels: guarantee tested performance.
These numbers make it easier to weigh upfront cost against future savings.
Prioritizing upgrades – low cost to high cost, based on urgency and ROI
- Start small: seal leaks, add weatherstripping.
- Next step: films, curtains, or shades for problem areas.
- Mid-tier: storm windows or secondary glazing.
- Big investment: full Energy Star replacements for long-term efficiency.
This way, you get quick returns now while planning for bigger savings later.
Finding reliable vendors / installers — quality, warranties, local climate experience
Your installer matters as much as the product itself. Ask for:
- Proof of experience with energy-efficient windows.
- Written warranties on both labor and materials.
- Local references, since climate-specific know-how makes a big difference.
Choosing the right upgrade is about balancing your home’s current needs, your budget, and how long you plan to stay there.
Emerging & Future Technologies
Smart windows / electrochromic glass – windows that tint automatically
Imagine windows that can adjust themselves as the sun moves. Electrochromic, or “smart,” glass does just that — it tints when exposed to direct sunlight and clears again as the light fades. You don’t have to lower blinds or draw curtains, and the comfort level in your home stays consistent without extra effort. While the cost is still high, this technology is moving quickly from commercial buildings into high-end homes.
New coatings, reflective films, dynamic glazing
Researchers are also developing coatings and films that adapt with the seasons, blocking heat in summer while letting warmth in during winter. Dynamic glazing — glass that shifts tint levels automatically throughout the day — is another exciting area. These innovations show how windows are evolving beyond being just glass, becoming active players in energy savings and home comfort.
Sharing future-forward upgrades gives readers a glimpse of what’s coming and adds a wow factor to the topic.
Wrap Up
In the short term, upgrades like sealing drafts and adding window films can cut bills noticeably within the first year. Over five years, investing in Energy Star-certified replacements or high-performance frames can reduce energy costs by as much as 20–30% while making your home far more comfortable.
The smartest approach is to start small, test what works best in your home, and then scale up to bigger upgrades when you’re ready. Each step builds on the last, combining quick wins with lasting improvements.
Have you tried upgrading your windows yet, or are you still weighing your options? Share your experience in the comments — your story might guide someone else.
For more practical tips and in-depth home upgrade guides, explore Build Like New.
Disclaimer: The information in this article is for general guidance only. Actual energy savings will vary depending on your home’s condition, location, climate, and installation quality. Always consult certified professionals before making major upgrade decisions.

