
Avoid Costly Repairs: 8 Ways to Winterize Your Home While You’re Away
The first time I came home after a long winter trip, I opened the front door and felt a blast of air colder than outside. A pipe had frozen and burst in the basement, leaving behind a damp mess and a repair bill I wasn’t ready for. If you’ve ever worried about what happens to your house when it sits empty in freezing weather, you know the fear isn’t about comfort—it’s about damage you may not even notice until it’s too late.
You don’t have to go through that. With a few simple steps, you can keep your home safe from frozen pipes, hidden leaks, and even the mold that sneaks in while you’re away. Think of it as giving yourself peace of mind: you enjoy your trip, and your house stays just the way you left it.
Have you ever come back from a vacation to find something in your home went wrong while you were gone?
Why Winter-Proofing Matters Before You Leave?
I still remember the shock of walking into my own basement after a cold snap and finding water pooled across the floor. The culprit? A frozen pipe that had burst while I was away for just a week. The cleanup was exhausting, and the repair bill was even worse. According to the Insurance Information Institute, winter storms cause billions of dollars in insured losses every year in the U.S.—with frozen pipes ranking among the most common and costly problems.
That’s why winter-proofing your house before you leave isn’t just a checklist item—it’s a form of insurance you control. Think about it: coming home should feel comforting, not overwhelming. The last thing you want is to step into a freezing house that smells of mold or hear the crunch of ice in places it doesn’t belong.
Here’s why taking action matters:
- Repairs cost far more than prevention — A few hours of prep now saves thousands in damage later.
- Cold can hit silently — You might not notice drafts, leaks, or frozen spots until they’ve already caused harm.
- Peace of mind while you’re away — Knowing your home is protected means you can actually enjoy your time off without the constant “what if” running in your head.
- Emotional weight is real — It’s not just about money. Walking into a damaged home can feel like losing part of the safety and comfort you count on every day.
When you think of winter-proofing as protecting both your wallet and your sense of security, it stops feeling like a chore and starts looking like one of the smartest moves you can make before a trip.
Quick Winter-Proofing Checklist
When you’re rushing to pack and finalize travel plans, it’s easy to forget small steps that make a big difference. That’s why I keep a simple “before you leave” list—something I can tick off in less than an hour. Think of this as your fast-track to peace of mind:
- Shut off water & drain pipes — the single best move to prevent burst pipes.
- Set thermostat to 55°F or higher — cold air can still sneak in, so don’t go lower.
- Seal drafts & insulate — check windows, doors, and attic spots.
- Prep roof & gutters — clear leaves and debris so ice doesn’t build up.
- Smart lighting for security — timers or smart plugs make your house look lived in.
- Forward mail and packages — avoid piles that scream “no one’s home.”
- Arrange snow removal — an untouched driveway is another giveaway.
- Notify a trusted neighbor — nothing beats human eyes checking in.
I’ve learned that this short list alone prevents most of the winter headaches homeowners complain about later. If you can’t do everything, do these eight.
Secure Your Plumbing – #1 Source of Winter Claims
Plumbing is where most winter horror stories begin. People who came back to find their basement turned into an ice rink. Frozen pipes aren’t just costly—they’re emotionally draining to deal with.
Here’s how I make sure mine stay safe before I travel:
- Turn off the main water valve — this step removes the biggest risk.
- Drain faucets & outdoor spigots — open taps until water runs dry; don’t forget garden hoses.
- Put your water heater in vacation mode — saves energy and prevents overheating.
- Pour non-toxic antifreeze into toilet bowls and drain traps — a small move that keeps cracks from forming in unused pipes.
The EPA points out that water left sitting can turn into mold within 24–48 hours. That means a tiny leak or frozen pipe isn’t just a plumbing problem—it’s a health and safety issue too. Taking time to prep your plumbing isn’t optional; it’s one of the smartest things you can do before locking the front door.
If frozen pipes are your biggest concern, I recommend checking out our detailed guide on 10 essential tips to prevent frozen water pipes this winter—it covers the small steps that make a big difference.
Keep Heat Flowing Even When You’re Away
One mistake I used to make was turning the heat way down when I traveled, thinking I was saving money. It felt smart—until I learned how easily pipes freeze when the indoor temperature drops too low. The truth is, shutting the heat off completely is asking for trouble.
Here’s what I do now before leaving:
- Set the thermostat to at least 55°F — cold enough to save on bills, but warm enough to keep pipes safe.
- Use a smart thermostat — I love being able to check and adjust the temperature from my phone while I’m away.
- Open cabinet doors under sinks — it looks silly, but it lets warm air flow around exposed pipes.
- Prep for power outages — if you’ve got a sump pump, a small battery backup can save you from flooding when the power cuts out.
It’s not about wasting heat—it’s about striking the balance between comfort, cost, and safety. Coming home to a warm, damage-free house is always cheaper than paying for burst pipe repairs.
Block Drafts & Seal Energy Leaks
Cold air doesn’t just make your home uncomfortable—it drives up heating costs and stresses your furnace. Many guides stop at “seal leaks,” but let’s go a step further and talk about the practical side: which fixes you can do yourself, and which ones might need a pro.
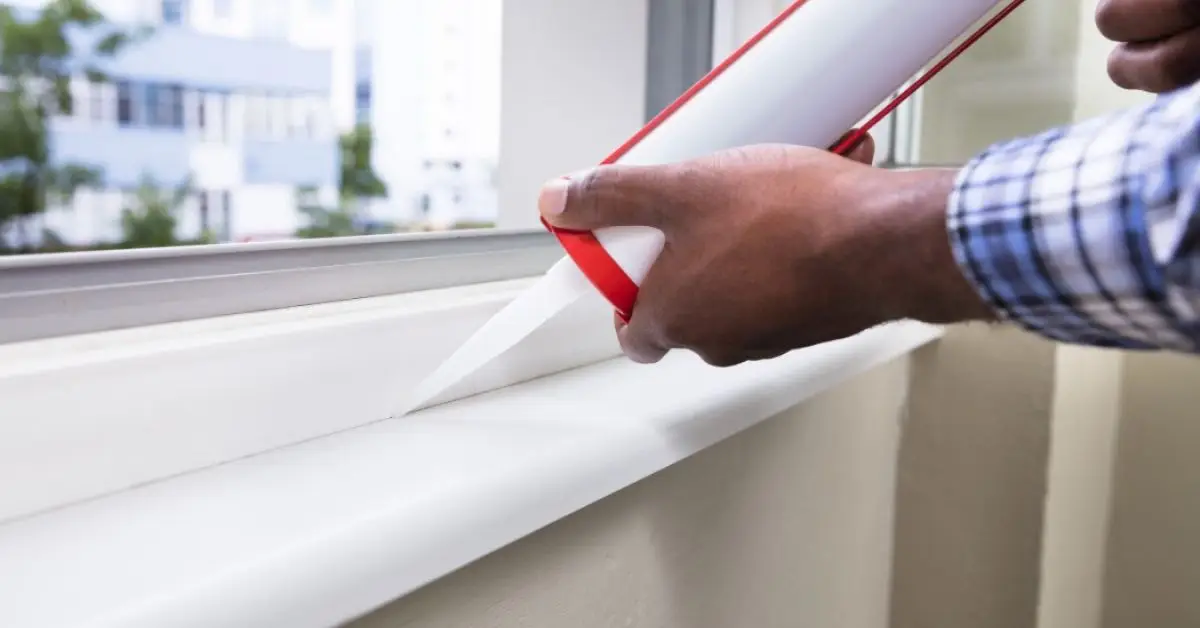
- Caulk around windows and doors — a $5 tube of caulk can close gaps that let icy air pour in.
- Install draft stoppers — cheap, quick, and effective for under-door leaks.
- Insulate attic and crawlspaces — more effort, but one of the best ways to cut heat loss.
- Weigh the cost vs benefit — spending $50–$100 on sealing can save hundreds over a single winter in heating bills.
According to the U.S. Department of Energy, about 25–30% of a home’s heat loss happens through windows and doors. Want to dive deeper into simple maintenance? Our article on 12 winter maintenance tasks you can do yourself breaks down affordable fixes that keep your home running smoothly all season. That means even small gaps add up quickly—and fixing them is one of the smartest, most affordable upgrades you can make before winter sets in.
Roof, Gutters & Outdoor Prep
One winter, I ignored the gutters before leaving on a trip. When I came back, a sheet of ice had built up along the roof edge, forcing water under the shingles and right into the living room wall. That was my first lesson in how dangerous ice dams can be.
Here’s what I always handle now before the first big freeze:
- Clean gutters and leaves — clogged gutters hold water that freezes, creating heavy ice dams.
- Check roof shingles — a loose shingle is all it takes for meltwater to seep into your attic.
- Prevent ice dams with heat cables — installing them along roof edges helps water drain instead of freeze.
- Store outdoor furniture and hoses — keeps them from cracking or warping and makes snow clearing easier.
Think of your roof as the first line of defense against winter. If you protect it, you protect everything underneath. For a step-by-step approach to protecting your roof from snow and ice, take a look at 10 expert roof protection tips for winters—it’s a must-read if you want to avoid leaks and costly ice dams.
Prevent Indoor Moisture & Mold
A closed-up house in winter can trap more than just cold—it can trap moisture. And moisture is exactly what mold loves. I’ve seen homeowners spend thousands on mold remediation that could have been avoided with a few simple steps.
Here’s what works best for me:
- Run a dehumidifier on a timer — keeps humidity steady without wasting power.
- Use moisture absorbers like silica or rock salt — especially in closets, basements, or rooms you don’t heat.
- Ventilate basements and crawl spaces — even a cracked vent or small fan helps air circulate.
Mold can begin growing within just 24–48 hours if dampness isn’t controlled. That means even one hidden leak during your trip can turn into a health hazard by the time you’re back. Taking these steps is like adding a safety net—you may never see the damage, but you’ll know it isn’t forming behind your walls.
Security & Peace of Mind While Away
Protecting your home in winter isn’t just about the weather—it’s also about making sure it doesn’t look abandoned. Burglars notice small details, and even neighbors can tell when a house hasn’t been touched for days. I’ve seen local police departments post reminders every holiday season: make your house look lived in, even when you’re not there.
Here’s what I do:
- Set up smart lights and motion sensors — staggered timers or app-controlled plugs make it seem like someone’s moving around inside.
- Ask a neighbor or friend to check weekly — nothing replaces a human presence. A quick walk-through can catch problems before they escalate.
- Arrange snow removal — a clear driveway and sidewalk send a strong signal that the house is occupied.
- Forward mail and packages — nothing screams “empty house” like an overflowing mailbox or packages piled at the door.
I’ve found that once you take these simple steps, you spend far less time worrying while you’re away. Peace of mind is as valuable as protecting your pipes.
Bonus – Insurance & Local Alerts
This is the part almost everyone skips, but it can make or break your financial safety net. Insurance companies expect you to do your part when leaving a home vacant, and ignoring that can lead to claim denials if something goes wrong.
Here’s what I recommend before locking the door:

- Call your insurer — ask if there are any special rules for leaving the house vacant in winter. Some policies require you to maintain a minimum temperature or check in periodically.
- Set up utility outage alerts — many local power and water companies will text or email if there’s a service disruption in your area. That early warning could help you call a neighbor to check in before a frozen pipe or outage spirals into damage.
- Understand the risk of skipped prep — if your house isn’t properly winterized, you may end up paying out-of-pocket even if you thought you were covered.
For me, knowing that both my preparation and my insurance align gives me the confidence to leave home without second-guessing what I might find when I return.
7-Day Action Plan Before Departure
When I break down winter-proofing into small steps, it suddenly feels manageable instead of overwhelming. You don’t have to do everything in one frantic evening—spread it out over the week before you leave, and you’ll know your home is ready for the cold.
- Day 1–2: Inspect roof and gutters — clear out debris, check shingles, and make sure nothing is waiting to turn into an ice dam.
- Day 3–4: Seal leaks and prep pipes — caulk windows, cover drafts, and drain outside faucets.
- Day 5: Test your heating system — run it for a cycle, check thermostats, and make sure it responds properly.
- Day 6: Prep mail and security — set light timers, forward packages, and confirm snow removal.
- Day 7: Do a final walkthrough — check every room, unplug unnecessary electronics, and lock up with confidence.
By spacing these steps out, you’ll never feel rushed—and you’ll leave home knowing you didn’t forget the details that matter most.
Conclusion
Winter-proofing isn’t about doing everything perfectly—it’s about stacking enough smart steps so that your house stays safe while you’re away. From protecting your plumbing to keeping your home looking lived in, each move adds up to fewer worries and fewer costly surprises.
Now I want to hear from you: what’s your go-to winter-proofing hack when you travel? Drop your tip in the comments—I bet other readers could use your experience too.
For more practical, no-nonsense home advice, visit us anytime at Build Like New—where we turn everyday maintenance into simple steps you can actually follow.
Disclaimer: The information in this article is for general educational purposes only and should not be taken as professional advice. Always consult licensed contractors, insurance providers, or local authorities for guidance specific to your home and location.

