Alarm System Sensors Explained: How They Work & DIY Replacement Tips
When I think about home security, I don’t just picture locks on doors or CCTV cameras. What really gives you peace of mind are those small, invisible guardians inside your home—alarm system sensors. They’re the first to notice if something’s not right, whether it’s a door creaking open at midnight, a window shattering, or even smoke building up in the kitchen.
You and I both know the world isn’t always predictable. A burglary, a fire, or even a carbon monoxide leak can happen when we least expect it. That’s where sensors quietly step in. They don’t sleep, they don’t get distracted, and they don’t forget to check if a door is locked.
Their job is simple but powerful: detect danger early and give you those extra few minutes to react, call for help, or get your family to safety.
The truth is, most people underestimate sensors because they’re small and hidden. But ask any security expert or even a homeowner who avoided a break-in thanks to a triggered motion detector—these little devices are the backbone of your entire alarm system. Without them, your security hub is just an empty box.
So before we dive into the technical side of how sensors work, pause for a moment: imagine how different your sense of safety would feel if you knew every corner of your home was being quietly monitored, 24/7.
Tell me this—what’s the one thing you’d want your alarm system to protect against the most: intruders, fire, or something else?
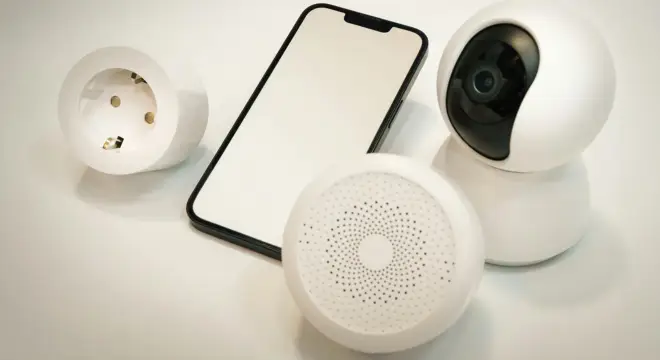
What Are Alarm System Sensors?
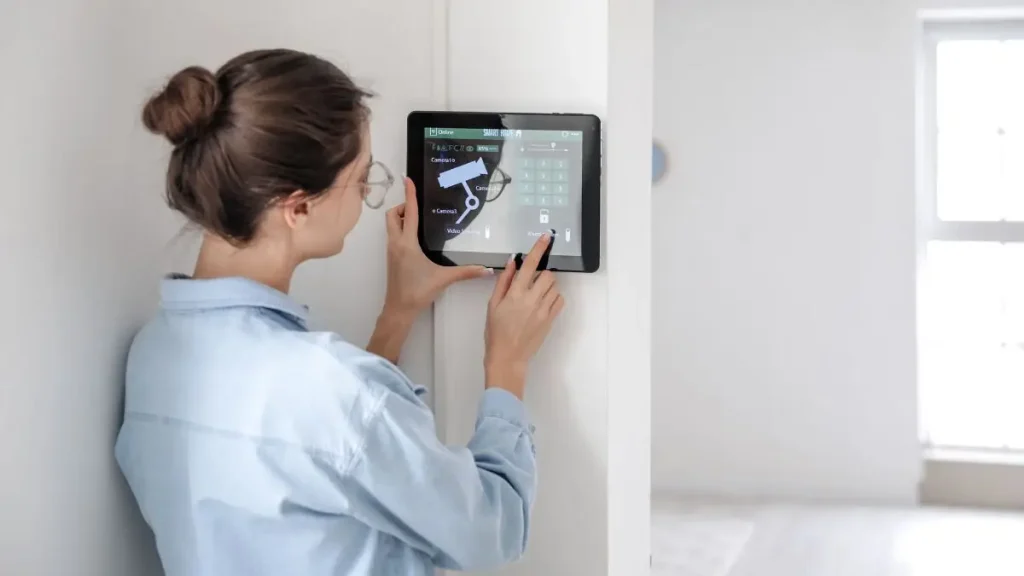
Let’s clear up one common confusion first: an alarm hub on its own doesn’t protect your home—the sensors do. Think of the hub as the brain, but the sensors are the eyes and ears spread across your house.
A sensor is a small device that notices changes—like a door opening, glass breaking, or sudden motion—and instantly signals the hub. The hub then decides what to do: sound the siren, send you a notification, or call the monitoring team if you’ve opted for it.
Most homes use sensors in key locations—front and back doors, ground-floor windows, hallways, and sometimes in rooms that hold valuables. If you’ve got a modern security system, you may also see sensors in places like the kitchen (for smoke/CO) or the basement (for flood detection).
Once you see sensors as the “frontline soldiers” of your home alarm system, the whole setup makes a lot more sense.
Main Types of Alarm System Sensors & How They Work
When I first explain alarm systems to people, I usually break it down into four core sensor types. Each one solves a different problem.
Motion Sensors
These are probably the ones you’ve heard of. Motion sensors either use infrared to detect body heat or ultrasonic waves to detect movement. Some advanced models combine both to reduce false alarms. Place them in hallways or living rooms, and they’ll catch anyone moving where they shouldn’t be.
Glass-Break Sensors
Burglars often target windows, which is why glass-break sensors exist. They “listen” for the specific frequency of shattering glass and instantly alert your system. If you’ve got pets that roam around, these are a smarter choice than motion sensors because they won’t mistake your dog for an intruder.
Door & Window Contact Sensors
These are small magnetic sensors that tell if a door or window has been opened. When the magnet separates from the sensor, it triggers an alert. You’ll usually hear a chime if the system is disarmed—or a loud alarm if it’s armed.
If you want a deeper dive into the different types of window sensors and how they can strengthen your home’s entry points, check out our detailed guide on window sensors.
Environmental Sensors (Often Overlooked)
This is where most guides stop, but I don’t want you to miss the bigger picture. Modern alarm systems also use smoke, carbon monoxide, and flood sensors. They don’t just stop burglars—they protect your family from silent, deadly threats inside the home.
According to Vivint, one of the biggest smart home security providers, a layered setup combining motion, contact, and glass sensors is what really gives you complete protection. If you only rely on one type, you’re leaving gaps open.
Behind the Scenes — How Sensors Communicate With Your Alarm Hub
Now, here’s where most people get curious: “Okay, the sensor knows something happened… but how does that message reach me?”
There are two main ways:
- Wired sensors send signals directly through cables. They’re reliable but harder to install.
- Wireless sensors use radio frequency, Wi-Fi, or smart home protocols like Zigbee/Z-Wave. They’re easier to set up and move, but you’ll need to watch battery life.
Once the hub receives the signal, it can trigger the siren, notify you via an app, or even send the alert to a professional monitoring center.
Power is another key part. Some sensors run on batteries (lasting anywhere from 3–10 years), while others are hardwired. Knowing which one you have helps you plan maintenance better.
Think of it like a WhatsApp message: the sensor types the text (“door opened”), the hub is your phone, and the app notification is you actually reading it. Simple but effective.
Many homeowners like to get instant alerts and maintenance tips directly—joining a dedicated WhatsApp alert group can help you keep track of sensor updates and reminders effortlessly.
How Alarm Sensors Keep Your Home Secure in Real Life?

Here’s what it looks like outside of theory.
- Intruder detection: Motion sensors catch someone sneaking through the hallway. Door/window sensors pick up a forced entry. Glass-break sensors react if someone smashes a patio door.
- Instant alerts: The hub doesn’t just scream with a siren—it can also ping your phone with a push notification or text.
- Professional help: If you’re signed up for monitoring, the system automatically alerts the center. If they can’t reach you, they send help.
- Managing false alarms: Drafty windows, low batteries, or roaming pets are common triggers. Choosing the right sensor type (for example, glass-break over motion if you have pets) makes a huge difference.
The key takeaway here? Security isn’t just about scaring intruders—it’s about giving you time. A few seconds’ warning can mean the difference between a scare and a serious loss.
Motion, glass-break, and contact sensors are critical, but don’t forget to secure common weak spots—read about 9 easy targets burglars look for in your home to make sure you’re fully protected.
Signs It’s Time to Replace Alarm Sensors
No sensor lasts forever. Here are the red flags I tell homeowners to watch out for:
- Age: Most contact and motion sensors last 5–10 years, while smoke/CO sensors usually need replacing every 7–10 years.
- Frequent false alarms: If you’ve cleaned and repositioned the sensor but it still triggers, it’s probably failing.
- Dead batteries that don’t fix the issue: If changing the battery doesn’t help, the sensor hardware itself may be dying.
- Missed triggers: Doors opening without alerts or delayed notifications are a serious sign.
- Physical wear and tear: Cracks, corrosion, or damage from humidity weaken performance.
- Outdated tech: Older sensors may not integrate with newer hubs or smart devices.
The worst mistake I see? People wait until after a break-in or a false alarm to check their sensors. Instead, treat them like you would your car’s brakes—proactive replacement is always cheaper than reactive regret.
Quick check for you: when was the last time you tested your door/window sensors? If you had to think about it, it’s probably overdue.
Have you ever noticed a sensor acting up or a false alarm in your home? Share your experience in the comments below—I’d love to hear how you manage your home security.
DIY Battery Replacement for Door & Window Sensors (Step-by-Step)
If there’s one thing you can safely handle on your own, it’s changing the batteries in door and window sensors. Don’t worry, it’s easier than swapping out your TV remote battery—just a bit more careful.
What You’ll Need
- The right replacement battery (check your sensor manual or app).
- A small coin or flat tool.
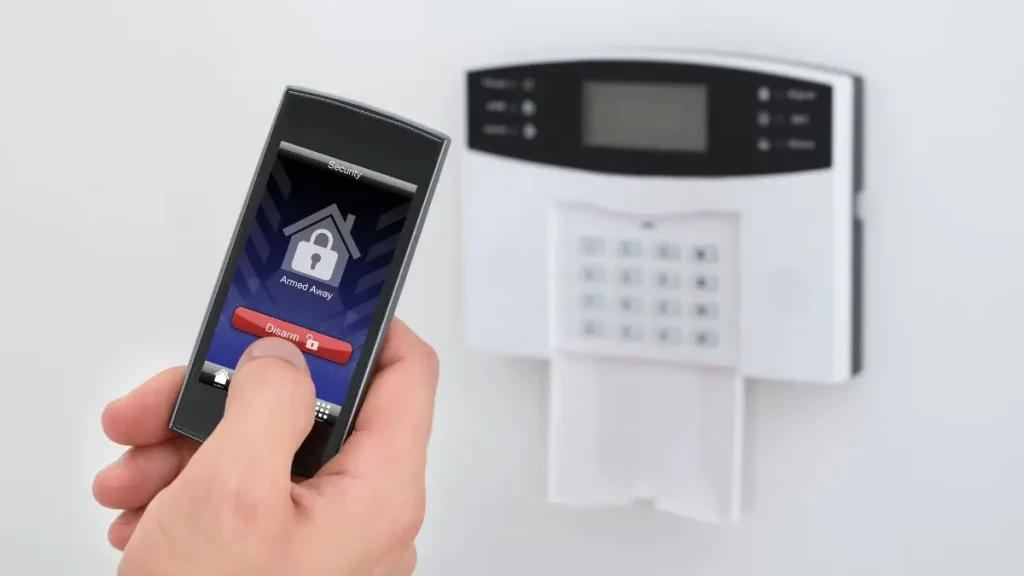
Step 1: Disarm Your System
Never skip this. Disarm from your hub or mobile app, so you don’t trigger the alarm mid-replacement.
Step 2: Remove the Sensor from the Backplate
Use a coin to gently twist open the case. Don’t force it—you just need a light turn to pop it off.
Step 3: Replace the Battery
Slide the old battery out, positive side up for the new one, and make sure it’s snug.
Step 4: Reattach and Test
Snap the sensor back onto the base. Open and close the door/window once so the hub updates its status.
Done. That’s it. No technician needed. Just remember: if the battery dies again within weeks, the sensor itself may be failing.
When NOT to DIY: Replacing Entire Alarm Sensors

Here’s where I have to be firm: replacing the actual sensor hardware isn’t the same as swapping a battery.
Most security companies, including Vivint and ADT, clearly warn against DIY full replacements. Why? Because:
- You might accidentally disable the whole system.
- You could damage the wiring or the hub connection.
- You’ll almost certainly void your warranty.
If you suspect a sensor is dead beyond repair, call your provider or a licensed technician. Yes, it costs a bit, but peace of mind is worth more than a broken alarm system.
Cost Guide: Sensor Replacement & Maintenance
Let’s talk numbers—because everyone wonders: “How much will this set me back?”
- Contact sensors: $20–$40 each
- Motion sensors: $50–$80
- Glass-break sensors: $60–$90
- Smoke/CO/flood sensors: $60–$120
Professional installation can add $30–$70 per sensor. On the flip side, a simple battery replacement costs just a few dollars.
Insurance companies sometimes even give small discounts if your alarm system is professionally monitored and updated. That means replacing faulty sensors can indirectly save you money too.
Tips to Extend Sensor Lifespan & Reduce False Alarms
The best way to save money on replacements? Treat your sensors well. Here’s what I recommend:
- Clean regularly: Dust and cobwebs can confuse motion sensors.
- Test monthly: Most hubs have a “test” or “walk-through” mode—use it.
- Replace batteries early: Don’t wait until they die.
- Smart placement: Keep sensors away from heat vents, curtains, or pet climbing zones.
- Update firmware: If you use a smart home system, check for updates in the app.
These habits take 5 minutes but can add years to your sensors’ life.
Along with maintaining your sensors, small changes around your home can make burglars think twice—check out these 7 simple changes that make burglars run from your home.
Future of Home Alarm Sensors — Smart & AI-Powered
Security tech is evolving fast. The next-gen sensors aren’t just watching—they’re learning.
- AI motion detection: Systems can now tell the difference between a human and your cat.
- Smart home integration: Imagine saying, “Alexa, arm the sensors,” and knowing your whole house is secure.
- Battery-free designs: Some companies are testing energy-harvesting sensors that never need replacement.
- Anti-jamming protection: Advanced wireless sensors fight back against hacking attempts.
This matters because buying a sensor today isn’t just about safety—it’s about investing in future-proof tech that grows with your home.
Key Takeaways & Action Checklist
By now, you know:
- Sensors are the real backbone of your alarm system.
- They come in different types, each protecting you in unique ways.
- Batteries you can replace yourself, but full sensors should be handled by pros.
- Watch for lifespan signs and upgrade before a failure puts your family at risk.
Quick action checklist for you:
- Test all your sensors this week.
- Clean dust/cobwebs.
- Check battery levels.
- Note any false alarms.
- Call a pro if anything feels off.
Because when it comes to home safety, small steps today prevent big regrets tomorrow.
Want more practical home security tips? Visit our Home Security Guides category to explore articles on protecting every corner of your home.
Disclaimer: This guide is for general informational purposes only and not a substitute for professional advice. Always follow your alarm system manufacturer’s instructions and consult certified technicians for installation or replacement. Attempting DIY beyond battery changes may void warranties or compromise safety.