
Stop Basement Water Damage Now: 7 Quick DIY and Effective Fixes
Water in a basement never starts on the floor—it starts outside, sneaks through one weak spot, and shows up where you least expect it. Most guides toss a shopping list at you and call it a day. You and I need something better: a clear plan that fixes the real source first, then locks things down inside.
I’ve gone through the top results and saw the same patterns—paint a sealer, buy a pump, add a drain. Useful, but incomplete. They skip order of operations, common install mistakes, and what each fix actually costs. That’s why “how to DIY waterproof a basement” feels confusing when you’re standing in a damp room with a tight budget.
Here’s how we’ll do it: start with the outside (gutters, downspouts, grading) so you’re not fighting new water every storm. Then seal cracks the right way, use interior coatings that buy you time, protect window wells that quietly flood, and—if you need it—add a simple interior drain you can maintain.
I’ll flag the traps that make good products fail—dirty walls before coating, bad measurements on covers, and drains without a real exit. You’ll also see realistic costs, where DIY ends, and when calling a pro actually saves money.
Before we dive in, tell me—what’s your biggest suspect right now: downspouts, wall cracks, or that basement window well?
Why DIY Basement Waterproofing Matters (The Real Cost of Ignoring It)
A damp basement isn’t just an eyesore—it’s a slow-moving disaster. The longer you ignore it, the more expensive it becomes to fix. I’ve seen homeowners spend thousands on cosmetic repairs upstairs, only to watch mold creep back through the walls below because the source was never addressed.
Here’s what happens if you let water sit in your basement:
- Mold growth in as little as 24–48 hours. The EPA warns that mold can spread fast and trigger asthma, allergies, and even chronic respiratory problems.
- Structural damage. Water eats at mortar joints, cracks concrete, and weakens wood framing. That “small leak” today can turn into foundation repairs tomorrow.
- Property value loss. No buyer wants a house with a wet basement. Even minor water stains can knock thousands off your resale value.
- Health risks. Beyond breathing issues, damp environments attract pests like termites and silverfish, adding another layer of headache.
If you’ve been putting it off, think about this: the cost of patching a gutter or sealing a crack is nothing compared to the price of replacing a rotted foundation beam. That’s why waterproofing matters before anything else.
1. Start with the Source — Fixing Exterior Drainage Before Anything Inside
WATERPROOF! Magazine
Most people jump straight to paints and pumps, but I’ve learned the first battle is always fought outside. If water keeps flowing toward your house, no sealer in the world will keep it dry.
Here’s what you should check first:
- Gutters and downspouts. Clean them out and make sure downspouts carry water at least 6–10 feet away from your foundation.
- Grading. Your yard should slope away from your house, not toward it. Even a few inches of soil can make the difference.
- Splash blocks or extensions. Simple plastic or metal extensions can redirect water far enough that it never touches your basement walls.
One homeowner on Reddit summed it up perfectly: after years of leaks, all they did was extend their downspouts another 8 feet—and 80% of their basement water problems disappeared overnight. No fancy systems, no contractors, just a $20 fix.
If you start here, you may find you don’t even need heavy-duty solutions inside. It’s the simplest, cheapest, and smartest first move.
2. Seal Cracks and Gaps Like a Pro (Affordable DIY Materials)
Every basement I’ve seen in trouble had the same silent culprit—tiny cracks that no one bothered to seal. The good news is, you don’t need a contractor for the first line of defense.
Here’s a simple step-by-step you can follow:
- Clean. Scrub the crack with a wire brush and vacuum out all dust or loose material.
- Patch. For wide gaps, use hydraulic cement—it expands as it sets and locks tight. For hairline cracks, epoxy injections or polyurethane foam do the trick.
- Seal. Once it’s filled, coat the surface with a waterproof sealer to keep moisture from sneaking back in.
The biggest mistake? People slap on cement while the surface is still damp. That’s a guarantee for failure. Always let the wall dry fully before sealing, or you’ll be doing it again in six months.
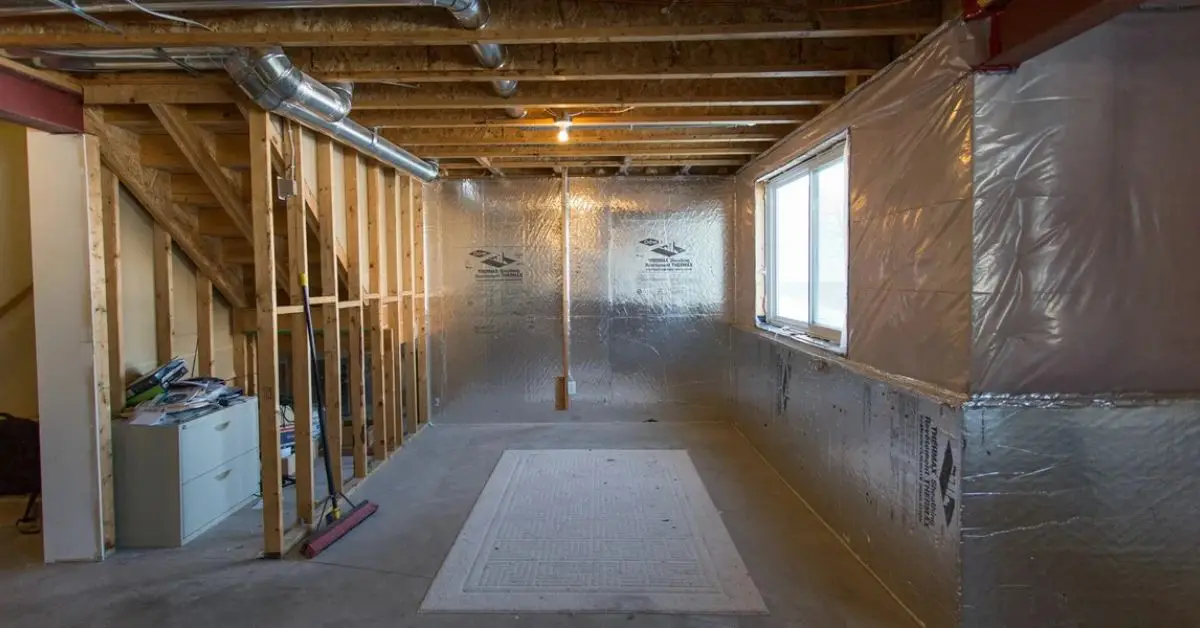
3. Interior Waterproof Coatings That Actually Work
Once you’ve patched the cracks, it’s time to give the walls an extra layer of defense. Not all coatings are equal, though, and this is where most guides oversimplify.
Liquid Rubber (easy for beginners)
If you’re new to DIY, liquid rubber is forgiving. It rolls on like paint but dries into a flexible, waterproof layer. Homeowners often say it’s their “set it and forget it” solution.
Drylok vs. Paint Sealants (when to use which)
Drylok is thicker and made for basement walls—it can resist water pressure better than generic waterproof paints. But here’s the truth: if the wall isn’t prepped right, even Drylok peels.
On the flip side, budget paint sealants are fine for minor damp spots, but don’t expect miracles if you have active leaks.
If you want to see how experts compare the options, The Spruce has a helpful breakdown with costs.
4. Install a Reliable Basement Window Well Cover
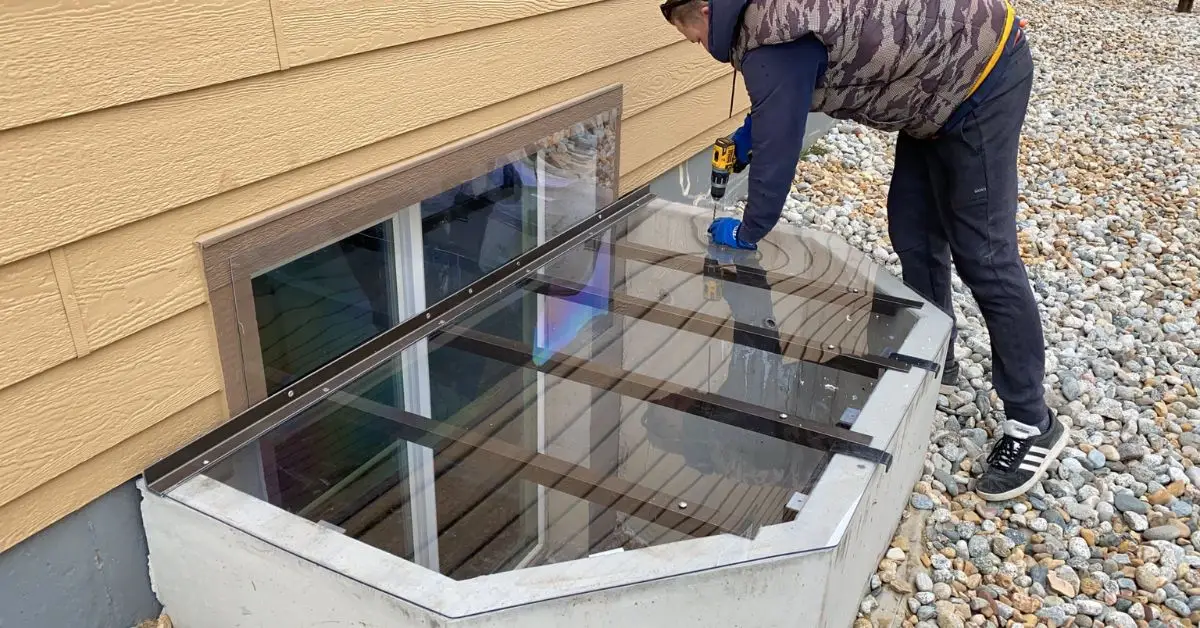
Window wells are sneaky. You look at them as harmless little pits, but they’re often the first gateway for water to enter. Leave them uncovered, and the next heavy rain turns that well into a mini swimming pool pressing against your basement window.
But here’s the trap: cheap plastic covers that you buy on a whim. They may look like protection, but many pop open at the first gust of wind—or worse, trap leaves that hold water right against the window.
Instead, go for polycarbonate or metal-framed covers that bolt into place. They don’t just block rain—they stop snow and debris, too.
Think of this step as locking the side door to your house. No point securing the front if the window wells are wide open. Covers don’t just keep water out—they add an extra layer of security too. If you want more ways to keep your windows safe, see Stop Burglars in Their Tracks: 7 Window Safety Hacks.
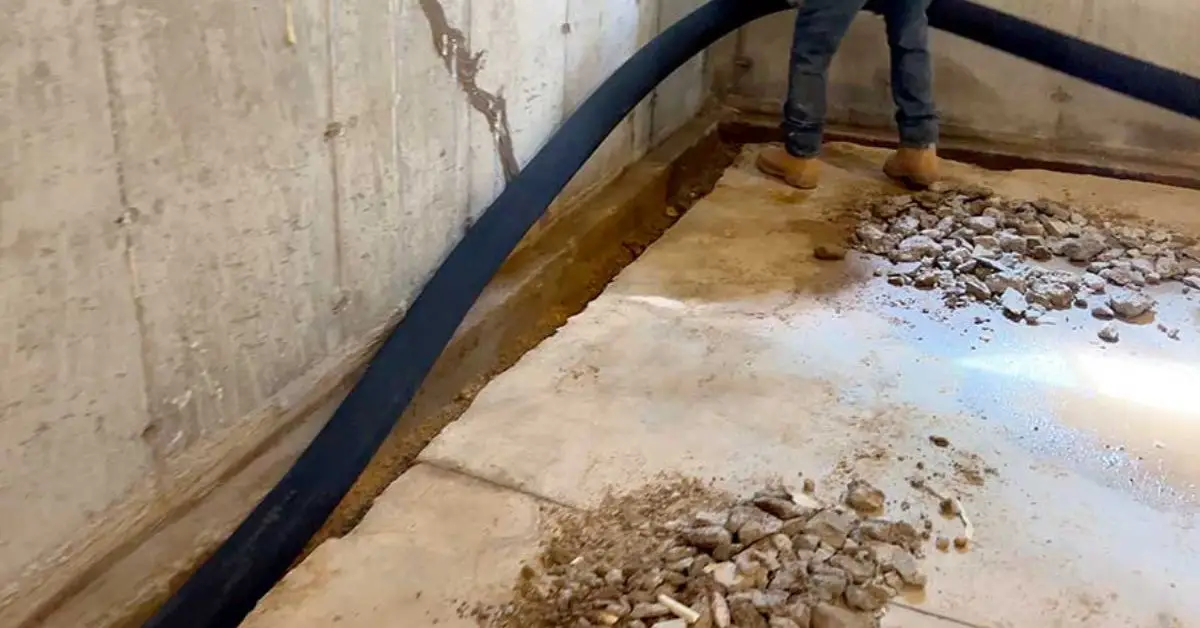
5. Simple DIY French Drain Setup Inside the Basement
Sometimes, no matter how many cracks you seal or coatings you apply, water still finds its way in. That’s where a French drain comes in—a system designed to collect water at the lowest point and send it somewhere safe.
Here’s the basic process I recommend if you want to try it yourself:
- Trench. Cut a narrow trench along the inside edge of your basement floor, close to the wall.
- Pipe. Lay perforated PVC pipe with the holes facing down so water can flow in.
- Gravel. Surround the pipe with gravel—this keeps dirt out and ensures smooth drainage.
- Cover. Put a layer of filter fabric over the gravel, then patch the floor with fresh concrete.
The key difference? Interior French drains are easier for homeowners and help manage water that already entered. Exterior French drains require digging around the foundation, which is costly and labor-heavy—but they stop water before it ever reaches the basement wall.
Here’s a quick cost breakdown so you can weigh the options:
| Type of French Drain | DIY Cost (materials only) | Professional Cost (installed) |
|---|---|---|
| Interior French Drain | $800 – $1,500 | $3,000 – $7,000 |
| Exterior French Drain | $1,500 – $2,500 | $8,000 – $15,000 |
When you see the numbers, it’s clear why many homeowners start with the interior version. It’s not just easier to install—it’s much lighter on the wallet.
When DIY Isn’t Enough — Signs You Need a Pro
I’ll be straight with you: not every basement problem can be solved with a patch kit and a few bags of gravel. Some situations are simply too big or too risky to handle alone.
Here are the red flags I tell homeowners to watch for:
- Recurring flooding. If your basement fills with water every heavy rain, the problem is deeper than surface fixes. If your basement has already taken on water, don’t panic—there are a few immediate steps you can take to limit the damage before repairs begin. I’ve outlined them here in 9 Things to Do Immediately After Basement Flooding.
- Large foundation cracks. Small hairlines are fine for DIY, but anything wider than a quarter-inch is a structural concern.
- Sump pump backups. If your pump can’t keep up or fails repeatedly, you’re one storm away from major damage.
Professional waterproofing often runs into the thousands, but sometimes it’s the only move that protects your home long-term. Industry data shows average costs in the $5,000 to $10,000 range, depending on the system and how extensive the work is.
The way I see it, paying for a pro is less about “giving up” and more about protecting the biggest investment you own—your house. The smart move is knowing where your DIY limits end.
Long-Term Maintenance Hacks for a Dry Basement
Waterproofing isn’t a “do it once and forget it” job. Even the best fixes wear down if you don’t keep an eye on them. I always tell homeowners to treat it like car maintenance—small, regular checkups keep you from facing a big bill later.
Here’s a simple seasonal checklist you can follow:
- Spring: Clean gutters and extend downspouts after winter storms.
- Summer: Test your sump pump before the heavy rain season. Just pour a bucket of water into the pit and make sure it kicks on.
- Fall: Reseal any small cracks or touch up coatings before cold weather hits.
- Winter: Check window well covers to make sure snow and ice aren’t pressing against them.
To make it easier, sketch out a DIY Waterproofing Maintenance Calendar and stick it in your garage or basement. Divide the year into quarters and tick off each task. It takes less than an hour every few months, but it can save you thousands down the road.
Once your basement is dry and secure, you can even take the next step and transform it into a usable part of your home. Check out 9 Expert Tips to Turn Your Basement into a Cozy Living Space for inspiration.
Wrap-Up
Let’s put it all together. A dry basement isn’t about buying one magic product—it’s about stacking the right steps in the right order:
- Start outside with gutters, downspouts, and grading.
- Seal cracks and gaps properly.
- Add coatings like Drylok or liquid rubber for extra defense.
- Protect window wells with covers that stay in place.
- Install a French drain if water still sneaks in.
Do this, and you’re not just fixing leaks—you’re protecting your foundation, your health, and the value of your home.
I’d love to hear from you: What’s the one waterproofing trick that worked best in your basement? Drop it in the comments below so others can learn from your experience.
And if you want more practical, no-fluff guides on keeping your home solid and safe, visit us anytime at Build Like New. It’s where I share fixes that actually work—not just the ones on product labels.
Disclaimer: The information shared here is for general educational purposes only. DIY basement waterproofing methods may not suit every home or situation. Always assess your specific conditions and consult a licensed contractor if you suspect major structural issues or persistent flooding.

