
8 Simple DIY Steps to Swap Your Door Sweep Without Removing the Door
Every time I walk into someone’s home and feel a blast of cold air sneaking under the front door, I know exactly what’s wrong — the door sweep has given up. It’s one of those small fixes most people ignore until the draft becomes unbearable, the heating bill spikes, or you spot a line of ants crawling right through that tiny gap. I’ve been there myself, and trust me, it doesn’t take a pro or a weekend-long project to fix.
The truth is, a good door sweep is your first line of defense against wasted energy and unwanted pests. Air leaks like these can account for up to 30% of your heating and cooling costs. That’s money slipping right out of your house every month. The good news? You can stop it with a fifteen-minute DIY job that doesn’t even require you to remove the door.
Before I walk you through the exact steps, I want you to think about this: when was the last time you checked the bottom of your door? If the light sneaks through or you feel a draft, this is your fix.
Have you ever tried replacing a sweep before, or is this your first attempt?
Types of Door Sweeps – Which One Fits Your Door Best?
If you’ve ever walked down the hardware aisle, you know the shelves are full of “door sweeps” that all look similar but perform very differently. I’ve learned the hard way that grabbing the cheapest one often means you’ll be back at the store in a few months. Let me break down the main types so you don’t waste money or time.
- Adhesive sweeps – These are peel-and-stick strips you press onto the bottom of your door. They’re quick to install and great if you rent or don’t own many tools. The downside? Adhesive weakens over time, especially if your entryway sees a lot of traffic or moisture. Think of these as a temporary fix rather than a long-term solution.
- Screw-in aluminum sweeps – This is the option I usually recommend. The aluminum strip holds a rubber or vinyl seal, and because it’s screwed in place, it stays put for years. Yes, it takes a drill or screwdriver, but the durability is worth it. If you’re looking for the balance between easy installation and lasting results, this is it.
- Automatic sweeps – These are the premium choice. When the door closes, a mechanism drops the seal down flush with the floor; when you open it, the seal lifts up. They’re perfect for soundproofing or uneven floors. They do cost more and take a little patience to install, but the comfort upgrade is noticeable.
The goal here is simple: match the sweep type to your needs. Don’t just pick by price tag—pick by how long you want the fix to last and what kind of results you expect.
If security is your main concern along with drafts, you’ll want to look beyond sweeps and check out these 8 simple ways to secure your back door from intruders today. Pairing both gives you comfort and peace of mind.
Tools & Materials You’ll Actually Need (No Overbuying)
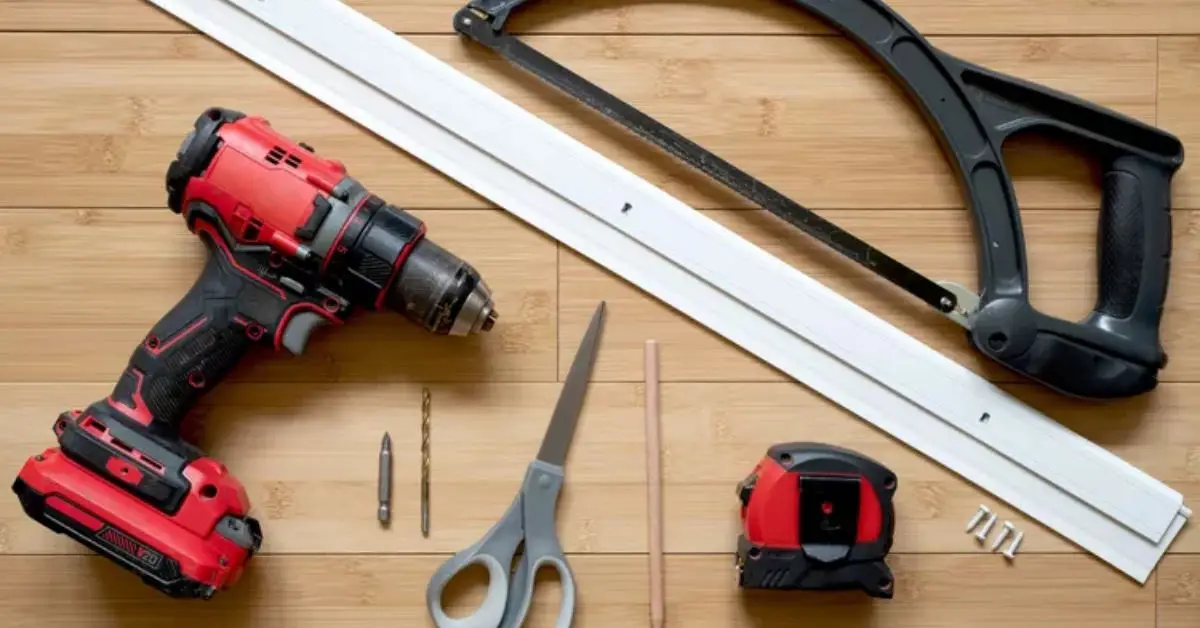
One thing I hate about most guides is how they throw a giant shopping list at you when in reality you only need a handful of basics. Here’s the honest checklist I use whenever I swap out a sweep:
- Screwdriver or drill – For screw-in sweeps, a drill makes the job faster, but even a basic screwdriver will do.
- Tape measure – Accuracy matters. A sweep that’s a quarter-inch too short will still leak air.
- Pencil – To mark where you’ll cut and align. Simple but essential.
- Scissors or utility knife – Most sweeps have a rubber or vinyl strip you’ll trim to size.
- Door sweep kit – Expect to spend between $15 and $25 on a quality sweep. Anything cheaper is usually thin vinyl that cracks quickly.
If you want a little extra peace of mind, check out the Energy Department’s guide on detecting air leaks — it’ll help you spot other weak spots in your home once the sweep is handled.
Keep it simple. With these five tools and one kit, you’re ready to go. No fancy gadgets, no surprise expenses — just a quick fix that pays for itself in energy savings.
Step-by-Step Guide – How to Install a Door Sweep Without Removing the Door
I’ve done this dozens of times, and the biggest relief for most people is realizing you don’t have to take the door off its hinges. Here’s the exact process I follow — quick, clean, and effective.
- Clean the bottom edge of the door: Wipe away dust, dirt, and old adhesive. A sweep won’t stick or sit right if the surface is grimy.
- Measure your door width accurately: Use a tape measure from edge to edge. Don’t eyeball it — even a half-inch mistake can leave gaps.
- Mark the sweep for trimming (if needed): Place the sweep against the door and mark where it should end. This saves you from cutting it too short later.
- Cut the sweep to fit: Use a hacksaw for metal strips and scissors or a utility knife for the rubber/vinyl portion.
- Align the sweep against the door bottom (flush, not tilted): Hold it steady and make sure it brushes lightly against the threshold without dragging.
- Pre-drill small holes (for screw-in types): This prevents the door from splitting and makes it easier to drive in screws.
- Secure with screws or adhesive strip: If using screws, tighten them just enough to hold firm without bending the metal. For adhesive sweeps, press firmly along the entire length.
- Test closure and adjust gaps: Open and close the door a few times. If you feel resistance or still see daylight, reposition slightly.
That’s it — no door removal, no special tools. Just a bit of patience and accuracy.
If you’re curious about what different sweeps look like before buying, the Lowe’s installation guide has a helpful visual breakdown that matches the steps above.
Mistakes DIYers Make (And How to Avoid Them)
I’ve seen plenty of sweeps fail not because the product was bad, but because of little mistakes during installation. Here are the ones I run into most often:
- Installing the sweep too high or too low: If it’s even a fraction off, you’ll either still feel drafts or the door will scrape the floor. Always test-fit before drilling or sticking it down.
- Relying on glue alone: Adhesive might hold for a few weeks, but as the door moves and weather changes, it will peel. If you want the sweep to last, use screws whenever possible.
- Cutting the sweep too short: Trim slowly and double-check measurements. Once it’s short, there’s no fixing the gap without buying another sweep.
- Ignoring uneven thresholds: Some floors slope or have small dips. If you don’t account for this, one corner may still leak. In those cases, adjustable or automatic sweeps save the day.
Keep these in mind, and you’ll avoid the frustration that makes people think sweeps “don’t work.”
Troubleshooting – What If Your Door Still Leaks Air?

Sometimes, even after installing a new sweep, the draft doesn’t completely disappear. Don’t worry — here’s how I troubleshoot:
- Check threshold height: If the floor plate is too low or worn, raising or replacing it might be the real fix.
- Add weatherstripping along the sides: A sweep only seals the bottom. Cracks along the jamb can leak just as much. A simple foam strip solves that.
- Use silicone caulk for extra seal: For doors with tiny gaps at the edges, a bead of clear silicone can stop air and water infiltration.
- Consider automatic sweeps: On uneven floors, a regular sweep will always miss spots. Automatic models drop to match the surface and close the gap.
For a step beyond DIY, the Frost King guide explains how to pair sweeps with thresholds for a tighter seal — useful if your home has older or worn entryways.
Remember, sealing one draft often reveals another. Each small adjustment brings you closer to a comfortable, energy-efficient home. Another smart move while you’re sealing leaks is to think about indoor air quality. Even with a tight sweep, habits like proper window ventilation can make a big difference — this Lüften guide for winter air quality shows exactly how.
Final Check – How to Know You Installed It Right
Before you call it done, give your work a quick inspection. Here’s the checklist I use every time:
- The door closes smoothly without drag: If it scrapes the floor or feels heavy, the sweep is sitting too low. Adjust it slightly upward.
- No visible gap at the bottom: Stand inside and look toward the light. If you can see daylight, air and pests will still sneak in.
- No draft when you test with your hand: On a breezy day or with a fan running, place your hand near the bottom of the door. You shouldn’t feel cold air slipping through.
When all three boxes are ticked, you’ve officially installed the sweep the right way — and you should notice the difference right away in comfort and quiet. And while you’re improving your entry points, don’t forget about glass doors — here are 5 easy ways to make your sliding glass door burglar-proof today. It’s another quick upgrade that goes hand in hand with your new sweep.
Have you tried installing a door sweep before, or is this your first attempt? Share your experience in the comments below — your tip might save another DIYer some frustration. For more practical home repair guides like this, visit Build Like New and explore step-by-step fixes you can actually trust.
Disclaimer: The information in this article is for general DIY guidance only. Always follow the manufacturer’s instructions for your specific product and use proper safety precautions. If your door or frame is damaged, or if you’re unsure about installation, consider consulting a professional.

