
7 Simple Hacks to Erase Grease Stains From Your Kitchen Fast
I still remember the first time I noticed that dull, sticky film on my kitchen counter — that mix of oil, dust, and forgotten splatters that somehow survive every wipe. It wasn’t obvious at first, just a slight sheen near the stove. But when the sunlight hit it the next morning, it felt like my entire kitchen was quietly coated in grease. I tried the usual quick fixes — a wet cloth, some dish soap, even vinegar — but nothing seemed to cut through it completely. That’s when I realised: most of us clean the surface, not the stain.
If you’ve ever looked at your kitchen tiles or counters and wondered why they still feel tacky even after cleaning, you’re not alone. Grease doesn’t just sit on top — it bonds with heat, air, and time, turning into a stubborn layer that resists ordinary cleaning. The good news? You don’t need industrial chemicals or endless scrubbing to win the battle. You just need to know what works where — and why.
In this guide, I’ll walk you through seven proven, science-backed ways to remove grease stains from your kitchen surfaces — from gentle home remedies to powerful deep-cleaning tricks that actually last. These aren’t random hacks pulled off social media; they’re methods tested by experts, remodelers, and even real homeowners who’ve fought the same battle you’re facing right now.
So before you reach for that sponge again, let’s figure out what kind of grease you’re really dealing with — and how to make your kitchen shine again without the endless effort.
What’s been your biggest challenge when it comes to cleaning grease — the stovetop, cabinets, or that one spot you can never quite get right?
Why Grease Stains Are Tougher Than You Think
If you’ve ever wiped your countertop three times and still felt that slick, sticky film under your hand, you already know — grease doesn’t play fair. It’s not just another kitchen mess; it’s chemistry in action. Once grease meets heat and air, it starts to change, bonding to your surfaces in ways that regular soap can’t easily undo. And the longer it stays, the harder it gets to remove.
What Happens When Grease Sits
When grease lingers on your surfaces, it goes through a process called polymerization — basically, the oil molecules react with oxygen and harden into a thin, varnish-like layer. Think of it as the same process that helps paint dry, only this time, it’s sealing dirt right onto your counter. Over time, this layer traps dust, cooking residue, and even moisture, creating that stubborn, yellowish build-up that seems impossible to clean.
You’ll often notice it in spots that get warm — behind your stove, on the cabinet doors above it, or near the vent hood. These are places where the combination of heat and oil makes grease “cook” onto the surface instead of just sitting there.
Here’s what makes old grease such a pain:
- It oxidises and becomes sticky.
- It absorbs odours, making your kitchen smell even after cleaning.
- It repels water, so normal wiping doesn’t break it down.
How Different Kitchen Surfaces React to Grease
Every surface in your kitchen has its own personality — and grease clings to each one differently.
- Laminate counters: The smooth finish traps grease in micro-scratches, so it looks clean but feels slippery.
- Stone or granite: These are porous by nature. If you don’t seal them regularly, grease seeps in and darkens the surface.
- Wood: Grease absorbs quickly into unsealed wood, leaving cloudy or dark patches that won’t go away with water alone.
- Tiles and grout: The rougher texture gives grease plenty of hiding spots, especially in the joints.
That’s why the same cleaner that works on your stove might not be safe for your wooden cabinets — something many people realise only after dulling the finish. A professional remodeling guide from The Spruce even highlights how porous materials like marble and wood need special attention to avoid surface damage.
The Danger of Being Too Aggressive
Here’s the tricky part — when grease won’t budge, it’s tempting to grab the harshest cleaner or toughest scrubber you can find. But that’s where many kitchen surfaces lose their shine for good. Abrasive scrubbing pads or strong solvents can strip away protective coatings, leaving your counters dull, streaky, or permanently etched.
If you’ve ever seen cloudy spots appear right after cleaning, that’s a sign of finish damage. Instead of going all in with force, the key is layered cleaning — starting mild and working your way up only if needed. The right method cleans the grease without hurting what’s underneath.
Quick Emergency Trick (for Fresh Spills)
Let’s be honest — no one plans for a grease spill. It happens in a blink, usually right in the middle of cooking. The good news? If you act fast, you can stop that slick patch from ever becoming a permanent stain.
Blot + Absorb Immediately (Paper Towel, Corn Starch)
The first move is speed. Don’t smear; blot. Grab a paper towel or sprinkle a bit of corn starch or baking soda directly onto the spill. These powders work like magnets for oil, drawing it out before it seeps into the surface. Let it sit for a few minutes, then wipe it gently.
Quick tip: if the spill is near a stove or warm area, wait until the surface cools slightly before touching it — you’ll avoid spreading hot, liquefied grease further.
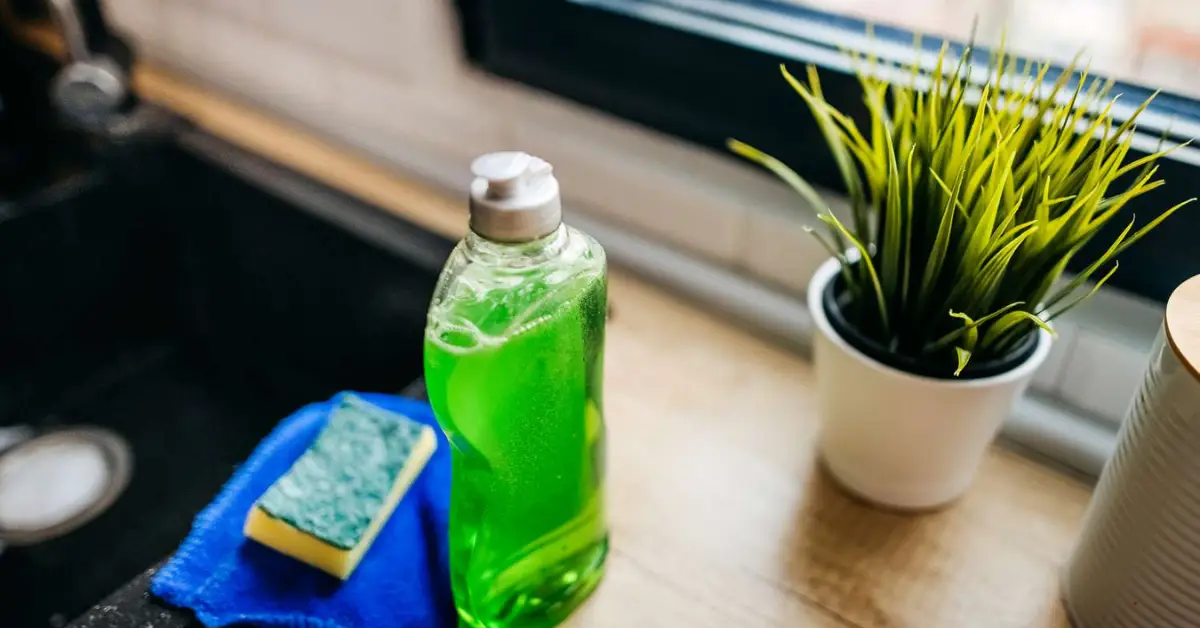
Mild Dish Soap + Warm Water Wipe
Next, mix a few drops of dish soap in warm water. Dip a microfiber cloth in the solution, wring it out, and wipe the area in small circles. Dish soap breaks down grease molecules (that’s why it’s used for cleaning oil off wildlife), and the warmth helps loosen what’s left.
Keep your movements light — the goal is to lift, not push. For tricky corners, use a soft-bristled toothbrush.
Why Speed Matters – Before Grease “Sets”
The longer grease sits, the more it bonds with your surface. Cleaning it right away prevents:
- Permanent yellow stains that show up later.
- Sticky patches that attract more dirt.
- Odour buildup that lingers even after mopping.
A five-minute cleanup now can save you hours later — and that’s the real secret behind every spotless kitchen. If you’ve ever noticed that your sink’s flow slows down just when you’re scrubbing away grease, don’t ignore it — proper water pressure can make cleaning much easier. Check out our quick guide on 10 Easy Fixes for Low Water Pressure in Your Kitchen Sink to get your tap back to full strength.
What’s your go-to quick fix when a fresh grease splash hits your countertop or backsplash?
Method Hierarchy: From Gentle to Heavy-Duty (Your 7 “Genius” Methods)
When it comes to cleaning grease, it’s not about how hard you scrub — it’s about starting soft and moving up only when needed. Every layer of grease has its own personality: some melt away with a light touch, while others need a bit of science and patience. Let’s go step by step — from the gentlest methods to the real heavy hitters.
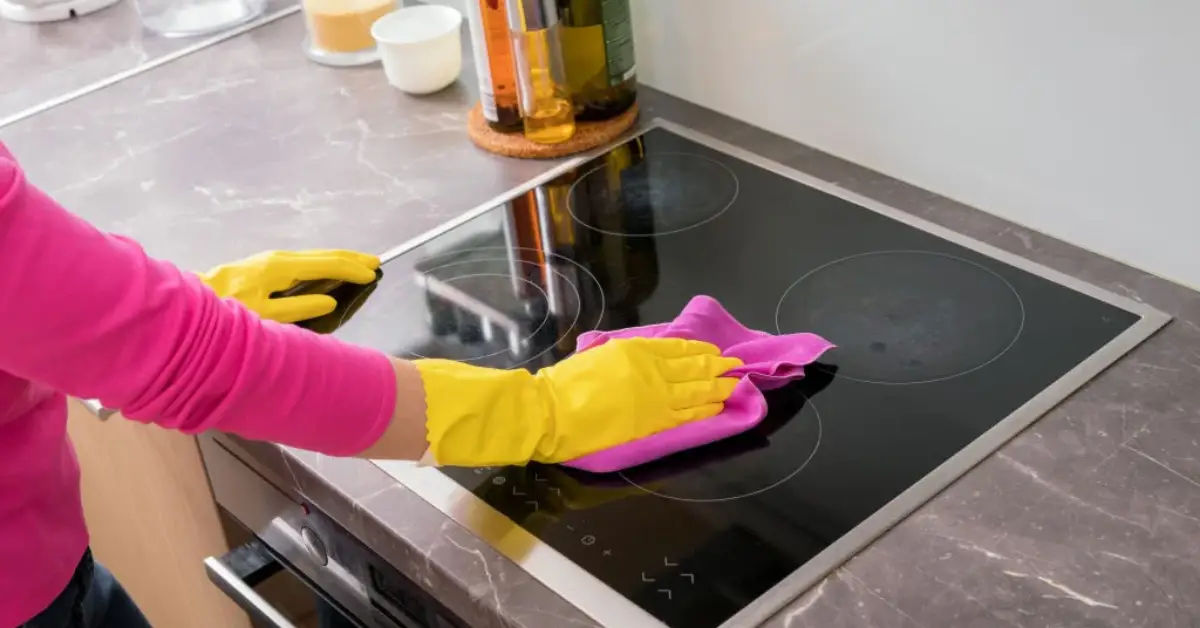
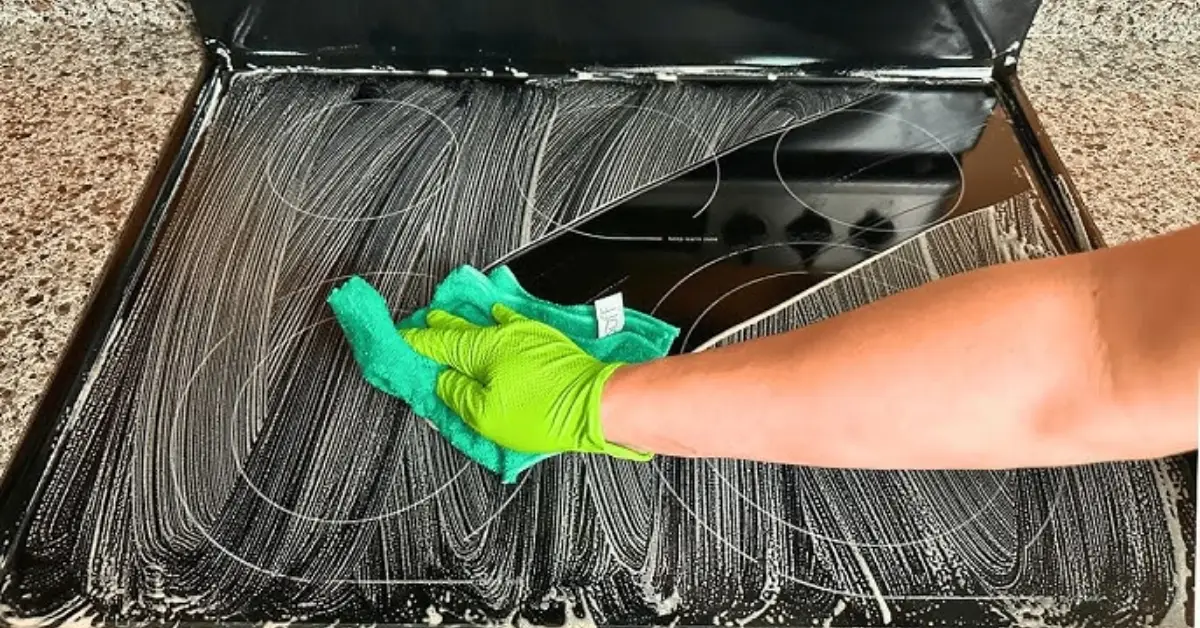
1. Dish Soap + Microfiber Warm-Water Wash
For most light or fresh grease stains, this is your first line of defence. Dish soap breaks down oil molecules the same way it cleans frying pans — by lifting and surrounding the grease so water can rinse it away.
How to do it:
- Mix a few drops of dish soap in a bowl of warm (not hot) water.
- Dip a microfiber cloth, wring it out, and gently wipe the greasy spot in small circles.
- Rinse the cloth often and keep changing the water as it clouds up.
Pro tip: Add a dash of white vinegar or rubbing alcohol for a little extra cutting power — but only on non-porous surfaces like stainless steel or laminate.
Caution: Skip this trick on untreated wood or stone; soap and acid can dull or damage the finish.
2. Baking Soda (or Cornstarch) Paste Poultice
If the stain’s older or feels sticky to the touch, this gentle, powder-based method works wonders. Baking soda absorbs oil while loosening the residue from the surface without scratching it.
How to make it:
- Combine 2 parts baking soda with 1 part water to make a thick paste.
- Spread it over the greasy spot and leave it for 10–15 minutes.
- Gently wipe off with a damp microfiber cloth.
- For vertical spots (like cabinet doors), cover the paste with plastic wrap so it stays in place.
When to repeat: If the stain’s still visible after drying, repeat once more. Old, oxidised grease often needs two passes.
According to HowStuffWorks, baking soda’s mild alkalinity helps dissolve fatty acids found in grease, making it both safe and effective for kitchen use.
3. Vinegar + Degreasing Boosters (Citrus or Isopropyl Mix)
When natural oils and mild soap don’t do the job, this mix adds a little chemistry. Vinegar’s acidity helps cut through sticky residue and restore shine — especially on metal and glass surfaces.
Recipe to try:
- Mix equal parts white vinegar and warm water in a spray bottle.
- Add a teaspoon of lemon juice or isopropyl alcohol for extra degreasing.
- Spray, wait 2–3 minutes, and wipe clean with a soft cloth.
Layer it: For thick buildup, apply your dish soap solution first, rinse, then spray vinegar mix — the combo works better than either alone.
Caution: Never use vinegar on marble, granite, or any natural stone. The acid can etch or dull the surface permanently.
4. Commercial Degreaser or Enzyme Cleaner
When home remedies fail, it’s time to bring in the pros. Commercial cleaners are designed to dissolve layers of aged grease — the kind that’s been baked on over months or years.
When to use:
- For old stains that have darkened or hardened.
- Around vent hoods, stove backs, or cabinet tops where buildup is thick.
How to choose the right one:
- Look for non-toxic, kitchen-safe or enzyme-based formulas.
- Always read the label for surface compatibility (avoid using heavy degreasers on varnished wood or painted areas).
Use it right:
- Spray lightly and let it sit for 5–10 minutes.
- Wipe clean with a damp microfiber towel, and always rinse afterward to avoid residue.
5. Steam / Heat + Wipe Method
Sometimes the best cleaning tool is heat. Warm steam softens the grease layer, making it easier to wipe off — perfect for tiles, grout, and metal surfaces.
How to do it:
- Use a handheld steam cleaner or hold a hot, damp cloth over the greasy area for 20–30 seconds.
- Immediately follow up with a microfiber wipe.
- For grout, use a soft brush while the area’s still warm.
Why it works: Heat breaks down the chemical bonds in the grease, turning it soft and slippery again so it wipes away easily.
Caution: Avoid using this method on wood or laminated counters; high heat can warp or bubble the surface.
6. Ammonia / Stronger Solvent Trick (Rescue Case)
When nothing else works, this is your last resort — but it works fast. A popular community tip on Reddit suggests using a mix of hot water, ammonia, and dish soap for deeply set grease.
How to use:
- Mix 1 part ammonia with 8 parts hot water and a few drops of dish soap.
- Apply using a cloth or sponge and let it sit for a minute.
- Wipe off immediately and rinse well with clean water.
Safety rules:
- Always wear gloves and open windows for ventilation.
- Never mix ammonia with bleach — it creates toxic fumes.
- Test a small spot first before applying on painted or sensitive areas.
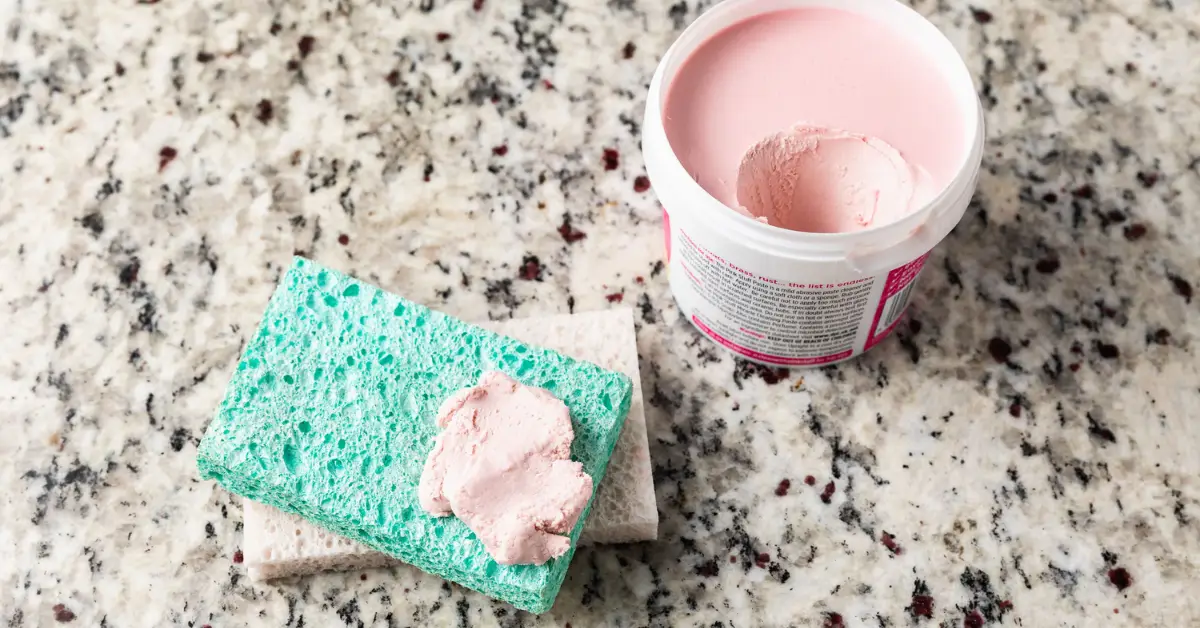
7. Gentle Abrasive Scrub + Protective Finish
If you’ve reached this step, you’re dealing with hardened, long-neglected grease — the kind that looks almost baked in.
What to use:
- A non-scratch cleaning powder like Bar Keepers Friend or a paste of baking soda + salt.
- Apply gently with a soft sponge or nylon scrub pad.
Steps:
- Moisten the area lightly.
- Sprinkle or apply the abrasive.
- Rub in small circular motions, avoiding excess pressure.
- Wipe clean and dry completely.
Aftercare: Once the surface is spotless, apply a light protective layer — like mineral oil on wood or a sealer on stone — to help prevent future buildup.
Every kitchen has its own cleaning rhythm — what works for stainless steel might ruin oak cabinets. The trick is to treat grease like layers, not a stain. Start mild, listen to what your surface needs, and move up the scale only when you have to.
Which of these methods do you think you’ll try first — the gentle kind or the heavy-duty rescue one?
Surface-by-Surface Cheat Sheet (Material-Wise Do’s & Don’ts)
Every kitchen surface reacts differently to grease. What works beautifully on your laminate counter could ruin your marble or fade your cabinet finish. The trick is to know your material before you start scrubbing. Here’s your quick-reference guide — real-world tested, not just theory.
Laminate & Melamine Surfaces
Best methods:
- Start with the dish soap + warm water routine for everyday cleaning.
- For older stains, use the baking soda paste sparingly — avoid letting it sit too long.
Avoid:
- Harsh solvents, bleach, or abrasive powders — they can lift the laminate’s protective coating.
- Excess water near seams; it may cause bubbling or peeling.
Quick tip: Always use a microfiber cloth rather than a sponge — it picks up grease without scratching the glossy finish.
Wood & Butcher Block
Best methods:
- Go for the baking soda poultice or vinegar-free degreasing mix (like mild dish soap + warm water).
- Follow with a light coat of mineral oil or food-safe conditioner once dry.
Avoid:
- Vinegar, ammonia, or alcohol-based cleaners — they can dry out or stain the grain.
- Soaking or steaming, as moisture can warp wood.
Quick tip: Always clean with the grain, not across it — it keeps the finish smooth and the fibers intact.
Natural Stone (Granite, Marble, Quartz)
Best methods:
- Stick with dish soap and water or a pH-neutral stone cleaner.
- Use steam cautiously — a short burst to loosen grease, followed by a dry wipe.
Avoid:
- Vinegar, lemon juice, or anything acidic. These eat away at the sealant and cause dull spots.
- Abrasive powders or scrubbers.
Quick tip: Seal your stone every six months to prevent future grease absorption. According to This Old House, regular sealing helps protect stone surfaces from oil stains and etching.
Tiles, Backsplash, and Grout
Best methods:
- Use steam or a degreasing spray to lift grease from the grout.
- For mild stains, a baking soda paste works perfectly between tiles.
Avoid:
- Hard metal brushes that chip the grout or enamel.
- Strong acidic cleaners — they can weaken the grout lines.
Quick tip: Run a small silicone squeegee or dry cloth over the backsplash after cooking — it prevents grease build-up before it hardens.
Painted Surfaces, Appliance Exteriors & Stainless Steel
Best methods:
- Go mild: dish soap + warm water is ideal for painted areas and appliances.
- On stainless steel, use vinegar + water spray followed by a soft microfiber buff.
Avoid:
- Baking soda or anything gritty on painted finishes.
- Steel wool or scouring pads on stainless steel — they leave permanent scratches.
Quick tip: Wipe stainless steel with the grain, not against it. Finish with a drop of olive oil on a cloth for a polished shine.
Test, Repeat, Escalate — What to Do If the Stain Persists
Even the best cleaning methods sometimes need patience. Old, cooked-on grease has a way of holding on — but that doesn’t mean you’ve lost the battle. Here’s how to tackle it without damaging your kitchen.
How Long to Try Each Method Before Moving to the Next
- Light grease: You should see results within 5–10 minutes using dish soap or vinegar mix.
- Moderate stains: Let the baking soda paste sit for 10–15 minutes before wiping.
- Heavy buildup: Try the commercial degreaser for 10 minutes, but always check after 5.
If you’re not seeing progress after two full attempts, it’s time to move up the ladder.
How to Combine Methods (e.g. Paste + Degreaser)
Layering can work miracles when done right.
- Start with baking soda paste to soften the stain.
- Rinse it off, then follow with a degreaser or vinegar mix to lift what’s left.
- For thick grease, apply steam right before the wipe — it helps release trapped oil.
Always rinse between steps so you’re not mixing ingredients directly on the surface.
When to Call a Pro or Consider Resurfacing
Some stains aren’t just on the surface — they’ve seeped in.
- If wood feels tacky no matter what you do, it may need sanding or refinishing.
- For natural stone, deep oil stains might require a professional poultice or resealing.
- If laminate bubbles or peels, a handyman can re-bond or replace the damaged section.
Sometimes, calling in help saves your surface from more damage — and keeps you from wasting time on a losing battle.
When was the last time you gave your kitchen surfaces a deep clean? Try one surface at a time, test gently, and see which method brings back that fresh, clean glow without the struggle.
Prevent Grease from Returning (Maintenance + Protective Strategies)
Once you’ve put in the effort to clean every inch of your kitchen, the real win is making sure it stays that way. Preventing grease buildup isn’t just about wiping — it’s about building small, smart habits that stop the grime before it even settles.
Daily Wipe Habits + Right Tools
Grease builds gradually — not in one big spill, but in dozens of tiny splatters you barely notice. A quick daily routine makes a huge difference.
What to do:
- After each cooking session, wipe the stove area and backsplash with a microfiber cloth dipped in warm soapy water.
- Keep a small spray bottle of diluted dish soap handy — one or two sprays can save hours later.
- Microfiber cloths are better than paper towels because they trap oil without spreading it.
Quick tip: Keep one designated “grease cloth” under the sink. It’s easier to grab when things get messy mid-cook.
Keeping your space clutter-free also makes it easier to clean daily. You can follow our guide on How to Declutter Your Kitchen: 7 Steps to a Cleaner, Happier Space for simple ways to keep every corner organised and grease-free.
Using Booster Sprays or Degreasing Wipes
If you cook often or love fried food, you’ll want a little extra help. Booster sprays and degreasing wipes can break down the light oil film before it hardens.
Options that work well:
- Citrus-based sprays that cut through oil while leaving a fresh scent.
- Enzyme wipes that remove food residue and restore shine.
Use them once a day on high-traffic areas — like the stove, vent hood, and counters near the sink.
Tip: Check that your wipes are non-abrasive and ammonia-free, especially for stainless steel or wood finishes.
Applying Sealants or Finishes (for Stone, Wood)
If you’ve got natural stone counters or wooden surfaces, sealing is your best long-term defence against grease. A proper sealant creates an invisible barrier that stops oil from soaking in or staining.
According to This Old House, sealing granite or marble once or twice a year helps repel moisture and prevent stubborn grease marks.
How to do it:
- Clean the surface thoroughly and let it dry.
- Apply a pH-neutral sealant using a soft cloth or brush.
- Let it soak for 15 minutes, then buff gently.
- Repeat annually (or bi-annually for wood that’s used heavily).
Bonus: For wooden butcher blocks, use food-grade mineral oil every month to maintain a natural, water-resistant finish.
Cooking Practice Tips (Splatter Guards, Lids, Ventilation)
Even the cleanest kitchen gets greasy if the air isn’t doing its job. Grease travels — tiny airborne particles settle on cabinets, walls, and lights.
Simple ways to stop it:
- Use splatter guards when frying or sautéing.
- Always cook with a lid slightly tilted to trap steam and grease.
- Keep the vent hood or exhaust fan running throughout cooking and a few minutes after.
- For extra help, wipe the fan filters weekly — they collect more grease than you think.
You can also make your cooking area safer and more sustainable by upgrading to eco-friendly essentials. Explore our list of 10 Must-Have Plastic-Free Kitchen Items for a Healthier Home to keep your kitchen both clean and conscious.
Small tweaks like these turn cleanup from a chore into a quick habit — and your kitchen starts staying clean by default.
Mistakes to Avoid & Cautions
Even with the right products, a few common missteps can undo all your hard work. Here’s what you should steer clear of while cleaning grease.
1. Using Acidic or Abrasive Cleaners on Marble or Stone: Acidic cleaners — like vinegar, lemon, or strong degreasers — may strip away the stone’s sealant and cause dull spots or permanent etching. Always stick to pH-neutral solutions.
2. Scrubbing Too Hard: Pressure doesn’t equal power. Vigorous scrubbing can remove protective coatings or scratch delicate finishes, especially on laminate or polished wood.
3. Mixing Incompatible Chemicals (Ammonia + Bleach): This combination produces toxic fumes — never mix them. If you’ve already used one cleaner, rinse thoroughly before applying another.
4. Not Rinsing Properly: Soap or cleaner residue can attract more dirt and leave streaks. Always wipe with a clean, damp cloth after using any cleaner.
5. Leaving Residue That Attracts More Dirt: Even eco-cleaners leave a film if not wiped properly. A final dry buff with a microfiber cloth removes leftover moisture and keeps your counters smooth.
Measuring Results + When to Stop (Indicators of Success)
It’s easy to get lost chasing “perfectly clean.” The truth is, you just need to know when enough is enough — and when a deeper fix is required.
What “Cleaned” Looks Like (Matte vs Streaky)
A truly clean surface feels dry, smooth, and even, not slippery or shiny with oil. A little matte finish is normal — that’s the natural texture showing through, not leftover grease.
Check under light: Tilt your head or use your phone flashlight. If you see streaks or patches reflecting light differently, there’s still some residue left.
How Long Surfaces Stay Clean (Recheck After 24h)
Give it a day. If the area feels slightly tacky again, there’s still oil inside the pores. Try one more round using a mild degreaser — not a harsher cleaner.
Tip: If you’re cleaning before bedtime, recheck in the morning. Overnight settling can reveal what you missed.
Visual Cues for Hidden Grease
Even when the surface looks spotless, these clues tell you there’s still grease:
- The cloth slides unevenly while wiping.
- Dust sticks faster in one spot than another.
- A faint smoky odour lingers after cooking.
When that happens, it’s time for a deeper wipe-down or steam clean.
If a Ghost Stain Remains, Next Rescue Method
Sometimes grease leaves behind what I call a “ghost stain” — a faint, darker patch that seems to reappear.
- Try combining your baking soda paste with a degreaser as a layered clean.
- Let it dwell for 10 minutes before wiping.
- If it’s in stone or wood, it may need resealing or a professional poultice treatment.
Grease doesn’t disappear overnight, but with consistency and a few smart upgrades, your kitchen can stay spotless without feeling like a daily project.
What’s the one spot in your kitchen that never seems to stay clean — the backsplash, stove edge, or cabinet doors?
Bringing It All Together
If there’s one thing I’ve learned after years of battling kitchen grime, it’s that grease doesn’t care how clean you think your home is — it hides where you least expect it. But once you understand how it builds, bonds, and spreads, keeping your kitchen spotless becomes simple. You don’t need harsh chemicals or endless scrubbing — just the right order, a few smart habits, and a little patience.
Start small: wipe daily, seal what matters, and treat your surfaces gently. With the right rhythm, your counters, tiles, and cabinets won’t just look cleaner — they’ll stay that way. And the best part? You’ll actually spend less time cleaning and more time enjoying your kitchen.
Grease stains are stubborn, but they’re not unbeatable — especially when you clean smarter, not harder.
What’s the toughest grease challenge you’ve faced in your kitchen? Share your go-to tricks or questions in the comments — I’d love to hear how you tackle it. And for more practical, home-improvement tips and guides, visit Build Like New — where smart fixes meet lasting results.
Disclaimer: The cleaning methods mentioned here are for general household use. Always test any product or solution on a small, hidden area first to ensure it’s safe for your specific surface. Build Like New is not responsible for damage caused by improper application or use of cleaning products.

