
7 Signs You Have Pantry Moths—and the Fastest Way to Get Rid of Them
Last summer, I opened my pantry and froze. Tiny moths fluttered out like they owned the place, and every jar of flour, rice, and cereal seemed suspect. I cleaned everything twice, tossed half my groceries, even sprayed natural repellents that promised miracles. Two weeks later, they were back — worse than before.
If that sounds familiar, you’re not alone. Pantry moths have this frustrating habit of coming back no matter how spotless your kitchen looks. Most people don’t realize that it’s not the moths you see — it’s the hidden mistakes we make every day that invite them in. Things like keeping food too long, trusting “sealed” boxes, or skipping the tiny cracks where eggs hide.
In this guide, I’ll show you seven simple mistakes that might be attracting pantry moths right now — and exactly how to fix each one before they take over again. You don’t need harsh chemicals or a pest control bill, just a better understanding of what’s really happening inside your pantry.
Have you ever thought your pantry was clean, only to find moths back a week later? Tell me below — I’d love to know what you tried and what actually worked for you.
Why Pantry Moths Keep Coming Back (Even After You Clean)
You clean every shelf, wipe every jar, and still — a few days later, you see another tiny moth drifting by the sugar jar like nothing happened. I’ve been there too, and the truth is frustrating: it’s not that your cleaning didn’t work, it’s that you didn’t get to their life cycle.
The hidden lifecycle that keeps them alive for weeks
Pantry moths don’t just appear out of nowhere. They live quietly in the smallest gaps of your shelves — eggs, larvae, cocoons, and adults — each stage lasting long enough to outsmart your regular cleaning routine.
Here’s how it plays out:
- Eggs hatch within 4–7 days, often inside sealed food packages.
- Larvae feed for 2–3 weeks, hiding deep in cracks or food corners.
- Cocoons stick to wood, metal, or cardboard, invisible until they hatch again.
Even if you clean every visible spot, a single untouched egg can restart the whole infestation. That’s why the problem feels endless — it’s not your effort, it’s biology working against you.
Why your ‘deep clean’ may still leave eggs behind
You might scrub every surface, but pantry moth eggs are nearly transparent and glued to surfaces you don’t expect — the underside of shelves, screw holes, the rim of your flour jar lid.
Most people don’t think to:
- Vacuum along wall seams and shelf joints
- Disinfect screw holes and corners with vinegar solution
- Freeze newly bought grains before storage
According to the National Pesticide Information Center (NPIC), larvae can survive long periods if food residue remains in hard-to-reach spots. That’s why “deep clean” often fails — it kills the visible problem, not the invisible cycle.
Mistake #1 — Ignoring What’s in Unopened Packages
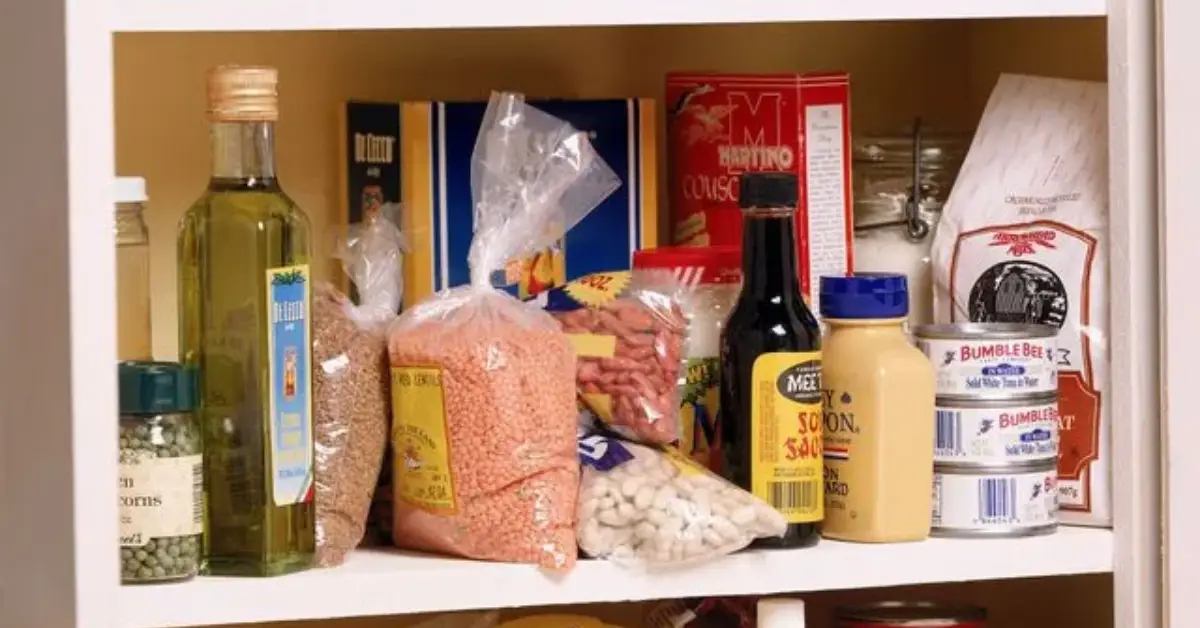
When you see moths, your first instinct is to toss opened packets. But here’s the surprise: the real danger might still be sealed. Pantry moths can sneak into factory packaging long before you even bring it home.
How larvae slip through sealed boxes and plastic
You might think your unopened bag of oats is safe, but thin cardboard and plastic film are no match for larvae that can chew through soft packaging. I’ve seen people keep infested flour for months, wondering why the moths never leave. Always check for:
- Tiny web strands inside or around unopened boxes
- Powdery residue or small brown clumps in grains
- Minute holes near corners or seams
Even one contaminated bag can spread larvae through your entire pantry within days.
Why whole grains, nuts, and pet food are their favourite targets
Pantry moths love oily, nutrient-rich foods — things like raw nuts, dried fruit, birdseed, and pet food. These items have longer shelf lives and often sit in warm corners for weeks.
If you buy in bulk, divide them into smaller airtight glass jars instead of leaving them in store packaging. Label the dates too — rotation stops them from finding a permanent home.
Mistake #2 — Overlooking Hidden Storage Spots
It’s easy to assume your cleaning is complete when every visible shelf looks spotless. But pantry moths thrive where you rarely look.
The forgotten corners (and appliances) where eggs hatch
They love warm, dark areas — behind microwaves, near toasters, or under the edge of pantry shelves. Even the rim of jar lids can hold cocoons. A few minutes with a flashlight can reveal what daily cleaning misses.
Focus your next inspection on:
- The top corners of cabinets
- The space under shelf liners
- The creases of reusable grocery bags
It’s not just about cleaning what you see — it’s about hunting where they hide.
Why vacuuming alone doesn’t cut it
Vacuuming is great for crumbs, but not for eggs glued into corners. Those eggs can survive suction and cling to the nozzle if not emptied right away. Always:
- Empty the vacuum immediately outside your home
- Disinfect the nozzle tip with vinegar spray
- Follow up with a cloth wipe-down of the same area
A quick vacuum might make things look clean, but real prevention means treating it like a search-and-destroy mission.
Mistake #3 — Using Scented Repellents Instead of Real Solutions
I used to tuck bay leaves in my flour jars and call it a day. The internet swears by it, but let’s be honest — the moths don’t care.
The myth of bay leaves, cloves, and essential oils
While these scents may deter moths for a short time, they don’t break the life cycle. Larvae still hatch and eat through your food quietly. Think of these as air fresheners, not barriers.
If your pantry smells great but still has moths, it’s time to shift from scent to strategy.
What actually works: pheromone traps and freezing grains
Real solutions target the source, not the smell.
Try this instead:
- Use pheromone traps to capture adult males and stop breeding early.
- Freeze grains and flour for at least 72 hours before storing — it kills hidden eggs naturally.
- Store everything in airtight containers (glass or thick plastic only).
When you combine traps, freezing, and smart storage, you’ll finally see fewer moths… and a calmer pantry life. If you’re also tired of finding moths outside the kitchen, check out 7 Proven Ways to Keep Moths Out of Your Closet Forever — it walks you through simple, natural tricks to protect your clothes from fabric moths too.
Mistake #4 — Keeping ‘Bulk’ Items Too Long
Buying in bulk feels smart — it saves money and time — but when it comes to dry goods, it’s also an open invitation for pantry moths. The longer food sits, the more time larvae have to settle in, feed, and multiply quietly.
How long-term storage creates perfect breeding zones
Pantry moths don’t need much to survive — just warmth, darkness, and time. When you keep flour, rice, or grains for months, you’re unknowingly creating a stable ecosystem for them. Even unopened bags can hide microscopic eggs that stay dormant until conditions are right.
If you’re storing in bulk, here’s what helps:
- Rotate food every few months — use older stock first.
- Avoid stacking unopened bags directly on top of each other.
- Keep a “use by” note or shelf label to remind yourself what’s due next.
It’s not about giving up bulk shopping — it’s about creating a cycle that stays one step ahead of the moths.
Why glass jars and date labels prevent reinfestation
Glass jars aren’t just pretty — they’re your best defense. Moths can chew through cardboard and thin plastic but not through glass or thick-seal containers. Transparent jars also make it easy to spot webbing or larvae before it spreads.
Try this simple habit:
- Label each jar with the purchase date using masking tape.
- Check older jars monthly before refilling them.
- Keep pet food or seeds in sealed bins, preferably outside your pantry.
A few sticky notes and clear jars can save you weeks of frustration later.
Mistake #5 — Forgetting the Source: Reusable Bags and Bins
You clean the pantry, scrub every shelf, but what about the bags and bins you bring food home in? Most people overlook them — and that’s exactly where the problem begins again.
Cloth bags and storage containers that trap larvae
Reusable grocery bags, cloth bins, and airtight boxes might look spotless but can hold tiny larvae in seams or lids. Those invisible hitchhikers wait for warmth and start the cycle again the moment food returns.
Before you reuse anything:
- Turn cloth bags inside out and shake them under sunlight.
- Wash them in hot water and dry fully.
- Inspect bin lids and edges for silky residue or tiny webbing.
If you reuse containers without cleaning them, you’re unknowingly bringing the moths right back home.
How to sanitise safely without toxic sprays
Skip the harsh stuff — your pantry doesn’t need chemical fumes. Go simple instead:
- Mix equal parts white vinegar and warm water.
- Add a pinch of baking soda or lemon juice for extra disinfecting power.
- Wipe down and air-dry completely before refilling.
As The Spruce explains, natural cleaners like vinegar are effective at removing food residue and moth eggs without leaving harmful residues.
Eco-friendly doesn’t mean unsafe — it just means smart, clean, and consistent.
Mistake #6 — Not Checking Ceiling Cracks and Shelf Edges
If you’ve cleaned everything and still see moths, try this — look up. Most people stop at eye level, but pantry moths don’t. They climb, nest, and hide in places you’d never think to check.
Where moths lay eggs you never expect
They love warm, quiet spots where no one disturbs them:
- Ceiling corners and light fixtures.
- Shelf brackets, screw holes, and wall seams.
- The top lip of cabinet doors or wooden edges.
A quick scan with a flashlight can reveal tiny cocoons you’ve missed for months. Once you spot them, you’ll realise why they kept coming back.
How to seal and caulk like a pro
Once you’re sure the area’s clean and dry, use a thin line of silicone caulk to seal cracks and gaps along shelves and walls. That alone blocks their favourite hiding zones.
Quick tips:
- Clean and dry the area first.
- Apply a small bead of caulk and smooth it with a damp finger.
- Recheck every few months for any gaps or peeling edges.
It’s an easy weekend fix that can make your “moth-free pantry” last for good.
Mistake #7 — Throwing Away Food Without Treating the Space
Tossing infested food feels like victory — until you open the pantry next week and find another moth. That’s because they don’t just live in the food; they live around it.
Why cleaning the air and surfaces matters more
Even after you clear everything out, airborne eggs and larvae can cling to cracks, air vents, or the corners of your shelves. Every time you open the door, they scatter again.
Do this after every cleanup:
- Keep pantry doors open for a few hours to air things out.
- Run a fan or dehumidifier to remove excess moisture.
- Wipe handles, hinges, and light fixtures — moths hide in these small spots.
A clean pantry is more than just empty shelves; it’s about treating the space like a fresh start.
Simple disinfectant + vinegar mix that disrupts eggs
Mix white vinegar, warm water, and a teaspoon of baking soda, spray every surface, and let it sit for 10 minutes. The mild acidity helps loosen and destroy eggs without any toxic residue.
If you have a handheld steamer, use it for corners and seams — heat kills eggs instantly and sanitises at the same time.
Pantry moths might be stubborn, but if you treat both the food and the space, you’ll finally stop the cycle for good.
Your turn: Have you ever found moths returning even after a total cleanout? What’s the one trick that finally worked for you? Drop it below — your tip might save someone else’s next grocery haul.
Fast Fixes: The Right Way to Get Rid of Pantry Moths for Good
When you’ve already cleaned everything and those moths still reappear, it’s time to reset your pantry from the ground up — safely and naturally. I’ve done this process several times, and it always works when done methodically.
Step-by-step natural removal guide (based on NPIC & USDA Food Safety guidelines)
Here’s the plan I follow whenever I need a clean, pest-free restart:
- Empty every shelf — remove all jars, boxes, and bags.
- Vacuum every corner, bracket, and crevice to remove hidden crumbs and larvae.
- Wipe down with white vinegar and warm water — it dissolves eggs and disinfects surfaces.
- Inspect each food item carefully for webbing, clumps, or strange odours.
- Let the pantry air out for at least an hour before restocking.
The U.S. Department of Agriculture (USDA) emphasises that proper cleaning and inspection of food storage areas are key to preventing pest contamination and maintaining household food safety.
Following these principles gives you a clean base — no toxins, no chemicals, and no lingering larvae.
Freezer treatment, pheromone traps, and airtight storage
Once everything is out, it’s time to eliminate what’s left:
- Freeze grains, flour, and nuts for 72 hours to destroy eggs naturally.
- Place pheromone traps to catch adult moths and stop their breeding cycle.
- Use airtight glass or thick plastic containers for all dry goods going forward.
Freezing stops larvae before they hatch, and traps handle the adults — this two-step combo works faster than any spray.
24-hour reset routine (with vinegar & vacuum combo)
If you ever spot new moths, here’s your 24-hour plan:
- Vacuum again, focusing on ceiling edges and joints.
- Spray vinegar solution along shelves, walls, and hinges.
- Keep doors open overnight to air out the space completely.
- Replace traps in the morning for any new flyers.
You don’t need chemicals or professional treatment — just discipline, a vacuum, and vinegar.
Prevention Plan — Keeping Moths Out Permanently
Once you’ve cleared them out, prevention is the real victory. Pantry moths return only when conditions suit them, and these habits make sure they never feel at home again.
The ‘Pantry Rotation Rule’: label, date, and purge every 3 months
Pantry pests thrive on forgotten food. That’s why I follow the three-month rotation rule — label, date, and review everything quarterly.
Here’s what to do:
- Mark each new item with its purchase date.
- Keep older stock in front so it’s used first.
- Set a three-month reminder for a quick cleanout.
Regular rotation means nothing ever sits long enough to attract pests — or spoil without you noticing.
Temperature and humidity control checklist
Dry goods should always be stored in a cool, clean, and well-ventilated space to prevent both pests and mould. Pantry moths prefer warmth and moisture — remove those, and they won’t survive.
Quick checklist:
- Keep pantry temperature below 25°C (77°F).
- Use dehumidifiers or silica gel packs in corners.
- Fix small leaks or damp spots that add moisture.
- Allow airflow — leave the door slightly open after cleaning.
Your pantry should feel like a cool, dry storage room — not a warm nesting spot.
Safe natural deterrents (lavender bags, diatomaceous earth)
A few gentle, natural deterrents can help keep things moth-free year-round:
- Lavender sachets or cedarwood blocks in pantry corners.
- Food-grade diatomaceous earth dusted along shelf edges.
- Clove or mint leaves in reusable pouches to add scent and discourage nesting.
These aren’t replacements for cleaning — they’re your low-effort insurance policy. A little care and airflow go a long way toward a calm, pest-free pantry. And if you like using natural, non-toxic fixes that actually work, you’ll love How to Keep Your Home Stink Bug-Free with 10 Simple Natural Methods — it shares more safe and effective ways to keep pests out of your living spaces.
What about you? Have you tried freezing your food or rotating your pantry to keep moths away? Share what’s worked best for you — your tip might help someone finally win their own kitchen battle.
Quick Table
| Problem | What Attracts Moths | Fix It With |
|---|---|---|
| Stored grains & flour | Heat + stale air | Freezer & airtight jars |
| Hidden larvae | Cracks & corners | Vinegar + vacuum |
| Reused bags | Larvae remnants | Wash with hot water |
Sometimes all you need is a quick visual to remember what really works. This simple table sums up everything you need to keep pantry moths from ever taking over again — short, clear, and easy enough to save for your next cleanup day.
Before You Go — The One Rule Most People Miss
Always treat prevention like cleaning — not the other way around
Most people wait for a problem before they act. But real pest control isn’t about reacting — it’s about maintaining. Treat prevention the same way you treat cleaning: something you do regularly, not just when you see a moth.
A few minutes every few weeks can save you from losing an entire shelf of groceries. Keep your jars sealed, rotate your stock, and never underestimate the power of good habits.
While you’re already refreshing your pantry habits, it’s the perfect time to prepare your whole home for the season ahead — read 5 Must-Do Home Tasks This November to Stay Winter-Ready for quick, practical steps to keep everything in top shape.
If this guide helped you spot what you were missing, share your own pantry moth story or cleaning hack in the comments below — someone else might need exactly your tip.
And if you love practical, real-life home fixes that actually work, visit Build Like New for more expert-tested guides and everyday DIY solutions that keep your home in perfect shape.
Disclaimer: The information in this article is for general household guidance only. Always follow product labels and official safety recommendations from trusted sources like the USDA when handling food or cleaning supplies.

