
5 Proven Tricks to Make Your Flat Couch Cushions Look Full Again
Most people don’t notice their couch cushions going flat until one day they sit down and feel that sudden drop. I’ve been there too — sinking into a spot that used to feel supportive, wondering if the entire couch is done for. The good news is, flat cushions aren’t the end of your sofa. In fact, most of the time, it’s a fixable problem you can handle in minutes once you understand what’s really going on inside the cushion.
When I’ve helped clients with this issue, the first thing I look for is the cause. Sometimes the foam has compressed. Sometimes the filling has shifted. And sometimes the base underneath the cushion is the real culprit. Once you know which one you’re dealing with, the solution becomes a lot clearer — and a lot faster.
In this guide, I’ll walk you through expert-backed methods that actually work in real homes. You’ll see the quick fixes you can try right now, the longer-lasting repairs professionals use, and the simple checks that keep your couch from flattening again.
Before we dive in, tell me something: what kind of couch do you have — zippered cushions or sewn-in ones?
1. Diagnose the Problem Quickly
If you and I were standing in your living room right now, I wouldn’t start by fluffing anything. I’d start by figuring out why the cushion went flat in the first place. Most people skip this step and jump straight into fixing — and that’s how cushions get damaged, foam gets torn, or the problem comes back a week later.
What “flat” really means
When a cushion looks flat, it usually comes down to one of three things:
- Compressed foam — the most common reason. Foam loses its bounce over time, especially in the center seat where everyone sits.
- Shifted or compacted fiber — the filling bunches up in corners or thins out in the center.
- Worn-out support underneath — webbing or a soft base panel starts sagging, and the cushion sinks with it.
You don’t need to be technical to spot these. Once you know what to look for, the pattern is obvious.
Do a quick 3-step spot check
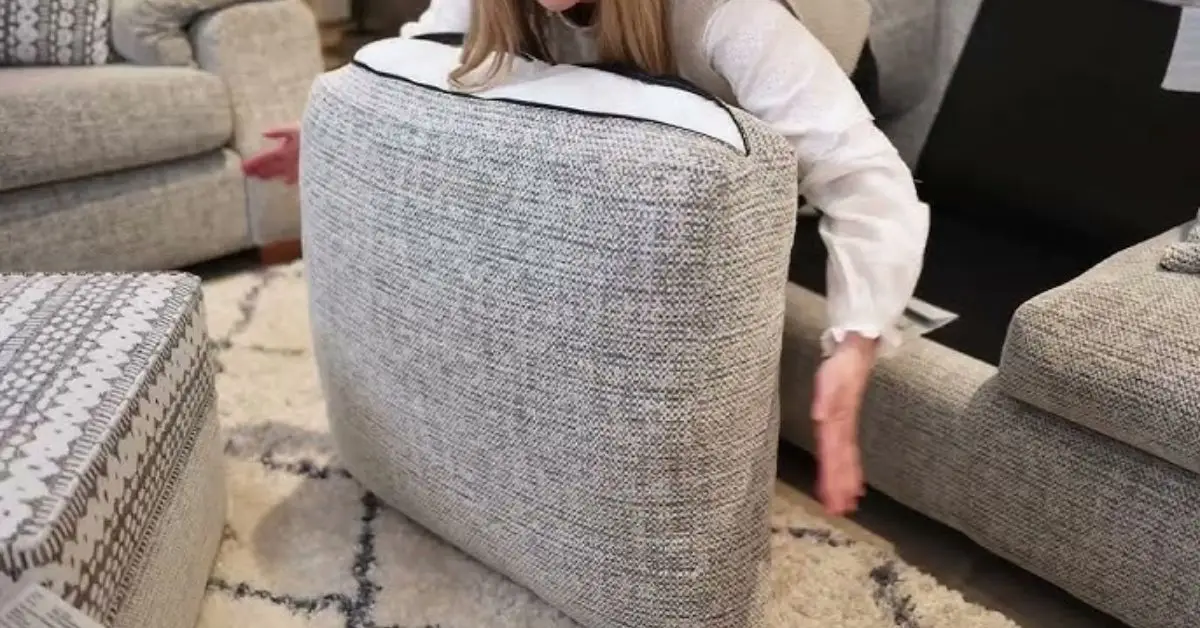
ScS Sofas
Here’s the simple test I’ve used in dozens of homes. It takes under a minute.
- Remove the cushion: Lift it off the couch and feel the weight. A cushion that’s too light often means the fill has thinned out.
- Do a press test: Press the foam with your palm.
- If it rebounds slowly, it’s compressed.
- If it feels lumpy or uneven, the fiber filling has shifted.
- Check the base under the cushion: Run your hand along the platform.
- If it dips in the middle, the couch itself is sagging.
- If you feel loose webbing or a soft board, the support layer needs attention.
Most “flat cushion” guides don’t mention this base check, but it’s important. Even a brand-new cushion will sink if the structure underneath is weak.
Surface issue or structural issue?
Here’s the quick way I separate the two:
- Surface issue (easy fix): Flattened foam, bunched fiber, uneven corners, light cushion weight.
- Structural issue (moderate fix): Soft base, sunken frame, loose straps, or webbing that flexes more than it should.
If it’s surface-level, the fixes are fast. If the base is the problem, no amount of fluffing will help — you’ll need to add or reinforce support later.
2. Quick, No-Tool Fixes You Can Do in Minutes
Now that you know what’s causing the problem, let’s talk about the fast fixes. These are the same steps I share with clients who just want their couch to feel comfortable again right now — no sewing, no cutting, no tools.
And yes, these genuinely work.
Flip, rotate, and re-fluff
Most cushions don’t wear evenly. The front edge gets all the pressure, while the back barely moves. When you flip and rotate, you’re simply redistributing that pressure.
Here’s what to do:
- Flip the cushion upside down.
- Rotate it so the part that supported the front now sits at the back.
- Push the filling from the corners toward the center with both hands.
This alone can restore a surprising amount of lift. Homes & Gardens explains this same idea — the filling needs to be moved back where your body presses the most. If you’re refreshing your living room while fixing your cushions, you may also find it helpful to remove bulky items that add visual clutter — a principle covered in 10 things you’ll never see in a minimalist’s home.
Beat the cushion (gently)
I know it sounds silly, but it works. A quick beating loosens compacted fiber and helps the cushion breathe again.
Do it like this:
- Hold the cushion upright.
- Use your hands or a soft item (like another pillow).
- Give firm, even hits across the surface.
The goal isn’t to smack it hard — just shake the filling loose so it can spread again.
Try the steam or sunlight revival trick
Foam reacts to heat. A little warmth helps it expand, soften, and regain shape.
Two easy ways:
- Steam method: Use a clothes steamer and hold it a few inches away. Move slowly across the surface so the foam warms without soaking the fabric.
- Sun method: Place the cushion outside in direct sunlight for 1–2 hours. The foam warms up and naturally expands.
Just make sure you don’t overheat delicate fabrics.
Real-user hacks from Reddit
If you like real-world experiences, these came straight from Reddit threads — stuff regular people tried and shared because it worked for them.
- Restuffing without replacing the entire foam: “You’ll have to open it and adjust the stuffing … order new filler … then refill.” This is usually the quickest way to refresh a cushion that’s lost volume.
- Steam brings foam back to life: Some users swear that steaming compressed cushions makes the foam “wake up” and regain its shape, especially after years of pressure.
You don’t need tools for these — just a few minutes and whatever you already have at home.
3. Add Simple Support Under the Cushion

When the cushion still sinks even after fluffing, the support underneath is usually the real issue. I’ve checked plenty of sofas that looked fine on the outside but dipped simply because the base lost its strength over time. Adding the right support can make the seat feel new again.
Use Cushion Support Pads or Boards
This is the fastest fix when the base is weak.
- Dense foam panels add soft but firm lift.
- Thin plywood or cushion support boards offer stronger, longer-lasting support.
I’ve used both in client homes, and the difference is instant — you slide the support under the cushion, level it out, and the seat rises right back up. Even many industry experts recommend dense foam or wood panels for restoring stability.
Reinforce Spring or Webbing Structure
If you removed the cushion earlier and saw stretched webbing or tired springs, you’ll need more than support boards. Light re-webbing works well for mild sagging and is a common fix among upholstery professionals.
You’ll need a few basic tools:
- Staple gun
- Upholstery webbing
- Fabric or support strips
- Scissors
- A pry tool or flat screwdriver
When to Call a Professional
If the springs are broken, the webbing has torn, or the wood frame is cracked, I always recommend bringing in a professional. Structural damage spreads quietly, and forcing a DIY fix can create a bigger repair later.
4. Re-stuff or Replace Cushion Filling (Medium-Term Fix)
When a cushion has lost its loft for good, no amount of flipping or steaming will save it. I’ve opened many flat cushions only to find foam that has collapsed or fiberfill that’s turned into thin, compact layers. Restuffing is the most reliable way to bring the shape back.
Choosing the Right Stuffing Material
Each fill type feels different and lasts differently:
- High-density foam: Best for firmness and longevity.
- Feather / down: Very soft but needs regular fluffing.
- Synthetic fiberfill: Affordable and easy to add volume with.
- Upholstery batting: Wraps around foam blocks for a smoother outer surface.
For a simple breakdown on filling material and techniques, The Spruce has a helpful guide.
How to Restuff — Step by Step
Here’s the method I use with clients:
- Open the cushion cover (zipper or seam).
- Remove the old filling; save anything that’s still usable. If you notice pet smells while opening the cushion, you can freshen the fabric naturally using the methods in 7 natural tricks to remove dog and cat odors without harsh chemicals.
- Insert the new foam block or pack in fresh fiberfill.
- Shake and compress the cushion so the fill spreads evenly.
- Zip it shut or sew the seam closed.
Once you’ve done this once, you’ll be surprised how easy it is to fix other cushions too.
Tools & Materials You’ll Need
Keep these nearby:
- Polyester fiberfill
- Quilt or upholstery batting
- High-density foam block or cut-to-size foam
- Fabric glue (optional)
- Heavy-duty zipper or sewing tools for sewn covers
- Staple gun for inserts that need securing
5. Quick Fix Products That Work in Minutes
Some people don’t want to open cushions or deal with tools — they just want something they can buy, slide into place, and feel the difference right away. These options work well when you need a fast, reliable improvement.
Cushion Support Pads & Inserts
If the main issue is a weak base, support pads are the quickest upgrade.
- ATORSE Couch Cushion Support Pad: A dense foam pad that slides under the cushion and immediately lifts the seat. I’ve used similar pads in quick-fix situations, and they make a noticeable difference in firmness and height.
Replacement Foam Options

When the cushion itself has collapsed completely, replacing the foam gives the best long-term boost.
- Foamma High-Density Upholstery Foam Cushion: Ideal for seats that need solid, supportive structure again.
- Custom Cut-to-Size Upholstery Foam: Great when your couch has unique dimensions — you get a perfect fit without trimming.
Fiber / Batting Fillers
If the cushion feels flat but not “dead,” fiberfill can restore volume.
- Polyester Cushion Insert / Fiberfill: Lightweight, affordable, and easy to pack into corners where the fill has thinned.
Maintenance Tips to Prevent Future Flattening
Once your couch feels comfortable again, a simple maintenance routine keeps it from slipping back into that sagging shape. I always give clients these habits after we finish restoring their cushions.
Develop a Fluff / Rotate Routine
Cushions flatten faster when pressure stays on the same spot.
- Rotate or flip cushions every few weeks.
- Re-fluff weekly or biweekly, depending on whether your cushions are foam, fiber, or down.
This small habit spreads out wear and keeps your cushions feeling fuller for longer.
Monitor and Reinforce Base Support
Many guides miss this step, but the base is often the reason cushions sag in the first place.
- Check the underside of the couch every few months.
- Make sure frame screws stay tight.
- Look for webbing that’s stretching or losing tension.
Stay Home Body also highlights how worn support layers under the cushion — not just flattened foam — can create sagging.
Avoid Moisture and Compression Damage
Foam reacts badly to moisture and long-term weight.
- Keep cushions dry and let them breathe.
- Don’t leave heavy objects or bags sitting on one spot for long periods.
- If you use sunlight to revive foam, avoid overexposure — it can weaken fabrics over time.
Since dust and allergens can also settle deep inside sofa fibers, it’s worth checking the overlooked places where buildup happens, as explained in 8 hidden spots in your home where allergens hide.
When to Replace Entire Cushions (Not Just Repair)
There’s a point where fixing the same cushion again and again costs more time and effort than simply replacing it. I always tell people to watch for these signs — they save you from doing work that won’t hold up.
Signs You Need Full Replacement
You’ll know repair isn’t worth it when:
- The foam has completely broken down — it feels crumbly, rubbery, or deflated no matter what you do.
- The support system underneath is damaged — broken springs, torn webbing, or a compromised frame.
- The cushion cover is worn out — seams split open, fabric thinning, or zippers no longer holding.
If two or more of these show up, replacement is the smarter long-term choice.
Replacement Options
You’ve got a few good paths here depending on your budget and how attached you are to the couch:
- Order custom-cut foam with new cushion covers for a fresh, firm feel.
- Hire a re-upholstery service if you want a full makeover without buying a new couch.
- Buy brand-new cushions or replace the whole couch if the structure is too far gone.
Legitimacy Check & Safety / Disclaimer
I always add this section for clients because DIY upholstery can go wrong fast if you’re not careful. A few simple precautions keep everything safe and predictable.
Safety Considerations
- When using a steamer, keep a safe distance so you don’t scorch the fabric.
- When cutting foam, use a sharp utility knife and keep your fingers out of the cutting line.
- When repairing webbing or springs, remember that staple guns can cause injuries — handle with both hands and secure your work area.
Durability Expectations
Every method has its limits:
- Restuffed cushions may feel extra firm at first and then settle over a few days.
- Support boards and quick-fix pads work well, but they’re semi-temporary and depend on how heavily the couch is used.
When to Call a Pro
Get professional help when:
- The couch structure is cracked, warped, or unsafe.
- You’re working with a high-value or antique sofa you don’t want to risk damaging.
Final Take
Before you jump into fixing your couch, here’s the short version of the five expert-approved methods you now have in your toolkit:
- Diagnose the issue so you’re fixing the right problem.
- Try the fast, no-tool methods to revive surface-level flattening.
- Add support pads or boards if the base is sagging.
- Restuff or replace the filling for longer-lasting shape.
- Use quick-fix products when you want instant improvement without DIY.
If you’re deciding where to start, here’s my suggestion:
- For urgent comfort: Try the no-tool hacks right now.
- For an affordable upgrade: Add support pads or get fresh foam inserts.
- For long-term results: Restuff or replace cushions fully.
- For ongoing comfort: Set a monthly reminder to rotate and fluff your cushions.
If you’re ready to fix your couch today, start with the simplest solution and build from there. And if you want more practical, expert-backed home repair guidance, you can explore more tips at Build Like New — where I break down fixes you can actually do.
Disclaimer: All repair methods shared here are based on general home-upkeep practices and personal experience. Always assess your furniture’s condition before attempting any fix. Use tools carefully, follow safety precautions, and stop immediately if you notice structural damage. For expensive, antique, or heavily damaged furniture, consult a professional to avoid injury or further damage.

