
8 Red Flags That Show Your Pipes Aren’t Protected — Fix Them Now
When I walk into someone’s home for a plumbing inspection, there’s one thing I can spot almost instantly: pipes that have been ignored for too long. You can see it in the moisture on the walls, the uneven water temperature, or the quiet hiss behind a sink that shouldn’t be making any sound at all. Most homeowners don’t notice these early clues because nothing dramatic has happened yet. But the truth is, uninsulated pipes rarely stay “just fine” forever. They age faster, waste energy, and fail when the weather swings hard.
If you’ve been seeing small changes around your home—higher bills, strange noises, cold spots in winter—you might already be dealing with the early signs. And once you know what to look for, it becomes much easier to fix the problem long before it turns into an expensive repair.
Let’s start with the signs that matter most. Before we go deeper, what’s the biggest issue you’ve noticed around your pipes lately?
Why Pipe Insulation Is Critical for Protecting Your Home
When I check a home’s plumbing, one of the first things I look for is whether the pipes are insulated. Because if they aren’t, you’re not just risking cold-weather problems — you’re risking hidden damage, higher bills, and early pipe failure.
Here’s why insulation matters more than most people realize:
- It reduces heat loss and energy waste — something even the Building America Solutions Center highlights for everyday homeowners.
- It prevents condensation on cold-water lines, which can create damp spots, mold, or corrosion over time.
- It lowers the risk of freezing and sudden pipe bursts during rapid temperature drops.
- It keeps water temperature stable, so you’re not overpaying just to get hot water to your taps.
- It helps your plumbing last longer by protecting it from extreme temperature swings.
And in most US homes, the pipes that fail first are always the ones in attics, basements, crawlspaces, garages, and exterior walls — the places nobody thinks about until something goes wrong.
How to Identify the Warning Signs — What You’re Actually Looking For
If you’re like most homeowners, you only pay attention to your pipes when something changes — the water feels colder, a wall feels damp, or you hear a sound that wasn’t there last month. Those tiny changes usually show up long before a major problem hits.
The issue is: most SERP articles only focus on winter problems. They don’t talk about year-round issues like condensation, energy loss, corrosion, or noise changes. They also don’t give you simple, quick checks you can do yourself.
Here’s how this article fills that gap:
- You get a clear, practical checklist you can run through without tools.
- You learn early warning signs homeowners usually miss.
- You understand year-round risks, not just winter ones.
- You see why each sign matters, not just what it is.
- You get guidance that’s actually rooted in expert insights — not generic advice.
By the time you’re done, you’ll know exactly what to look for, what it means, and when to act — before a small issue becomes a costly repair.
8 Clear Signs Your Home Pipes Need Immediate Insulation
When I walk through a home with the owner, these are the eight signs I look for first. They’re the ones that show up early, long before a pipe fails or water damage spreads. If you spot even one or two, it’s usually a signal to act before the problem becomes expensive.
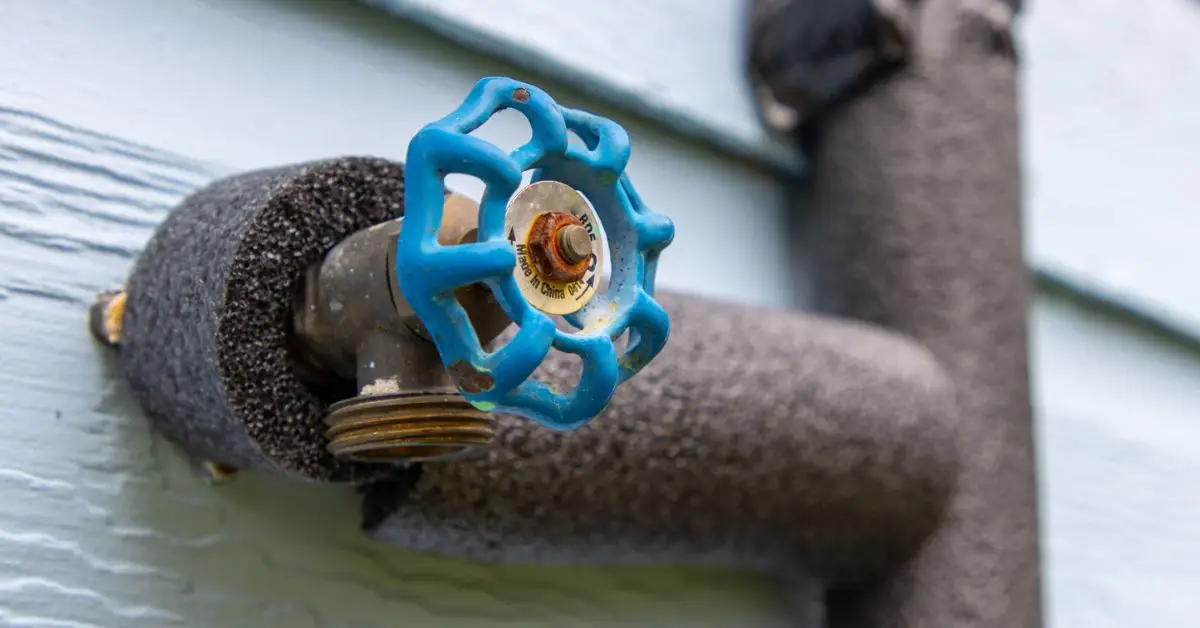
Sign 1: Pipes Freeze or Show Frost in Cold Weather
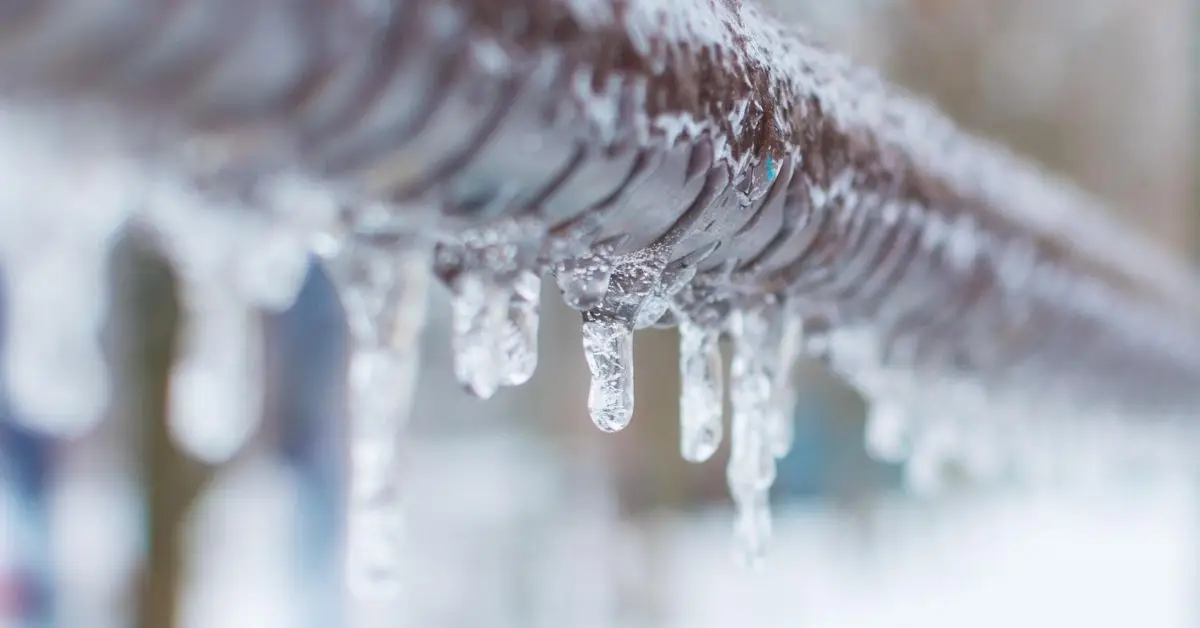
When a pipe freezes, it doesn’t always burst right away. Sometimes the only clue you’ll see is a thin frost layer or a sudden drop in water flow first thing in the morning. I see this most often in basements, garages, outdoor spigots, and crawlspaces — all the places where cold air slips in faster than you expect.
Insulation works like a buffer. It keeps the temperature consistent so the pipe doesn’t hit that danger zone where water expands and pressure builds.
Steps to verify:
- Turn on your faucets early morning and notice if the flow is weak or delayed.
- Touch exposed pipes and look for frost or an icy film.
- Walk through your attic or crawlspace after a temperature drop to check for cold spots.
If you want a deeper look at preventing freeze-ups before they start, check out my full guide on 10 essential tips to prevent frozen water pipes this winter.
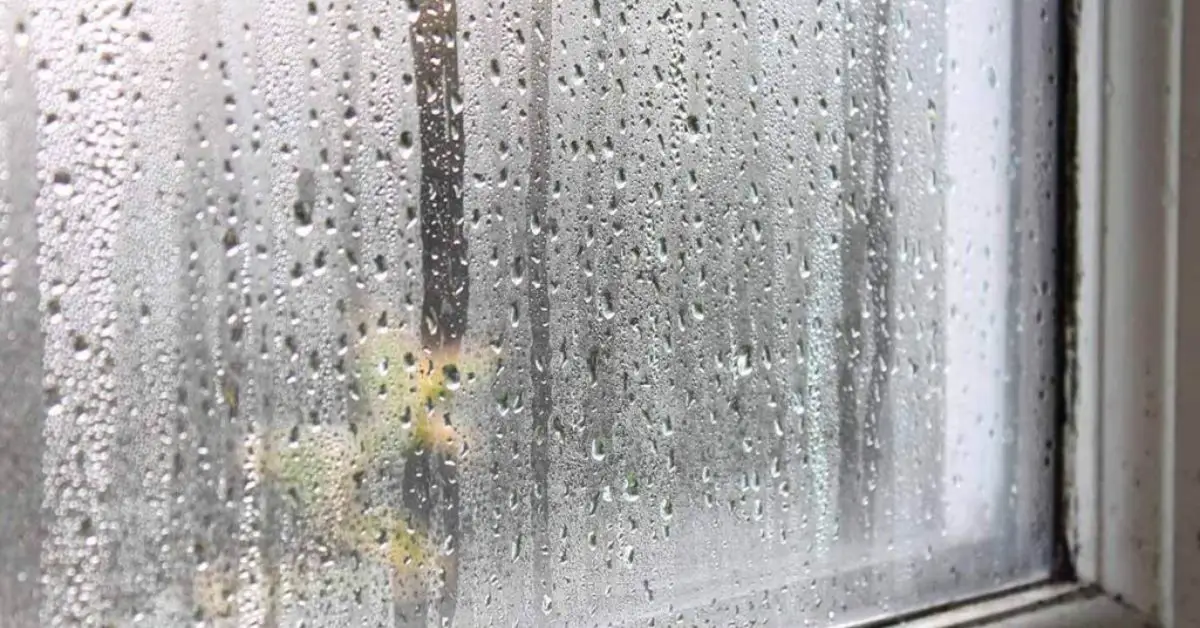
Sign 2: Condensation or Moisture Beads on Cold Water Pipes
Cold water pipes “sweat” when warm indoor air hits the cooler surface. That moisture builds slowly, but once it drips behind drywall or flooring, it can create mold or rust before you ever see the problem from the outside.
This isn’t a winter issue — it happens in humid homes year-round, especially in bathrooms, kitchens, and laundry areas.
Steps to verify:
- Check pipes after showers or cooking — moisture appears fast in humid rooms.
- Look for puddles, stains, or damp drywall near hidden pipe runs.
- Touch the pipe surface to see if it feels wet.
Sign 3: Rising Energy or Water-Heating Bills
If your hot-water pipes aren’t insulated, heat escapes before the water reaches your faucet. That means your water heater works harder and longer. Homes with exposed pipes in basements and attics waste a surprising amount of energy this way.
Even Energy.gov notes that insulation reduces heat loss and helps hot water reach taps faster — a simple fix that cuts monthly bills.
Steps to verify:
- Compare your last two to three months of utility bills.
- Touch hot-water pipes — if they’re warm, heat is leaking out.
- Time how long it takes hot water to reach your taps.
Sign 4: Inconsistent Water Temperatures at Faucets
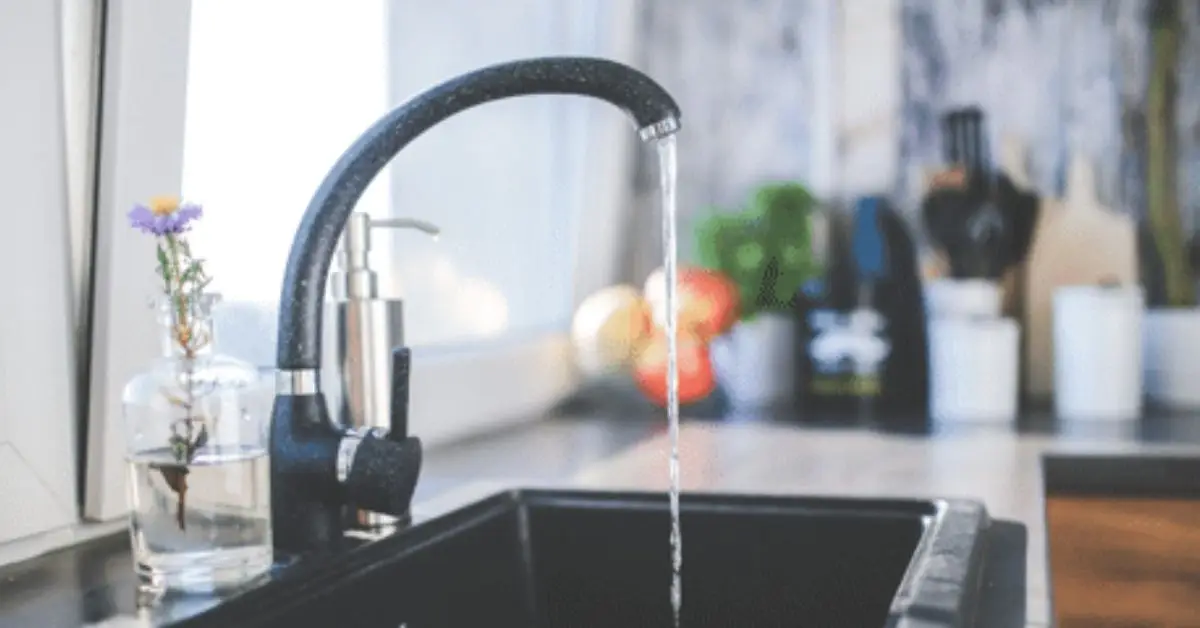
If your water starts hot, then cools, then gets warm again, that’s a classic sign of heat loss along the pipe. In summer, uninsulated cold-water lines can even warm up, which makes the issue more noticeable.
Insulation evens out these swings so you don’t get that frustrating temperature roller-coaster.
Steps to verify:
- Run hot water and check temperature during the first 60 seconds.
- Test again early morning or late at night.
- Inspect long pipe runs for any exposed sections.
Sign 5: Loud Banging, Rattling, or “Water Hammer” Noises
Uninsulated pipes tend to vibrate more when water flow changes quickly. That vibration travels through walls and floors, creating banging, clanking, or knocking sounds. Over time, it can loosen joints and fittings.
Steps to verify:
- Turn taps on and off quickly to see if noise appears.
- Listen for where the sound starts.
- Check exposed metal pipes that pass through tight holes or framing.
Sign 6: Pipes Located in Unheated or Uninsulated Areas
Sometimes the pipe doesn’t show symptoms — the location itself is the warning. In US homes, the riskiest spots are always the same: attics, basements, crawlspaces, garages, exterior walls, and utility areas.
Bare metal or PVC in these spaces is almost guaranteed to have problems eventually.
Steps to verify:
- Walk through your basement, attic, and garage with a flashlight.
- Look for bare pipes along walls, ceiling joists, and floor framing.
- Notice any drafts or cold pockets near the pipe.
Sign 7: Visible Corrosion, Rust, Wear, or Discoloration
Whenever I see rust streaks, green mineral deposits, or a chalky buildup around joints, I know the pipe has been stressed by moisture or temperature swings. Insulation helps regulate both, so corrosion often signals missing or failing insulation.
Steps to verify:
- Check joints, valves, and bends — corrosion shows up there first.
- Look for green, white, or brown stains around metal fittings.
- Press old insulation (if present) to see if it’s soft, damp, or failing.
Sign 8: You Live in a Climate with Temperature Extremes or High Humidity
Every region has its own challenge. Northeastern, Midwestern, and Mountain states face long freezes. Southern and coastal states deal with humidity, condensation, and mold. Both extremes put uninsulated pipes at higher risk.
You can confirm your local patterns using long-term climate data from sources like the National Weather Service — it gives a clear picture of your area’s risk level.
Steps to verify:
- Check your region’s winter lows or humidity averages.
- Inspect outdoor faucets every season.
- Check attic and exterior-wall pipes when the weather shifts.
What to Do Next — A Simple Step-by-Step Action Plan
If you’ve spotted even one of the signs above, here’s the same step-by-step process I walk homeowners through. You can do most of it in one afternoon.
Step 1: Do a whole-home pipe scan
Walk through your house and look for exposed, cold, sweating, noisy, or high-risk pipes. Check attics, basements, crawlspaces, garages, and exterior-wall runs.
Step 2: Mark all problem areas
Use painter’s tape to tag any pipe that needs insulation. It makes the installation phase faster and helps you avoid missing spots.
Step 3: Measure pipe diameter
You only need a simple tape measure. Correct size matters — insulation that’s too loose won’t help, and insulation that’s too tight won’t seal well.
Step 4: Choose the right insulation type
Different areas need different solutions.
- Foam sleeves for most indoor lines
- Fiberglass wrap for hotter pipes
- Vapor-barrier wrap for sweating cold pipes
- Heat tape for recurring freeze zones
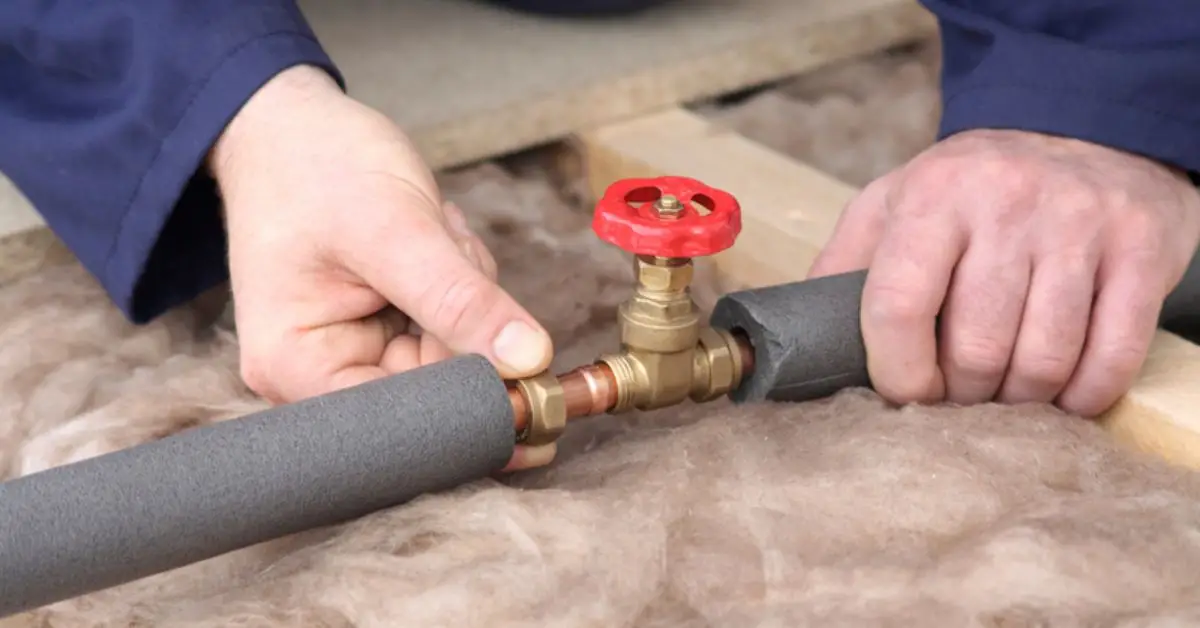
Step 5: Install insulation properly
Clean the pipe, slide the sleeve on, and seal every seam with insulation tape. A snug fit keeps moisture out and heat in.
Step 6: Seal surrounding drafts
Cold air sneaking in around pipes is a major freeze trigger. If you want to handle seasonal prep at the same time, my checklist of 7 winter-proof home fixes you can’t ignore this season pairs well with these insulation steps. Check vents, gaps, rim joists, and attic openings — quick fixes often make a big difference.
Step 7: Test after installation
Over the next 48 hours, check for:
- Stable water temperature
- Reduced condensation
- Fewer noise vibrations
You’ll usually see improvements fast.
Step 8: Call a professional if needed
If you notice corrosion, aging pipes, complicated layouts, or recurring freeze issues, it’s safer to bring in a pro. This isn’t overkill — older homes often have hidden risks.
Is Pipe Insulation Worth It? (A Clear Cost vs Benefit Breakdown)
Most homeowners ask me this question right away — “Is it really worth insulating my pipes?” And the honest answer is yes, because the math rarely works in favor of waiting.
Here’s how it breaks down:
Typical insulation cost vs. burst-pipe repair
Pipe insulation is inexpensive compared to the cost of repairing water damage. Depending on the area, insulating exposed pipes might cost a fraction of what a single burst pipe repair runs.
The Insurance Information Institute notes that water damage claims are among the costliest for US homeowners — and burst pipes are a major cause.
Energy savings over the winter
Insulated hot-water pipes deliver heat faster, which means your water heater runs less. Even small monthly savings add up over a winter season.
Long-term protection benefits
Insulation reduces wear, moisture buildup, corrosion, and pressure swings. That means fewer surprises, fewer repairs, and a plumbing system that lasts longer.
Insurance implications
Some insurance policies expect homeowners to take “reasonable steps” to prevent freeze damage. Insulating pipes is one of those steps — and skipping it can sometimes complicate claims after water damage.
Seasonal Homeowner Checklist

This is the quick, printable-style list I give to homeowners who want a simple, no-fuss routine they can follow every year. It keeps your pipes protected no matter where you live or how unpredictable the weather gets.
Inspect before winter
Walk through your attic, basement, crawlspace, and garage. Make sure all exposed pipes are insulated and there are no gaps, loose seams, or worn-out sections.
Check pipes after cold nights
A sudden cold snap is when problems show up first. Confirm water flow, feel for cold spots, and check for frost on exposed segments.
Monitor humidity
High humidity can trigger condensation on cold-water lines. Keep an eye on bathrooms, kitchens, laundry rooms, and any space that lacks ventilation.
Re-inspect insulation every 6–12 months
Insulation settles, shifts, or absorbs moisture over time. A quick check twice a year prevents slow damage.
Drain outdoor lines before freezing seasons
Clear hoses, shut off outdoor spigots, and drain the lines completely. A small step that protects the entire plumbing branch. While you’re preparing the exterior of your home, you can also follow my guide on 10 genius ways to winterize your lawn before it’s too late to keep everything outdoors protected for the season.
Conclusion
When you know what to look for, the early warning signs become obvious. And once you take a few simple steps to insulate your pipes, you protect your home from water damage, energy waste, and expensive repairs that catch most homeowners by surprise.
If any of the signs in this guide sounded familiar, don’t wait for the problem to get worse. Take a walk through your home, follow the checklist, and handle the fixes that make sense for you. And if you’re unsure, it’s always smarter to get help before a small issue turns into a major repair.
I’d love to hear from you. What’s the first sign you’ve noticed in your home? Drop a comment and share your experience — it helps other homeowners too.
And if you want deeper guides, home maintenance tips, or step-by-step tutorials, visit Build Like New. It’s where I share the same advice I give to homeowners in real life — simple, practical, and built for real homes.
Disclaimer: This guide is for general informational purposes only. Every home is different, and plumbing issues can vary based on age, layout, and regional conditions. For safety concerns, major leaks, corrosion, or recurring freeze problems, consult a licensed professional before taking action.

