
10 Must-Follow Steps to Safely Disinfect Your Home After the Flu
After the flu finally leaves your body, it’s easy to think the problem is over. I’ve been there. You start feeling better, life slowly returns to normal, and cleaning the house feels like just another chore to get out of the way.
What often gets overlooked is what the flu leaves behind. Germs don’t disappear when symptoms fade. They settle on things you touch every day—phones, door handles, bathroom sinks, couches, and kitchen counters. If those areas aren’t disinfected properly, the virus can still move from surface to hand, and from hand to another person.
I’m not talking about a quick wipe-down or regular cleaning. Disinfecting a home after the flu is about stopping the cycle—so you don’t get sick again and no one else in your home does either. This matters even more if you live with kids, older adults, or anyone whose immunity isn’t strong.
In this guide, I’ll walk you through clear, practical steps to disinfect your entire home after the flu. You’ll know what to clean first, where germs hide the longest, and how to do it safely without overdoing it or missing critical spots.
Before we get into the steps, let me ask you something honestly: When you clean after being sick, are you confident the flu is truly gone from your home—or are you just hoping it is?
Step 1: Start With High-Risk, High-Touch Surfaces First
When I disinfect a house after the flu, I never start room by room. I start with hands. Anything your hands touch again and again becomes the fastest way for flu germs to move from one person to another.
Think about how often you touch the same objects without noticing. Even if someone is feeling better, these surfaces can still carry germs if they weren’t disinfected properly.
Start here first, always:
- Doorknobs and door frames
- Light switches
- TV remotes and gaming controllers
- Mobile phones and tablets
- Faucets and cabinet handles
The reason I put these first is simple: you can disinfect the whole house, but if these spots are missed, germs keep circulating. The CDC clarifies how frequent hand-contact surfaces fuel transmission, which is why priority matters more than perfection. If you’re short on time or energy, doing just this step well already reduces a big part of the risk. If you want to go a step further without adding more work, I’ve shared a few simple home disinfection hacks that actually work and fit easily into busy routines.
Step 2: Disinfect the Bathroom Thoroughly (Flu Germ Hotspot)

Bathrooms need more attention than any other space, and I don’t say that lightly. Warmth and moisture create the perfect environment for germs to stick around longer.
Even when someone is no longer sick, the bathroom often holds the highest concentration of leftover germs.
Focus on these areas:
- Toilet handles and flush buttons
- Sink taps and counters
- Toilet seat and lid
- Toothbrush holders and soap dispensers
- Towel racks and frequently used towels
One thing many people miss is contact time. Disinfectants don’t work instantly. They need to stay on the surface for the time listed on the label to actually kill viruses. Resources like Disinfecting After a Cold or Flu on the Clorox Learning Center explain why wiping too quickly cancels out the benefit.
Slow down here. This step protects everyone who uses the bathroom next.
Step 3: Deep-Disinfect the Kitchen Without Contaminating Food Areas
The kitchen is tricky. You’re fighting germs, but you’re also protecting food. That balance matters.
I always separate cleaning from disinfecting in this space. First remove crumbs and spills, then disinfect carefully—especially around areas where hands touch more than food.
High-risk kitchen zones include:
- Countertops (especially edges people lean on)
- Refrigerator and microwave handles
- Stove knobs
- Cabinet pulls and drawers
- Sponges and dishcloths
Sponges and dishcloths are often ignored, yet they collect moisture and germs all day. Replace them or disinfect them properly. If you skip this, germs can spread right back onto clean surfaces.
The goal here isn’t to soak everything in chemicals. It’s to break the transfer of germs from surface → hand → mouth.
Step 4: Clean and Disinfect Living Room & Shared Spaces
This is where flu germs spread quietly. Everyone relaxes here, touches the same objects, and rarely thinks about hygiene.
When I clean shared spaces, I focus less on what looks dirty and more on what gets touched the most.
Key areas to disinfect:
- Coffee tables and side tables
- Remote controls
- Game controllers
- Lamp switches
- Couch arms and hard chair surfaces
Shared electronics deserve special attention. They move from hand to hand and are rarely cleaned during regular housework. A disinfecting wipe used correctly goes a long way here.
If more than one person uses the space, this step isn’t optional—it’s protective. Shared areas are often where germs quietly spread, which is why these home disinfecting tips you can’t ignore if you want to stop spreading germs expand on this problem in a very practical way.
Step 5: Properly Disinfect Bedrooms to Prevent Reinfection

This step matters more than people think. I’ve seen flu come back simply because the sleeping area wasn’t handled properly.
Your bedroom is where your body was recovering. Germs can linger on nearby surfaces even after you feel fine.
Pay attention to:
- Nightstands and headboards
- Phones and alarm clocks
- Bedside light switches
- Mattress surface (light disinfecting or steam, never soaking)
You don’t need to drench anything. Gentle, surface-level disinfection is enough. The goal is to reduce exposure during rest, when your immune system is still rebuilding.
If you want to avoid relapse or someone else in your home getting sick next, this step closes the loop.
Step 6: Wash and Sanitize Laundry, Bedding, and Soft Fabrics Correctly
After the flu, laundry is not just laundry. I treat it as part of the recovery process. Flu viruses don’t magically disappear from sheets, blankets, towels, or clothes just because they look clean.
What matters most here is how you wash, not how much detergent you use.
Do this carefully:
- Wash bedding, towels, and frequently worn clothes separately
- Use the warmest water the fabric label allows
- Dry items completely; damp fabric helps germs survive
- Avoid shaking dirty laundry, which can spread germs into the air
Many people ask me whether detergent alone is enough. In most cases, yes—if the water temperature and drying are done properly. Health guidance from Healthline explains how flu viruses can survive on fabrics and why correct washing makes a difference, especially right after illness.
Handle clean laundry with clean hands. It sounds obvious, but this is where reinfection quietly happens.
Step 7: Use the Right Disinfectants the Right Way (Safety + Effectiveness)
This is where good intentions often fail. I’ve seen people disinfect everything and still get it wrong because the product or method wasn’t used correctly.
Disinfecting isn’t about using the strongest chemical. It’s about using the right one, the right way.
What you need to get right:
- Choose products meant to kill viruses, not just clean dirt
- Let the disinfectant sit on the surface for the full contact time
- Never mix chemicals like bleach and ammonia
- Use gloves and proper ventilation
If a disinfectant is wiped off too quickly, it doesn’t do its job. And mixing products can be dangerous, not helpful. Slow, careful use is far more effective than rushing through it.
Step 8: Don’t Forget Electronics and Personal Items
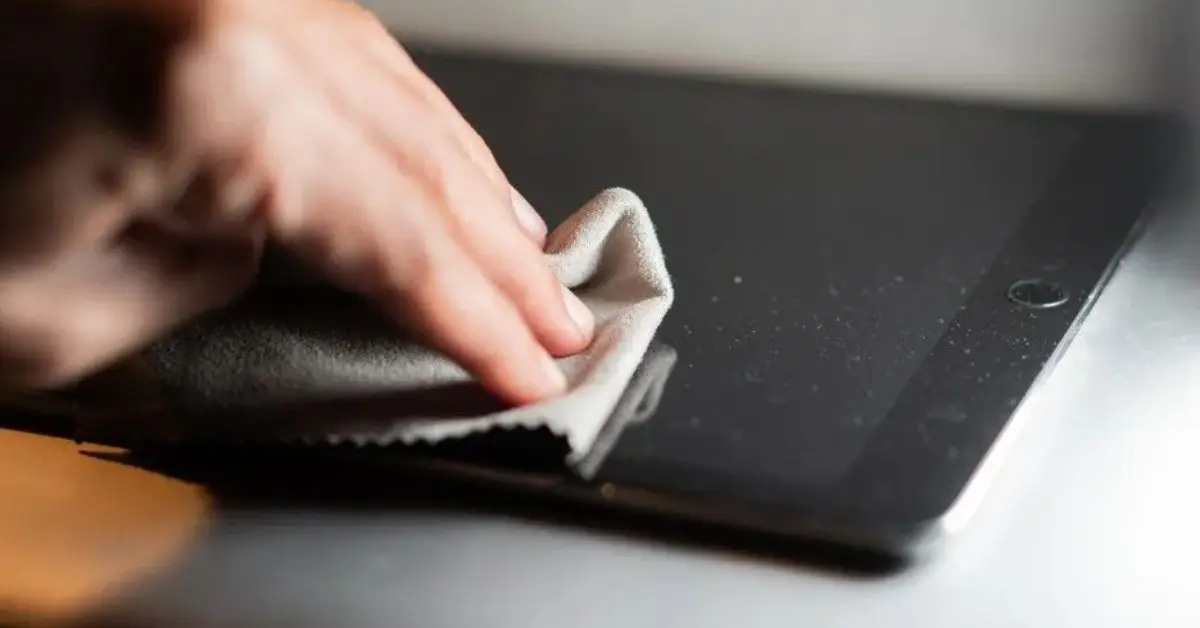
If I had to name one category people miss the most, it’s electronics. Phones, tablets, and keyboards move with us everywhere—especially when we’re sick.
These items get touched constantly and cleaned rarely.
Pay attention to:
- Mobile phones and cases
- Tablets and laptops
- Keyboards and mouse
- Earbuds and headphones
Use alcohol-based wipes or sprays designed for electronics. Light pressure, no soaking, and no harsh chemicals. Let the surface air-dry completely.
This step closes a big gap. You can disinfect every room, but if your phone is still contaminated, germs travel right back to your hands.
Step 9: Improve Air Quality While Disinfecting Your Home
Flu isn’t only a surface problem. I always think about the air while cleaning, because breathing is constant—even when touching isn’t.
Poor airflow traps germs. Good airflow reduces exposure.
Simple things that help:
- Open windows when possible
- Run exhaust fans in bathrooms and kitchens
- Replace or clean HVAC filters
- Avoid spraying disinfectants in closed rooms
Clean air supports everything else you’re doing. This step doesn’t replace surface disinfection, but it strengthens it in a way most people ignore.
Step 10: Maintain a Flu-Safe Home After Disinfection
Once the deep disinfecting is done, the goal shifts. Now it’s about staying ahead, not starting over.
I always recommend a light daily routine instead of waiting for another illness.
What maintenance looks like:
- Quick daily wipe of high-touch surfaces
- Regular hand hygiene habits
- Weekly cleaning of shared electronics
- Extra caution during flu season
You don’t need to deep-clean every day. You just need consistency. A few focused minutes each day reduce the chance of the flu coming back—or spreading to someone else.
Long-term protection comes from habits, not one-time cleaning, which is why these cleaning tips every homeowner should follow for better health naturally support a flu-safe home.
If you had to choose just one habit to keep after all this, which surface would you commit to disinfecting daily?
Post-Disinfection Habits to Maintain a Low-Risk Home
Once the house is disinfected, the real protection starts. I always remind people: disinfection works best when it’s supported by small, repeatable habits. You don’t need to clean nonstop—you need consistency.
Daily wipe list (keep it realistic):
- Doorknobs and light switches
- Phone screens and cases
- Faucet handles
- TV remotes and shared electronics
- Kitchen counter edges
This takes 5–10 minutes, not hours. That’s the point. Small actions done daily matter more than one intense cleaning day.
When to repeat a full disinfect:
- If someone in the house develops new flu symptoms
- After a fever finally breaks
- If another family member gets sick within a week
During flu season, habits matter even more. Regular handwashing, covering coughs, and wearing a mask around a sick family member (especially kids or seniors) reduce spread far more than people expect.
Infection-control professionals often emphasize routine over reaction—daily hygiene beats panic cleaning after things go wrong.
When to Deep Clean vs. Just Spot-Clean
This is where many people either overdo it or not do enough. I decide based on risk, not fear.
You should deep clean if:
- Your home has seniors, infants, or immunocompromised individuals
- Someone had strong symptoms like high fever or prolonged coughing
- Multiple people shared the same bedroom or bathroom
Spot-cleaning is enough when:
- Symptoms were mild and isolated
- One person was sick and recovered quickly
- You’re maintaining cleanliness during flu season
Spot-cleaning means high-touch surfaces only. Deep cleaning means full room coverage. Knowing the difference saves time and energy—and keeps you consistent.
Common Mistakes to Avoid
I see these mistakes all the time, and they quietly undo good work.
- Skipping ventilation while using disinfectants
- Wiping surfaces before disinfectants have time to work
- Using products that are expired or meant only for cleaning, not disinfecting
- Reusing the same cloth across multiple rooms
Disinfecting isn’t about speed. It’s about letting the process work the way it’s designed to.
Disinfection Workflow Summary
If you want something simple to come back to, this is it.
Daily (5–10 minutes):
- Wipe high-touch surfaces
- Clean phones and remotes
- Wash hands before and after cleaning
After illness:
- Full bathroom and bedroom disinfect
- Wash bedding and towels properly
- Clean shared electronics
During flu season:
- Increase hand hygiene
- Spot-clean shared areas daily
- Deep clean only when risk increases
This checklist is designed to be printable and easy to follow—no guessing, no overthinking.
If you’ve read this far, I’d love to hear from you. Which habit do you already follow—and which one do you think you’ll start today? Drop your thoughts in the comments.
And if you want more practical, real-world home care guides like this, visit Build Like New—that’s where I break things down so your home stays clean, safe, and truly livable.
Disclaimer: This content is for general informational purposes only and is not a substitute for medical advice. Always follow product labels and safety instructions, and consult a healthcare professional if flu symptoms persist or worsen.

