
4 Best Ways to Remove Water Stains From Wood
I’ve ruined a wood table once by trying to “fix it fast.” A white ring from a cold glass didn’t look serious, so I grabbed the first hack I found online. Five minutes later, the stain was gone—and so was part of the finish. That’s when I learned something most guides don’t tell you upfront: water stains on wood aren’t all the same, and treating them the wrong way can cause permanent damage.
If you’re here, chances are you’re staring at a cloudy ring, dull patch, or dark mark on wood you actually care about—a dining table, nightstand, or floor. And you don’t want guesses. You want methods that work without sanding, stripping, or making things worse. I get that.
In this guide, I’ll walk you through safe, finish-friendly ways to remove water stains from wood, based on what actually works in real homes—not just theory. I’ll also point out when you should stop and avoid DIY altogether. No hype. No risky shortcuts.
Before we get into fixes, let me ask you something: does your stain look white and cloudy, or dark and soaked in? That one detail changes everything.
Before I touch any stain, I always stop and figure out what kind of water mark I’m dealing with. This one step saves more furniture than any cleaning hack. Most damage happens because people use the right method on the wrong stain.
Let me help you identify yours the same way I do.
How to Identify the Type of Water Stain on Wood
Before I try to remove any water stain, I always pause here. This step decides whether the fix will be quick and safe—or a complete mess. Most people damage wood not because the method is bad, but because it doesn’t match the stain.
Let’s break this down in a way you can actually use.
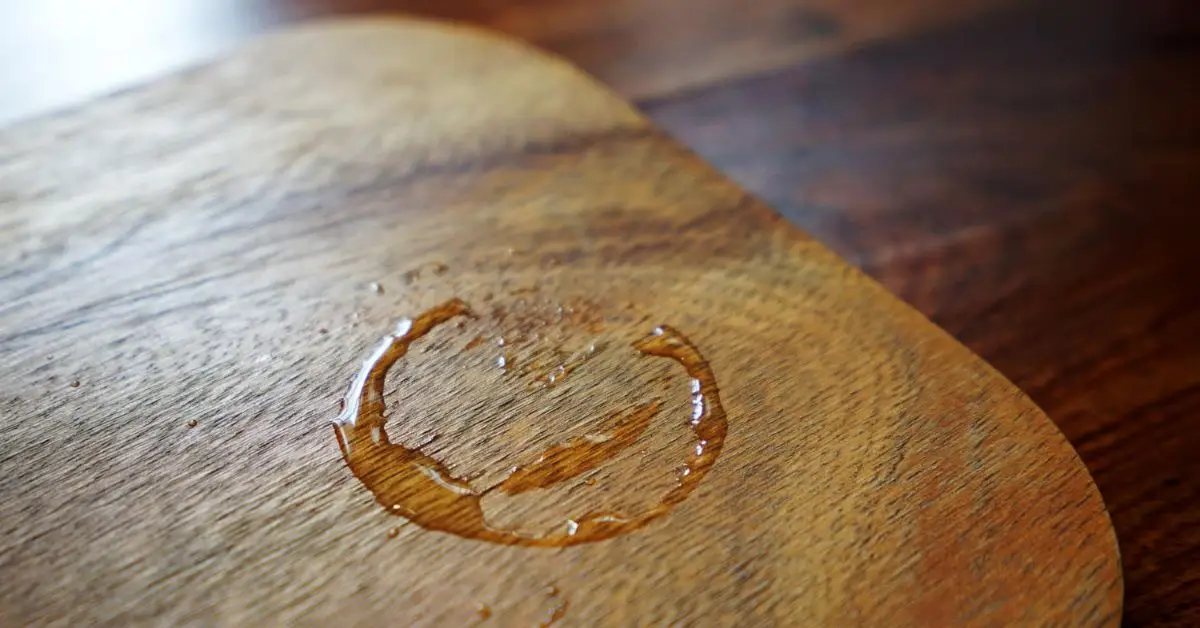
White Water Rings: Moisture Trapped in the Finish
If you’re seeing a white or milky ring, this is usually the best-case scenario.
Here’s what I look for:
- The stain looks pale or cloudy, not dark
- The surface still feels smooth
- The mark appeared after a hot mug, cold glass, or steam
This means moisture is stuck in the protective finish, not inside the wood. These stains respond well to gentle heat or oil-based methods if done carefully.
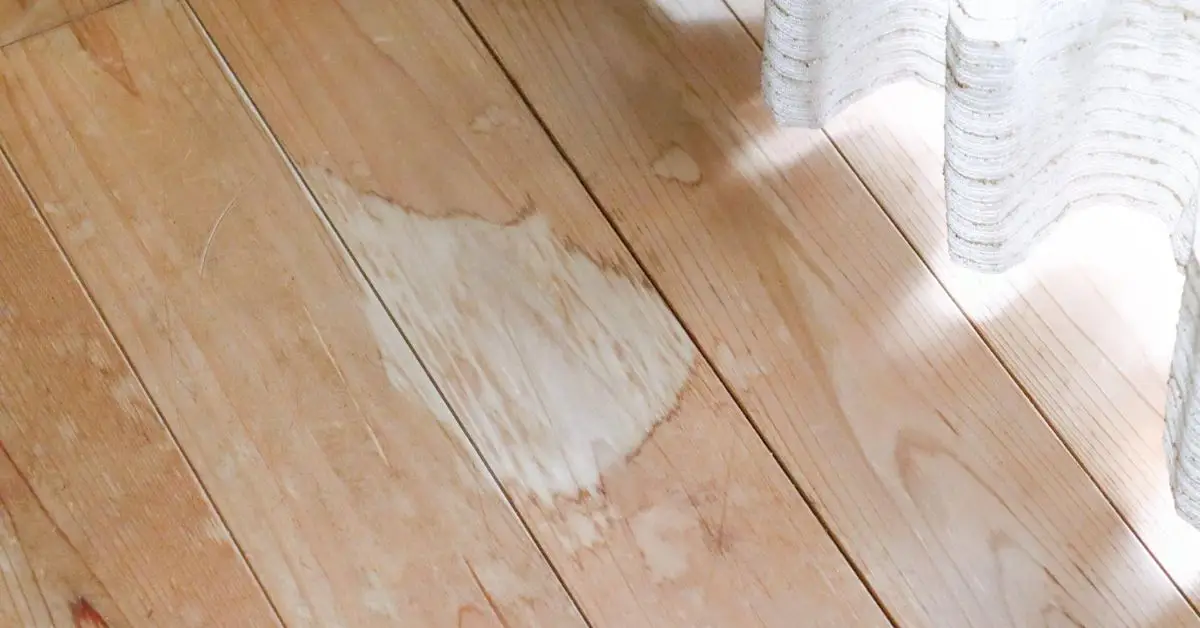
Cloudy or Dull Marks That Sit Just Below the Surface
Sometimes the stain isn’t a clear ring. It looks spread out, dull, or slightly foggy.
In my experience:
- These stains are still finish-level, but deeper
- They don’t fade on their own
- Rushing aggressive methods here can thin or damage the finish
You’ll need patience with these. Slow, controlled techniques work better than force.
Dark Water Stains: When Moisture Reaches the Wood Fibers
This is where I tell people to stop and rethink DIY.
Dark brown or black stains usually mean:
- Water passed through the finish
- The wood fibers absorbed moisture
- Oxidation or mold may have started
If the wood looks darker than the surrounding area or feels slightly rough, surface tricks won’t fix it. Trying them often spreads the damage. Dark water stains aren’t just cosmetic—they’re often a sign of deeper moisture problems, similar to what happens with ceilings when stains keep spreading and get ignored, something I’ve broken down in detail in the top causes of ceiling stains and how to fix them before it’s too late.
According to Martha Stewart’s wood care experts, dark stains usually require refinishing or professional treatment—not household hacks.
How I Check the Wood Finish Before Trying Anything
You don’t need tools for this—just observation.
I do two simple checks:
- If water beads on the surface, the wood is sealed
- If water darkens the spot instantly, moisture is penetrating
Older furniture often has lacquer or shellac, which reacts fast to heat. Modern pieces usually have varnish or polyurethane, which needs gentler abrasion or time.
How You Know the Stain Is Safe to Treat at Home
I move forward with DIY only if:
- The stain is light or cloudy
- The surface feels smooth
- There’s no swelling or texture change
If you’re unsure, that hesitation is your answer. Guessing is how finishes get ruined.
Once you’ve identified the stain correctly, choosing the right method becomes obvious—and that’s exactly what we’ll get into next.
4 Safe Methods to Remove Water Stains from Wood
This is the part where most articles rush—and where most damage happens. I don’t believe in trying everything at once. I match the method to the stain, move slowly, and stop the moment something feels off. That’s how you fix the problem without trading it for a bigger one.
Below are the four methods I actually trust, in the order I try them.
Method 1: Dry Heat (Iron or Blow Dryer)
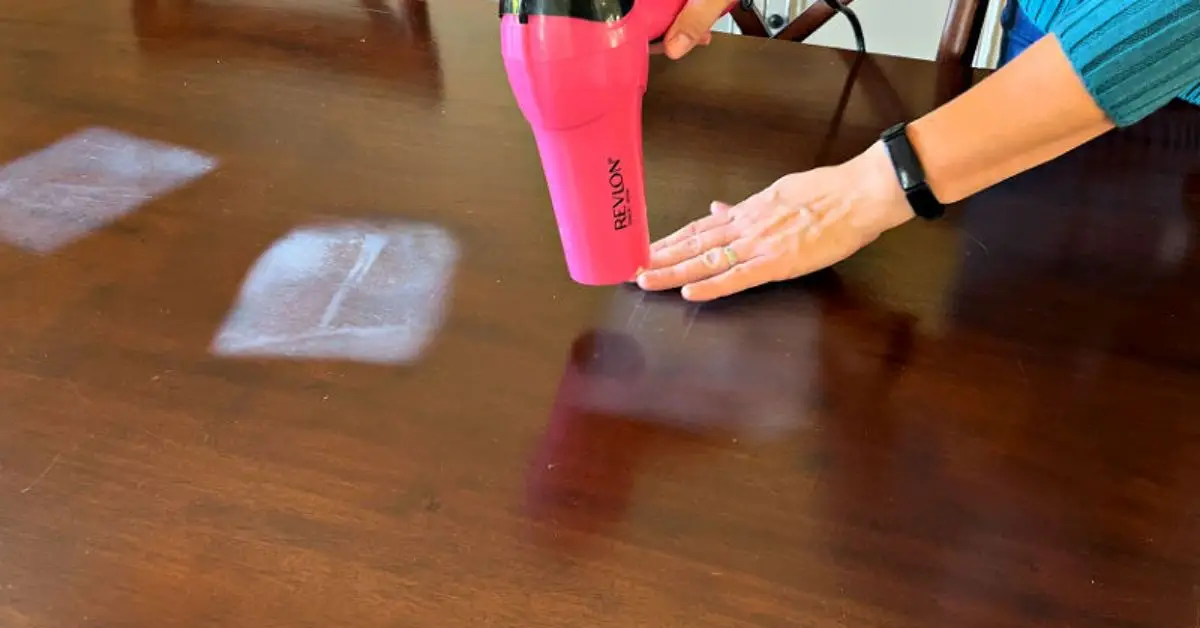
I start here only when the stain is white or cloudy and the surface still feels smooth.
Why this works:
Heat helps trapped moisture escape from the finish. You’re not drying the wood—you’re releasing humidity stuck above it.
How I do it safely:
- Place a clean cotton cloth over the stain
- Set the iron to low heat, no steam (or use a blow dryer on low)
- Keep it moving at all times
- Check every 5–10 seconds
Important warnings I never ignore:
- Never use steam
- Never hold heat in one spot
- Stop immediately if the finish looks shiny or soft
When not to use this:
- Dark stains
- Unfinished or oil-finished wood
- Antique pieces with unknown finishes
Professional cleaners quoted by Architectural Digest stress that heat works only on surface moisture and becomes risky fast if overused.
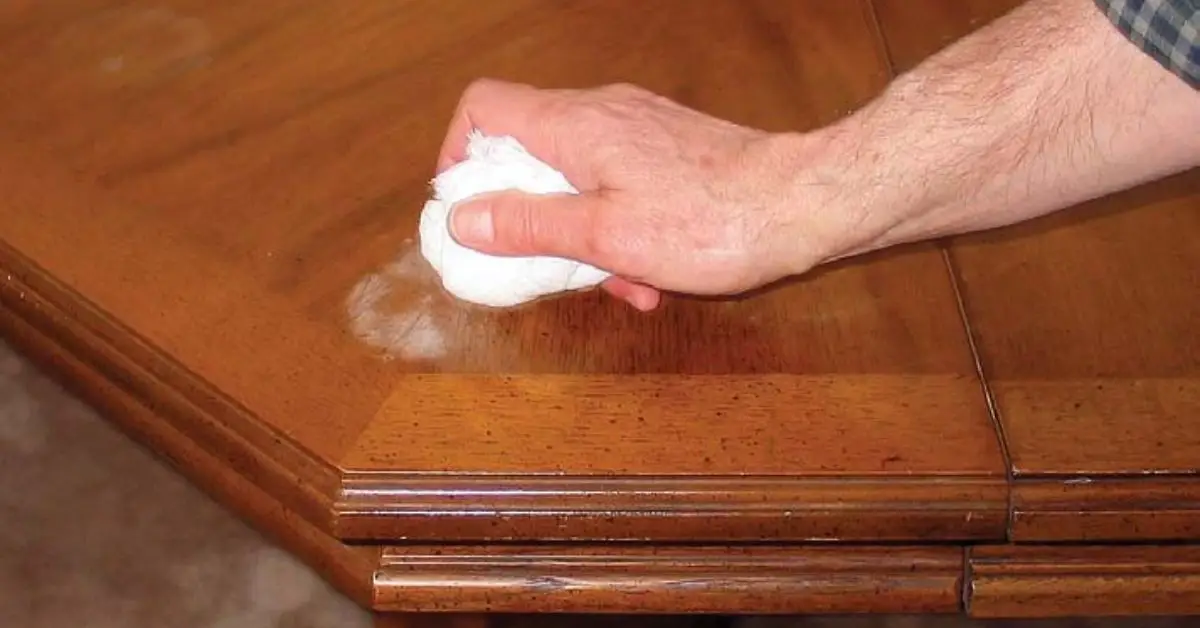
Method 2: Toothpaste + Baking Soda Paste
I use this when heat alone doesn’t work and the stain is still clearly surface-level.
Why this works:
It’s a mild abrasive, strong enough to lift discoloration but gentle enough for most sealed finishes.
Exact mix I stick to:
- 1 tablespoon plain white toothpaste
- ½ tablespoon baking soda
How I apply it:
- Test on a hidden spot first
- Rub gently with a soft cloth, following the grain
- Stop after 30–60 seconds
- Wipe clean with a damp cloth and dry immediately
What to watch out for:
- Don’t scrub
- Don’t repeat more than once or twice
- Never use gel toothpaste
This method gets a lot of love—and criticism—on DIY forums because results depend heavily on pressure and patience. When it works, it works quietly. This is the same mistake I see people make with stainless steel—using the right product but the wrong pressure, which is why I always warn readers about common surface-damaging habits like those explained in stainless steel cleaning mistakes that leave streaks and scratches.
Method 3: Mayonnaise or Petroleum Jelly Overnight
This looks strange, but I’ve seen it work more times than I expected.
Why this works:
The oil slowly replaces the trapped moisture in the finish. You’re not cleaning—you’re balancing.
How I use it:
- Apply a thick layer over the ring
- Cover lightly with a cloth
- Leave it for 6–12 hours
- Wipe clean and buff gently
Best used on:
- Finished wood
- White rings from cold glasses
Not for:
- Dark stains
- Unsealed wood
This method needs patience. If you’re in a hurry, skip it—it’s slow by design.
Method 4: Commercial Wood Cleaner or Restorer
I move to this only when DIY methods fail or the stain is slightly deeper but not fully soaked in.
Why this belongs here:
Some stains need chemical help—but only finish-friendly ones.
How I choose a product:
- Match it to the finish (not all are universal)
- Avoid anything labeled “stripper” unless refinishing is the goal
- Look for restorers, not removers
How I apply without damage:
- Test first, always
- Use minimal product
- Work in small sections
- Wipe off fully—don’t let residue sit
This option suits readers who want a ready solution but still care about preserving the wood.
When Not to DIY: Signs You Need Professional Help
This is the part most guides skip, but I think it matters the most. Knowing when to stop can save you money, time, and a lot of regret. I’ve seen people turn a small stain into a full refinishing job just because they didn’t pause.
Here’s when I personally don’t touch the stain anymore.
Deep, Dark Stains That Don’t Lighten at All
If the stain is dark brown or black and doesn’t change even slightly after gentle methods, it means water has gone deep into the wood fibers. At this point, surface fixes won’t work. You’re looking at sanding, bleaching, or refinishing—jobs better handled by a pro.
Wood Feels Soft, Raised, or Swollen
Run your fingers over the area. If the wood feels spongy, uneven, or puffed up, moisture has caused structural changes. Trying heat or abrasives here can crack the finish or tear the grain.
Cracking, Peeling, or Flaking Finish
If the finish is already breaking down, DIY methods can strip it further. I stop immediately when I see:
- Peeling edges
- Hairline cracks
- Patchy shine
That’s a sign the finish itself is failing, not just stained.
Antique or High-Value Furniture
If the piece has age, history, or sentimental value, don’t experiment. Older finishes react differently, and one wrong move can permanently lower the value. In these cases, professional restoration isn’t overkill—it’s protection.
If you’re hesitating right now, trust that feeling. Stopping early is always cheaper than fixing damage later.
How I Prevent Water Stains on Wood Going Forward
Once you’ve dealt with a stain, the real win is making sure it doesn’t happen again. I keep prevention simple and realistic—no high-maintenance routines.
Everyday Habits That Actually Help
- Use coasters, even for cold drinks
- Add placemats or table runners where spills happen often
- Stick felt pads under planters, vases, and décor
These tiny habits prevent most white rings before they start.
Control Humidity, Not Just Spills
Wood expands and contracts with moisture in the air, not just direct contact. That’s why stains and warping often show up seasonally.
According to guidance from the U.S. Environmental Protection Agency, indoor humidity should stay between 30–50% to prevent moisture damage to materials like wood.
If your home swings outside that range, no stain fix will last long. I’ve learned that many household stains—whether on wood or in places like sinks—come back when moisture and maintenance are ignored, which is exactly why prevention matters just as much as removal, something I also cover in these proven ways to stop that annoying pink stain in your sink.
Protect the Finish Before It Fails
I occasionally refresh surfaces with:
- Furniture wax for sealed wood
- Wood oil for oil-finished pieces
This adds a moisture barrier and keeps the finish from drying out and becoming vulnerable.
Quick Reference: Match the Stain to the Right Method
If you just want a fast answer, this is how I decide what to try first.
| Stain Type | Best Method | Notes |
|---|---|---|
| White ring | Heat or mayonnaise | Surface only |
| Cloudy mark | Toothpaste paste | Test first |
| Dark spot | Commercial restorer | May need a pro |
If you’re unsure where your stain fits, don’t guess. Tell me—what does your stain actually look like right now?
Final Thoughts: Fix the Stain, Don’t Create a New Problem
If there’s one thing I want you to take away from this guide, it’s this: water stains on wood are fixable—but only when you treat the right problem the right way. Most damage doesn’t come from water itself. It comes from rushing, guessing, or copying a method that doesn’t match the stain.
I’ve seen simple white rings disappear in minutes when handled gently—and I’ve seen the same rings turn into permanent damage because someone pushed too hard. The difference is always patience and understanding what the wood is telling you.
If you’re ever unsure, pause. Re-check the stain. And when in doubt, protecting the finish is more important than removing the mark.
I’d love to hear from you now. Have you tried any of these methods before? Did something work—or fail—for you? Drop your experience in the comments so others can learn from it too.
For more practical home fixes, real-world repair guides, and no-nonsense advice, explore more resources on Build Like New. My goal there is simple: help you fix things the right way, the first time.
Disclaimer: The methods shared here are for general guidance only. Results can vary based on wood type, finish, and stain severity. Always test any method on a hidden area first. For valuable, antique, or heavily damaged wood, professional restoration is recommended.

