
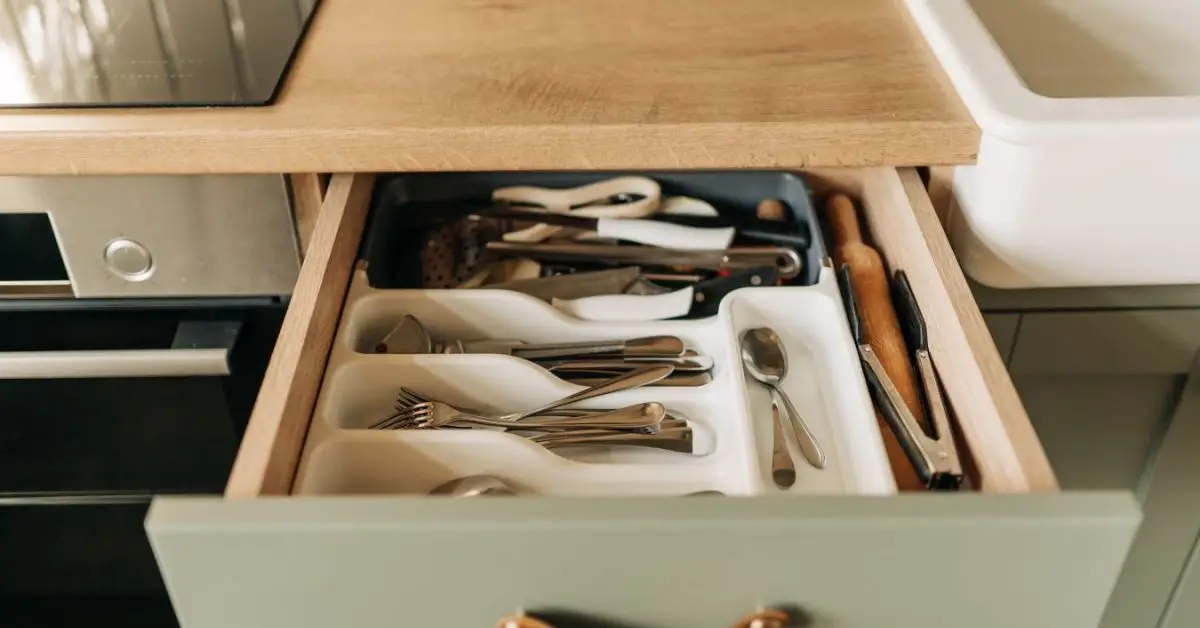
2 Easy Fixes for Sticky, Greasy Kitchen Drawers That Actually Work
I’ve cleaned more kitchens than I can count, and I’ll say this straight: sticky grease inside kitchen drawers is one of the most ignored messes—and also one of the most frustrating. You open a drawer to grab a spoon, and your fingers come back tacky. Not dirty-looking. Just… sticky. That’s grease buildup doing quiet damage over time.
I’ve tested what actually works in real homes, not just what sounds good on paper. The good news? You don’t need harsh chemicals, expensive cleaners, or an hour of scrubbing. You need two simple tricks, used the right way, that cut through grease fast without ruining the drawer finish.
If your kitchen drawers feel sticky even after cleaning, you’re not doing anything wrong—you’ve just been using the wrong approach. Let me show you what actually works.
Before we jump in, quick question for you: Are your drawers lightly greasy—or full-on sticky and grimy from years of buildup?
What Causes Sticky Grease Buildup in Kitchen Drawers
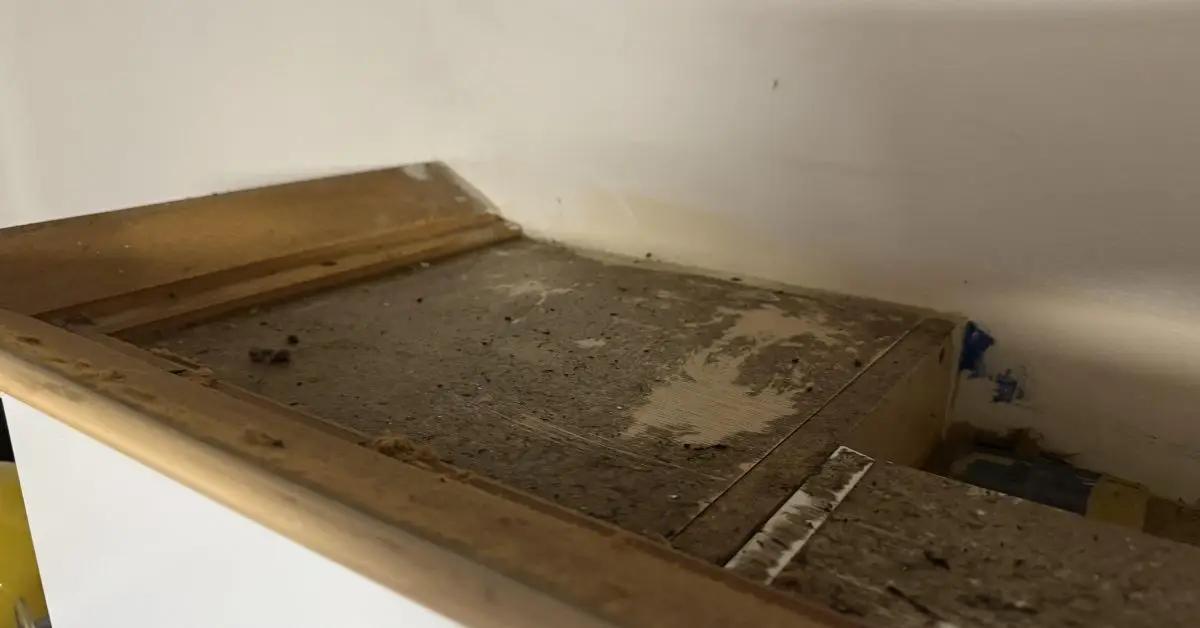
I’ve noticed this pattern in almost every real kitchen I’ve worked with: people clean what they can see. Countertops, cabinet doors, stovetops. Drawers stay ignored, and that’s exactly why grease settles there quietly.
Here’s where that sticky layer actually comes from:
- Cooking oil and food vapors: When you cook, oil doesn’t just splatter—it turns into tiny airborne particles. They float, cool down, and settle inside drawers, especially the ones near your stove.
- Heat and daily cooking smoke: Heat makes grease spread easily. Once it cools, it turns tacky and hard to remove. Over time, layer after layer builds up.
- Hand contact over time: Slightly oily or damp hands transfer residue every time you open a drawer. It feels harmless in the moment, but it compounds fast.
What most people don’t realize is that drawers are closed environments. Grease gets trapped inside, mixes with dust and moisture, and forms a sticky film that regular wiping can’t fix. That’s why drawers often feel worse than cabinets. Sticky grease inside drawers is part of a bigger kitchen problem—if you’re also noticing oily residue on counters, cabinets, or appliances, this guide on removing grease stains from kitchen surfaces explains what actually works across the kitchen.
Home-cleaning experts at Real Simple point out that kitchen surfaces close to cooking zones collect grease even when they look clean. That invisible buildup is exactly what causes the stubborn stickiness people struggle with later.
Once you understand the cause, prevention becomes obvious—and cleaning stops feeling random.
Trick 1 – The Effective DIY Grease Removal Method
Let me be clear with you: grease doesn’t come off because you scrub harder. It comes off when you break it down first.
This method works because it loosens grease before you wipe it away.
Step-by-Step Process
Follow this in order. It saves time and effort.
- Empty the drawer fully: You need access to corners, sides, and the back panel.
- Make a warm cleaning solution
- Warm water
- A few drops of liquid dish soap
- Wipe gently and let it sit: Use a microfiber cloth or soft sponge. Let the solution rest on sticky areas for about a minute.
- Handle stubborn grease: Sprinkle a small amount of baking soda on the cloth and gently rub the sticky spots.
- Rinse residue away: Wipe with a clean, damp cloth so grease doesn’t spread around.
- Dry immediately: This prevents moisture damage and keeps the surface smooth.
Best Cleaning Agents for Kitchen Drawers
These work because they’re designed to deal with oil—not because they’re harsh.
- Dish soap: Breaks grease bonds and lifts oil from surfaces.
- Baking soda (used lightly): Helps loosen thick buildup without scratching. If you prefer using simple pantry items for cleaning, you’ll be surprised how versatile they can be—these clever cornstarch household tricks solve far more everyday home problems than most people expect.
- Diluted vinegar (optional): Cuts leftover residue and odors when used sparingly.
Start mild. If grease comes off easily, don’t escalate.
Safety and Surface Compatibility
This is where people usually mess up.
Avoid these mistakes:
- Bleach on wood or laminate
- Soaking drawers with excess water
- Overusing vinegar on finished surfaces
If you’re unsure about the material, test your cleaner on a hidden spot first. I never skip this step.
When grease is removed properly, you’ll feel it immediately. The drawer won’t just look cleaner—it’ll slide smoothly without that sticky drag.
Tell me—are your drawers lightly greasy, or does the stickiness feel years old?
Trick 2 – Tool-Assisted Grease Removal That Saves Time

I’ll be real with you—sometimes grease has been sitting there so long that wiping alone feels like punishment. If you want results without exhausting your arms, tools make a big difference. The right one can cut your cleaning time in half.
Recommended Tools (and Why They Work)
These aren’t fancy gadgets. They work because they do specific jobs well.
- Microfiber cloths: They grab grease instead of spreading it around. One good cloth can replace three paper towels.
- Soft-bristle brush or old toothbrush: Perfect for drawer corners, grooves, and edges where grease hides.
- Handheld steam cleaner (optional): Steam melts grease on contact. No chemicals, minimal effort.
Each tool speeds things up because it either lifts grease faster or reaches spots your hand can’t.
How to Use Each Tool for Best Results
Here’s how I use them so the job stays quick and clean:
- Microfiber cloth
- Dampen it with warm, soapy water
- Wipe in straight lines, not circles
- Switch sides once it gets greasy
- Brush
- Dip lightly into your cleaning solution
- Gently scrub corners and drawer tracks
- Wipe residue immediately after
- Steam cleaner
- Short bursts only
- Follow right away with a microfiber cloth
- Never let moisture sit inside the drawer
Professional cleaners often recommend steam for old grease because heat breaks oil bonds instantly. Even kitchen-care editors at The Kitchn have tested steam against greasy surfaces and found it cuts through buildup with far less scrubbing.
If you hate scrubbing, this is your shortcut.
Quick Drying & Finishing Tricks That Make Drawers Look New
Removing grease is only half the job. If you skip finishing, drawers dry unevenly and feel dull or streaky. This is the step most guides ignore—and it shows.
Proper Drying Techniques
I always do this, no matter how clean the drawer looks:
- Dry immediately with a clean cloth
- Leave the drawer open for 10–15 minutes
- Avoid air-drying alone (it leaves marks)
Moisture left behind attracts dust—and grease sticks faster next time.
Polishing or Conditioning Drawer Interiors
This depends on the material:
- Wood drawers: Use a tiny amount of food-safe mineral oil on a cloth. Wipe lightly.
- Laminate or painted drawers: A dry microfiber wipe is enough. No polish needed.
This step restores smoothness and keeps surfaces from feeling rough or sticky later.
Preventing Streaks and Residue
To keep drawers looking clean longer:
- Don’t overload cleaners
- Always finish with a dry wipe
- Clean handles last (they transfer grease back)
When you do this right, drawers don’t just feel clean—they stay clean longer.
Quick check for you: Do you prefer quick wiping tools, or would you rather use steam once and be done?
Preventing Grease Buildup in the Future
Once your drawers are clean, the real win is keeping them that way. From my experience, grease comes back only when drawers are treated like an afterthought. A few drawer-specific habits make a big difference long term.
Here’s what actually works:
Simple habits I always recommend:
- Use washable drawer liners: Liners catch grease, crumbs, and spills before they touch the drawer surface. You clean the liner, not the drawer.
- Wipe spills immediately: Fresh grease wipes off easily. Old grease bonds and turns sticky.
- Clean handles before interiors: Handles transfer grease back inside. This step alone prevents repeat buildup.
- Vent while cooking: Exhaust fans and open windows reduce airborne grease that later settles inside drawers.
Long-term cleanliness always comes down to routine and timing—and if you’ve ever wondered whether you’re cleaning too often or not enough, this expert-backed guide on how often you really need to mop each room helps build a smarter home maintenance schedule.
Practical kitchen-care guides like Mr. Cabinet Care’s grease removal advice also highlight that grease prevention starts with limiting buildup at the source—not just cleaning after the fact.
Suggested deep-clean frequency:
- Light cooking: every 3–4 months
- Regular home cooking: every 6–8 weeks
- Heavy frying or daily cooking: monthly checks
When Home Remedies Aren’t Enough – Professional Options
I’ll be honest with you—there’s a point where DIY stops being smart. If grease has been sitting for years or the drawer finish is delicate, forcing it can cause permanent damage.
You should consider professional help if:
- Grease feels thick, rubbery, or layered
- Wood looks dull or blotchy after cleaning
- Drawers are custom, antique, or soft wood
- Old oil smells linger even after wiping
Professional cabinet and drawer cleaners use controlled degreasers and low-moisture methods that protect finishes. Based on industry pricing and service listings, most US households typically see:
- Basic drawer and cabinet cleaning: $150–$300
- Deep grease removal or finish-safe restoration: $300–$600
It’s not cheap—but it’s often cheaper than repairing or replacing damaged drawers.
Common Mistakes That Make Grease Worse

This is where most frustration comes from. I see people clean again and again, but the grease keeps coming back because of these mistakes.
Avoid these if you want real results:
- Using harsh chemicals: Bleach and strong degreasers strip finishes and make surfaces absorb grease faster later.
- Over-wetting drawers: Too much water pushes grease deeper and causes swelling or warping.
- Scrubbing aggressively: Hard scrubbing spreads grease instead of lifting it—especially on wood and laminate.
- Repeating a failed method: If wiping hasn’t worked twice, wiping harder won’t fix it.
Grease removal isn’t about force. It’s about timing, technique, and knowing when to stop.
Before you move on—are you more interested in low-effort maintenance or a once-and-done deep clean routine?
Wrapping It All Together
If there’s one thing I want you to take away, it’s this: sticky grease in kitchen drawers isn’t a cleaning failure—it’s a strategy problem. Once you understand why grease builds up, use the right method to remove it, and put simple prevention habits in place, the problem stops coming back.
You don’t need harsh chemicals.
You don’t need to scrub for hours.
You just need a smarter approach that works with how kitchens are actually used.
I’ve seen these exact steps turn grimy, sticky drawers into smooth, clean ones again—without damaging the finish or making cleaning feel like a chore. When you clean with intention instead of guesswork, the results last.
If this guide helped you, I’d love to hear from you. What part of your kitchen gives you the most trouble—drawers, cabinets, or handles? Drop a comment and let’s talk through it.
And if you want more practical, no-nonsense home care advice like this, explore more guides on Build Like New—where the focus is always on fixing, cleaning, and maintaining your home the right way, not the hard way.
Disclaimer: The methods shared in this article are based on general home-cleaning practices and real-world experience. Results may vary depending on drawer material, finish, and level of grease buildup. Always test any cleaning method on a small hidden area first. The information provided is for educational purposes only and should not replace professional advice for delicate or high-value surfaces.

