
10 Little-Known Wood Staining Secrets for Perfect DIY Results
When I first started staining wood, I thought it was just about slapping some color on a piece of furniture. I quickly learned that a smooth, rich finish isn’t magic—it’s a mix of the right prep, proper techniques, and a few insider tricks most DIY guides skip. Over the years, I’ve tried, failed, and perfected methods that turn ordinary wood into pieces that look professionally done.
In this article, I’m going to share 10 wood staining secrets that I wish I’d known from day one. By the time you’re done, you’ll not only know how to stain wood—you’ll know how to do it with confidence, avoid common mistakes, and get results that actually make your friends ask, “Did you hire someone for this?”
Understanding the Real “Search Intent” Behind How to Stain Wood
Before we dive into the tips, let’s take a step back. When someone searches for how to stain wood, they aren’t just looking for a list of steps—they want confidence. You want to know you won’t ruin the wood, that the color will turn out right, and that you’re not wasting time or money. Most guides online focus on the “how,” but few explain the why behind each move or the mistakes that trip up DIYers.
Before staining, it’s smart to remove any water marks or previous stains; I’ve shared some safe methods for cleaning water stains without ruining the wood, which can save you a lot of prep work.
If you’re a beginner, your focus is usually:
- Avoiding blotchy or uneven color
- Preventing dark edges or streaks
- Understanding what tools and prep really matter
Intermediate DIYers often want:
- Better control over the finish depth and color richness
- Techniques to save time while keeping a professional look
- Solutions for tricky woods like maple or pine
Secret 1: Pick the Right Stain (Not Just “Any Stain”)
Here’s where a lot of people get stuck. It’s tempting to grab the first stain you see at the hardware store, but not all stains behave the same way on every wood. Choosing the right one is half the battle.
Here’s what you need to know:
- Oil-based stains: Great for deep, rich color and longer working time. They penetrate well but take longer to dry.
- Water-based stains: Dry faster, have less odor, and clean up easily. Ideal if you want a lighter, more controlled finish.
- Gel stains: Thick and forgiving, perfect for vertical surfaces or blotchy woods where control is key.
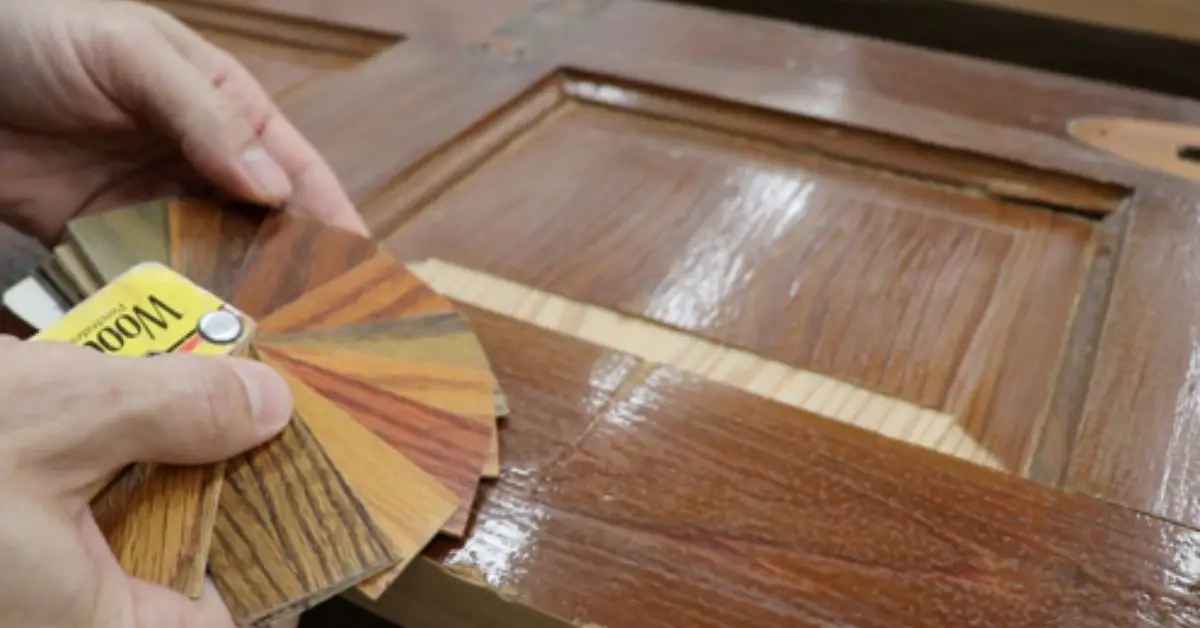
And remember, wood species matter: pine and maple can blotch easily, while oak and cherry are more forgiving. That’s why testing on a scrap piece first—or a hidden section of your project—makes a huge difference.
For a trusted guide on choosing the right stain and learning proper application tips, I like to reference Martha Stewart’s How to Stain Wood. The guide is clear, practical, and beginner-friendly, making it easy to pick the right stain for your project.
Secret 2: Pre-Stain Prep Is the Real Game-Changer
Here’s the truth: how your wood looks after staining is 80% determined before you even touch the brush. Skipping prep is the fastest way to end up with uneven, blotchy results.
Step 1: Sanding Progression
- Start with 120-grit for removing rough spots and old finish
- Move to 180-grit for smoothing the surface
- Finish with 220-grit for a silky texture that accepts stain evenly
Step 2: Raise the Grain
- Lightly wipe the surface with a damp cloth after sanding
- This brings up the wood fibers, which you then sand lightly again to prevent fuzziness after staining
Step 3: Dust Removal
- Use a tack cloth or a lightly dampened cloth to wipe away all dust
- For stubborn particles, a mineral spirits wipe works well to ensure the surface is truly clean
Pro Tip: Shine an LED flashlight across the surface before staining. It will highlight imperfections, scratches, or leftover dust spots that you might otherwise miss. Fixing these before the stain goes on makes a world of difference in the final finish.
Secret 3: Test Samples Before You Commit
I can’t stress this enough: never assume your stain will look the same on the final piece as it does in the can. Testing first saves you from costly surprises and frustration.
Here’s how I do it:
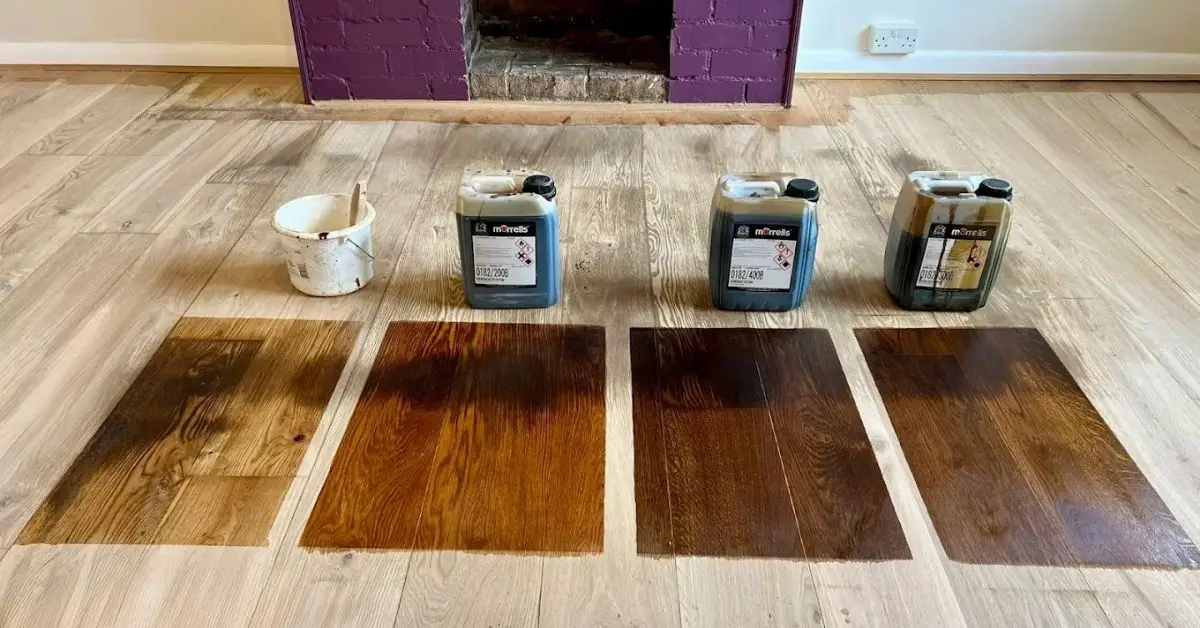
- Color test on scrap wood: Always try your stain on a piece of the same wood or an inconspicuous area. You’ll see how it really behaves.
- Lighting matters: Natural daylight, indoor lights, and shadows can all change how the color looks. Walk around your test piece in different lighting before deciding.
- Temperature and environment: Staining in a room that’s too hot or too humid can alter drying times and color absorption. For a reliable reference on proper conditions, I often check Sherwin-Williams’ guide on applying interior wood stains. It explains how environmental factors affect stain behavior and finish.
Testing isn’t a step you skip—it’s your insurance policy for a professional-looking outcome.
Secret 4: Application Techniques Pros Don’t Always Share
Even if you have the right stain and prepped wood, how you apply it determines the final look. Here are the techniques I’ve picked up after plenty of trial and error:
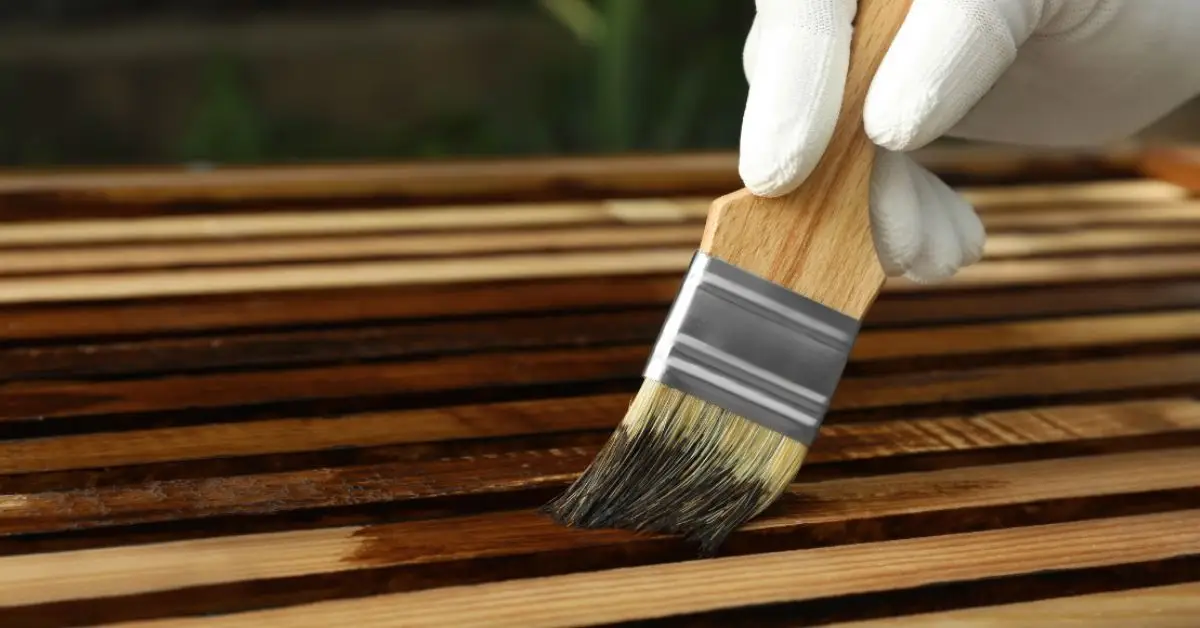
- Work with the grain, not across it: This reduces streaks and helps the stain absorb evenly.
- Wet edge technique: Keep a wet edge as you go to avoid lap marks, a simple trick pros swear by.
- Edge handling: Use careful strokes and a light hand on edges to prevent drips. Reddit users often suggest tackling edges separately to maintain consistency.
- Two-rag method: One rag for applying, one for wiping excess. It gives you more control and prevents blotches.
These little adjustments make a big difference in the finish. Once you get the rhythm, staining feels almost effortless.
Secret 5: Preventing and Handling Blotches
Blotchy wood is the bane of many DIYers’ lives. The solution isn’t just luck—it’s about preparation and technique:
- Use wood conditioners: Applying a pre-stain conditioner levels absorption, especially on soft or blotchy woods like pine and maple.
- Sanding sealer alternative: If you don’t have conditioner, a thin sanding sealer coat can help reduce uneven staining.
- Adjust techniques for tricky woods: On highly absorbent or blotchy species, apply thinner coats and wipe consistently to maintain color evenness.
Secret 6: Timing Is Everything — Don’t Rush Drying
One thing I’ve learned the hard way: rushing ruins the results. Stain depth, color uniformity, and topcoat adhesion all depend on timing.
- Let stain penetrate fully: Don’t wipe too early. Follow the stain instructions but also use touch tests; you’ll feel when it’s ready.
- Topcoat patience: Adding polyurethane or varnish too soon can lift the stain or create streaks.
- Drying times vary: Oil-based stains usually need longer than water-based. Temperature and humidity matter here, too. Waiting might feel slow, but it guarantees a smooth, professional finish.
When you respect the timing, the difference is striking—rich color, smooth texture, and no surprises.
Secret 7: Finishing Touches That Look Pro
Staining is just the beginning. If you skip the finishing touches, even the most perfectly stained wood can look amateur. Here’s how I make my projects look professional:
- Choosing protective topcoats: Polyurethane, lacquer, or varnish protect your work and enhance the color. Pick one based on the level of wear your piece will face.
- Applying varnish or lacquer: Use thin, even coats and let each layer dry completely before recoating. This prevents bubbles, streaks, and uneven gloss.
- Recoat and maintenance basics: Even a finished piece benefits from occasional touch-ups. Lightly sanding and recoating every few years keeps the wood looking fresh.
A little attention here goes a long way—this is what separates a “good DIY job” from something that looks store-bought.
Secret 8: Avoid These Common Mistakes (and Fix Them Fast)
Here’s where most beginners stumble. I’ve seen countless DIYers ruin hours of work with these missteps:
- Too much stain vs. too little: Overloading creates puddles and streaks, while too little gives a weak, uneven color. The key is to apply thin coats and build gradually.
- Ignoring stain label compatibility: Not all stains work with all finishes. A quick check on the product label can save a ruined topcoat.
- Uneven sanding evidence: Skipping grits or missing spots shows up instantly after staining. Light, consistent sanding is essential.
- Fast or uneven drying: If your stain dries too quickly, lightly re-wipe or adjust your method next time to keep color uniform.
These mistakes are easy to prevent once you know them—consider this your “shortcut to looking like a pro.”
Secret 9: Advanced DIY Hacks from the Community
Sometimes the best tricks don’t come from guides—they come from people like you who’ve been in the trenches. I’ve collected a few that make tricky projects much easier:
- Stubborn woods: Reddit DIYers recommend applying gel stains in thin, overlapping layers and wiping immediately to avoid blotches.
- Edge-handling tricks: Use painter’s tape on tricky edges, or apply stain with a small brush before tackling the main surface. These community-tested hacks save a lot of frustration.
Seeing what others do gives perspective. Don’t be afraid to experiment, as long as you test on scrap first.
Secret 10: Safety and Cleanup Most Guides Skip

We often focus so much on the finish that we forget the basics of safety. Here’s my approach:
- Ventilation and protective gear: Always stain in a well-ventilated area and wear gloves and a mask. Fumes can be stronger than you expect.
- Safe disposal of oily rags: These rags can self-ignite. Reddit DIY threads suggest drying them flat outdoors or storing them in a metal container with a lid.
- Tools cleaning tips: Clean brushes and applicators immediately with the recommended solvent to extend their life. The same care you take with your wood prep applies to tools too—just like avoiding streaks on stainless steel, proper cleaning and handling of brushes prevents marks and ensures a smooth finish.
For more detailed guidance on safe staining and cleanup practices, I often refer to Home Depot’s guide on how to stain interior wood. It breaks down ventilation, protective gear, and cleanup in a simple, practical way that’s perfect for DIYers.
Quick Cheat Sheet / Checklist
Sometimes you just need a simple, printable list to keep at your side while staining. Here’s my go-to cheat sheet:
Prep Checklist
- Sand in sequence: 120 → 180 → 220 grit
- Raise the grain with a damp cloth, then lightly sand again
- Remove all dust with a tack cloth or mineral spirits wipe
- Test stain on scrap or hidden area
Optimal Temperature & Environment
- Room temperature between 65–75°F
- Low humidity for even drying
- Well-ventilated area to reduce fumes and speed drying
Tools & Materials
- Stain of choice (oil-based, water-based, or gel)
- Brushes, foam applicators, or clean rags
- Protective gloves and mask
- Painter’s tape for edges
- Wood conditioner or sanding sealer for blotchy woods
Keep this checklist handy—it will save you time, prevent mistakes, and help your wood project look professional every time. Even after finishing your wood project, accidents happen—spills and stains on surfaces can ruin your hard work, so I always keep a few strategies handy for removing common stains.
Conclusion
Staining wood doesn’t have to feel intimidating. With the right prep, techniques, and timing, you can achieve results that rival a professional finish. I’ve shared the secrets I’ve learned over years of trial and error, plus practical community tips, so you don’t have to make the same mistakes I did.
I’d love to hear from you! What’s your biggest struggle when staining wood? Drop your questions or tips in the comments below, and if you want more hands-on DIY guides, visit Build Like New for step-by-step projects, expert advice, and insider hacks.
Disclaimer: The tips and techniques shared here are for general DIY guidance. Always follow product instructions and safety precautions. Results may vary based on wood type, environment, and tools used.

