
Save Time and Avoid Clutter with a Laundry Chute – Here’s How to Build One
If you’ve ever found yourself lugging a heavy laundry basket up and down the stairs, you know how exhausting—and even risky—it can be. Whether it’s piles of clothes, towels, or bedsheets, carrying them all the way from one floor to another can do a real number on your back. It’s the kind of chore that feels like a never-ending cycle of strain and frustration.
But what if I told you there’s a simple solution that could save you trips, time, and potentially even your health? Enter the laundry chute.
In this article, I’m going to share how a DIY laundry chute can completely change the way you handle laundry at home. Imagine never having to carry laundry up and down stairs again. Sounds like a dream, right? Well, it’s not just a dream—it’s an easy, practical fix that you can implement yourself. Let’s dive into why installing a laundry chute could be the game-changer your home needs.
What Is a Laundry Chute and How Does It Work?
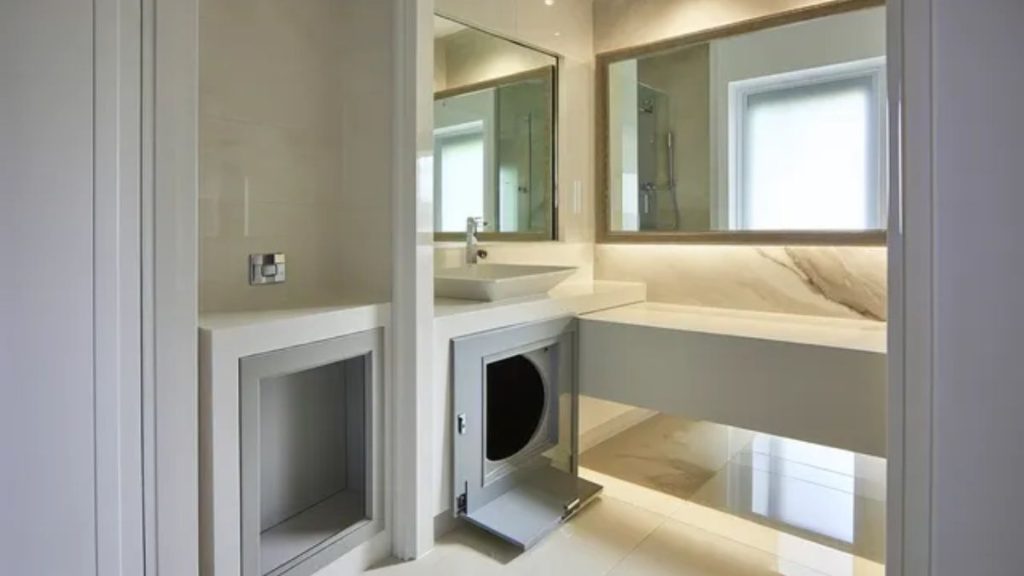
A laundry chute is a vertical passage built into your home that allows clothes to be dropped from one floor directly to a lower level—usually right into a laundry room or designated basket. It’s one of those simple solutions that make life easier, even though most people forget about it until they experience the hassle of lugging baskets around.
The setup is usually pretty straightforward. The chute itself is often a tube or shaft made from materials like PVC, metal, or even wood, and it’s installed in the wall between two floors. At the top, you have a door or hatch (usually in a bathroom or closet), and at the bottom, there’s another hatch that opens up into your laundry area. When you need to get rid of laundry, you simply open the top door, drop the clothes, and let gravity do the rest.
Why is this such a big deal? Well, let’s face it—carrying heavy laundry baskets up and down stairs can take its toll on your body. It’s tiring, awkward, and, after a while, your back will start to remind you of it. With a laundry chute, you’re saving time, energy, and, importantly, your body from unnecessary strain. It’s a smart solution that not only streamlines your chores but also keeps things simple.
In short: It’s a chute, it’s a shortcut, and it’s one less reason to dread laundry day.
Why Install a Laundry Chute?
Let’s be honest: laundry day isn’t anyone’s idea of fun. But what if I told you there’s a way to make it a little bit easier, and even a bit less taxing on your body? Installing a laundry chute offers several benefits that make it an absolute game-changer for your household.
First, it saves you time. If you’ve ever had to run up and down stairs multiple times with heavy laundry, you know how much time it takes. A laundry chute eliminates this by allowing you to simply drop your clothes down to the laundry area below. That’s it—saving you both time and energy.
Second, it offers physical relief. Let’s face it, hauling laundry upstairs is hard on your back. You bend, twist, and lift heavy baskets, putting unnecessary strain on your muscles. A laundry chute means you don’t have to bend or carry anything. All you have to do is open a hatch and let gravity take care of the rest.
Lastly, it’s space-efficient. A laundry chute can be installed in areas you might not normally think of—like a closet, bathroom, or hallway—making it a space-saving solution that doesn’t take up valuable storage space. It’s a great way to utilize otherwise unused parts of your home.
With these practical benefits, it’s clear that installing a laundry chute can save you from unnecessary hassle and strain. Plus, it’s a smart, space-saving solution. But how exactly do you get started?
Planning Your DIY Laundry Chute
Before you start tearing down walls, it’s important to plan carefully to make sure the installation is smooth and effective. Proper planning is key to avoid costly mistakes or inconvenient setups. The first thing to consider is the location. You’ll want to install the chute between two floors, ideally with easy access to your laundry room or basement.
Think about areas that are unused or underutilized, like closets or even bathrooms. The closer the chute is to your laundry area, the better. This way, you minimize any unnecessary distance, making the system more efficient.
Next, make sure to focus on measuring and alignment. Getting the measurements right is crucial for ensuring that the chute is positioned correctly. If the chute is misaligned, it could cause problems down the line, and we definitely want to avoid that. Ensure it aligns vertically between the two floors, so clothes can easily slide down without obstruction.
You also need to keep safety considerations in mind when planning your chute. Be sure to install fire-blocking materials, especially if the chute passes through critical areas like stairwells. It’s important that your laundry chute doesn’t become a potential fire hazard. Additionally, securing the door mechanisms so they stay closed when not in use is key to preventing accidents.
If you’re unsure about the best way to plan the layout or avoid common mistakes, checking out expert advice, like that from This Old House, can be really helpful. They’ve shared practical tips on selecting the ideal location and designing the chute so it fits perfectly into your space. Their guidance will help ensure that your planning phase goes off without a hitch.
By considering these factors in your planning stage, you’re setting yourself up for success and making sure the laundry chute fits seamlessly into your home’s layout. Once everything is planned, you’ll be ready to move forward with the installation!
Have you ever thought about installing a laundry chute? Or maybe you already have one in your home? Share your thoughts and experiences in the comments below—I’d love to hear how it’s worked for you!
Step-by-Step Guide to Building a Laundry Chute
Now that you’ve got your plan in place, it’s time to dive into the actual building process. Don’t worry—it’s not as complicated as it might sound. With the right tools and a bit of patience, you can easily install a laundry chute yourself. Here’s how to go about it:
Materials Needed:
First, make sure you have all the materials. As per Fine Homebuilding professional guide, you’ll need a saw (to cut the opening), measuring tape, a drill, screws, a chute (which could be PVC, metal, or other materials depending on your preference), and a door mechanism at both ends.
Step 1: Cutting the Openings
You’ll need to cut openings at both the top and bottom where the chute will be installed. Start by measuring the space carefully, ensuring the opening is large enough for the laundry to drop easily but not too large to cause issues with alignment. The top hatch should be at a convenient height for dropping clothes without straining yourself.
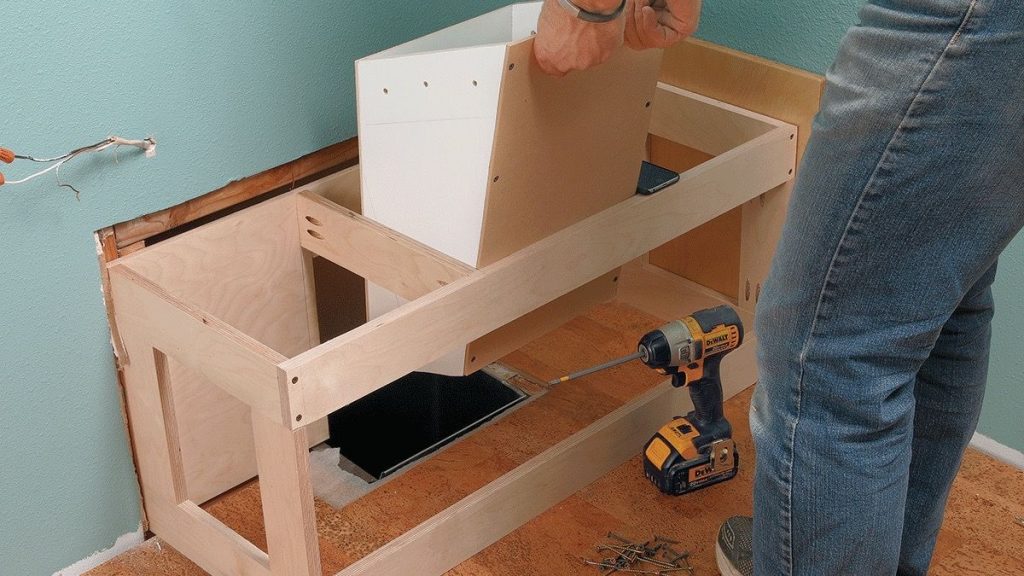
Step 2: Installing the Chute
Once the openings are ready, install the chute itself. If you’re using PVC or metal, make sure the pieces are cut to the right size. You’ll attach them to the wall, ensuring the chute aligns vertically. This is where precise measurements and alignment come into play to ensure everything works smoothly.
Step 3: Securing the Doors
At both ends of the chute, install secure doors or hatches. These will keep the chute closed when not in use. For added convenience, consider installing soft-close doors to avoid any loud slams.
Safety Tips:
When installing, be sure to check that all edges are smooth and secure. You don’t want any sharp edges that could pose a danger, especially if children or pets are around. Also, double-check that all fasteners are tightly in place so nothing comes loose over time.
If you’d like more detailed instructions on building your own laundry chute, Fine Homebuilding provides a comprehensive guide that breaks down the steps, tools, and techniques in detail. Their advice can help you get the job done right without missing any crucial steps.
If you’re planning a DIY project involving glulam beams, it’s important to know the right cutting techniques to avoid costly mistakes. Here’s what you need to keep in mind.
Enhancing Your Laundry Chute Design
Once your laundry chute is up and running, it’s time to think about how to make it work even better for you and your space. There are plenty of ways to improve both the functionality and aesthetics of your new chute.
Aesthetic Integration
A laundry chute doesn’t have to be an eyesore. You can design it so it blends seamlessly with the rest of your home. Consider hiding the opening behind a decorative door or in a closet, so it doesn’t detract from your home’s decor. You could even make the top hatch look like part of a built-in storage unit.
Functional Additions
Consider adding a few functional upgrades, like soft-close doors that prevent loud slamming. If you’re worried about odors from the chute, think about installing a ventilation system or adding a deodorizer near the bottom to keep things fresh.
Another idea is to add a clear acrylic window on the chute, so you can see how much laundry is inside, especially if the chute is long or twists a bit. It’s a small touch that can make a big difference when you’re managing your laundry.
Enhancing the design doesn’t just make your laundry chute more visually appealing—it can also make it more efficient and enjoyable to use.
Real-Life Success Stories
Still not convinced? Let me share a couple of real-life success story that might inspire you to take the plunge and install a laundry chute in your own home. Many homeowners who have installed a laundry chute report a huge improvement in their daily routines and a drastic reduction in back pain.
For instance, a UK mother shared her experience with a DIY laundry chute in an article for The Sun. She explained how the chute transformed her laundry days, making it faster, easier, and less physically demanding.
She no longer had to carry heavy baskets up and down multiple flights of stairs, which gave her more time to focus on other tasks and improved her overall well-being. Her success story is a perfect example of how something as simple as a laundry chute can improve your quality of life.
This story show that a laundry chute isn’t just about convenience—it’s about making life a little easier and more organized. So, if you’re still on the fence, think about the time, energy, and physical strain you could save. It might just be the best home improvement decision you make.
Potential Challenges and Solutions
As with any home improvement project, there can be a few challenges along the way. But don’t worry—most of these are manageable with a little planning and foresight. Here are some common challenges you might encounter and how to solve them:
Clogs
One of the most common issues with laundry chutes is clogging. Over time, clothes, lint, or debris can build up and block the chute, preventing clothes from sliding down. To avoid this, make sure you clean the chute regularly and inspect it for any buildup. If possible, install a cleaning access door at the bottom of the chute to make maintenance easier.
Space Constraints
If you’re working with limited space, it might be a bit tricky to find a suitable spot for your laundry chute. If you’re struggling with this, consider installing the chute in a closet or hallway where it won’t interfere with other areas. You can also get creative with your chute design—maybe using a smaller diameter for the chute or finding ways to integrate it into your existing cabinetry.
Noise
The sound of clothes tumbling down the chute can be surprisingly loud, especially if you’re dealing with heavy fabrics or a long chute. To minimize the noise, consider installing a soft liner inside the chute, or add a cushion or insulation material around the opening to absorb sound. You can also make sure that the chute is securely attached at both ends to avoid rattling.
While these challenges may sound daunting, most can be easily addressed with a little thought and preparation. If you encounter any of these issues, there are plenty of resources and guides available to help. With the right approach, your laundry chute will work smoothly for years to come.
Conclusion
At the end of the day, whether or not a laundry chute is right for you depends on a few factors. But if you’re tired of hauling laundry up and down the stairs, experiencing back pain, or just want to save some time in your day, installing a laundry chute could be the perfect solution. It’s a simple, yet incredibly effective way to make your laundry routine easier and more efficient.
Remember, it’s not just about saving time—it’s about reducing physical strain, making your home more organized, and freeing up your energy for other important tasks. A laundry chute also adds value to your home, especially if you plan on reselling in the future. Buyers are always looking for small, thoughtful upgrades that make everyday life easier.
So, ask yourself: Are you ready to make laundry day a little less dreadful? If so, why not start planning your DIY laundry chute today? The benefits are clear, and with a little planning, the process can be surprisingly straightforward. It’s one of those small changes that can make a big difference.
If you found this guide helpful, don’t forget to follow for more DIY tips and home improvement advice. Let’s make your home smarter, one project at a time!
Disclaimer: Always consult with a professional before making structural changes to your home. Check your local building codes to ensure compliance with safety regulations. Remember, safety comes first when dealing with home improvements!

