
Stay Warm and Safe: 12 Essential Winter Home Repairs You Can Handle Yourself
Winter can be brutal on your home. Trust me, I’ve seen it all—burst pipes, leaking roofs, frozen faucets. These problems don’t just ruin your comfort; they can drain your wallet fast.
But here’s the thing: you don’t need to wait for a disaster or call expensive professionals every time. With some simple DIY winter maintenance, you can stop many of these issues before they start.
In this article, I’m going to share 12 easy-to-do tasks you can handle yourself. No fancy tools, no special skills—just practical steps to protect your home and save big.
By the end, you’ll know exactly what to check, fix, and prepare so that winter won’t catch you off guard.
Ready to take control and keep your home safe this season? Let’s get started.
Task 1 – Clean and Inspect Gutters and Downspouts
If there’s one thing I’ve learned over the years, it’s this: clogged gutters are a silent enemy during winter. When your gutters get packed with leaves and dirt, water can’t flow properly. That water freezes and creates ice dams—these ice dams block melting snow from draining, causing water to back up and leak into your home. Trust me, those leaks can lead to some serious and expensive damage to your walls and roof.
Here’s how you can handle this yourself, safely:
- Use a sturdy ladder to reach the gutters, and always wear protective gloves to keep your hands safe.
- Start by scooping out any leaves, twigs, or debris with your hands or a small gutter scoop.
- After clearing, flush the gutters with a hose to make sure the downspouts aren’t blocked.
- While you’re up there, check for any loose, cracked, or damaged sections—tighten or repair them if you can.
To make life easier next time, consider investing in gutter guards. They’re like a shield for your gutters, preventing leaves and debris from piling up, which means less cleaning and fewer problems for you.
Keeping your gutters clean is one of the best ways to prevent water damage and avoid those expensive roof repairs that nobody wants to deal with during freezing weather.
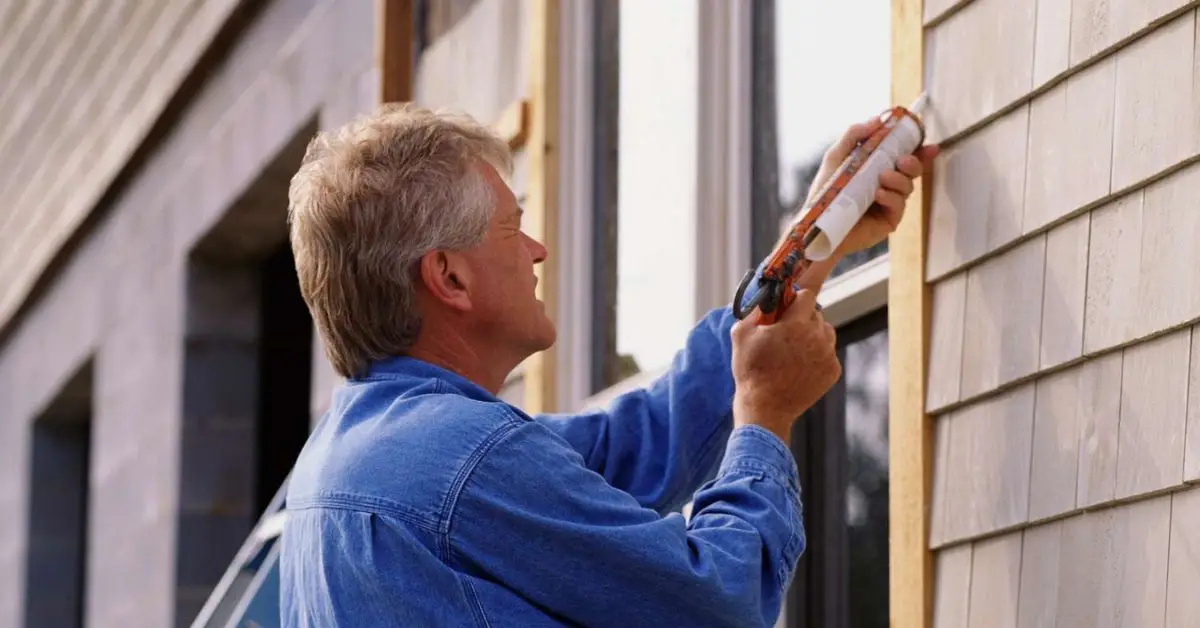
Task 2 – Seal Exterior Cracks and Gaps
Have you ever noticed cold drafts sneaking in around your windows or doors during winter? Those little cracks and gaps might seem harmless, but they’re robbing you of your hard-earned money. When cold air slips in and warm air escapes, your heating system has to work overtime—and you end up paying the price in higher bills.
Here’s what you can do to stop this:
- Take a walk around your home and look carefully for gaps or cracks near windows, doors, and even the foundation. Run your hand along the edges—you’ll often feel cold air where there’s a leak. If you’re sealing cracks and gaps around your home, it’s also a great opportunity to check for and seal any openings that might let bats or other pests inside—here are some easy fixes to stop bats from invading your home that DIYers swear by.
- For small cracks and gaps, use caulking—it’s like putting a seal on your home. Just squeeze it into the cracks and smooth it out.
- Around doors and windows, apply weatherstripping. It’s easy to install yourself and acts as a barrier to block cold drafts.
These fixes are simple but make a huge difference. You’ll notice your home feels warmer and your heating bills start to drop.
By sealing leaks, you’re improving your home’s insulation, cutting energy costs, and making your living space more comfortable—especially when the temperature outside drops.
Task 3 – Inspect and Repair Roof Shingles or Tiles
Your roof takes a serious beating in winter, so it’s smart to give it a good look before the cold really hits. I always tell people to keep an eye out for damaged or missing shingles and tiles because even a small crack or loose piece can let water in. That water sneaks into your home, causing leaks and heat loss, which nobody wants when the temperatures drop.
Here’s how you can spot and fix problems:
- Walk around your house and look up—focus on shingles that are cracked, curling, or missing. If you’re comfortable, carefully climb a ladder to inspect more closely.
- For minor damage, you can use roofing cement to seal small cracks or reattach loose shingles yourself.
- If you see extensive damage, multiple missing shingles, or signs of sagging, it’s time to call a professional roofer. Some repairs need expert tools and know-how to keep your roof safe.
For more detailed roof inspection tips, you can check out The Spruce’s guide on winter home renovations.
Taking care of your roof now saves you from water leaks and heat escaping through those gaps when winter storms arrive.
A solid roof means no leaks and better heat retention, keeping your home dry and warm through harsh weather.
Task 4 – Protect Outdoor Faucets and Sprinkler Systems
Frozen pipes can be a nightmare—and outdoor faucets and sprinkler systems are often the first to freeze in winter. I always recommend preparing these early because a burst pipe can cause serious water damage and expensive plumbing repairs.

Here’s how you can protect them:
- First, drain water from outdoor faucets and sprinkler lines to remove any standing water that can freeze and expand.
- Then, shut off your irrigation system from the main valve to stop water flow before the freeze hits.
- Finally, cover exposed faucets with insulated faucet covers—they’re cheap and easy to install but make a big difference in preventing freezes.
Taking these steps now can save you a ton of trouble later.
Protecting faucets and sprinkler systems helps you avoid frozen pipes and the costly plumbing problems that come with them.
Task 5 – Replace Furnace Filters and Test Heating System
Keeping your furnace in good shape is key to staying warm all winter. One simple thing you can do is change the furnace filters regularly. Dirty filters reduce airflow, making your system work harder and costing you more in energy bills.
Here’s what you need to know:
- Check your furnace filter every 1–3 months and replace it if it looks dirty or clogged.
- If your furnace is making strange noises, smelling odd, or not heating well, those are signs it might need professional servicing.
- Besides filter changes, test your thermostat and listen for unusual sounds when the system turns on.
Doing these simple checks helps your furnace run efficiently and improves the indoor air quality you and your family breathe every day.
For a detailed guide on furnace maintenance, take a look at this HouseLogic article on home repair jobs for winter.
Replacing filters and testing your heating system means better heating performance and a healthier home environment.
Task 6 – Insulate Exposed Pipes
Frozen pipes are one of the most common winter problems, and they often start with pipes that are exposed to cold air in basements, attics, or crawl spaces.
Here’s how you can protect them:
- Identify pipes that run along outside walls or unheated areas—these are the most vulnerable.
- Use pipe insulation foam sleeves or wrap them with heat tape for extra protection.
- Make sure to cover both hot and cold water pipes to prevent freezing and bursting.
Taking this simple step can save you from the hassle and expense of dealing with burst pipes and water damage.
Insulating pipes helps you avoid plumbing emergencies and protects your home from costly water damage.
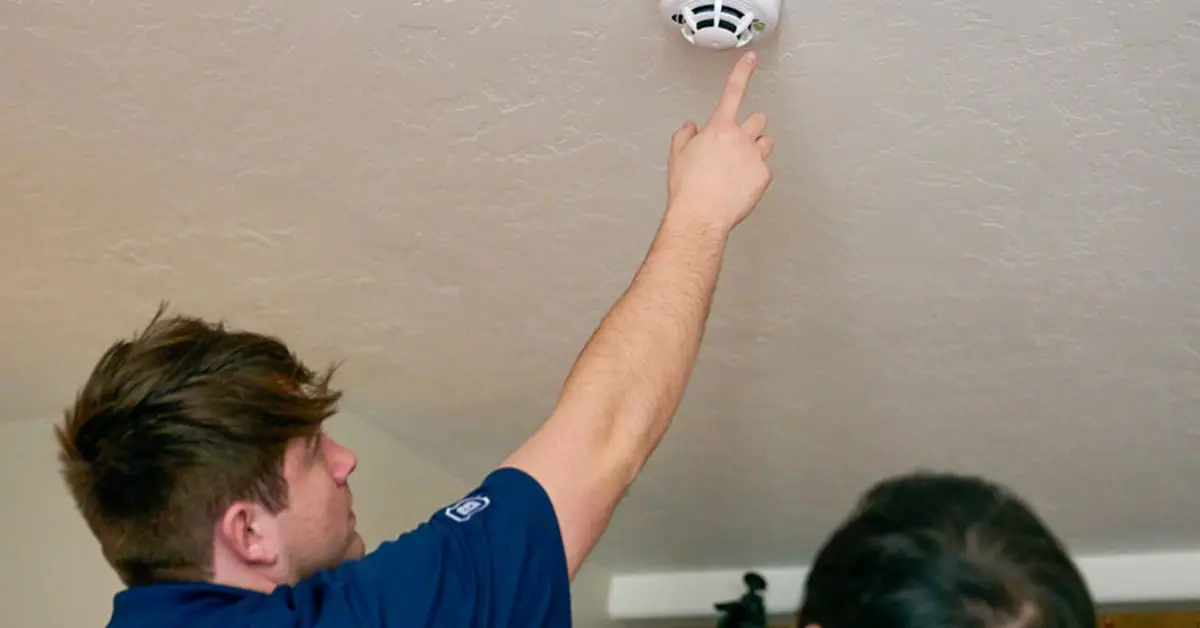
Task 7 – Test Smoke and Carbon Monoxide Detectors
Winter means more time spent indoors and often with heaters running, which increases the risk of smoke or carbon monoxide (CO) buildup. That’s why having working detectors is absolutely critical.
Here’s what you should do:
- Test your smoke and CO detectors once a month by pressing the test button.
- Replace batteries at least once a year, or immediately if you hear a low-battery beep.
- Make sure detectors are placed on every floor, especially near sleeping areas and close to the furnace or fireplace.
Remember, carbon monoxide is odorless and deadly, so these detectors can literally save your life.
Why this section is important:
Working detectors give you peace of mind by protecting your family from heating-related hazards like fires and carbon monoxide poisoning.
Task 8 – Clean and Inspect Chimney and Fireplace
If you use a fireplace, you’ve got to keep it safe and efficient. Over time, creosote buildup inside your chimney can ignite and cause dangerous chimney fires.
Here’s how to stay on top of it:
- Have your chimney inspected and cleaned regularly, especially before heavy use. If you want to try a basic cleanup yourself, start by removing any loose soot or debris.
- Check the chimney cap and flue to make sure they’re intact and clear of blockages like bird nests or leaves.
- Follow safe fireplace practices—never leave fires unattended and use a proper screen to catch sparks.
A well-maintained chimney and fireplace keep your home warm and your family safe.
Cleaning and inspecting your chimney prevents fire hazards and ensures your heating is safe all winter.
Task 9 – Install Draft Stoppers on Doors and Windows
Drafts sneaking in around your doors and windows can make a huge difference in how cold your home feels—and how high your heating bills go up. One of the easiest fixes I recommend is using draft stoppers.
Here’s what you need to know:
- There are different types: fabric tube draft stoppers, adhesive foam strips, and door sweeps.
- Installation is usually simple—just place draft stoppers along the bottom of doors or stick foam strips around window frames.
- These block cold air from sneaking in and keep your warm air inside, making your rooms more comfortable quickly.
Using draft stoppers can make a noticeable difference, especially if you’re dealing with older doors or windows.
Draft stoppers are a quick, budget-friendly fix that improves comfort and helps you cut down heating costs.
Task 10 – Program or Install a Programmable Thermostat
One thing that truly changed how I manage my heating is using a programmable thermostat. It lets you control when your heater runs, so you’re not wasting energy heating an empty house or overheating during the night.
Here’s the scoop:
- You can program it to lower the temperature when you’re away or asleep and raise it before you return or wake up.
- Many models are easy to install yourself—just follow the step-by-step instructions included.
- This small upgrade can lead to significant energy savings and make your home feel just right without constantly adjusting the thermostat.
For a helpful guide on programmable thermostats and energy-saving tips, check out this Real Simple article on winter home projects.
A programmable thermostat automates your heating, lowers your bills, and keeps your home comfortable without extra effort.
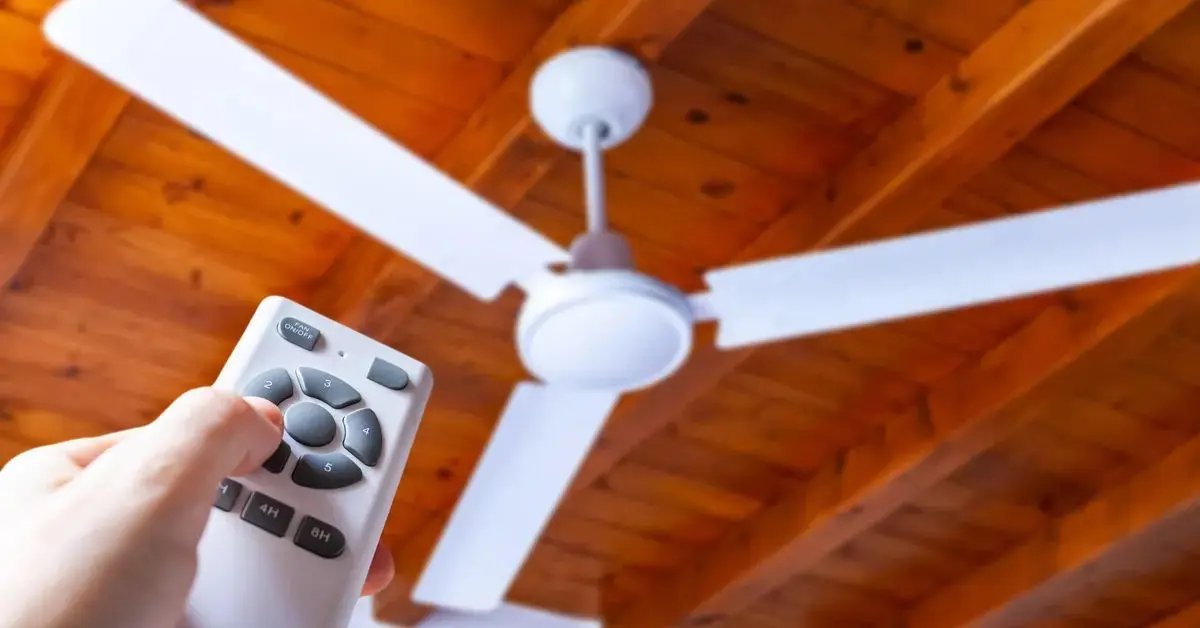
Task 11 – Reverse Ceiling Fans to Distribute Warm Air
You might not realize it, but your ceiling fan can help keep your rooms warmer in winter. By reversing the fan blades to spin clockwise at a low speed, the fan pushes warm air trapped near the ceiling down into the living space.
Here’s how you do it:
- Look for a small switch on the fan’s motor housing to change the blade direction.
- Run the fan on low speed once reversed—too fast and it could create a cooling breeze instead.
- Feel the difference as warm air circulates evenly, making your room more comfortable.
This simple trick helps your heating system work less while keeping you cozy.
Reversing your ceiling fan improves heat circulation, enhancing warmth and reducing heating costs.
Task 12 – Maintain Humidifiers for Indoor Comfort
Dry winter air can be tough on your skin, throat, and even your sinuses. Using a humidifier adds moisture back into your home, making the air more comfortable and healthier.
Here’s what you need to do:
- Regularly clean your humidifier according to the manufacturer’s instructions to prevent mold and bacteria buildup.
- Keep the water tank refilled with clean water to maintain optimal humidity levels.
- Monitor indoor humidity with a hygrometer; aim for 30-50% to avoid excess dampness.
Maintaining your humidifier means you breathe easier and your skin stays hydrated all winter long.
Proper humidifier care keeps indoor air comfortable and healthy, protecting your skin and respiratory health during dry months.
Bonus – Essential Tools and Safety Tips for Winter DIY Repairs
Before you dive into these winter maintenance tasks, having the right tools and safety gear makes all the difference. I always keep a checklist to stay prepared and safe.
Here’s what you should have on hand:
- Basic tools like a ladder, gloves, screwdriver, caulking gun, and flashlight.
- Safety gear such as goggles, non-slip boots, and a sturdy mask if you’re dealing with dust or chemicals.
- Winter-specific items like insulated gloves and knee pads to stay warm and comfortable while working outside. While you’re making your home safer from winter damage, why not boost your overall home security too? Check out this guide on DIY home security systems that are easy to install and give you peace of mind year-round.
And don’t forget these safety tips:
- Always check weather conditions before starting outdoor work.
- Use a sturdy ladder on even ground and have someone spot you if possible.
- Take breaks to warm up and avoid rushing—cold hands and fingers can lose grip easily.
Being prepared with the right tools and safety gear helps you do repairs safely and effectively, reducing the risk of accidents.
Final Encouragement & Next Steps
You’ve got a solid plan now to tackle those winter DIY repairs yourself—and trust me, it feels great to save money while protecting your home. Doing these tasks regularly can prevent costly damage and keep your house cozy all season long.
Here’s what I suggest:
- Schedule these maintenance tasks on your calendar each year—it’s a small effort that pays off big.
- Share your own tips or ask questions if you get stuck; I’m here to help you along the way.
- Remember, every step you take makes your home safer and more comfortable. Once winter passes, you’ll want your yard looking great too—avoid common pitfalls with this helpful post on DIY lawn care mistakes so you can keep your outdoor space healthy and beautiful.
I’d love to hear from you!
Have you tried any of these winter DIY tasks before? Or maybe you have your own tips to share? Drop a comment below — let’s help each other keep our homes safe and warm this winter!
For more helpful DIY home maintenance tips, visit Build Like New!
Disclaimer: This article is for informational purposes only. Always follow safety guidelines and consult a professional for major repairs.

