
Transform Your Tiles: 5 Simple DIY Grout Cleaner Recipes
I used to scrub my bathroom floor till my arms ached, and the grout still looked tired. Mopping helped the tiles, but the lines stayed grey, patchy, and a little grim. That’s when I realized it’s not about scrubbing harder—it’s about using the right mix for the right mess.
I tested the popular DIY grout cleaning hacks you see everywhere—some brightened fast, some fizzled, and a few could actually rough up certain grout if you’re not careful. The difference came down to simple things: the type of stain (soap scum, mildew, or dirt), the type of grout or stone around it, and how long you let the cleaner sit before you scrub.
In this guide, I’ll give you five easy, safe recipes from basic pantry items, show you when vinegar helps and when it hurts, and share quick tools that save time (including a small upgrade that turns scrubbing into a breeze). You’ll also get a simple weekly routine so the white lines stay white.
Before we dive in—what kind of stain are you fighting right now, and is your grout sealed or sitting next to natural stone?
Why Your Grout Gets So Dirty (and Why Simple Cleaning Fails)
If you’ve ever looked at your tiles and wondered why the grout lines stay dark no matter how much you mop, you’re not alone. I used to think it was just poor cleaning on my part—but grout behaves differently than tile. It’s not smooth and glossy; it’s porous, like a sponge, which means dirt doesn’t just sit on top. It sinks in.
Here’s what really happens over time:
- Porous surface traps grime: Every drop of dirty mop water seeps into the grout instead of staying on the surface.
- Moisture breeds mold and mildew: Bathrooms and kitchens are humid, and grout becomes the perfect spot for black or green growth.
- Discoloration builds slowly: What starts as light grey patches turns into dark, stubborn stains that a simple wipe can’t lift.
- Cleaning products leave residue: Ironically, some regular floor cleaners leave behind a film that actually holds onto dirt.
The frustrating part? A quick mop or spray just moves dirt around. It doesn’t get deep into the grout’s tiny holes. That’s why you can scrub hard and still feel like nothing changes. Real results come when you use the right cleaner that reacts with the stains—like oxidizing agents or mild abrasives that reach inside the pores.
As explained by The Spruce, grout’s cement-like base makes it naturally more vulnerable than tile, which is why it tends to “soak up everything around it” and hold onto grime far longer than you expect.
So if you’re tired of endless scrubbing, the good news is you don’t need to work harder—you just need smarter recipes that actually tackle the root of the problem. Grout isn’t the only hidden spot that traps grime—your kitchen has its own germ havens you should be cleaning more often than you think.
Tell me—what’s the toughest stain you’ve battled on your grout: dirt, mold, or soap scum?
5 Tried-and-Tested DIY Grout Recipes
When it comes to grout, there isn’t a single “one-size-fits-all” cleaner. Different stains respond to different solutions, and sometimes it’s about using what you already have in the cupboard. I’ve learned that having a few reliable recipes in your back pocket makes the job easier, faster, and a lot less frustrating. Here are five tried-and-tested options that cover everything from everyday touch-ups to those stubborn dark lines that never seem to budge.
1. Baking Soda + Water
This is the most basic mix, but don’t underestimate it. Baking soda works like a gentle sandpaper for grout—it scrubs away dirt without scratching the surface.
- How to make: Mix 3 parts baking soda with 1 part water to form a paste.
- Why it works: The grit of baking soda physically lifts dirt, while its natural deodorising quality helps with musty smells.
- Best for: Light stains, routine cleaning, and safe use on most grout types.
2. White Vinegar Spray
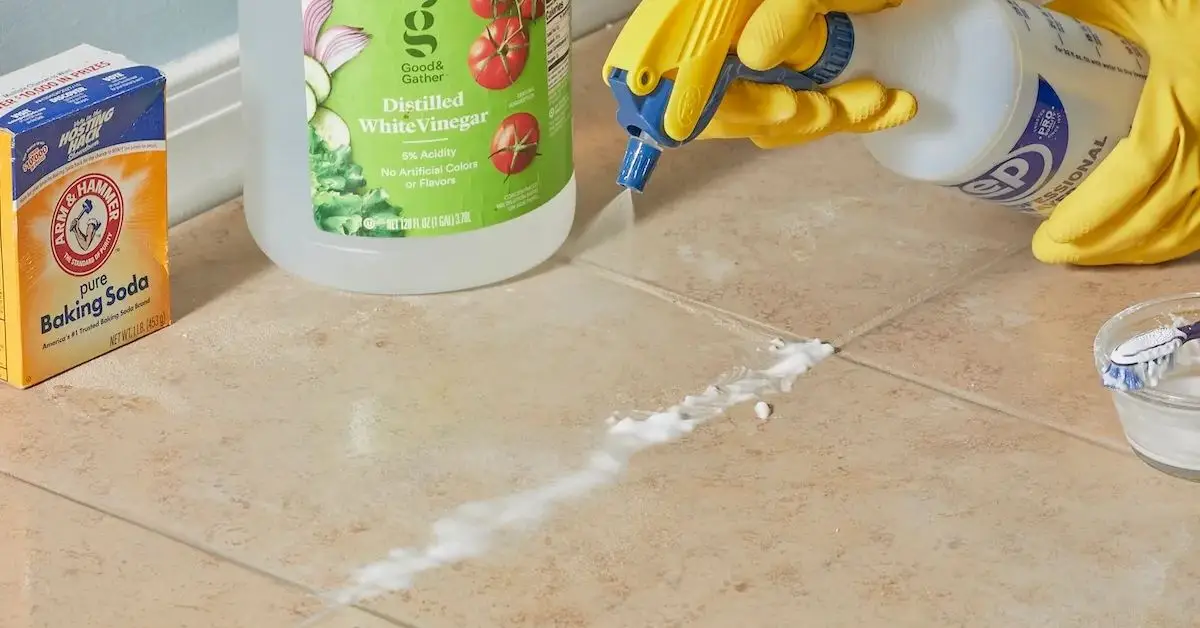
Vinegar is a common go-to because of its acidity, which cuts through soap scum and mineral deposits. But it’s not safe for every surface.
- How to make: Combine equal parts vinegar and warm water in a spray bottle.
- Why it works: The acid dissolves mineral buildup and film that regular mopping leaves behind.
- Caution: Avoid using vinegar on cement-based grout or natural stone—it can weaken or dull the surface.
- Best for: Ceramic tile grout in kitchens and bathrooms where scum builds up fast.
3. Hydrogen Peroxide Alone
Hydrogen peroxide is one of those quiet heroes—strong, but not as harsh as bleach.
- How to use: Pour or spray 3% hydrogen peroxide directly onto stained grout. Let it sit 10 minutes before scrubbing.
- Why it works: It’s an oxidiser, which means it breaks down organic stains (like mold and mildew) and kills bacteria.
- Best for: Bathrooms, especially in damp corners where mold shows up first.
4. Baking Soda + Hydrogen Peroxide Paste
This mix is the heavy hitter when basic cleaning isn’t enough.
- How to make: Blend 2 parts baking soda with 1 part hydrogen peroxide into a thick paste.
- Why it works: Baking soda scrubs dirt off the surface, while hydrogen peroxide seeps in, lightens stains, and sanitises. The fizzing action shows it’s working.
- Best for: Dark, stubborn grout lines that look like they’ll never come clean.
5. Lemon Juice (or Cream of Tartar) Alternative
Sometimes you want a natural option that cleans and freshens at the same time. That’s where lemon and cream of tartar shine.
- How to make: Use lemon juice directly or mix cream of tartar with a splash of water to form a paste.
- Why it works: Both are mild acids that brighten discoloured grout, while lemon leaves a clean, citrus scent behind.
- Best for: Small areas, backsplashes, or guest bathrooms where you want it to smell as fresh as it looks.
These five recipes give you flexibility—you don’t need a cupboard full of chemicals, just a few basics you already keep around. Whether it’s a quick touch-up before guests arrive or a deep clean after months of neglect, one of these will get the job done.
If you had to start today, would you grab the simple baking soda paste or go all-in with the fizzing peroxide mix?
Choosing the Right Hack for Your Grout Type
Not all grout is the same, and that’s why a recipe that works beautifully in one bathroom might leave damage in another. I learned this the hard way when vinegar—something I thought was harmless—ended up dulling the grout around my kitchen floor. The truth is, you need to match the cleaner to the type of grout you have.
- Cement-based grout: This is the most common type, but it’s also the most vulnerable. It absorbs liquid like a sponge, which makes it easy to stain. Harsh acids, like vinegar or lemon juice, can eat into the surface and make it even more porous over time.
- Silicone or epoxy grout: Found in newer homes and showers, this type resists water and mold better. It’s less porous, so mild scrubs like baking soda or even just dish soap and water often do the trick.
- Grout near natural stone (like marble or granite): This area needs extra care. Acidic cleaners can etch or damage the stone around the grout. Stick with neutral solutions—think baking soda paste or a mild hydrogen peroxide mix.
As experts point out in COIT’s cleaning guide, choosing the right solution for your grout type isn’t just about results—it’s about protecting the surface so you don’t end up with more damage than dirt.
Step-by-Step: How to Apply—Make Your Grout Sparkle Every Time
Having the right recipe is only half the job. How you apply it makes the difference between a quick wipe-down and a real transformation. Here’s the method that consistently works for me:
1. Mix and Apply
- Prepare your chosen recipe in a small bowl.
- Use an old spoon or spatula to spread the paste directly onto the grout lines, or spray if you’re using a liquid mix.
2. Let it Dwell (5–10 mins)
- Give the cleaner time to sink in—this is when the fizzing or softening action happens.
- Don’t rush; walking away for a few minutes actually makes the scrubbing easier.
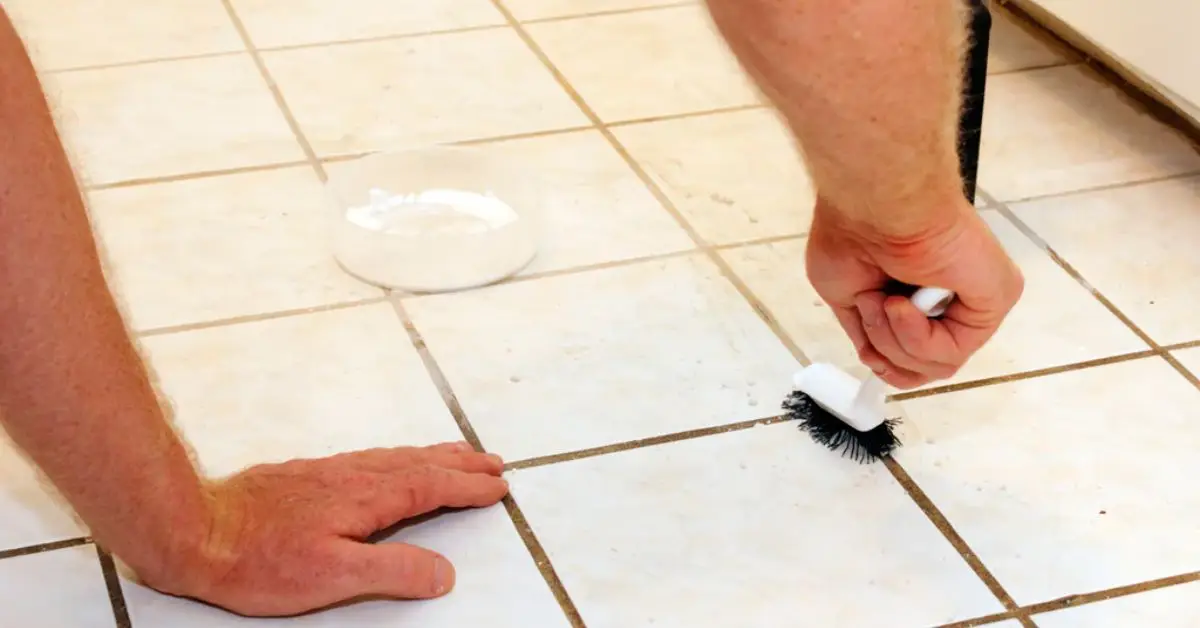
3. Scrubbing Tips
- Use a firm toothbrush, grout brush, or if you want to save time, a drill with a brush attachment.
- Work in small circles instead of straight lines—this helps lift dirt from all sides of the grout.
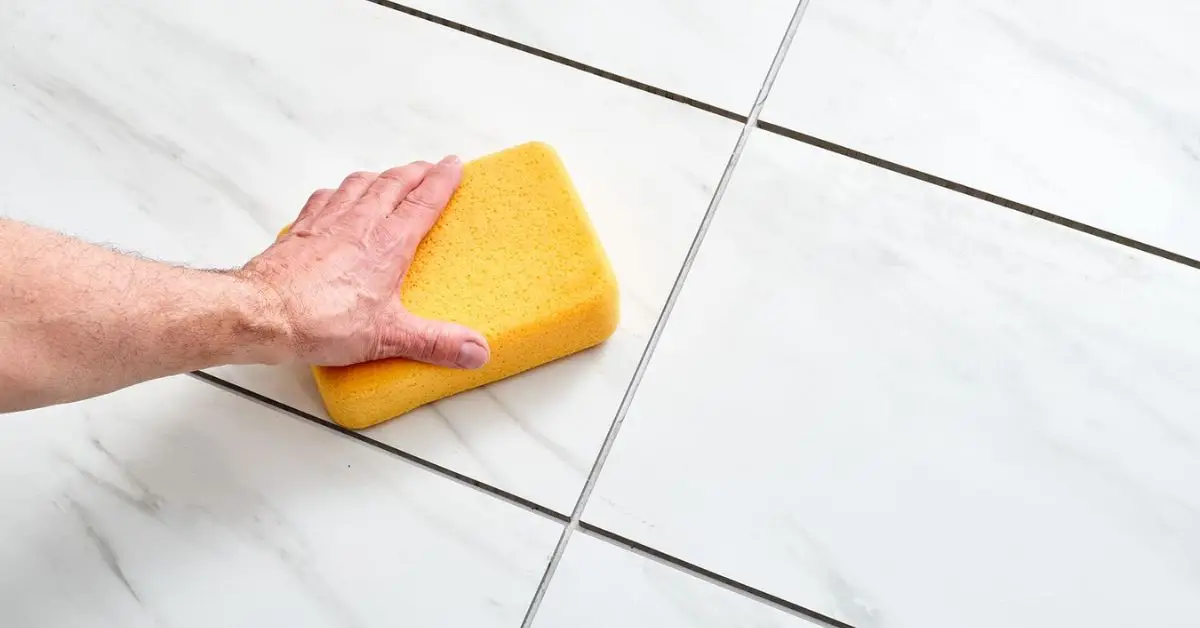
4. Rinse + Dry + Reseal
- Wipe away the loosened dirt with warm water.
- Dry the area with a cloth to stop new water stains.
- If possible, reseal your grout every year or so. Sealing locks out moisture and stains, meaning you won’t have to deep-clean nearly as often.
By following these steps, you’re not just making grout look good for today—you’re keeping it protected for the long run.
Do you usually give your cleaner time to “sit,” or are you more of a scrub-right-away type?
Pro Tips & Time-Saving Hacks Other Writers Missed
After years of trial and error, I’ve found that the biggest difference between a long, exhausting grout-cleaning session and a quick, satisfying one is knowing the shortcuts. Most articles will stop at “make a paste and scrub,” but there are a few tricks that save time, protect your grout, and even make the process a little more enjoyable.
- Upgrade your tools: Instead of wearing out your wrist with a toothbrush, attach a small scrub brush to a power drill. The circular motion does the hard work for you in seconds.
- Weekly spritz routine: Keep a small spray bottle of mild cleaner handy (like diluted hydrogen peroxide or dish soap solution). A quick spray-and-wipe once a week stops stains from building up and means fewer deep cleans later.
- Add fragrance naturally: Drop a little lemon rind or a few drops of essential oil into your cleaning mix. It doesn’t just smell fresher—it makes the space feel cleaner too.
- Gentle option for sensitive surfaces: If you’re dealing with delicate grout or areas near natural stone, use a pH-neutral mix like warm water with a squeeze of mild washing-up liquid. As Better Homes & Gardens points out, harsh cleaners aren’t always necessary when regular upkeep can do the job just as well.
- Watch the bubbles: When using baking soda and hydrogen peroxide together, let the fizzing finish before you scrub. That’s the signal the reaction has worked and the dirt has loosened.
These little adjustments don’t just save time—they make cleaning less of a chore and more of a quick reset. Once your grout looks fresh, you can brighten the space even more by adding kitchen-friendly houseplants that thrive indoors and make the whole room feel cleaner.
If you had to pick one shortcut to try today, would you go for the drill brush upgrade or the weekly spritz routine?
Conclusion
At the end of the day, grout doesn’t need fancy chemicals or expensive products to look brand new again. The five simple hacks we covered—baking soda, vinegar (with caution), hydrogen peroxide, their fizzing combo, and even lemon—are proof that everyday ingredients can do a professional-level job when used the right way. They’re budget-friendly, safe, and far less harsh than the cleaners most of us grew up with.
The real secret, though, is consistency. A quick weekly spritz-and-wipe, sealing your grout once in a while, and choosing the right recipe for your surface will keep those lines bright without hours of scrubbing. Think of it as maintenance, not a marathon—you’ll spend less time cleaning and more time actually enjoying your space. If you’re already planning a mini home refresh, small upgrades like kitchen cabinet hardware ideas can transform your space just as much as sparkling grout does.
I’d love to know—which of these hacks are you going to try first, and what’s the toughest grout stain you’re battling right now? Share your experience in the comments below.
For more smart, practical home care tips, visit Build Like New and keep your home looking fresh without breaking a sweat.
Disclaimer: These cleaning methods are based on common household practices and general advice. Always spot-test on a small, hidden area first, especially if your grout is old, damaged, or near natural stone. Avoid overusing acidic cleaners like vinegar or lemon on cement-based grout. If you’re unsure or dealing with severe mold or damage, consider consulting a professional cleaner.

