
Easy Steps to Install a Golf Simulator in Your Home?
Do you want to practice your golf swings without leaving the comforts of home?
Would you like to have the same challenges and conditions just as if you were out on a real golf course? An indoor golf simulator has all it can offer-golf play on real courses without ever having to leave the room! This article will teach you how to construct and set up a golf simulator room so that you can enjoy an endless performance and practice of golf at home.
Creating a Golf Simulator Room: The Essentials for a Better Home Golf Swing Experience?
A golf simulator room at home is probably the most exciting thing you can do. With the right setup for your golf simulator, you will be able to pretend you are on a real course right in your own living room.
Let’s get started on creating the desired golf simulator room of your dreams.
1. Start with Choosing a Room Space to Put Your Golf Simulator
Before outfitting the golf simulator room, the preliminary step is knowing the size of the space available. That is primarily because the kind of simulator you get and the area you mean to use will influence that decision. So, measure your space properly so that everything fits properly.
Decide to build a new room or convert an existing area in your house. Basements, garages, spare rooms, and attics are ideal for personalized golf simulator setups. Really with a bit of planning, almost any room can be turned into a beautiful space to golf!
Basement
Transform your basement into a golf simulator room because basements are good with additional space for setting up and naturally helping contain noise from all activities with the other household occupants, allowing private practice without anyone else’s disturbance.
If basement ceilings typically won’t be incredibly high, that can actually be helpful because golf simulators won’t require an exceptionally high ceiling for most swings. A few renovations, good planning, and this can turn your basement into the golf space you need for truly practicing!
Office Room
A spare room in your office is certainly a good candidate for setting up that golf simulator. Often office rooms are designed for privacy and concentration and are therefore an ideal focus space for practicing golf. Converting the space, you may seamlessly integrate comfort and technology to turn it into a multifunctional room, retaining much of that professional feel while meeting the most important part of your golf needs.
Attic
Transforming an attic into a golf simulator room is indeed a creative and enjoyable endeavor. Sloping ceilings dominate most attics, ruling out the height for swings. However, careful planning and customization can turn that around undeniably. The right modifications, such as strategically placing the simulator and even modifying the ceilings, may make the attic a private, unique, cozy, and architecturally different golf space.
Garage
The garage should be truly practical. It can become an indoor golf simulator when it is not used to park vehicles; being space enough for typical separation from living areas, this garage dramatically reduces noise disturbance as well as offers lots of room for the setup.
However, there are a few considerations to consider to get the space really perfect for a simulator.
Key Changes
- Temperature Control: Garages can be overly hot or cold in different seasons, so the addition of insulation or a heating/cooling system is necessary to keep it comfortable all year round.
- Lighting: Proper care and safety should protect or make bright areas glare-free and yet provide visibility of screens with proper lighting.
- Insulation: Walls and ceilings should be insulated to provide a stable environment and further dampening noise
Extra Indoor Space
Build a golf simulator in an area of your home that you are not using. Maybe there is a corner in a large living room or a bit of space near a family room. Such spaces are given practically on entertaining with already built-in designs at home.
Key Things to consider:
Space: Ensure the size is good enough for the swing part and the projection area of the simulator.
Aesthetic Integration: Getting creative with furniture placement or decor will make the simulator sit well with the rest of the room.
Noise Management- Add soft furnishings or rugs to absorb the noise impact in shared spaces.
Separate Home Spaces
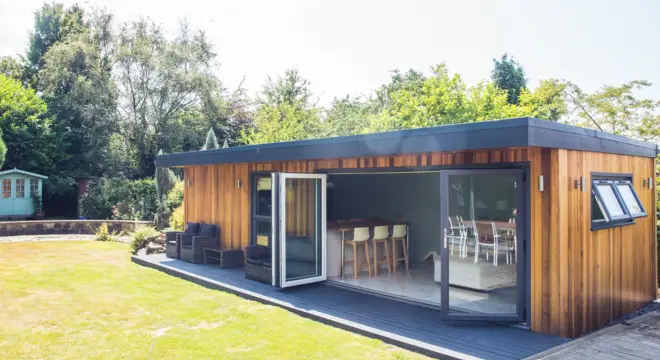
A golf simulator would even be installed in a separate, dedicated space in your home-a detached guest house, converted garden shed, or single-studio. This type of area guarantees privacy which makes way for hours of undisturbed practice without intrusions from or into the main house. It keeps all noise and activity confined, creating an almost perfect setting for immersive golfing experiences.
In addition, independent spaces are frequently offered as a bonus, giving greater leeway in customisation, allowing you to make the place suited for the unique needs of your golf simulator.
Outdoor Garden
Golf in a natural setting brings a sense of freedom and relaxation; an outdoor garden golf simulator setup can provide a unique experience with this. Creating one involves installing a weather-safe enclosure to protect the equipment from the elements, but nothing in the process is as hard as it sounds.
The setup allows you open-air golf practice, which will give a different feel as that of indoor simulators. Given the right protection, an outdoor golf simulator can truly have that duality between nature and technology.
Check the Golf Simulator Room or Space Requirements and Measurements?
Once you’ve chosen the space for your golf simulator room, the next critical step is accurately measuring the dimensions of the area. This ensures that your golf simulator setup fits perfectly without any unnecessary adjustments later. A well-measured room allows you to plan for proper placement of equipment and ensures a seamless integration of the golf simulator components.
Here’s a simple guide to help you determine the ideal measurements for your golf simulator room:
Width: Aim for a minimum of 10 feet, though 12-15 feet provides ample space for a comfortable swing.
Depth: A depth of at least 10 feet is necessary, with an ideal range of 16-20 feet to accommodate the simulator and allow for unrestricted play.
Height: A ceiling height of 9-10 feet is crucial to ensure enough space for your swing without interference from the ceiling.
Establishing Golf Simulator Room Essentials?
After settling on those perfect dimensions for your golf simulator room, it’s time to get focused on the essentials that will add the finishing touches to your golfing experience. Here are the prime components you need to consider while setting up your simulator room:
Flooring
The flooring is critical to the golf simulator room itself because the mat simulates the real feel of a golf course as it has a stable foundation under your stance. As much as possible, specialized golf mats for simulators must be used, but a smooth surface, even plain concrete, would be the minimum requirement for swinging. The surface of the mat or simulator should ideally have that of a fairway-like grass feel. Furthermore, the hitting mat and artificial turf must have the same height for seamless transition.
Wall Treatment
The right treatment for walls is important when they are both safety and hee results in visual clarity. Dark colors or subdued patterns can also be employed on walls for visual accuracy and to avoid glare from the projector screen. Acoustic sound panels, being sound absorbers from impact sounds and protecting the wall from random club swings, define a nice and functional finish for your golf simulator room.
Ceiling Considerations
Ceiling treatments play a significant role in creating a comfortable and distraction-free environment.
- Lighting: Ensure you have adequate overhead or ceiling lighting that doesn’t cast shadows on the screen or interfere with your swing. High-wattage, flicker-free lights are ideal, especially if you’re using a swing camera to capture your shots.
- Noise Transfer: If your simulator room shares space with other areas of your home, soundproofing the ceiling can help reduce the impact noises generated during play. This can be done by installing sound-absorbing materials or insulation, which will help keep the noise from disturbing other members of the household.
Choosing and Installing Your Golf Simulator?
Setting up your golf simulator isn’t just about getting a screen and mat. It’s about picking the right equipment that fits your space and makes your experience more enjoyable. Here’s how you can go about it in simple steps:
What to Think About
1. Space Requirements: Before you buy your simulator, make sure the room is big enough. You’ll need enough height, width, and length to swing comfortably and set up the equipment. Measure your space to ensure it fits.
2. Type of Simulator: There are different simulators with various features. Some are basic, while others are more advanced. Key things to look for:
- Ball tracking to measure how fast and in what direction the ball goes.
- Swing analysis to see how your swing can be improved.
- Different courses to make your experience feel like you’re playing at different golf clubs.
- Quality visuals like clear graphics or a good projector.
3. How to Set It Up: Setting up your simulator might take a little time, depending on the type. Here’s how you can get it right:
- Make sure the room is well-lit and clear of obstacles.
- Protect your walls with a screen or impact net to avoid damage.
- Follow the setup instructions from the simulator to install cameras, sensors, and screens.
4. Budget: Golf simulators range in price. Think about what you can spend and what features you really need. You can find affordable options with good features, while more expensive ones offer more advanced technology.
Installing the Golf Simulator Setup?
Once you’ve selected the right simulator and determined your space, the next step is to install your setup. Here’s how you can get it done:
1. Room Preparation
- Clear the space: Ensure the room is free from furniture or any obstacles that could interfere with your swing or the movement of the simulator components.
- Ensure proper lighting: Make sure the room has sufficient lighting, but avoid glare on the projector screen. Position your light sources carefully.
2. Placing the Simulator Equipment
- Hitting Mat and Turf: Set up your hitting mat on a stable, flat surface. Ensure that the mat height matches the artificial turf to create a smooth, even playing surface. This will help simulate a true golf experience.
- Projector and Screen: Install your projector at the right height and distance from the screen to ensure clear visuals. The screen should be durable enough to withstand ball impacts.
- Impact Net: Consider placing an impact net or screen behind your hitting area to protect your walls from any stray balls and enhance safety.
3. Sensor and Camera Setup
- Ball and Swing Sensors: Follow the instructions to set up your ball tracking sensors and swing analysis cameras. These devices are often mounted on the ceiling or walls, and they track your swing or ball trajectory for more accurate results.
- Calibrate the Sensors: Make sure you calibrate the system properly, so the measurements of your swings and ball flight are accurate.
4. Connect and Test
- Once everything is installed, connect your simulator system to your computer or device, as per the instructions.
- Test the setup by hitting a few balls and checking if the system tracks your swing and ball correctly. If everything is set up right, you should see your ball data on the screen, with graphics simulating the ball’s flight.
5. Final Adjustments
- Make sure your space is comfortable by adjusting any equipment settings.
- You can also set up additional accessories like speakers, fans, or comfortable seating if you plan on spending a long time using the simulator.
Finishing Touches: Optimizing the Room for Golf Simulator Play?
Once your golf simulator is set up, adding a few finishing touches can really enhance the experience and make your simulator room more comfortable and enjoyable. Here’s how you can optimize your space:
1. Acoustic Environment
To improve the sound quality, consider placing acoustic panels or rugs around the room. This helps reduce echoes and creates a better audio environment, which enhances the overall immersive experience. A balanced sound is essential to make the virtual golf course feel more real, adding to the enjoyment of your practice sessions.
2. Furniture Arrangement
Organize furniture so that it complements your golf simulator setup. Position seating a few feet away from the simulator to ensure clear views of the screen, and leave enough space for guests to move around comfortably. Thoughtful placement can also help make the room feel more spacious and functional.
3. Personalization and Ambiance
Add your personal touch to the room to make it more inviting. You can decorate with golf-related artwork, photos, or even hang your club set along the wall for an authentic touch. This personalization adds character and creates an enjoyable atmosphere that encourages you to spend more time in your simulator room.
4. Temperature and Ventilation
Ensure the room is well-ventilated and at a comfortable temperature. Proper climate control can make a big difference, helping you avoid distractions caused by heat or stuffiness during your practice or gameplay sessions.
5. Cable Management
Keep cables organized and out of sight. Using cable management systems not only improves the aesthetics of the room but also prevents tripping hazards. A tidy, neat setup enhances both the functionality and safety of your simulator space.
6. Comfort and Ergonomics
Consider the ergonomics of the room. Invest in comfortable seating and ensure that your setup supports good posture. This is important for long sessions, as proper support can help prevent discomfort and enhance your overall experience.
Calibration and Maintenance of the Golf Simulator?
To keep your golf simulator performing at its best and ensure longevity, regular calibration and maintenance are essential. Here are some quick tips to help you maintain your setup:
1. Regular Check-Ups: Schedule calibration sessions for sensors, cameras, and tracking devices as per the manufacturer’s guidelines. This ensures accurate measurements and reliable data for your shots.
2. Calibration Tools: Use any calibration tools or software provided by the manufacturer to ensure consistent and precise performance.
3. Regular Cleaning: Dust and dirt can negatively impact performance. Clean your projector, sensors, and screens regularly to maintain clarity and precision.
4. Storage and Protection: When not in use, store your equipment properly to protect it from dust and potential damage. Consider using storage furniture that doubles as decor to keep smaller items safe and organized.
Conclusion: Golf Simulator Room Setup
Creating the perfect golf simulator room combines careful planning, the right equipment, and attention to detail. By ensuring the space fits your simulator’s needs, choosing the right technology, and adding personal touches, you can enhance both your gameplay and enjoyment.
Don’t forget regular maintenance and calibration to keep everything running smoothly.
With the right setup, your home golf simulator will become a place where you can practice, play, and improve your game, no matter the weather. It’s all about creating an enjoyable, realistic golfing experience within your own space.

