
8 Vinegar and Baking Soda Cleaning Hacks That Actually Work
I’ll be honest—when I first heard about mixing vinegar and baking soda for cleaning, I thought it was just another Pinterest myth. But the truth? It actually works. Not for everything (we’ll get into that later), but for a surprising number of common messes around the house.
Here’s why: vinegar is acidic, baking soda is basic. When you combine them, they create a fizzy reaction (remember your science class volcano?). That fizz helps loosen up grime, unclog drains, and neutralize odors—without any harsh chemicals.
More importantly, they’re cheap, non-toxic, and safe around pets and kids. That’s why even big names like Treehugger, HowStuffWorks, and The Spruce recommend them for daily use.
But let’s be real—just dumping vinegar and baking soda together won’t magically deep-clean your home. That’s where most “hack” articles go wrong. They skip the how, the where, and the when. So in this article, I’ll walk you through eight specific vinegar and baking soda hacks that actually work—because I’ve tried them, I’ve researched them, and I’ve seen the difference.
Now, let’s start with the messiest one: your drains. When was the last time you cleaned those out, by the way?
1. Unclog and Deodorize Your Drains (Without Harsh Chemicals)
If your sink or shower is starting to smell—or water’s draining slower than usual—you’re probably dealing with a buildup of gunk inside the pipes. I’ve been there. And instead of reaching for expensive chemical drain cleaners (which can actually damage pipes over time), there’s a gentler fix that works surprisingly well.
Here’s what I do:
Pour about half a cup of baking soda straight into the drain. Then slowly add one cup of vinegar. You’ll hear it fizz up, and that’s a good sign—it means it’s breaking down the grime inside. Let it sit for 10–15 minutes. Then flush it out with boiling water.
This works because the reaction helps break up residue—things like soap scum, grease, and even hair to some extent. It also neutralizes odors while it’s at it.
Pro tip: If you do this once a month, you’ll rarely have to deal with full clogs.
Most articles mention this hack, but very few explain when and how to use it safely. For example, if you’ve already used a commercial drain cleaner recently, don’t follow this hack right away. Mixing chemicals can be dangerous.
And while it won’t fix a major clog deep in the pipes, it’s perfect for maintenance and light slowdowns.
So next time your sink smells funky, skip the toxic stuff. Try this first. It might just solve the problem in under 20 minutes.
What’s the one spot in your house that always seems to drain slow?
2. Bring Back the Sparkle in Grout and Tiles
If there’s one cleaning job that feels instantly satisfying, it’s scrubbing old, grimy grout and seeing it turn white again. But most people either ignore it or spend money on specialty cleaners that smell like bleach and don’t do much. Here’s what I’ve found works better—and it only takes two ingredients you already have.
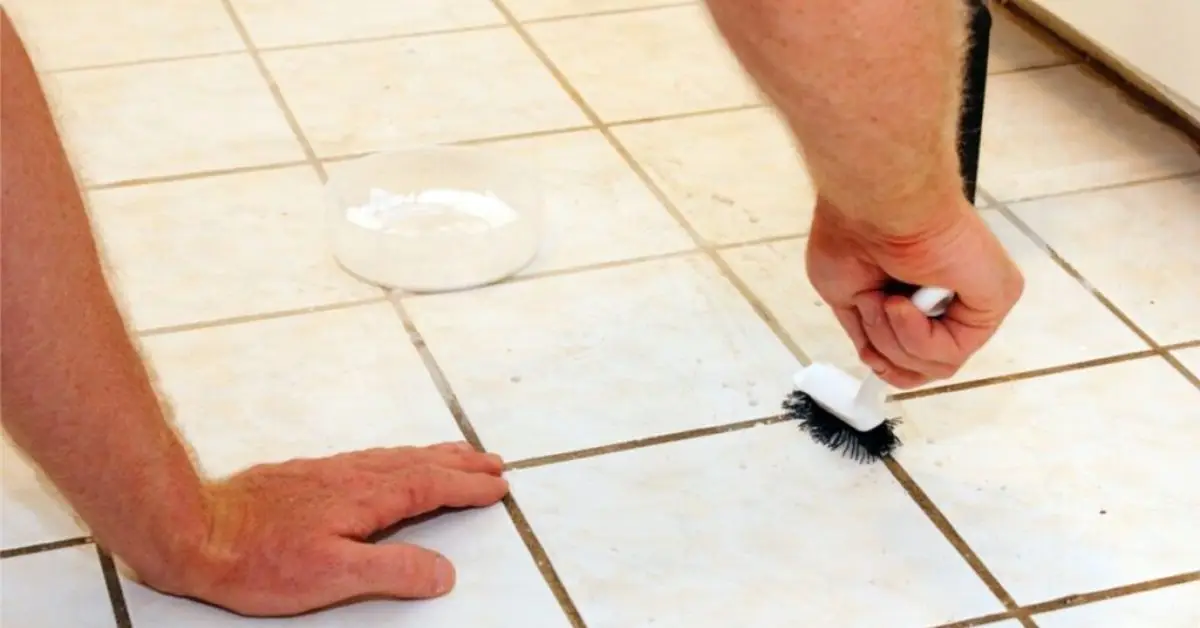
Make a thick paste using baking soda and a little water. Apply it generously over the dirty grout lines. Then spray vinegar over the paste. The reaction will start bubbling up right away—that’s the baking soda lifting dirt, while the vinegar helps dissolve soap scum and hard water stains.
Let it sit for five minutes, then grab an old toothbrush or a stiff scrub brush and get to work. Wipe clean with warm water when you’re done.
This method works especially well in bathrooms, kitchens, and around tile backsplashes. And unlike bleach, it doesn’t sting your nose or ruin your clothes.
Here’s where most guides drop the ball: they don’t tell you this combo works best on ceramic or porcelain. Don’t use it on natural stone like marble—it’ll damage the surface. Also, if your grout is sealed, test a small area first.
When I first tried this on my shower tiles, I didn’t expect much. But the results were honestly better than store-bought products. And it cost next to nothing. Giving old grout and tile a fresh look is one of those budget-friendly tricks that instantly elevates your space. For more affordable home upgrades that add serious value, check out these 5 genius home upgrades under $500 that make your home look expensive.
Have you ever looked at your bathroom floor and wondered if it used to be a different color? This is how you find out.
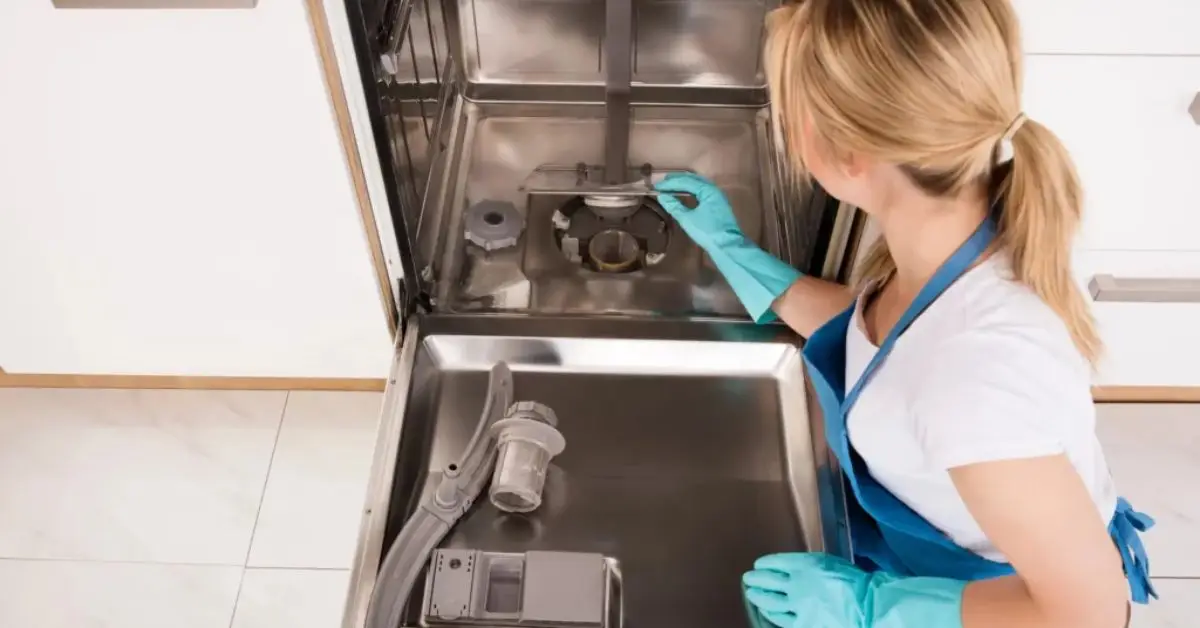
3. Deep-Clean Dishwashers, Washing Machines, and Kitchen Sinks
These are the places we expect to stay clean—but they’re actually some of the dirtiest spots in the house. I used to wonder why my dishwasher smelled weird even after a wash cycle, or why clothes came out of the machine smelling musty. Turns out, the machines that clean everything else need their own reset.
UK Cleaning Supplies
Dishwasher:
Pour one cup of white vinegar into a dishwasher-safe bowl and place it on the top rack. Run a hot water cycle. Then sprinkle half a cup of baking soda on the bottom and run a second short cycle. This combo deodorizes, removes old detergent buildup, and freshens the interior.
Washing Machine:
Run one empty cycle on hot with two cups of white vinegar. Then follow with another cycle using half a cup of baking soda. It helps clear moldy residue, especially if you’ve got a front-loader.
Kitchen Sink:
This one’s easy: dump half a cup of baking soda down the drain, followed by a cup of vinegar. Wait 10–15 minutes, then flush with hot water. For garbage disposals, you can freeze vinegar in ice cube trays and grind them to clean blades and deodorize at the same time.
Here’s something most articles miss: don’t let vinegar sit too long on rubber seals or hoses—it can degrade the material over time. Use it, but rinse thoroughly. This is backed by appliance manufacturers, not just cleaning blogs.
Doing this once a month has completely changed how fresh my appliances feel—and how well they perform. If your dishwasher still smells like last week’s dinner, this is your fix.
What’s the one appliance in your house that never quite smells “clean”? Try this routine and see the difference.
4. Rescue Burnt Pans Without Scratching Them
We’ve all done it—walked away from the stove for “just a minute” and come back to a scorched mess at the bottom of the pan. I used to think once a pan was burnt, that was it. But vinegar and baking soda can save most of them—without endless scrubbing or harsh scouring pads.
Here’s the method that works for me every time:
- Fill the burnt pan with enough water to cover the scorched area.
- Add about half a cup of vinegar and bring it to a simmer.
- Turn off the heat and stir in two tablespoons of baking soda. It’ll fizz up.
- Let it cool, then scrub gently with a sponge or soft brush.
This combo softens burnt-on residue, especially food starches and oils. The acid from the vinegar breaks down the gunk, and the baking soda gives it some safe grit to lift it off.
But here’s what most blog posts don’t tell you: avoid this trick on nonstick or aluminum pans. Vinegar can mess with the coating or dull the surface. Stick to stainless steel, cast iron (with care), or ceramic-coated cookware.
I’ve saved pans I thought I’d have to toss—ones with thick black crust on the bottom. You just have to be patient and let the mix do the heavy lifting.
Burnt a pan recently? Don’t throw it in the sink and forget it. Try this method and watch the bottom come back to life.
5. Clean and Deodorize Your Toilet (Without Bleach Smell)
Let’s be honest—nobody likes scrubbing the toilet. But skipping it just makes things worse. I used to dread it too, until I figured out this simple routine that doesn’t involve bleach or those overpowering blue tabs.

Here’s what works:
- Pour one cup of white vinegar directly into the bowl. Let it sit for about 30 minutes.
- After that, sprinkle baking soda around the inner rim and into the water.
- Use a toilet brush to scrub thoroughly, especially under the rim and around stains.
- Flush. That’s it.
The vinegar helps break down mineral stains and kill odor-causing bacteria, while the baking soda scrubs without scratching. And the best part? Your bathroom smells clean—not like a chemical factory.
You can also use this combo to clean other bathroom spots. For example, a clogged or crusty showerhead can be soaked in a vinegar and baking soda solution for 15–20 minutes to clear out buildup. Most articles skip that, but it’s one of the easiest bathroom wins you can get.
This routine takes less than five minutes of active effort, and it keeps things fresh for days. If your bathroom always smells “off” no matter how often you clean, this might be your missing step.
Next time you reach for that store-bought cleaner, ask yourself—why not try something gentler that actually works?
6. Make Microwave and Oven Stains Disappear (No Elbow Grease Needed)
Microwaves and ovens might be the most ignored appliances when it comes to deep cleaning—mostly because the stains feel baked in (literally). I used to think scrubbing was the only way. Turns out, steam plus a little science works better.
For microwaves, here’s what I do:
- Fill a microwave-safe bowl with one cup of water and two tablespoons of vinegar.
- Microwave it on high for 3–5 minutes until it’s steamy inside.
- Let it sit with the door closed for a minute, then carefully remove the bowl.
- Wipe down the inside with a soft cloth or sponge.
- If there are stubborn spots, sprinkle a little baking soda and wipe again.
The steam loosens food splatters, and the vinegar breaks down grease. Baking soda helps with anything that’s stuck without scratching the surface.
For ovens or stovetops, make a thick paste of baking soda and water. Spread it over greasy or burnt areas, let it sit for at least 20 minutes (or overnight if it’s bad), then spray with vinegar. The reaction lifts grime, and you can just wipe it off.
Most cleaning guides mention the microwave method but don’t pair it with baking soda for stubborn spots. And hardly anyone explains why this works: the steam softens messes, and the vinegar cuts through oil, making the cleanup smoother.
This has saved me hours of scrubbing—and it works way better than those harsh oven sprays that leave chemical residue behind.
If you’ve been putting off cleaning your microwave or oven because “it’s too much work,” try this first. You’ll be done in less time than it takes to reheat leftovers.
7. Deodorize Shoes, Rugs, and Other Stinky Stuff
Some smells just won’t go away, no matter how often you clean. Gym shoes, pet beds, car mats—these are the things that quietly build up odors until one day you walk in and think, “What is that smell?”
That’s where baking soda really shines. It’s not just a surface cleaner—it actually absorbs odor particles from fabrics, foam, and rubber. Here’s how I use it:
For shoes:
Sprinkle a few tablespoons of baking soda inside each shoe. Let it sit overnight, then shake it out in the morning. The difference is real—especially in sneakers or boots you wear often.
For rugs or upholstery:
Dust baking soda over the area, let it sit for 15–30 minutes (longer if the smell is bad), then vacuum thoroughly. It works on sofas, mattresses, even car interiors.
For laundry prep:
If something smells off even after a wash, soak it in a mix of warm water and a cup of vinegar for 30 minutes before running it through the machine. Add a bit of baking soda to the detergent compartment. It freshens up workout gear, old towels, and anything that’s picked up mildew.
This isn’t just some DIY hack passed around on the internet—brands like Arm & Hammer actually recommend this method, and they’ve been doing baking soda since before most of us were born. Whether it’s a funky-smelling chair cushion or a stale corner in your home office, odor control is key to feeling productive. While you’re freshening things up, you might want to explore these top 5 home office decor fixes for 2025 that are stylish and budget-friendly too.
Most articles focus on hard surface cleaning, but fabric odor is a major gap—and one that’s surprisingly easy to fix. If your home looks clean but still smells weird, this section might be your game-changer.
What’s one spot in your home that smells worse than it looks? Try this and see what happens.
8. DIY All-Purpose Spray That’s Actually Safe to Use Everywhere
Most store-bought surface sprays either leave a chemical residue or have that sharp, artificial lemon scent that lingers in the air longer than the mess you were cleaning. If you’re tired of that, this vinegar and baking soda combo makes a solid alternative—one you can mix at home in two minutes flat.
Here’s how I make it:
- 1 cup distilled white vinegar
- 1 cup water
- 1 tablespoon baking soda
- A few drops of essential oil (optional—for scent)
Mix it in a glass spray bottle (plastic can sometimes react with vinegar over time). Shake gently before each use.
This spray works well on most non-porous surfaces—kitchen counters, bathroom tiles, sinks, light switches, and even fridge shelves. The vinegar kills bacteria, the baking soda lifts grime, and the water dilutes just enough to make it gentle.
But here’s the thing most people don’t tell you: don’t use this on stone surfaces like marble or granite. The acid in vinegar can etch and dull the surface over time. Also skip it on wood that isn’t sealed.
One viral Facebook post got thousands of shares using this exact recipe, but what it didn’t include was this surface warning. And that’s how people end up damaging countertops they paid thousands for.
Use this spray daily for spot-cleaning and maintenance. It’s one of the simplest habits that makes your home feel clean all the time—not just when you do deep cleans.
What’s the one surface in your house you’re constantly wiping down? Try this spray there and notice the difference.
Do Vinegar and Baking Soda Really Work Together? Let’s Clear That Up
This might surprise you: vinegar and baking soda aren’t always better together. In fact, using them the wrong way can cancel out their cleaning power.
Let me explain.
When you mix baking soda (a base) with vinegar (an acid), they react immediately—producing carbon dioxide gas and water. That fizzy reaction looks impressive, but chemically, once the bubbling stops, you’re mostly left with a neutral liquid that’s not very powerful on its own.
That doesn’t mean it’s useless. The reaction itself is helpful—it can lift gunk in drains or fizz away grime from grout—but the leftover solution doesn’t clean much. That’s why timing and technique matter.
Use baking soda first to scrub or loosen up dirt. Then follow with vinegar to lift and rinse it. Or, in cases like drains, the bubbling action inside pipes helps shake loose buildup you can’t reach.
This is where a lot of online guides go wrong. They either tell you to mix both in a spray bottle (which fizzes up and turns into mostly water) or dump them together without a purpose. Reddit users have pointed this out too—there’s a whole thread warning people not to overuse the combo without knowing when it actually helps.
So here’s the takeaway:
Yes, they work together—but only in specific ways. If you’re just combining them for fun fizz, you’re wasting their potential.
Use each for what it does best:
- Baking soda = gentle scrub, odor absorber
- Vinegar = acid that dissolves grime and bacteria
When you know how and where to use them, that’s when they start feeling like a real cleaning hack—not a random experiment.
Ever tried a vinegar and baking soda trick that didn’t work? You’re probably not alone—and now you know why.
What Experts Say (and What Most Cleaning Blogs Miss)
It’s easy to find cleaning tips online, but not all of them come from people who actually understand what works long-term. So I started digging into what trusted professionals and home care experts say about vinegar and baking soda. And the difference in depth was huge.
For example, Architectural Digest calls vinegar and baking soda the “Swiss Army knives” of home cleaning—because they’re versatile, cheap, and safe for everyday use. But they also stress the importance of using them on the right surfaces and not falling for TikTok-style oversimplifications.
Similarly, Homes & Gardens, a well-known UK home magazine, highlights non-toxic cleaning as a growing priority, especially in households with pets, kids, or people sensitive to strong chemical fumes. And guess what’s at the top of their recommended list? Vinegar and baking soda.
What stood out most to me is that real experts never claim these two ingredients can do everything. They talk about using them strategically—like pre-treating fabrics, descaling appliances, or deodorizing hard-to-wash items. They also warn against risky habits, like storing mixed vinegar and baking soda in sealed containers (the pressure buildup can actually cause leaks or bursts).
None of this nuance makes it into most listicle-style blog posts. Those tend to repeat the same basic tips without explaining why they work—or when they don’t.
If you’ve ever read five articles on the same hack and still weren’t sure it was safe to try, that’s not your fault. It’s the content gap. And that’s why I dug deeper.
Do you trust home cleaning advice from influencers—or do you prefer science-backed, tested methods? This might be the section that helps you tell the difference.
Keep It Clean, Keep It Natural: Final Thoughts
So there you have it—eight vinegar and baking soda hacks that actually work when used the right way. If you’ve been relying on commercial cleaners for every little mess, I get it. But once you start using these natural methods, you’ll notice two things right away: your home smells fresher, and you’re not spending a fortune on five different sprays.
These two ingredients won’t replace everything in your cleaning kit—but they can handle way more than most people give them credit for. Especially if you follow the timing, surface safety, and method that fits each situation. If these cleaning habits spark a deeper desire to upgrade your space, just be mindful—some home changes need permits, even things like painting. Here are 6 surprising home upgrades that require a license you should know about before getting started.
My advice? Start with just one of the hacks from this list that solves a problem in your home right now—maybe it’s the sink drain, the microwave, or that pair of shoes that never seems to stop smelling. Test it. Tweak it. And see how it fits into your routine.
You don’t need to go fully “natural” overnight. But when something is this effective, safe, and affordable—it’s worth working into your habits.
What’s one area in your home that’s overdue for a deeper clean? Try one of these hacks and let me know how it goes.
Before You Start: A Quick Safety Disclaimer
Even though vinegar and baking soda are non-toxic, they’re still reactive in certain conditions. A few quick notes:
- Avoid using vinegar on natural stone (like marble, granite, or travertine)—it can etch the surface.
- Don’t mix them and store in a closed container—the pressure can build and cause leaks.
- Use with care on aluminum, unfinished wood, or soft metals—they may discolor or weaken over time.
- Always spot test before trying any new mix on delicate surfaces or fabrics.
These aren’t just “kitchen tips”—they’re legit chemical reactions. Use them smartly, and they’ll work harder than half the products in the cleaning aisle.
Want more easy home cleaning tips like these? Visit our Build Like New for guides, checklists, and everyday solutions.
Disclaimer: Always test cleaning solutions on a small area first. Avoid using vinegar on natural stone, aluminum, or unsealed surfaces. This article is for informational purposes only—follow manufacturer guidelines for appliances and materials.

