
How to Clean Your Toilet Bowl With Vinegar in 5 Simple Steps
If you’ve ever scrubbed your toilet bowl, flushed, and still seen that stubborn ring staring back at you—I get it. I’ve been there too. Most people want a clean toilet fast, without harsh chemicals or that strong bleach smell filling the bathroom. That’s exactly why vinegar keeps coming up as a go-to solution.
But here’s the thing most articles don’t tell you clearly: vinegar works really well when you use it the right way—and barely works at all when you don’t. I’ve tested this in real homes, with real hard-water stains, not just in theory. The difference between “vinegar failed” and “wow, that worked” usually comes down to a few small but critical steps.
In this guide, I’m going to show you how I clean a toilet bowl with vinegar in five simple, practical steps—no fluff, no unrealistic promises. I’ll also be honest about where vinegar helps, where it doesn’t, and how to get visible results without damaging your toilet or wasting time.
If you’re looking for a quick, natural way to clean your toilet bowl—and you want it done right the first time—you’re in the right place.
Before we start, let me ask you this: are you dealing with light stains, or that hard yellow ring that never seems to go away?
Why Vinegar Works for Toilet Bowl Cleaning (And When It Doesn’t)
Before I ask you to scrub anything, I want you to understand why vinegar works—because once you get the logic, you’ll stop wasting time on methods that were never going to help in the first place.
Vinegar works because it’s acidic. Plain white vinegar contains acetic acid, which helps break down limescale, urine residue, and mineral buildup caused by hard water. These stains aren’t regular dirt. They’re deposits—and acid is what loosens and dissolves them so scrubbing actually works.
That’s also why vinegar is popular in so many US homes. I use it myself because it’s:
- Non-toxic and safer around kids and pets
- Septic-safe, which matters if you’re not on a city sewer line
- Budget-friendly and easy to find in any grocery store
Now here’s the part most guides don’t explain clearly—and where frustration usually starts.
Vinegar is not a disinfectant. It can reduce some surface bacteria, but it does not kill germs the way bleach or EPA-approved cleaners do. Even trusted health sources like Healthline explain that vinegar shouldn’t be relied on for full disinfection.
So set the right expectation:
- If you want to remove stains, rings, and buildup → vinegar works well
- If you need hospital-level germ killing → vinegar is not the right tool
Once you understand this boundary, vinegar stops feeling unreliable and starts feeling useful.
What You Need Before You Start (Minimal, Realistic Setup)
If you’re aiming for quick results, you don’t need a long shopping list. I’ve seen people quit halfway just because the setup felt annoying.
Here’s exactly what I use—and what you actually need.
Essentials
- White distilled vinegar: This matters. Apple cider vinegar or scented versions don’t work the same way. White distilled vinegar has the right acidity and leaves no residue.
- Toilet brush: Any standard brush works. You don’t need a special one.
Optional (but useful)
- Gloves: Not required, but I recommend them—especially if you’re dealing with buildup.
- Baking soda: Optional because vinegar alone handles most stains. Baking soda only helps with tougher rings by adding mild abrasion, not because of the fizz. If you do decide to use it, these baking soda toilet cleaning tricks that actually work show safer ways to use baking soda without damaging the bowl or overdoing it.
That’s it. If a guide asks you to gather five different cleaners, it’s not written for real bathrooms.
Before we move on, take a quick look at your toilet bowl—are you seeing light stains, or a thick ring around the waterline? That detail will decide how aggressive the next steps need to be.
Step 1 & 2 — Prep + Vinegar Application (Most People Get This Wrong)
This is where I see most people mess up. They pour vinegar into a full bowl of water, scrub a little, flush—and then wonder why nothing changed. If you skip proper contact, vinegar loses most of its power.
Step 1: Lower the Water Level for Better Contact
I always start by reducing the water in the bowl. More water means more dilution, and diluted vinegar won’t break down stains effectively.
Here’s what I do:
- Flush once and let the bowl refill normally
- If the water level is still high, gently push it down using the toilet brush. If you notice the water draining slowly or bubbling while doing this, that’s usually a clog—not a cleaning issue. In that case, it’s better to first try these plumber-approved ways to unclog a toilet without a plunger before continuing with vinegar.
You don’t need to drain it completely. You just want the stains exposed, not floating in water.
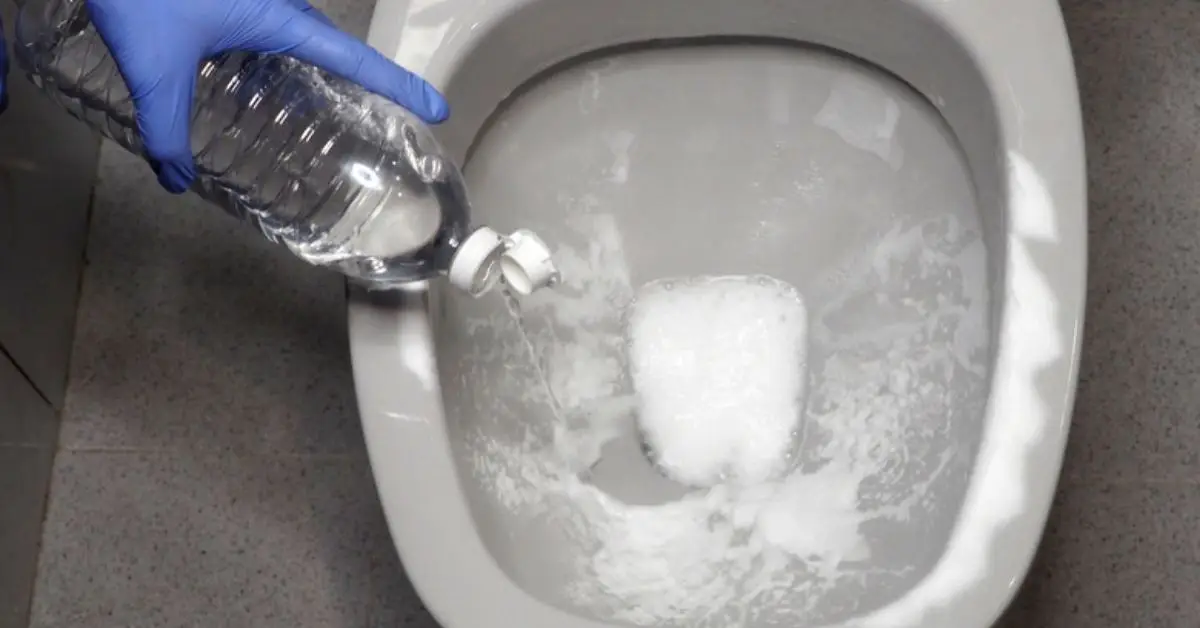
Step 2: Apply Vinegar the Right Way
“Just pour vinegar” is vague advice—and honestly, not very helpful. Amount and placement matter more than people think.
This is what works for me:
- Use 1½ to 2 cups of white distilled vinegar
- Slowly pour it under the rim first, letting it run down the sides
- Make sure the vinegar coats the waterline, where stains usually live
The goal is full surface contact. Vinegar can’t dissolve buildup if it never touches it.
Step 3 — Let It Sit (Timing Based on Stain Type)
If vinegar “didn’t work” for you in the past, chances are you didn’t wait long enough. This step is all about patience—and matching soak time to the type of stain you have.
Here’s how I decide:
- Light stains or routine cleaning: Let vinegar sit for 15–20 minutes
- Yellow rings or mineral buildup: Give it 30–60 minutes
- Thick hard-water stains: An overnight soak is justified
Hard water makes a big difference here. Many US states—like Arizona, Texas, Florida, and parts of California—have high mineral content, which means stains are tougher and need more time. Data from the U.S. Geological Survey clearly shows how widespread hard water is across the country,
The key thing I want you to remember: vinegar works slowly. Rushing this step almost guarantees weak results.
Step 4 & 5 — Scrub, Boost (If Needed), and Flush
Once the soak time is done, now you help vinegar finish the job.
Step 4: Scrub Without Damaging the Bowl
I always scrub gently but deliberately. Porcelain scratches easily, and scratches attract stains later.
What works best:
- Use circular motions, not aggressive back-and-forth
- Focus on the waterline and under the rim jets
- Let the softened buildup lift instead of forcing it
If you’ve soaked long enough, scrubbing shouldn’t feel like a workout.
Step 5: Optional Boost for Stubborn Stains
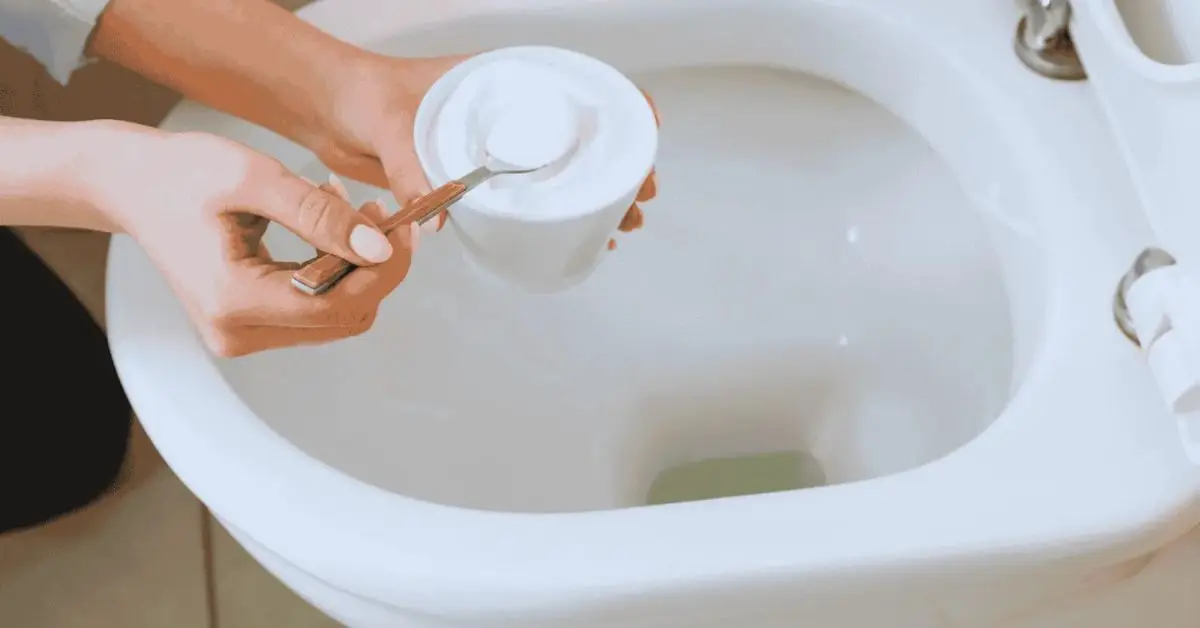
If stains are still hanging on, this is when baking soda helps—not before.
Here’s when I add it:
- Sprinkle baking soda only on problem spots
- Light fizzing helps loosen residue through mechanical agitation, not chemistry
- Scrub lightly again
Important to know: the fizz looks impressive, but it’s not magic. If stains don’t improve after this round, it’s a sign vinegar has reached its limit.
That’s your cue to stop and switch methods—not keep repeating the same steps.
Finally, flush once and check the bowl. If most stains are gone, you’re done. If not, the issue isn’t effort—it’s stain type, and we’ll handle that next.
Let me ask you this: after flushing, did the stain fade evenly, or is one specific area still darker than the rest?
Common Mistakes That Make Vinegar ‘Not Work’
If vinegar didn’t work for you before, it’s rarely because vinegar isn’t good. It’s usually because one of these common mistakes slipped in—and they’re easy to fix once you know them:
- Using too little vinegar: A sprinkle here and there isn’t enough. You need enough to coat the stains and work over time.
- Not letting it sit long enough: Rushing straight to the brush doesn’t give vinegar a chance to dissolve buildup. Time matters.
- Mixing vinegar with bleach: This one’s important. When you mix vinegar and bleach, dangerous chlorine gas can form. Trusted cleaning advice like this article from The Spruce explains proper vinegar use without toxic mixes.
- Expecting disinfectant-level sanitation: Vinegar lifts stains and odors, but it’s not engineered like commercial disinfectants. If you treat it like bleach, you’ll feel let down.
Every one of these mistakes shows up again and again in comments, forums, and real-world attempts. Fixing them doesn’t make cleaning perfect—it makes it effective.
How Often You Should Clean Your Toilet Bowl With Vinegar
Cleaning once is great. But what most guides miss is how frequently you should do it so stains never get a chance to settle back in.
Here’s a simple routine I follow—and it works every time:
- Weekly maintenance (standard homes): A quick vinegar clean once a week keeps the toilet fresh and prevents rings from forming.
- Hard water homes: If your bowl gets yellow rings within a few days, you’re likely dealing with mineral buildup from hard water. I recommend every 4–5 days in that case—because small efforts now save bigger scrubbing later.
- Eco-friendly routine: One of the biggest advantages of vinegar is that you can use it regularly with minimal environmental impact. If you’re aiming for a greener cleaning routine, vinegar becomes your go-to. To extend that freshness between cleanings, these natural hacks to keep your toilet water smelling fresh without harsh chemicals fit perfectly into an eco-friendly routine.
Here’s a quick question for you: after your last vinegar clean, did you notice stains coming back quickly, or did they take a while to reappear?
When Vinegar Is Not Enough (And What to Do Instead)
I want to be straight with you here—vinegar is great, but it’s not a miracle cure. Knowing when to stop using it actually saves you time and protects your toilet.
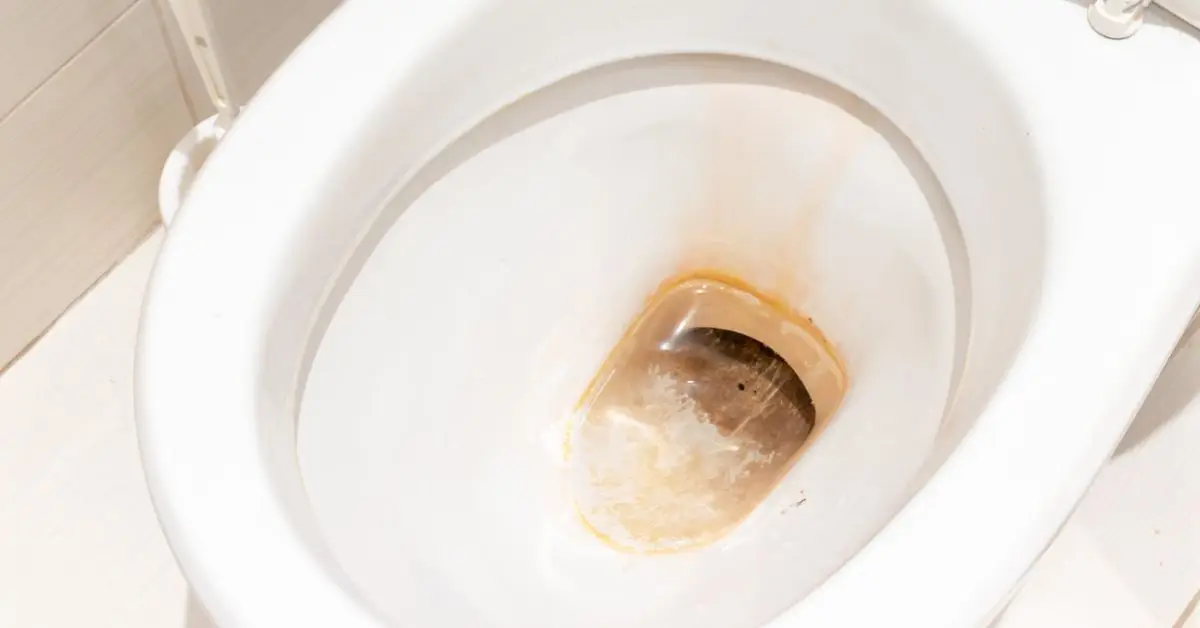
Here are situations where vinegar usually hits its limit:
- Rust stains: These come from metal in water, not mineral scale. Vinegar may lighten them, but it won’t fully remove deep rust.
- Severe limescale buildup: If the bowl has thick, rock-hard deposits that feel rough to the touch, vinegar alone will struggle.
- Old or damaged porcelain: Scratches, worn glaze, or very old toilets trap stains deep inside. No liquid cleaner can fully fix that.
What I do instead—carefully:
- Pumice stone (with caution): Works well on hard mineral rings, but only when the surface is wet and with light pressure. Overdoing it can scratch porcelain permanently.
- Commercial descalers: Look for cleaners made specifically for limescale or hard water deposits. I’m not talking about brand names—just the category. These are designed for problems vinegar can’t handle.
The key takeaway here is honesty: if vinegar isn’t working after proper use, the problem isn’t effort—it’s chemistry.
Key Takeaways for Fast, Visible Results
If you skimmed the steps, here’s what actually makes the difference:
- Vinegar works best on mineral and urine stains, not every type of discoloration
- Lowering the water level is critical—dilution kills results
- Soak time matters more than scrubbing strength
- Baking soda is optional, not required
- If stains don’t improve after proper soaking, switch methods
Simple steps, done correctly, beat aggressive scrubbing every time.
Safety & Responsibility Note
Before you wrap up, a quick safety check—because cleaning shouldn’t come with risks.
- Keep the bathroom well ventilated
- Wear gloves if you have sensitive skin
- Never mix vinegar with bleach—even small amounts can be dangerous
- Store cleaners away from kids and pets
A clean toilet isn’t worth a health scare.
If this guide helped you—or if you’ve dealt with a stain that refused to budge—drop a comment below and tell me what you’re fighting with. I read them all, and your question might help someone else too.
And if you want more practical, no-nonsense home guides like this, visit Build Like New—that’s where I share what actually works in real homes, not just on paper.
Disclaimer: This guide is for general cleaning advice only. Always follow product instructions, avoid mixing cleaners, and test any method on a small area first. Results may vary based on water quality, stain type, and toilet condition.

