
Natural Ways to Remove Odor and Residue from Your Washing Machine
I hate opening the washer and getting a whiff of sour, musty laundry — and I bet you do too. That smell usually means soap scum, trapped moisture, or mildew hiding in the drum, gasket, or detergent drawer. Left unchecked it ruins clothes, wastes energy, and can even make sensitive skin flare up.
I’ve tried the expensive cleaners, but the simplest fixes often live in my kitchen: baking soda, white vinegar, lemon, hot water, and a few minutes of elbow grease. In this piece I’ll walk you through a safe, step-by-step deep clean that uses only those ingredients, plus clear cautions about when to avoid acids that might harm seals or void warranties.
You’ll get practical steps for front-load and top-load machines, a quick maintenance plan so this doesn’t come back, and a short checklist you can use every month. No fluff — just what works, why it works, and what to watch for so you don’t damage your machine.
Before we jump in: what bothers you most about your washer right now — odor, visible grime, or clothes that still smell after a wash?
Why Deep-Cleaning Your Washing Machine Matters
I know it feels like a washing machine should clean itself, but it doesn’t. Every load leaves behind a thin layer of soap, lint, dirt, and hard-water minerals. Over weeks, that residue settles into the drum, the gasket, and the detergent drawer — places you don’t see until the smell hits you.
And that musty smell isn’t “normal.” It’s usually bacteria or mildew growing in warm, damp corners. The rubber gasket around a front-load door is the biggest trouble spot because moisture stays trapped there. Once it settles in, your machine starts working harder, clothes don’t smell fresh, and the buildup slowly reduces the machine’s lifespan.
Common issues that pile up inside a washer:
- Soap scum that sticks to the drum and traps odors
- Lint and detergent residue that form a sticky layer in hidden corners
- Hard-water deposits that dull surfaces and reduce water flow
- Mold and mildew hiding inside door seals or around the detergent tray
If your clothes sometimes come out smelling “not quite clean,” the machine is often the reason. A dirty washer keeps recirculating old grime, which affects both smell and performance. When grime builds up long enough, it can even cause minor leaks, slow cycles, and louder washing sessions because the system has to work against the gunk.
Kitchen Ingredients That Work — Safe, Natural & Readily Available
Before we get into steps, I want you to know why simple kitchen ingredients actually work. These aren’t random home hacks — they’re safe, effective, and gentler on your machine than most chemical cleaners.
Baking Soda — a gentle scrub + natural deodorizer
Baking soda has two superpowers: it deodorizes and it lightly scrubs without scratching. When you sprinkle it into the drum, it lifts grime, loosens old detergent layers, and neutralizes sour smells that cling to metal and rubber.
Why I trust it: baking soda is non-toxic, budget-friendly, and gentle on every part of your washer. If you like using simple, effective ingredients around the house, you can also try these baking soda toilet-cleaning tricks that work surprisingly well in everyday cleaning. Even big home-care experts like Martha Stewart recommend it for natural cleaning.
Why it helps:
- Breaks down light residue
- Neutralizes musty smells
- Safe on the drum, gasket, and detergent drawer
White Distilled Vinegar — mild acid that cuts through buildup
Vinegar works because its mild acidity dissolves the stuff baking soda can’t handle — especially mineral deposits from hard water and thick soap scum. A hot cycle with vinegar often makes the machine look and smell fresher instantly.
But you and I should be careful with overuse. Too much vinegar, too often, can slowly wear down rubber parts like hoses or gaskets. Using it once in a while for maintenance is fine — just don’t treat it like an everyday fix.
What vinegar helps with:
- Dissolving limescale and mineral deposits
- Breaking stubborn soap residue
- Eliminating deep-seated odors
For more ways to use these two ingredients safely and effectively together, here’s a list of must-try vinegar and baking soda home hacks that make cleaning easier.
Optional natural helpers — lemon, hot water, and simple tools
You don’t need fancy products. A few more things from your kitchen can make the job easier and more effective.
- Lemon juice: Its mild acidity freshens the drum and helps with mineral spots.
- Hot water: A high-temperature cycle alone can flush out light buildup.
- A soft brush or cloth: Perfect for seals and corners where grime collects.
Some home guides also recommend lemon for adding a clean scent and giving rubber parts a gentler treatment compared to vinegar. The goal isn’t to scrub aggressively — it’s to loosen residue and lift it before it becomes a bigger problem.
When you put these ingredients together the right way, you get a deep clean without harsh chemicals, without damaging seals, and without spending extra on store-bought cleaners.
Step-By-Step Natural Deep-Cleaning Method
When I clean my own washer, I follow a simple routine that works for both front-load and top-load models. The idea is to loosen old residue first, then flush it out with heat, and finally wipe the parts that traps grime the most. Take a minute to prep before you start — it makes the whole process smoother.
Preparatory Steps
Before you pour anything in, make sure the machine is empty. I always check whether I’m working with a front-load or top-load washer because the trouble spots are different. Front-loads need extra attention around the rubber gasket, while top-loads often hide residue under the agitator.
I also look at the manual for any warnings about acids or high-heat cycles. Some brands clearly mention not to use vinegar too often on rubber parts, so it’s better to know before you begin.
Quick prep checklist:
- Empty the washer completely
- Check model type
- Read manual notes on cleaning
- Pull out the detergent drawer if removable
- Keep a soft brush and microfiber cloth nearby
Cleaning the Drum
You can deep-clean the drum in two ways. Pick the one that suits the problem you’re dealing with.
Option A: Baking soda first
If the machine smells a little off or has light residue, this is the gentler approach.
- Add ½ cup baking soda directly into the empty drum
- Start the hottest, longest cycle your machine allows
- Once it finishes, wipe the drum with a microfiber cloth
- Leave the door open to air-dry
Baking soda gives you a clean base — it scrubs without scratching and removes stubborn odors.
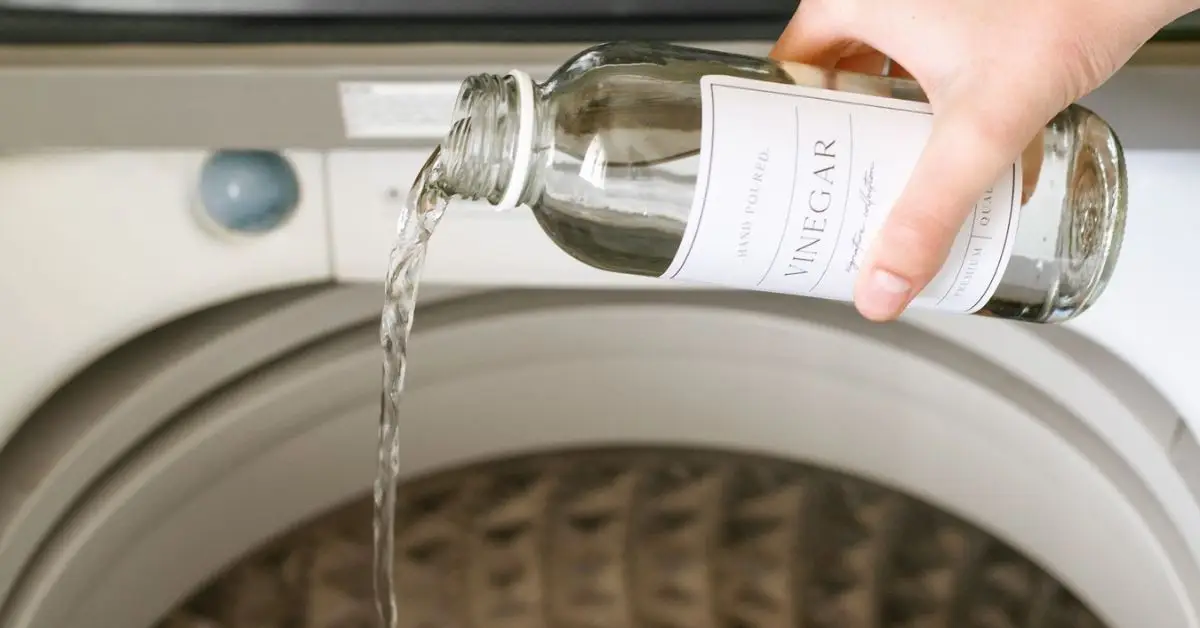
Option B: Vinegar cycle for mineral buildup
If you live in a hard-water area or you see dull white marks inside the drum, vinegar cuts through that layer quickly.
- Pour 2 cups of white vinegar into the drum or the detergent tray
- Run the hot-water hygienic cycle
- After the cycle, wipe the drum, the door, and the gasket carefully
- Keep the door slightly open to dry
This works well for limescale and old soap scum. Just don’t use vinegar too often because it can slowly wear down rubber parts over time.
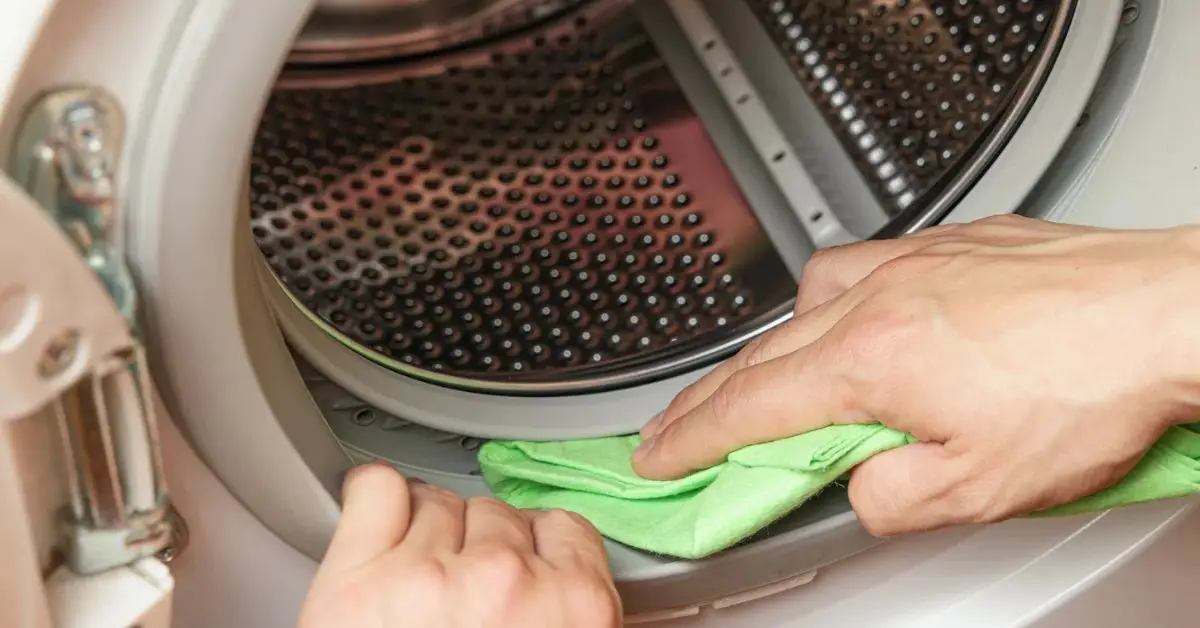
Cleaning Rubber Seals, Gasket, and the Detergent Drawer
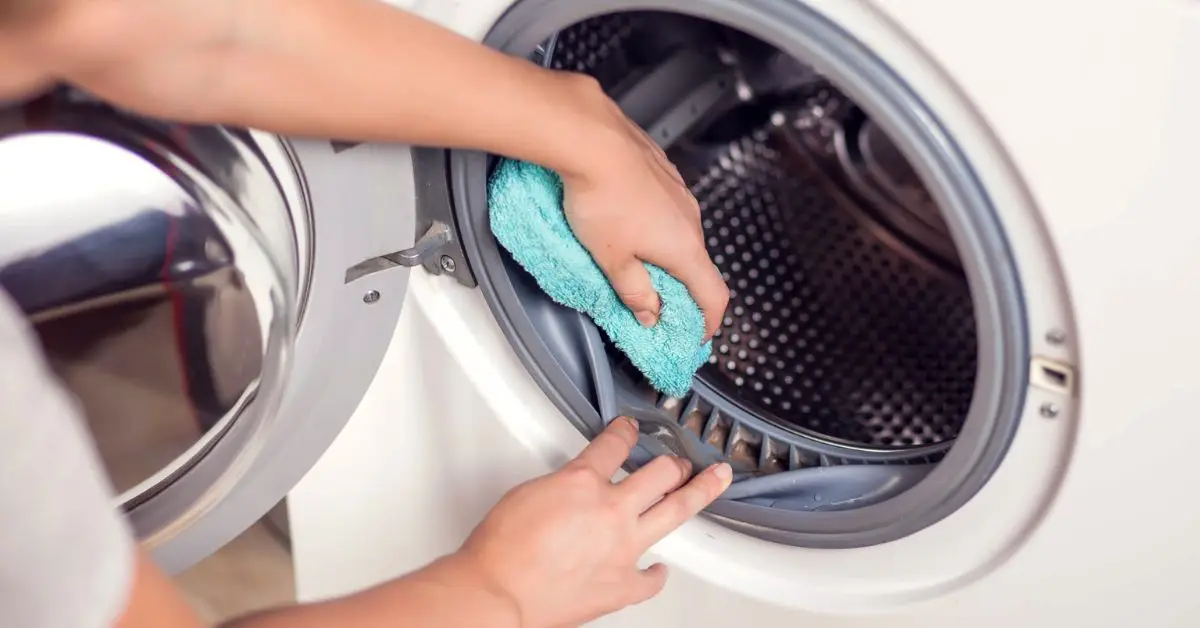
This is where the real grime hides. I mix a little vinegar with warm water or make a paste with baking soda and a few drops of water. Then I take a toothbrush or soft brush to get into the folds of the gasket and the railings of the detergent drawer.
Focus on:
- Deep folds of the door seal
- Underside of the rubber gasket
- Corners of the detergent tray
- Edges where water pools
Once everything looks clean, rinse lightly, dry with a cloth, and leave the door open to avoid mildew returning.
Final Rinse & Maintenance Cycle
If you want a fresh, neutral smell, run one last hot-water cycle with nothing inside. This rinses out any leftover baking soda, vinegar, or loosened residue.
Most appliance guides recommend doing a natural clean once a month if you wash often. The Home Depot also suggests regular maintenance cycles to prevent buildup from starting in the first place.
Risks & Why You Should Be Cautious
Most cleaning hacks online promise miracles, but machines aren’t all built the same. A little caution can save you from leaks, worn-out parts, or expensive repairs later.
Potential Harm from Repeated Vinegar Use
Vinegar is effective, but it’s still an acid. If you use it too often, it can slowly weaken rubber hoses, seals, and gaskets. Maytag has warned about this in their care recommendations, especially for high-efficiency and front-load washers where rubber parts sit in moisture more frequently.
So I use vinegar only when I need to remove mineral deposits — not as a weekly habit.
When Not to Use Vinegar
If your manual says “avoid acidic cleaners,” take that seriously. Also, never mix vinegar with bleach or any detergent. That combination can damage internal components and create harmful fumes.
Whirlpool highlights this as a common mistake people make when they try multiple cleaning hacks at the same time. Keeping cleaners simple is always safer.
Limitations of Natural Cleaners
Natural ingredients are great for:
- Soap scum
- Mild odors
- Light mildew
- Surface residue
- Mineral spots
But they won’t fix deeper issues like:
- A clogged drain pump
- Heavy limescale on hidden pipes
- A worn-out heating coil
- Mechanical faults
If you’ve cleaned the machine thoroughly and the odor or noise still comes back, it’s usually a sign that internal parts need servicing or descaling.
Enhanced Natural Cleaning — Ideas to Make Your Washer Smell and Feel Fresh
Once the deep-clean is done, I like adding a few small habits that keep the washer smelling better for longer. These aren’t mandatory, but they make a real difference if you wash often or deal with humidity at home.
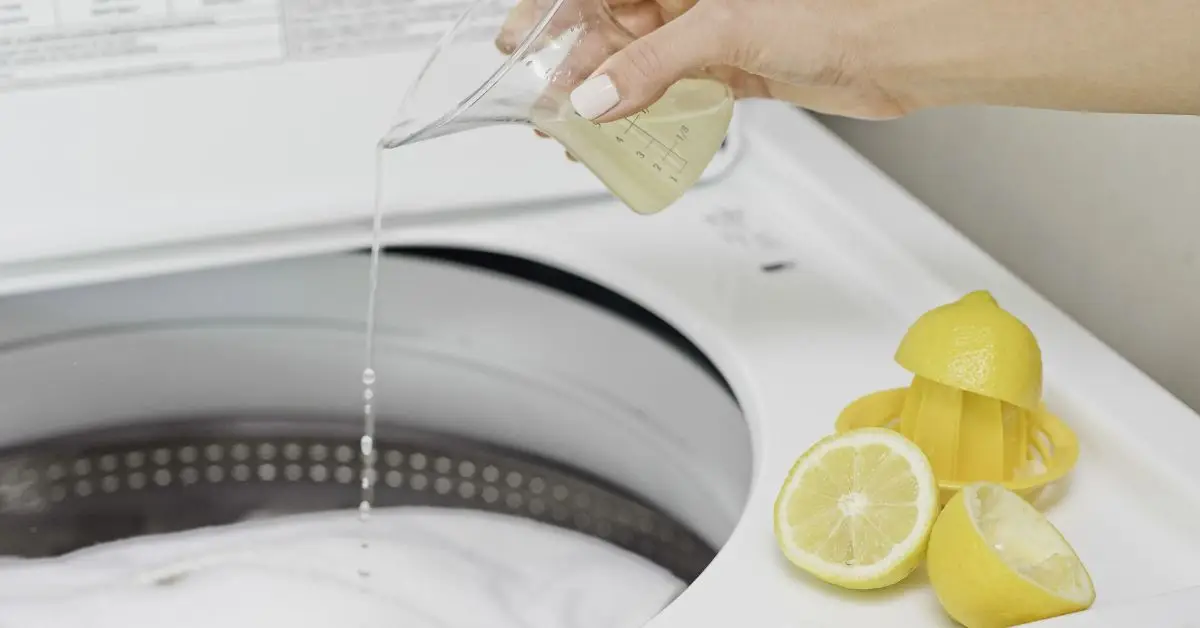
Use Lemon Juice or Citrus (Sparingly): When I want a natural fresh scent without leaning too much on vinegar, I use a little lemon juice. Its mild acidity helps loosen light mineral deposits, and the citrus smell feels cleaner than most commercial fragrances. I always dilute it with warm water because straight lemon juice can be too harsh on rubber parts.
Use this more as a “refresh” step, not a full descaling method. And since vinegar has so many practical uses beyond appliance care, you may find these genius vinegar tricks for getting rid of flies helpful around the home as well.
Air-Dry the Drum and Door: One habit that protects your washer more than anything else is simply letting it dry. After each wash, I leave the door and detergent drawer slightly open until everything feels dry to the touch. Moisture trapped inside the gasket is the biggest reason washers start smelling musty.
Give it a few hours to breathe, and your machine stays fresher for days.
Build a Regular Cleaning Schedule: A washer stays clean when deep-cleaning becomes a habit. A monthly routine works well for most homes, and if you do laundry several times a week, every 2–3 months is usually enough.
Guidance from the Center for Environmental Health on deep-cleaning a laundry machine also emphasizes routine upkeep to avoid odor and buildup.
Quick Natural Cleaning Checklist — For Busy Households
What you need
- Baking soda
- White vinegar (optional)
- Lemon juice (optional)
- Soft brush or old toothbrush
- Microfiber cloth
What to do — Drum
- Add baking soda and run a hot cycle
- Use vinegar occasionally if you have mineral buildup
- Wipe the drum dry afterward
What to do — Seals and Drawers
- Scrub gasket folds and detergent tray using diluted vinegar or a baking-soda paste
- Rinse lightly and wipe dry
Post-clean care
- Run a plain hot-water rinse if needed
- Leave the door and drawer open to air-dry completely
- Repeat monthly or every 2–3 months
Optional fresheners
- A little diluted lemon juice for mild scent
- Essential oils only on a cloth placed near the machine, never inside the drum
When Natural Cleaning Isn’t Enough — Signs You Need Professional Help or Stronger Cleaners

Even though I prefer natural cleaning, there are moments when it simply isn’t enough. If you’ve done everything right and your washer still acts up, it’s usually a sign that something deeper is going on.
- Persistent Mold or Bad Odor: If your washer still smells damp or mouldy even after a full natural deep-clean, the issue might be inside the plumbing lines, pump filter, or internal drainage path. These areas collect grime that baking soda and vinegar can’t fully reach. That’s when a technician or a professional maintenance service becomes the safest option.
- Visible Wear on Rubber Gaskets or Leaks: If you notice cracking, softening, or visible wear on the rubber seals, stop using acidic cleaners right away. Vinegar or strong citrus can make the damage worse. Any sign of leaking around the door or base is a clear signal to call for service instead of trying another DIY fix.
- Heavy Mineral Scale in Hard-Water Regions: If you live in a hard-water area, natural cleaners can help only to a point. Mineral deposits inside the heater, hoses, and drum can become stubborn over time. Occasional descaling or a technician visit keeps your washer running efficiently and prevents long-term wear.
Eco, Health and Budget Benefits of Natural Cleaning
Adding natural cleaning to your routine isn’t just about saving the washer — it also makes everyday life easier and safer.
- Non-Toxic and Safe for Family: Using simple kitchen ingredients keeps harsh chemicals out of your home. It’s easier on your skin, safer for kids, and better for pets who wander around the laundry area.
- Saves Money: You don’t have to buy expensive washing-machine cleaners every month. Baking soda, vinegar, and lemon juice cost almost nothing, and they last a long time.
- Better for the Environment: Fewer chemicals go down the drain, which is better for water systems and the environment. It’s a small change with a real impact.
Summary and Recommended Natural Cleaning Routine
Before you leave, here’s a simple routine that works for most households and keeps your washer running smoothly:
Monthly
- Hot-water cycle with baking soda
- Wipe drum, seals, and detergent drawer afterward
Every 2–3 months
- Light vinegar or lemon cleaning (only if your washer manual allows acidic cleaners)
Weekly
- Wipe the gasket, dry the edges, and clean the detergent drawer
After Every Wash
- Leave the door and drawer open to air-dry
And remember: if you ever notice strong odors that won’t leave, visible gasket wear, or leaks, switch to a technician instead of trying another DIY round.
If you found this guide helpful and want more practical home-care advice, I’d love to hear your thoughts. Drop a comment, share your experience, or tell me what topic you want next. And for more simple, effective home-improvement guides, visit Build Like New — your space deserves to feel fresh and work like it should.
Disclaimer: This guide is for general home-care purposes only. Always check your washer’s manual before using any cleaning method, especially acidic ingredients. If you notice leaks, damage, or persistent odor, stop DIY cleaning and contact a qualified technician.

