
How to Address Plaster Ceiling Cracks in Old Houses?
Have you ever looked up at the ceiling of an old house and noticed cracks running across its plaster surface?
These cracks, common in historic homes, often signal deeper issues beyond aesthetics. Natural aging, structural shifts, and environmental factors can all contribute. Addressing them early is crucial to preserving both the home’s beauty and integrity.
Let’s explore the causes of these cracks, the risks they pose, and effective ways to address them while preserving the charm of old houses.
Types of Plaster Ceiling Cracks
1. Superficial Cracks
Cracks form in webs for thin spider patterns. Typically, such web-like cracks would be signs of settlement of your house or painting problems. These cracks generally are not very critical, but if not looked through, they can start to develop and probably cause even more damages after the while.
2. Structural Cracks
Long cracks run from the ceiling and often downward along the walls. They indicate a serious possibility of foundation or structural problems. Such cracks can soon weaken the entire house, making it dangerous.
3. Water-Induced Cracks
Usually, such rough cracks are formed with color changes and are a result of leakage and moisture problems. Water leaks either from the roof or from some plumbing usually create such cracks which, if observed ignoring them, may end in weakening the plaster as well as proliferation of molds that further destroys the ceiling.
4. Cracks Accompanied by Sagging
On the whole, such cracks are the most dangerous. Now, when cracks go along with the ceiling having dips or sagging, that marks the onset of a definite danger for the ceiling to fall. Such cracks thus should be repaired immediately so as to prevent any eventuality or structural failure.
Causes of Plaster Ceiling Cracks?
1. Aging and Wear
Age induces gradual natural degradation of plaster, rendering it less sturdy and less flexible. Over many years, the materials used in the plastering begin to break down and soon cracks begin to be formed. It is a widespread reason for older houses. It may even produce external cracks or structural ones since the plaster becomes brittle.
2. Water Damage
Most frequently, plaster cracks can be attributed to dampness or moisture intrusion, which may occur through roof leakage, plumbing faults, or condensation in the attic. This moisture affects the plaster and causes it to become soft and weak. Water also causes damage to plaster by cracking but compromises the strength of ceilings and exposes them to further damage like sagging or crumbling.
3. Structural Problems
Some of the structural problems that cause plaster ceilings to crack include foundation settling, truss uplift, or weak load-bearing walls. As the foundation settles or shifts over time, stress is exerted on the ceiling, causing it to crack. In addition, if the load-bearing walls or trusses are not properly supported, any shifting that occurs will affect the plaster above them.
4. Excessive Weight
Another common reason for ceiling cracking and then mostly total collapse in regard to historic homes is cramming heavy things into the attic. Weight places stress on ceiling support, particularly if the structure is not designed for such weight. In due course, plaster ceilings give way with cracks, or eventually, they may even collapse altogether.
Warning Signs of Serious Ceiling Issues?
1. Cracks Spreading Across Walls and Ceilings
If cracks begin to spread from the ceiling to the walls, it may indicate serious structural problems that need immediate attention.
2. Sagging or Bowing of the Ceiling
When a ceiling starts to sag or bow, it’s a sign of stress on the structure, often caused by water damage or overloading. This could lead to collapse if ignored.
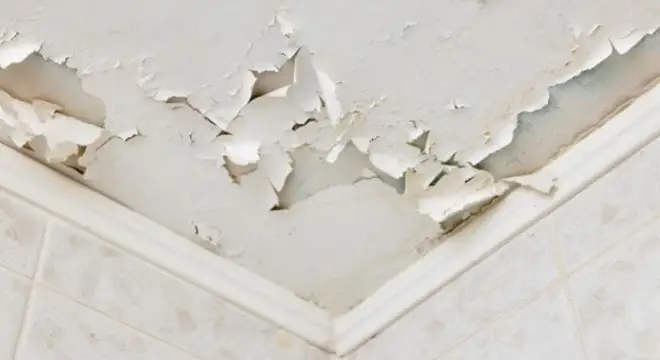
3. Bubbling Paint or Water Stains
Bubbling paint or visible water stains are signs of moisture problems, which weaken plaster and make ceilings more prone to cracking or sagging.
4. Sudden Creaking Noises or Debris Falling
If you hear creaking sounds or find debris falling from the ceiling, it suggests that the ceiling may be under significant strain and could collapse soon.
Assessing and Repairing Cracks
DIY for Minor Cracks
For small, superficial cracks (like hairline fractures), you can repair them yourself. Here’s a simple guide for patching minor cracks:
- Clean the Crack: Use a utility knife to remove any loose plaster around the crack. Clean the area thoroughly to ensure the compound sticks well.
- Apply Joint Compound: Spread a thin layer of joint compound over the crack using a putty knife. Press it into the crack, filling it completely.
- Smooth the Surface: Once the compound is applied, smooth it out so that it’s flush with the surrounding ceiling surface. Allow it to dry, then sand it lightly to ensure a smooth finish.
- Paint: Once the compound is dry and smooth, paint over the repaired area with a matching color to blend it seamlessly with the rest of the ceiling.
Professional Repairs
For more serious cracks, such as large structural cracks or sagging ceilings, it’s best to call in a professional. A structural engineer or plaster specialist can assess the underlying cause of the cracks. You should consider professional repairs in the following situations:
- Sagging or Bowing Ceilings: These may indicate a structural issue that requires expert assessment.
- Large or Deep Cracks: Cracks that span over large areas or extend down walls often point to deeper issues in the foundation or plaster structure.
- Water Damage: If the cracks are caused by water leaks, the source of the moisture needs to be addressed before repairing the plaster.
A professional will use the proper techniques to ensure that the integrity of the ceiling is restored without further damage.
Tools and Techniques for Professional Repairs
In cases where the plaster is loose or has been damaged extensively, modern tools and techniques can be used to restore its integrity:
- Plaster Washers: These are metal washers that can be screwed into the ceiling to hold loose plaster in place, restoring stability to the ceiling without completely replacing it.
- Plaster Reinforcement: In some cases, plaster may be reinforced with additional materials, such as mesh or lath, to provide better support and prevent future cracks.
- Replastering: For severely damaged ceilings, professionals may recommend replastering the entire surface to ensure a smooth, durable finish.
Preventing Ceiling Cracks and Collapses?
Regular Inspections
Regular inspections are an effective preventive measure against ceiling cracks and even collapses. Conduct an inspection at least once a year when one look for cracks and leaks and sagging signs.
You may be able to nip an early problem in the bud from becoming worse; after all, check for any changes in the ceiling’s condition and inspect areas that fluctuate in temperature or have a propensity for moisture, such as attics and basements. . Therefore, any possible minor problem can be treated before it becomes serious.
Proactive Maintenance
Taking proactive steps to maintain the integrity of your ceiling can greatly reduce the risk of cracks and collapse. Here are a few key actions:
- Reinforce Weak Ceilings: If your ceiling shows signs of weakness, consider reinforcing it. Installing additional support beams or using modern reinforcement methods like plaster washers can help stabilize the ceiling.
- Fix Leaks Promptly: Leaks from the roof or plumbing can weaken plaster and cause cracks. Always address water issues immediately by repairing leaks to prevent further damage.
- Ensure Proper Ventilation: Good ventilation, particularly in areas like attics, can prevent moisture buildup, which can weaken the plaster and lead to cracks. Ensuring that air circulates freely can help protect your ceiling from humidity-related damage.
Avoid Overloading
Overloading ceilings, especially in attics, is a common cause of ceiling collapses in older homes. In one real case, a historic home experienced a ceiling collapse after years of storing heavy items in the attic.
The added weight stressed the ceiling’s support system, causing it to crack and eventually fail. This collapse resulted in costly repairs and could have been avoided by reducing the weight in the attic and ensuring the ceiling was designed to bear such loads.
Adhering to Safety Standards
As homes age, it’s essential to ensure that they meet modern safety and building codes. Even though your home may have been built decades ago, applying current standards can help reinforce its structure.
This includes upgrading support beams, reinforcing load-bearing walls, and ensuring that ceilings are properly supported according to modern regulations. Adhering to safety standards can significantly strengthen aging structures and help prevent accidents, making your home safer for everyone inside.
Special Considerations for Historic Homes
Preservation vs. Modernization
In fact, historic homes often walk the fine line between preserving and modernizing. While at one end of the spectrum, an authentic historical remnant is found preserving a unique charm and integrity in architecture; on the other end lies the modernizing renovation of a home to improve safety, energy efficiency, and functionality.
- Preservation: This involves keeping the original materials, design, and structure intact. For example, lath-and-plaster ceilings, wooden beams, and original flooring may have historical value and should be carefully maintained, even if they show signs of wear. Restoration efforts may focus on repairing, repainting, or reinforcing these elements without replacing them entirely.
- Modernization: At times, updates may be necessary for safety reasons or to accommodate modern living standards (e.g., electrical systems, plumbing, or insulation). For example, installing modern electrical wiring or reinforcing load-bearing walls might be necessary to ensure the home meets current safety codes while still maintaining its aesthetic appeal.
Restoration Tips
Restoring a historic home requires a mix of traditional techniques and modern tools to ensure repairs respect the original structure while providing the necessary stability. Here are some key tips:
- Use Traditional Materials
If it were time to repair plaster ceilings or wooden structures, tradition would hold and use only original materials wherever possible. For example, restoring a typical lath-and-plaster ceiling that would involve a mix of plaster, lath boards could be needed. This is important for the aesthetic and structural integrity of the home. Using modern alternatives such as drywall would, in turn, change the history of the home and disrupt a harmony of old and new.
- Preserve Original Features
Restoration works best for architectural features of significance such as fireplaces, woodwork and windows: instead of replacing them, they can be repaired. An example is the restoration of wooden windows by stripping paint, sanding off the rough patches, and applying fresh wood preservatives if they have become intact but deteriorating.
- Reinforce, Don’t Replace
In structural repairs- extensions, sagging beams, or cracked plasters– grow to adopt a strong-strengthening technique without the effort of replacing old materials. Plaster washers or reinforced mesh are used for loose plaster. Steel brackets or hidden reinforcement stabilize beams or supporting sections.
- Consult Experts
Quite often, it needs the skill of an expert in both the restoration technique and standard historical preservation. Consulting a historic preservation expert or a specialty contractor will ensure that restoration meets all local building codes and preservation guidelines. This avoids expensive mistakes and keeps the house at par in value.
- Blend Modern Amenities Discreetly
Nevertheless, while restoring the original materials, modern lifestyles should not be overlooked. Hidden plumbing, HVAC systems, or insulation can all be discretely installed in order to preserve the view into the past. For example, underfloor heating or hidden ductwork makes comfort totally modernized without compromising the integrity of the structure.
Conclusion
In historic homes, maintaining the integrity of plaster ceilings and addressing cracks promptly is essential to preserving both the aesthetic value and safety of the property. Proactive maintenance and regular inspections are crucial in identifying early warning signs, such as water damage, sagging, or cracks. Addressing these issues before they escalate can save homeowners from costly repairs and ensure the safety of loved ones.
FAQs
1. What is the cost of repairing plaster ceilings?
The cost of repairing plaster ceilings can vary greatly depending on the extent of the damage and the region. For minor cracks or superficial damage, homeowners can expect to pay anywhere from $300 to $500 for repairs. However, more extensive damage, such as structural cracks or sagging, may cost between $1,000 and $4,000 or more, especially if structural reinforcement is needed. Professional restoration may increase the costs but ensures that the work meets both safety standards and historical preservation guidelines.
2. Are all cracks a cause for concern?
Not all cracks in plaster ceilings are cause for concern. Hairline cracks or superficial cracks are typically signs of settling and are usually not serious. However, larger cracks that span across the ceiling or walls, especially those accompanied by sagging or water stains, should be addressed immediately. These can indicate deeper structural issues or water damage, which could lead to significant problems if left untreated.
3. Can homeowners perform repairs themselves?
Minor cracks and superficial damage can often be repaired by homeowners using basic tools such as joint compound and paint. However, for more serious issues, such as structural cracks, sagging ceilings, or water damage, it’s recommended to consult a professional plaster specialist or structural engineer. These issues require specialized knowledge and skills to ensure the repairs are done safely and correctly.

