
Avoid These 6 Christmas Tree Decorating Mistakes This Year
Every year, I see people rush into decorating their Christmas tree and then wonder why it doesn’t look the way they imagined. I’ve been there too. You unpack the boxes, throw on the lights, hang every ornament you own, and hope it magically turns into a magazine-style tree. But the truth is, most disappointing trees aren’t caused by a lack of money or talent — they come from a handful of small mistakes that almost everyone makes without realizing it.
If you’ve ever stepped back and felt like your tree looked uneven, cluttered, flat, or just “off,” you’re not alone. When I analyzed the top guides and design advice out there, I noticed the same patterns repeated everywhere — plus a few big gaps. Most articles tell you what to do, but they rarely explain the things you should stop doing right away. And that’s where the real transformation happens.
So in this guide, I’m going to walk you through the six mistakes that quietly ruin a Christmas tree. These aren’t vague tips or trendy opinions. They’re real, practical issues backed by design experts, decorators, and even everyday people sharing their regrets online. By the time we’re done, you’ll know exactly what to avoid — and how to make your tree look fuller, brighter, and more intentional this year.
Before we move on, I want to hear from you: what’s the one thing about your tree that never turns out the way you want?
Why These Tree-Decorating Mistakes Matter
When you and I decorate a Christmas tree, we’re usually focused on the fun part — the ornaments, the colors, the topper. But the truth is, the small mistakes we make early on decide how the entire tree will look and how long it will hold up. A few rushed steps can leave the branches sagging, the lights uneven, or the whole tree feeling a little off, no matter how beautiful your decorations are.
These mistakes also come with real consequences:
- You waste time fixing problems you could’ve avoided
- Your ornaments don’t sit right or fall off
- The tree doesn’t look full or balanced
- And in some cases, you increase the risk of overheating or fire
When you understand why these mistakes matter, you start decorating with intention instead of frustration — and the tree instantly reflects that.
Mistake #1 – Skipping the Prep Work
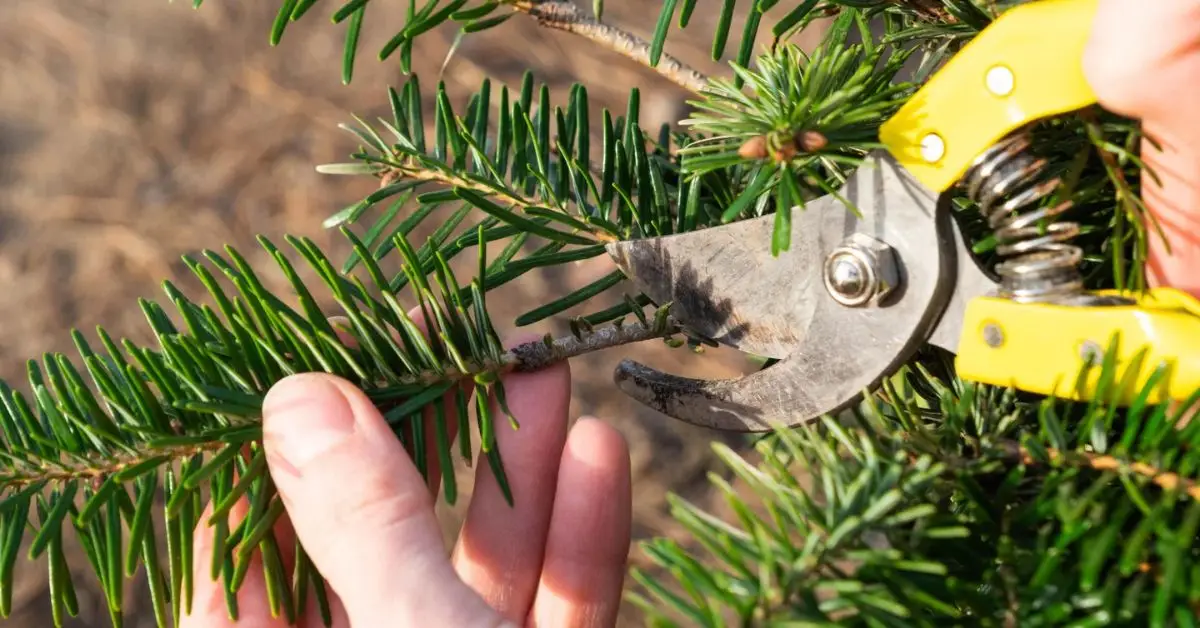
Not Trimming & Hydrating a Real Tree
If you’re using a real tree, you need a fresh cut at the base. Without it, the tree can’t drink water, and the branches start to weaken fast. That’s when ornaments begin to droop, needles dry out, and the whole tree loses its shape. Martha Stewart’s decorating guidance makes this clear — prep is everything.
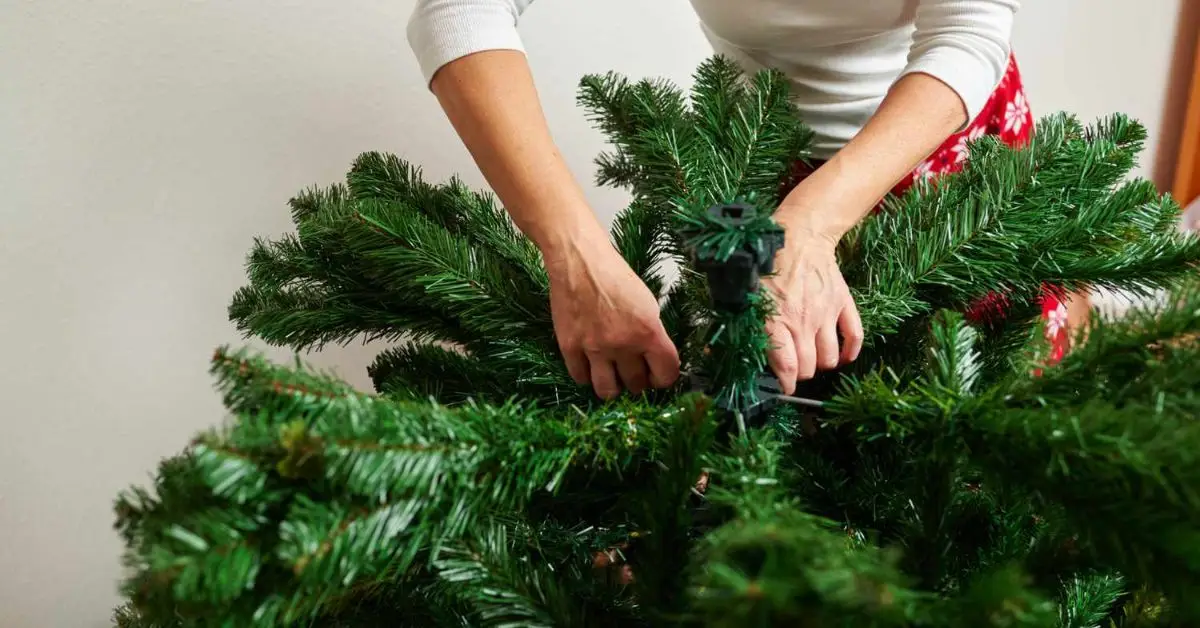
Forgetting to Fluff Every Branch
Fluffing isn’t exciting, but it’s the step that gives your tree that full, rich, showroom look. When branches stay compressed, you get empty pockets, visible wires, and no real dimension. Once you spread out every branch — even the ones at the back — you create volume that supports your ornaments and hides gaps.
Ignoring Stability (Base / Stand)
A tree that isn’t sitting solidly in its stand becomes a problem the moment you start decorating. Heavy ornaments pull it off balance, kids bump into it, and the whole thing becomes a hazard. A stable base does more than hold the tree up — it protects your decorations and keeps you from constantly adjusting and re-adjusting the angle.
Prep work is the foundation. If this part is weak, everything you add on top will feel unstable, uneven, or messy. A few minutes of proper setup saves you hours of frustration later.
Mistake #2 – Not Starting with Lights (or Choosing the Wrong Ones)
Adding Lights Too Late
If you’ve ever tried adding lights after hanging ornaments, you already know how chaotic it feels. The wires get caught, the bulbs sit awkwardly, and you’re forced to shove lights into tight spaces. When you start with lights, you get:
- Hidden wires
- Better depth inside the branches
- A smooth base for everything else
This one change alone can upgrade the entire look of your tree.
Using Hot, Inefficient, or Inappropriate Lights
I’ve seen people stick old incandescent strings on their trees without realizing how hot they get. On a real tree, that heat dries the needles and weakens the branches. On any tree, it can discolor foliage or stress the wiring. LED lights solve this by staying cool, lasting longer, and giving a cleaner glow.
Poor Light Placement & Overloading the Circuits
Most uneven trees don’t suffer from bad ornaments — they suffer from bad lighting. When the lights are too heavy on one side or too sparse on the inside, everything else looks unbalanced. And when you overload the outlet or daisy-chain too many strands, you’re risking more than an eyesore.
Lights aren’t just decoration — they’re the base layer that brings the entire tree to life. When you get the lighting right, everything else becomes easier and looks better, and you avoid the safety risks that come with heat and poor wiring.
Mistake #3 – Ignoring Design Cohesion (Theme, Color, and Balance)
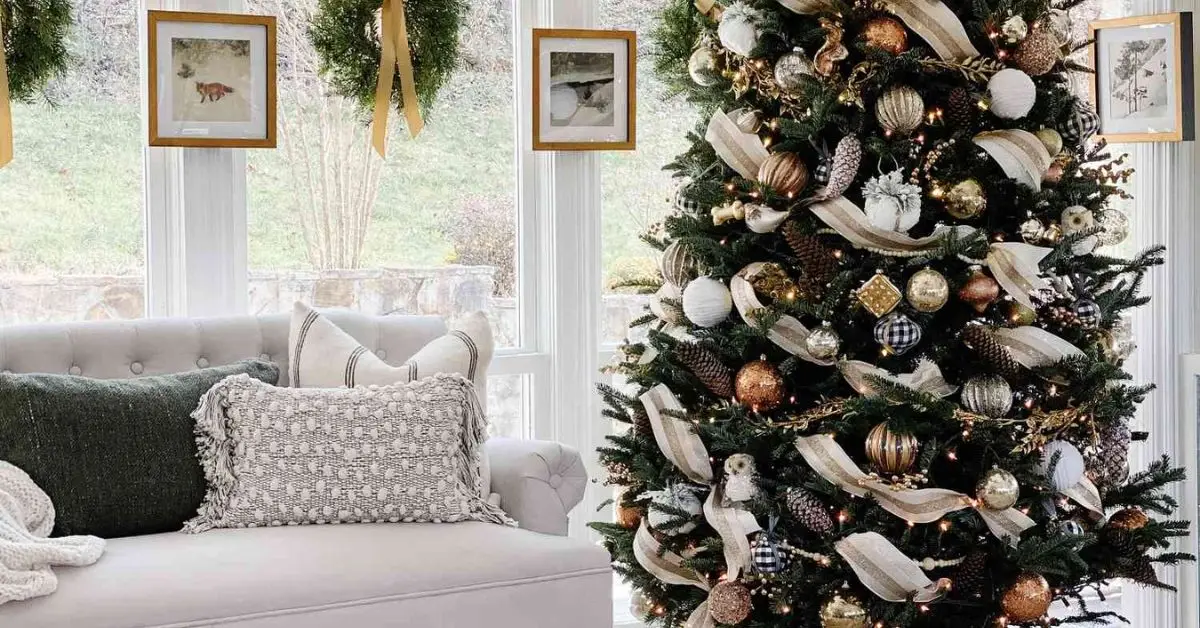
No Defined Theme or Color Palette
When you start decorating without a simple plan, your tree quickly slips into chaos. I’ve been guilty of this too — pulling out everything I love and hoping it somehow blends. But choosing a small color palette or a loose theme makes the whole tree feel more polished. Design editors at Livingetc point out in their guide on Christmas tree mistakes that most messy-looking trees come from skipping this step, and they’re right — a little direction goes a long way.
Over-Mixing Styles or Materials
You may adore rustic wood ornaments and also love shiny mirrored ones, but when you combine too many unrelated styles, the tree starts looking busy instead of beautiful. If you mix materials, do it with intention so the tree feels blended rather than confused. Think of it like creating an outfit — everything should relate, even if it doesn’t match perfectly.
Blindly Following Trends
Every year brings a new “in” look. I’ve seen people buy an entire box of trendy ornaments only to regret it later because it didn’t match their actual style. Trends aren’t bad, but letting them take over usually leads to a tree that feels temporary — and sometimes clashing. Your tree should still look like you.
A cohesive design makes the whole tree feel purposeful. Instead of looking like a random mix of ornaments, it becomes a thoughtful centerpiece that feels warm, calm, and well put together.
Mistake #4 – Overloading or Under-Decorating
Using Every Ornament You Own
I know the temptation — you unpack a box and feel like you should honor every ornament by putting it on the tree. But when the branches start drooping or ornaments start hiding each other, the beauty gets lost. It’s okay to edit. Choose what supports your theme this year and save the rest for another season.
Leaving Big Gaps or Bare Spots
Bare patches can make the tree look unfinished. One trick that always works for me is placing a few ornaments deeper inside the branches. That inner layer adds depth, fills gaps, and gives the tree a dimensional, warm look instead of a flat surface of dangling ornaments.
Too Much Tinsel or Garland Without Strategy
Tinsel and garlands can add charm, but only when you apply them with a plan. If you throw them on unevenly or in clumps, the tree looks lopsided. When used lightly and evenly, they support the design instead of overwhelming it.
Finding the right balance keeps your tree from looking either cluttered or unfinished. A well-edited, well-layered tree feels inviting, intentional, and visually balanced from every angle.
Mistake #5 – Poor Ornament Placement and Weight Management

Hanging Heavy Decorations at the Top
I’ve seen this go wrong so many times. When you hang your heavier pieces near the top, the branches can’t support the weight. They droop, twist, or even snap. And once the top gets heavy, the whole tree starts looking unbalanced. I always keep the heavier ornaments lower and use the sturdier branches to anchor them. It gives the tree a grounded, stable feel.
Ignoring the Depth of the Tree
If everything sits on the outer tips, the tree looks flat no matter how many ornaments you use. I follow the same approach recommended by brands like ArtiTree, which point out that placing a few ornaments deeper inside the branches instantly creates dimension and shadows. It makes the tree look fuller without adding anything extra.
Long Visible Strings or Poor Securing
This is one of those small details that makes a big difference. If the ornament strings hang long and loose, the whole tree looks sloppy. What I do — and what a lot of decorators swear by — is wrapping the string around the branch so it sits snug and hidden. It takes a few extra seconds but the payoff is worth it.
When the weight is balanced and every ornament sits with intention, the whole tree looks polished. Nothing droops, nothing feels random, and the structure stays secure all season.
Mistake #6 – Neglecting Final Touches: Tree Topper, Skirt, and Cord Management
Skipping or Choosing the Wrong Tree Topper
The topper is the final note in the whole design. When you skip it or choose one that’s too small, too heavy, or mismatched, the entire tree can look unfinished. A topper doesn’t have to be dramatic — it just needs to fit the look you’re going for.
Forgetting the Tree Skirt or Base Decoration
People often ignore the bottom of the tree because they think the gifts will hide it later. But during the weeks before the presents arrive, that exposed stand looks harsh. A simple tree skirt or decorative base cover softens the look and ties everything together.
You can also look at my guide on 5 things you should remove from your bathroom before guests arrive if you want your whole home to feel more welcoming this season.
Leaving Power Cords Visible or Tangled
If cords are running across the floor or hanging behind the tree, it breaks the visual flow. I always gather and bundle them, then tuck them behind the skirt. It keeps the tree clean-looking and reduces the chances of someone tripping over a wire.
These small finishing touches make the tree feel complete. They clean up the edges, hide the distractions, and make sure your setup is both beautiful and safe.
Bonus – Overlooked but Important: Maintenance and Long-Term Tree Care
Re-Fluffing Mid-Season
Branches settle over time, especially if you have a large tree. I always take a few minutes halfway through the season to re-fluff. It keeps the shape full and stops the ornaments from drifting out of place.
Checking Lights and Ornaments Weekly
Bulbs burn out, cords shift, and heavier ornaments can slowly slide down the branches. A quick weekly check keeps everything secure and prevents dark patches or accidental breakage. If you want to stay ahead of winter upkeep, you might also appreciate my list of smart home maintenance moves for December.
Safe Storage After Christmas
Poor storage is the silent mistake almost everyone makes. If you shove ornaments into a box or toss cords in a bin, you end up with a tangled mess and broken pieces next year.
Tree care doesn’t stop after decorating. A little upkeep keeps your tree looking great through the season and saves time, money, and frustration when the holidays come around again.
Tree-Decorating Hacks Worth Trying (that People Often Miss)
Bauble Clustering Trick
One hack I’ve seen explode on social media this year is bauble clustering. Instead of hanging ornaments one by one, you group three or four together using a small pipe cleaner and place them as a single cluster. It gives the tree that full, luxe, catalog-style look you normally see in staged holiday shoots.
Wrapping Strings to Hide Them
Long strings on ornaments can ruin an otherwise clean design. Wrapping the extra string tightly around the branch so it sits close and stays invisible. The ornament looks like it’s floating instead of dangling awkwardly.
Safe Cord Bundling
Wires can be distracting, but they’re easy to manage with small tools you might already have. Zip-ties, cord clips, or even reusable bundlers keep everything neat. Once the wires are grouped, you can run them down the trunk or behind the skirt so the lights shine without the clutter.
These hacks give you the polished look most people miss. They’re easy, trendy, and instantly make your tree look more intentional and high-end.
Quick Week-by-Week Decorating Checklist
Here’s a simple, practical checklist you can follow so the whole process feels manageable:
- Prep the tree: trim, hydrate (if real), and fluff every branch
- First pass of lights: wrap from the inside out
- Set your theme: finalize colors and ornament styles
- Start hanging ornaments: mix sizes, layer inner and outer branches, balance the weight
- Add the finishing touches: topper, skirt, and clean cord placement
- Weekly check-ins: adjust ornaments, check for sagging, replace bulbs
- Bonus safety checks: make sure cords aren’t overloaded or overheating
A clear step-by-step path helps you slow down and enjoy the process instead of getting overwhelmed. It also keeps everything organized from start to finish.
Why Avoiding These Mistakes Makes Your Tree Better — Beyond Looks
Decorating your tree shouldn’t feel stressful. When you avoid the common mistakes, the entire experience becomes easier and more enjoyable. It saves you from the frustration of things drooping, breaking, or looking messy.
It also saves money. Preventing ornament damage, avoiding fire risks from the wrong lights, and keeping your tree healthy all season means you’re not replacing things constantly. And if candles are part of your holiday setup, make sure you read my guide on whether it’s safe to leave a candle burning when you’re not in the room.
A well-maintained tree also lasts longer. The branches stay fuller, the lights stay safe, and you preserve your favorite ornaments for years.
And then there’s memory value. A well-balanced, cohesive tree looks great in family photos and feels more special to gather around. Those little design choices make the holidays feel warmer and more memorable.
Final Thoughts
Changing a few habits can completely transform how your tree looks and how long it lasts. A bit of prep, a simple theme, smarter placement, and some easy maintenance can give you a tree you’re proud to show off.
But remember, your tree doesn’t have to be perfect. Your ornaments carry memories, your style evolves, and the fun comes from experimenting. Make it yours.
If you want, share your tree-decorating wins or the mistakes you’ve made in the comments. I’d love to hear what you’re trying this year. And if you found this helpful, feel free to check out more guides over at my website, Build Like New — your support helps me keep creating useful, practical holiday content for you.
Disclaimer: This content is for general decorating guidance only. Always follow safety instructions on your lights, cords, and tree accessories to reduce risk.

