
Get Clean Blinds Today With These 4 Simple Steps
When I look at most cleaning guides online, I see the same problem every time — they jump straight into tools and steps, but nobody stops to explain what really makes blinds look old in the first place. And honestly, that’s the part most people get wrong. Blinds don’t lose their shine overnight; it happens slowly through dust, moisture, greasy air from the kitchen, and tiny habits we never think about.
I’ve cleaned and restored more blinds than I can count, and I can tell you this: if you understand the cause, the cleaning becomes simple. The good news? You don’t need expensive products or hours of scrubbing. You just need a clear, smart method that actually works for the blinds you already have.
In this guide, I’m walking you through a four-step method I use myself — something quick, practical, and safe for nearly every home. My goal is simple: by the time you finish reading, you’ll know exactly how to make your blinds look new again without stressing about doing it wrong.
Before we jump in, I’m curious — how long has it been since you last cleaned your blinds?
Why Cleaning Blinds Regularly Matters (Don’t Just Wait for Dirt to Show)
I’ve seen people wait until their blinds look dirty before they bother cleaning them, and by then the damage has already started. Blinds don’t just collect dust on the surface — they quietly trap allergens, moisture, and tiny particles that float around your home every single day. The EPA points out that indoor air can often be more polluted than outdoor air, and blinds are one of the biggest dust collectors in any room.
Here’s what actually happens when you ignore them:
- Dust builds up fast: If you live in a busy city or your home gathers dust easily, blinds are usually the first place it settles. Every time you open a window or switch on the fan, those particles move right back into the air you breathe.
- Your blinds start aging before they should: I’ve seen wood blinds warp because they were exposed to moisture and never wiped, fabric blinds lose their color from layers of grime, and metal blinds develop spots that never fully go away. A few minutes of care saves you from expensive replacements later.
- Your room starts looking dull without you realizing it: Even a thin layer of dust can make a clean room feel tired. You and I both know how small details shape the feel of a home. Bright, clean blinds instantly lift the space — and it doesn’t take much effort to keep them that way.
When you understand why blinds need regular care, keeping up with them becomes easier. You’re not cleaning for the sake of it — you’re protecting your air, your home, and the life of the blinds you already paid for.
Step-by-Step 4-Step Cleaning Method (Universal Base Method)
Step 1 – Dust First: Vacuum or Microfiber Cloth
Whenever I start cleaning blinds, I always begin with simple dust removal. It’s the safest way to prepare the surface without risking scratches or moisture damage. Close your blinds completely — flat for horizontal blinds or to one side for vertical blinds — so you can reach the entire surface in one go.
You can use:
- A vacuum with a soft brush attachment on low suction
- A microfiber cloth, glove, or even a soft duster for quick passes
- A gentle vacuuming motion for fabric blinds so the material doesn’t stretch or pull
I’ve found that this step alone can make blinds look noticeably better, especially if you’ve been delaying the cleaning for a while. Think of it as removing the “loose layer” before you touch anything else.
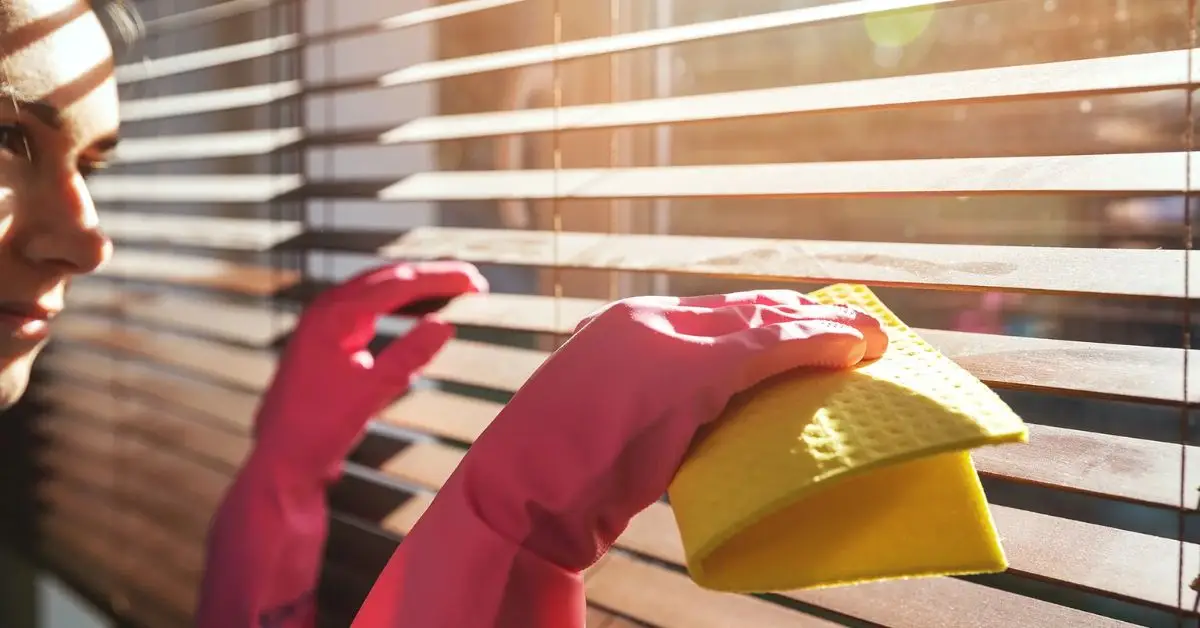
Step 2 – Wipe Slats with a Mild Cleaning Solution
Once the dust is gone, I move to light cleaning. You don’t need anything fancy — warm water mixed with mild dish soap is enough for most blinds. For vinyl or faux wood, a little white vinegar in the mix works well too. Here’s one trusted guide if you want a simple breakdown.
When you wipe:
- Make sure the cloth is damp, not dripping
- Avoid soaking wood or fabric blinds
- Clean each slat individually so you don’t push dirt around
- Wipe left to right for horizontal blinds
- Wipe top to bottom for vertical blinds
This is the step where blinds start regaining their “new” look. Sticky dust, fingerprints, and light grime all loosen up with minimal effort.
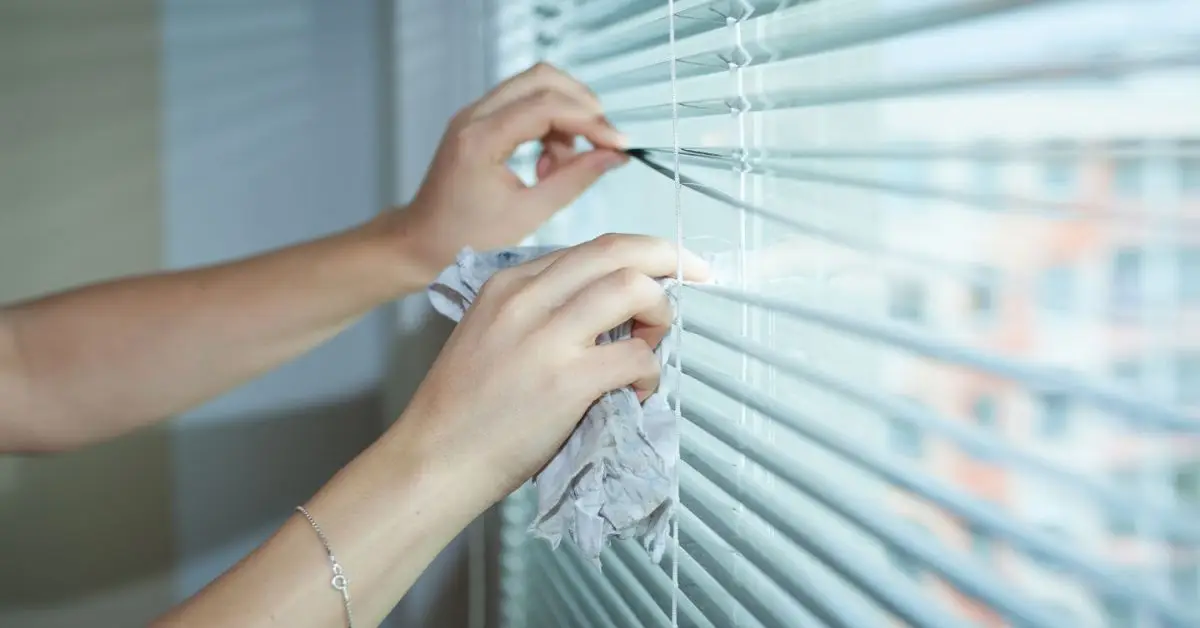
Step 3 – Clean Cords, Tapes, and Mechanisms + Flip and Clean the Other Side
Most people skip this part, but you shouldn’t. I’ve seen cords turn gray and rails collect dust balls simply because no one pays attention to them. Take a damp cloth and gently wipe:
- Cords
- Lift tapes
- Headrails and bottom rails
- Side mechanisms
After finishing the front, flip the slats or tilt the blinds and clean the other side. Dust doesn’t build up evenly — the backside often holds more than you expect.
Step 4 – Dry Properly and Let Blinds Air Out Before Using
This final step makes all the difference. Use a dry cloth to remove any remaining moisture right away. If you cleaned fabric or wood blinds, give them extra time to air-dry fully before you pull them up again.
Why I do this:
- It prevents streaks
- It stops moisture from soaking into the material
- It avoids mold, warping, or water spots
Let the blinds sit open for a few minutes and you’ll see how crisp they look once fully dry.
Material-Specific Care: Tailor the Method to Your Blind Type

Different types of blinds react differently to cleaning, and treating them all the same can actually cause damage. If you want a full breakdown of how to care for each material, Vista Fashions has a detailed guide that explains the best methods for wood, vinyl, and fabric blinds. I’ll walk you through the key points in a practical, easy-to-follow way.
If you’re thinking about enhancing your blinds with a valance or curtains, here’s a smart method to hang curtains on a blind valance without drilling, keeping your window treatments both stylish and functional.
Wood & Faux-Wood Blinds
Wood blinds are sensitive to moisture. I always stick to dry dusting or a lightly damp cloth — too much water or harsh chemicals can warp or discolor the wood. Occasionally, a wood-safe furniture polish can bring back the shine.
Quick tips:
- Dust weekly with a microfiber cloth
- Wipe gently with a barely damp cloth if needed
- Apply polish sparingly to restore luster
PVC / Vinyl / Aluminum / Faux-Wood
These blinds are much more forgiving. Mild soap and warm water usually do the trick. For stubborn dirt, you can remove the blinds and soak them briefly — just make sure they dry completely before rehanging. Regular wiping is especially important for kitchen or bathroom blinds exposed to moisture.
Quick tips:
- Wipe regularly with a damp cloth and mild soap
- Soak only if needed, then dry thoroughly
- Maintain weekly for moisture-prone areas
Fabric / Roller / Roman / Honeycomb Blinds
Fabric blinds need the gentlest touch. Vacuum with a soft brush attachment to remove dust, and spot-clean stains with mild detergent. Honeycomb blinds can trap dust in their cells, so a blast of compressed air works well. Avoid soaking — for tough stains, professional dry-cleaning is safest.
Quick tips:
- Vacuum weekly
- Spot-clean with mild detergent only
- Use compressed air for honeycomb cells
- Consider professional cleaning for stubborn stains
Maintenance Plan — How Often & Smart Habits to Keep Blinds Always Looking New
Keeping blinds looking fresh isn’t about random scrubbing — it’s about simple, consistent habits. From my experience, a little effort on a schedule goes a long way. Here’s what works best:
- Light dusting: Every 1–2 weeks keeps dust from settling too deep.
- Quick wipe-down: Once a month, especially in dusty areas or high-moisture zones.
- Deep clean: Every 3–6 months depending on your environment — kitchens, bathrooms, high pollution areas, or homes with pets may need it more often.
- Extra tips: Avoid harsh chemicals, always wring cloths well, operate cords gently, and check the hardware occasionally.
Just like you maintain blinds on a schedule, keeping your shower curtain liner fresh is easier if you follow a regular cleaning routine — check out these 6 super-effective ways to clean your shower curtain liner for a consistently clean bathroom.
Common Mistakes to Avoid (So You Don’t Ruin Your Blinds)
Even small missteps can shorten your blinds’ lifespan. From my years of cleaning, these are the biggest traps I see:
- Using soaking wet cloths or excessive water — especially on wood or fabric blinds; leads to warping, mold, or discoloration.
- Using harsh or alkaline cleaning chemicals, or abrasive scrubbers — these scratch or erode surfaces.
- Ignoring top/bottom rails, cords, or the backside of slats — partial cleaning means dust and grime come back fast.
- Skipping drying before re-hanging — damp blinds can develop stains, mold, or warping.
Bonus Hacks & Pro Tips for Faster, Better Cleaning
If you want to clean blinds like a pro and save time, these tricks make a huge difference:
- Vacuum + microfiber combo: Vacuum first, then wipe. It’s faster than wiping alone.
- Hard-to-reach slats: Wrap old socks or cotton gloves around your fingers to clean both sides at once. (Complete Blinds)
- Greasy areas: Add a tiny amount of baking soda or mild degreaser to warm-water solution — wipe and dry thoroughly. Avoid this on wood or fabric. If you’re looking for other time-saving home cleaning hacks, you can also learn 7 genius ways to clean curtains without taking them down — a handy trick for maintaining a polished look in your living spaces without extra hassle.
- Stubborn, old grime: For PVC, vinyl, or metal blinds, consider removing and soaking them gently. Never do this with wood blinds.
When It Might Be Time to Replace Your Blinds (Rather Than Clean Them)
Sometimes cleaning only goes so far. I always tell people: know when it’s better to replace than fight an uphill battle. Consider replacement if:
- Slats are cracked, warped, or the mechanism is broken beyond repair.
- Persistent stains or discoloration don’t respond to cleaning.
- Fabric blinds have deep-set stains or odors.
- Blinds are over 8–10 years old and look worn.
Quick Checklist & Follow Each Time You Clean Blinds
Here’s a simple routine I follow, and I recommend you do too:
- Dust
- Wipe
- Clean cords & rails
- Dry completely
- Inspect for damage
- Repeat on your schedule
I’d love to hear from you: which of these cleaning tips are you going to try first? Or maybe you have your own blind-cleaning hacks? Drop a comment below — I read them all!
Also, for more practical, real-world home improvement tips like this, check out my website Build Like New — it’s full of guides to keep your home looking fresh and new.
Disclaimer: The tips and advice in this article are for general informational purposes only. Always follow the manufacturer’s care instructions for your blinds. The author and Build Like New are not responsible for any damage that may occur if these methods are applied incorrectly.

