
7 Easy DIY Tricks to Make Dirty Tile Grout Look Brand New
I’ve walked into hundreds of bathrooms and kitchens where the tile still looked fine — but the grout made the whole space feel dirty.
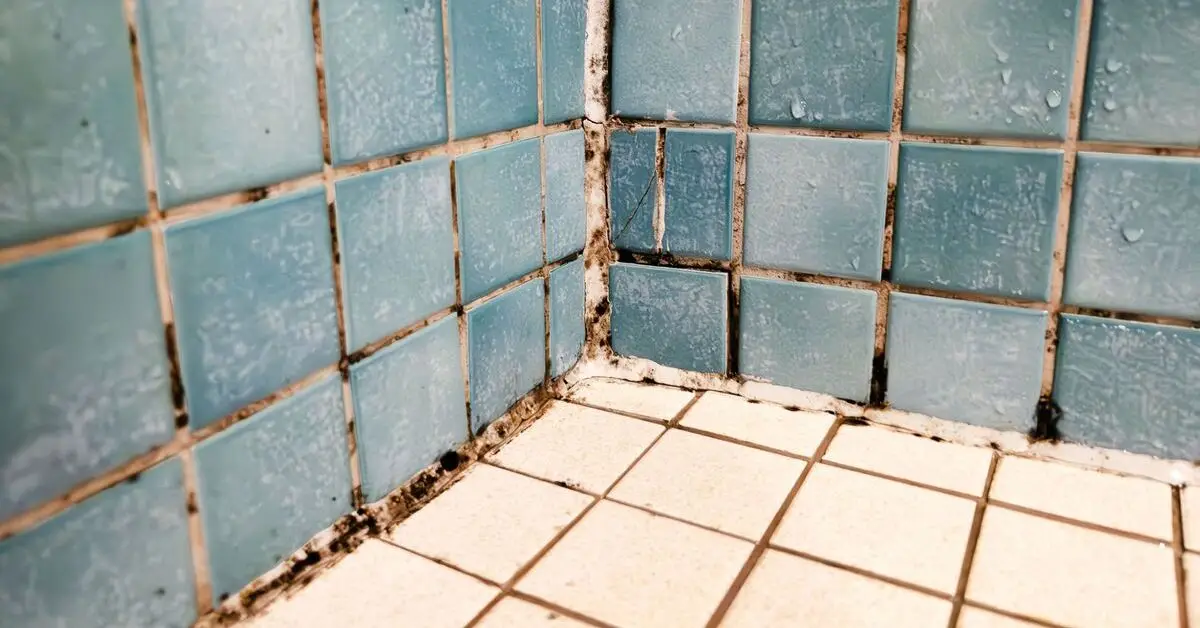
You mop. You scrub. You spray something that smells strong and hope for the best. And still, those grout lines stay gray, brown, or patchy. It’s frustrating because it makes the entire floor look older than it really is.
Here’s what most people don’t realize: grout is not tile. Tile has a smooth, sealed surface. Grout is porous. It absorbs moisture, soap residue, grease, and even bacteria over time. According to guidance from sources like Bob Vila and major home improvement brands, grout acts almost like a sponge if it’s not sealed properly.
That’s why regular surface cleaners often fail. They clean the top layer of dirt — not what’s trapped inside the grout lines.
Another problem? A lot of online advice mixes tile cleaning and grout restoration as if they’re the same thing. They’re not. Scrubbing harder won’t fix deeply stained grout. In some cases, it can even damage it.
And if you’ve ever used vinegar, bleach, or some random “viral hack” without seeing real results, you’re not alone. Many homeowners on Reddit’s cleaning communities report that the issue isn’t effort — it’s using the wrong method for the type of stain.
Before we jump into the seven DIY methods, I want you to understand what you’re dealing with. Because once you know why grout gets dirty — and what kind of buildup you actually have — choosing the right fix becomes simple.
Let me ask you this: does your grout look lightly dingy… or deeply stained and uneven?
Why Dirty Tile Grout Happens (And Why Simple Cleaning Often Fails)
I’ve seen it so many times — you spend time cleaning your floor, step back, and think, “Why does the grout still look so grimy?”
That’s because grout and tile aren’t the same thing. Treating them the same way is like trying to wash a shirt and a carpet with the same method — it just doesn’t work.
Grout vs Tile: What Gets Dirty (And Why It Matters)
Porosity of Grout — Why It Traps Grime
Grout is porous. That means it soaks up:
- soap residue from showers
- hard water minerals
- grease and cooking splashes
- everyday dirt that mops don’t fully extract
Over time, that grime settles deep inside the grout lines. A surface cleaner only wipes what’s on top — not stuff that’s been sitting deep in the grooves for months or years.
Tile, on the other hand, usually has a sealed surface. Dirt stays on the surface. That’s why tile can look clean while grout still looks old and dingy.
Understanding that difference is where everything starts to click.
Tile Surface vs Grout Joint — Different Cleaning Needs
A spray-and-wipe works fine on tile. But grout needs something that:
- loosens embedded debris
- opens up pores
- lets you lift the grime out
- doesn’t damage the grout material itself
That’s why pressure alone or harsh products can make grout look worse over time.
Common Mistakes That Make Grout Look Worse
Here’s what I see most often:
Over-Scrubbing
You think more effort equals better results.
But too much scrubbing:
- erodes grout lines
- makes them rougher
- can widen cracks
- leads to faster future staining
Grout gets more porous when damaged — which just cycles back to the same problem you’re trying to fix.
Using the Wrong Cleaner
This is where things really go sideways.
Not all cleaners are created equal. Some are too acidic. Some are too mild. Some create dangerous reactions when mixed.
That’s why it’s important to choose household products that are both safe and effective.
For example, cleaning professionals often recommend products meeting EPA’s Safer Choice criteria, because they’ve been evaluated for reduced health and environmental risk compared to harsher alternatives.
Choosing safer cleaners helps you protect your lungs, pets, and finishes — while still loosening stubborn grout grime.
Essential Prep — What You Need Before You Start
Most how-to guides skip this, but I never do.
Prep changes good results into great results.
Test Spot First — Why It’s Critical
Before you mix and apply anything across the whole area:
- Pick a small, hidden section
- Apply your solution
- Wait 10–15 minutes
- Rinse and let it dry
This tells you:
- whether the grout lightens
- if the tile reacts badly
- how long you should let it sit elsewhere
You avoid surprises in a visible spot.
Supplies Checklist (Budget Household Items)
You don’t need a machine or fancy tools. Just:
Cleaning essentials:
- Baking soda
- White vinegar
- Hydrogen peroxide
- Warm water
- Spray bottle
Application tools:
- Grout brush or old toothbrush
- Microfiber cloth
- Small bowl for mixing pastes
Personal protection:
- Rubber gloves
- Good ventilation (open windows or fan)
That’s it. Simple, inexpensive, and effective when used the right way.
Safety First — Pets, Kids, Fumes & Tile Types
Before you start:
- Ensure good airflow
- Keep pets and kids out of the room
- Don’t mix cleaners (especially vinegar + bleach)
- Avoid acidic solutions on natural stone
Cleaning should help your home, not create a new safety issue.
DIY Method 1 — Baking Soda + Vinegar Deep Clean

Most websites mention this combo. Very few explain why it works or how to use it correctly.
If you’ve tried it before and felt underwhelmed, chances are the timing or ratios were off. If you’d rather skip aggressive brushing altogether, I’ve also broken down 5 simple ways to clean tile grout without ever scrubbing, especially helpful if your grout lines are already fragile.
Why This Works (Chemistry Explanation)
Here’s what’s happening.
- Baking soda is mildly alkaline and slightly abrasive. It helps lift grime from porous surfaces.
- Vinegar is acidic. It reacts with baking soda and helps break down mineral deposits like hard water stains.
When they combine, you get that fizzing reaction. That fizz helps loosen debris trapped inside grout pores.
But here’s the part people miss:
The fizzing doesn’t do all the work. The dwell time and scrubbing do.
This method works best on:
- Soap scum buildup
- Mild mildew staining
- Light to moderate discoloration
It won’t magically fix deeply blackened grout that hasn’t been cleaned in years. That requires stronger methods.
Step-by-Step
This is the exact way I recommend doing it.
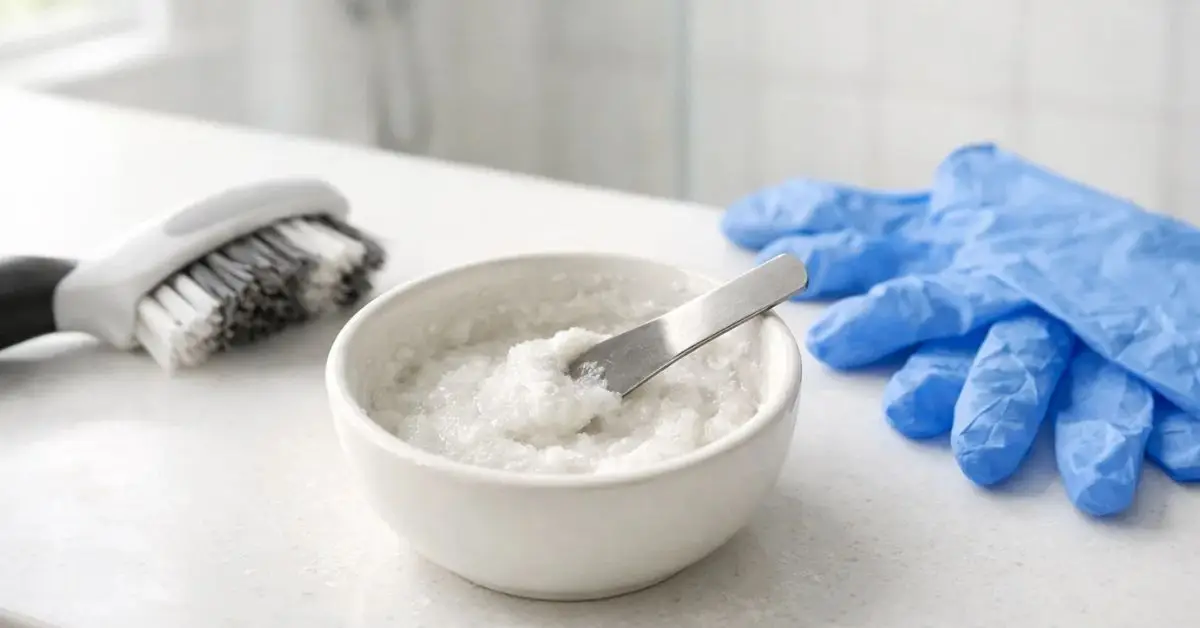
1. Make the Paste
In a small bowl:
- Mix baking soda with a little water
- Aim for a thick toothpaste-like consistency
You don’t want it runny. It should stay on the grout line without sliding off.
2. Apply to Grout Lines
- Spread the paste directly over grout
- Use your finger (with gloves) or a small brush
- Cover evenly
Let it sit for 5–10 minutes before adding vinegar.
3. Add Vinegar
- Lightly spray white vinegar over the paste
- It will start fizzing
Let it bubble for another 5–10 minutes.
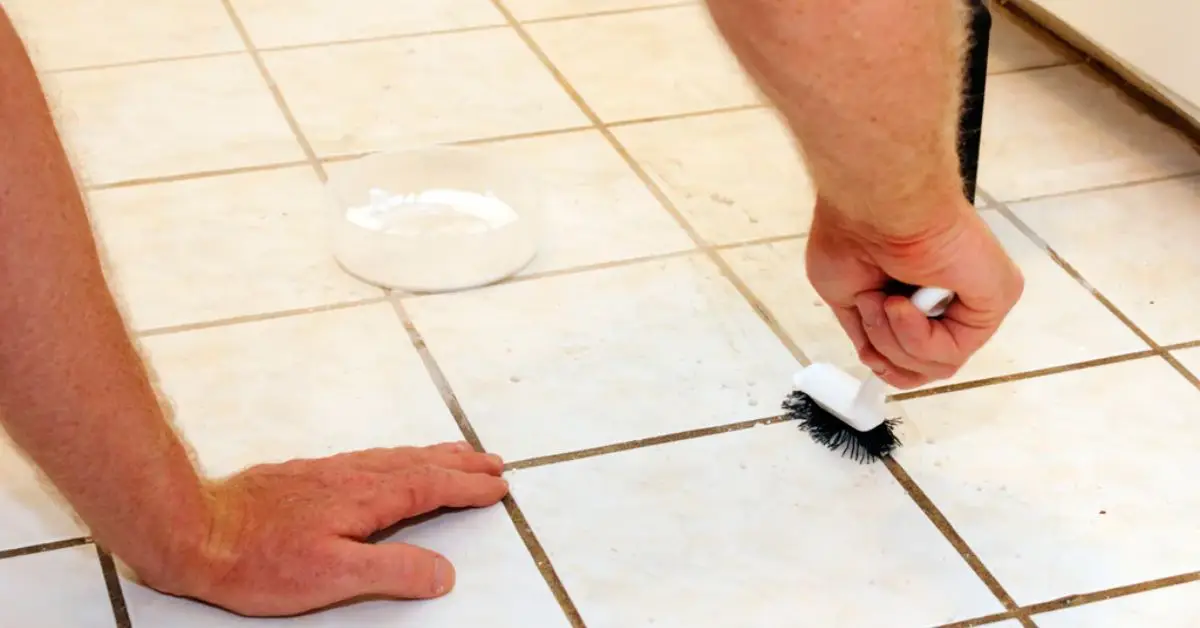
4. Scrub — Gently but Firmly
Use:
- A grout brush
- Or an old toothbrush
Scrub in small circular motions. Not aggressively. Controlled pressure works better than force.
5. Rinse & Wipe
- Wipe with a damp microfiber cloth
- Rinse thoroughly
- Let it dry completely before judging the results
Grout often looks better once fully dry.
When to Use This vs Other Methods
Use baking soda + vinegar if:
- The grout looks dull, not deeply black
- You see soap residue or white buildup
- You haven’t deep-cleaned in a while
Skip this method if:
- Stains are dark brown or black
- The area smells musty (possible deeper mildew)
- You’ve already tried this twice with no improvement
In those cases, you need something stronger but still safe.
Let’s move to that.
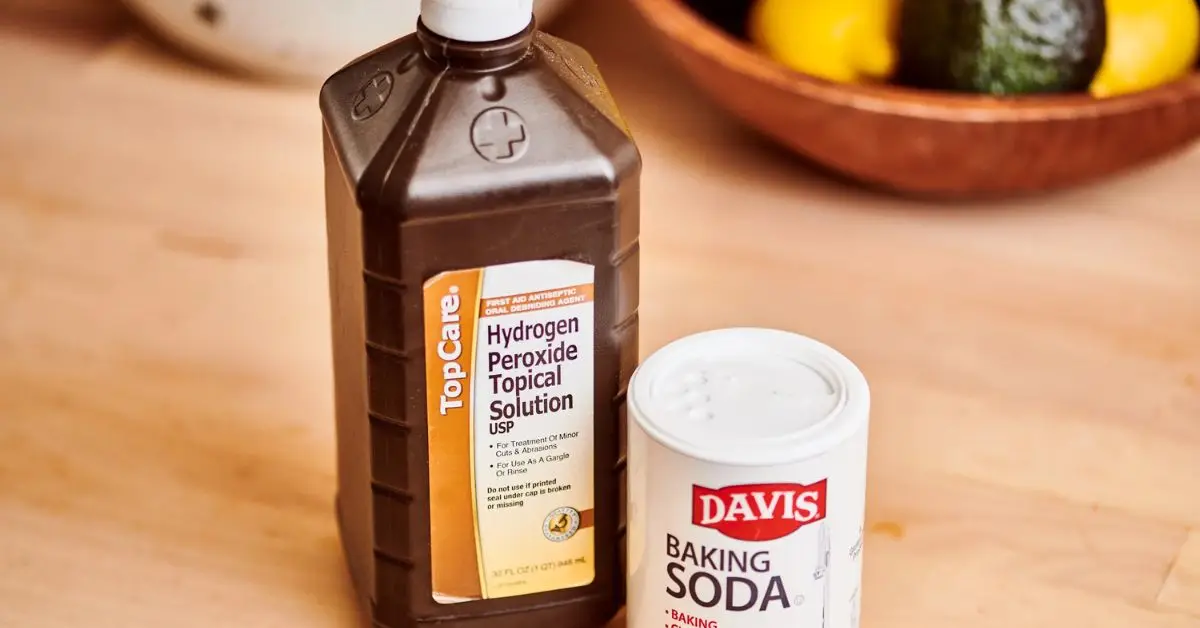
DIY Method 2 — Hydrogen Peroxide & Baking Soda Paste
If baking soda + vinegar is your “starter” method, this is your upgrade.
I prefer this for stubborn stains because it penetrates deeper without the harsh fumes of bleach.
Best for Dark Grout Stains
Hydrogen peroxide is mildly bleaching and antimicrobial.
It works well on:
- Dark mildew stains
- Bathroom grout discoloration
- Older stains that didn’t respond to vinegar
It’s often safer than chlorine bleach in enclosed spaces — though ventilation is still important.
How to Mix & Apply
Here’s the formula I use:
- ½ cup baking soda
- Enough hydrogen peroxide to form a thick paste
You want the same toothpaste consistency as before.
Steps:
- Apply paste directly onto grout lines.
- Spread evenly.
- Let it sit for 15–30 minutes.
- Scrub gently.
- Wipe clean with warm water.
For deeper stains, you can let it sit longer — even up to an hour.
Just don’t let it dry rock hard. Light misting can keep it active.
Tips from Home Cleaners
I pay attention to what real homeowners say works — not just polished blog posts.
Across cleaning forums like Reddit’s r/CleaningTips, users frequently suggest:
- Covering the paste with plastic wrap
- Letting it sit overnight for deep stains
- Using an electric toothbrush for tighter grout lines
- Doing one small section at a time
That overnight plastic wrap trick is surprisingly effective. It keeps the paste moist and working longer.
If your grout has been neglected for years, this method often delivers visible improvement after just one round.
DIY Method 3 — Steam Without a Steamer (DIY Heat Option)
Most guides skip this because they assume you need a steam machine.
You don’t.
Heat alone can loosen grime inside grout pores.
How to Use Hot Towels & Boiling Water Safely
Here’s how I do it:
- Boil water in a kettle.
- Carefully pour it over grout lines in small sections.
- Immediately place a hot, damp towel over the area.
- Let it sit for 5 minutes.
- Scrub gently while the surface is still warm.
The heat:
- Softens hardened residue
- Loosens grease
- Makes scrubbing easier
Important:
- Wear gloves
- Avoid splashing
- Don’t use this method on cracked groutPros & Cons vs Chemical Cleaners
Pros:
- No chemicals
- Safe for homes with pets
- Great pre-treatment before other methods
Cons:
- Less effective on deep mildew
- Requires careful handling
- Works best combined with a mild paste
Sometimes I use steam first — then follow with hydrogen peroxide paste. The difference is noticeable.
Now tell me — are you dealing with light buildup, or is your grout heavily stained? That will determine which method you start with.
DIY Method 4 — Oxygen Bleach Soak (Gentle but Strong)
A lot of people hear “bleach” and think of harsh fumes and ruined tile. That’s where oxygen bleach stands apart.
It’s gentler than chlorine bleach but still powerful enough to brighten grout when other methods fall short.
Most guides just say “use bleach.” They don’t explain that oxygen bleach works differently — and is safer for many tile types when used right.
What Oxygen Bleach Is
Oxygen bleach is a powdered compound (often sodium percarbonate) that releases oxygen when mixed with water.
That oxygen:
- helps lift embedded grime
- breaks down organic buildup
- gently whitens without harsh fumes
According to cleaning experts at Good Housekeeping, oxygen bleach is often recommended for deep-cleaning tasks precisely because it’s less aggressive than traditional bleach while still effective.
That’s why it’s a great option for grout that’s more stubborn than mild surface stains.
Correct Mixing & Contact Time
Here’s how to get good results:
- Dissolve oxygen bleach powder in warm water
- Aim for a milky solution
- Apply directly to grout lines
Let it soak 15–30 minutes, keeping the surface damp so the oxygen continues to work.
Then scrub gently with a grout brush and rinse.
If your grout is very stained, letting it dwell a bit longer — up to 45 minutes — can really help.
Rinse & Dry Best Practices
After scrubbing:
- Rinse plenty of warm water
- Wipe with a microfiber cloth
- Let grout dry completely
Wet grout can look darker than it actually is. Always judge results after drying.
This method is especially effective in bathrooms and high-moisture areas where mildew and soap scum embed deep into grout pores.
DIY Method 5 — Lemon Juice & Salt Natural Brightener
If you lean toward natural cleaning hacks, this classic method is worth trying for lighter stains.
It’s commonly shared among eco-friendly DIY circles as a simple brightener that doesn’t rely on chemicals.
How Acid + Abrasion Brightens Grout
Lemon juice brings mild acidity. Salt adds gentle abrasion.
Together, they:
- help lift mineral deposits
- loosen light surface grime
- brighten grout lines
Here’s the easy process:
- Sprinkle salt over grout
- Squeeze fresh lemon juice on top
- Let sit 10–15 minutes
- Scrub with a brush
- Rinse well
This isn’t a heavy-duty fix — but it’s great for maintenance or slightly dull grout.
When This Works Best
Use this method if:
- Grout looks a bit lackluster
- You want a natural alternative
- You’re keeping up regularly
Avoid it if:
- Grout is heavily stained
- You have delicate stone tile (acid risk)
Think of it as a brightener rather than a full restorator.
DIY Method 6 — Steam from Boiling Kettle + Scrub
If you want to avoid chemicals and still loosen embedded grime, heat is your friend.
And you don’t need an expensive steamer to make it work.
Setup Steps & Safety
Here’s the DIY steam approach:
- Boil water in a kettle
- Pour small amounts over grout lines
- Let it sit 2–3 minutes
- Scrub while the surface is still warm
Heat softens hardened residue and makes it easier to lift with a brush.
Always wear gloves and keep kids and pets away from the hot water.
This method works well as a pre-treatment before using a paste or soak.
Best Scrubs to Pair With Steam
Steam alone isn’t a complete solution for stubborn stains.
Try combining it with:
- a baking soda paste
- or a light hydrogen peroxide treatment
Heat first. Clean second. That order dramatically improves results.
DIY Method 7 — Toothpaste Trick That Actually Works

This method sounds surprising — but I’ve tested it on patchy grout, and it delivered visible improvement in small areas.
Why Some Toothpastes Work on Grout
The key is that many basic white toothpastes contain:
- mild abrasives
- soft polishing agents
Those ingredients can help lift surface stains from grout lines.
Here’s how to use it:
- Apply white (non-gel) toothpaste to the grout
- Let sit 5–10 minutes
- Scrub with a toothbrush
- Rinse thoroughly
It won’t restore large areas, but it’s great for touch-ups or spots that bug you visually.
Limitations & When Not to Use
This is more of a cosmetic refresh.
Avoid it if:
- You’re dealing with heavy staining
- You’re cleaning large floor areas
- You need deep restoration
Use it for small fixes — like under the toilet rim, by the shower threshold, or near the sink where grout looks dull.
What to Do After Cleaning — Protecting and Keeping Grout Fresh
Most people stop once the grout looks better.
That’s a mistake.
If you don’t protect it, you’ll be back here in a few months doing the same deep-clean all over again.
Aftercare is what makes the difference between “temporary improvement” and “long-term restoration.”
Drying & Airflow Best Practices
Grout absorbs moisture. So if you leave it damp, you’re basically inviting mildew back in.
After cleaning:
- Wipe grout lines dry with a microfiber cloth
- Leave bathroom fans running for at least 20–30 minutes
- Open windows if possible
- Avoid using the shower for several hours
In high-humidity bathrooms, consistent airflow can reduce mildew buildup significantly. Cleaning experts often recommend keeping moisture levels low because mold thrives in damp, unventilated areas.
If your grout keeps darkening quickly, moisture is usually the real issue.
DIY Grout Sealing Options (Budget)
If your grout isn’t sealed — or the seal has worn off — it will stain faster.
Sealing creates a barrier that slows down absorption.
Budget-friendly options:
- Small bottle grout sealers with built-in applicator tips
- Brush-on sealers for larger areas
- Spray sealers for quick coverage
Basic process:
- Make sure grout is completely dry (wait 24 hours after cleaning).
- Apply sealer directly onto grout lines.
- Let it absorb.
- Wipe excess off tile surface.
Most sealers last 1–3 years depending on traffic and moisture levels.
If you want long-term results, sealing is not optional — it’s protection.
Weekly Quick Maintenance Routine
You don’t need another deep clean if you maintain it.
Simple weekly habit:
- Spray warm water + a drop of dish soap
- Lightly brush grout lines
- Wipe dry
In showers:
- Squeegee walls after use
- Leave door open for airflow
Maintenance takes 5 minutes. Deep restoration takes hours.
Which one would you rather repeat?
Quick Troubleshooting — When DIY Isn’t Enough
Sometimes you do everything right — and grout still looks bad.
That’s when you need to be honest about the condition of the material.
Deep Set Stains — When Re-Grouting Might Be Better
If you notice:
- Crumbling grout
- Cracks or gaps
- Stains that don’t lighten at all
- Mold that returns immediately
The grout may be too damaged to restore.
In that case, re-grouting might be more cost-effective long term than repeated cleaning attempts. And if you’re thinking about painting over stained grout instead of replacing it, read these 10 insider tips before you paint tile grout first — it can go wrong quickly if moisture is trapped underneath.
It sounds extreme, but replacing grout in small sections is often manageable and can completely refresh the look of a room. If you decide replacement makes more sense, here are 7 easy ways to remove tile grout without damaging your floors, so you protect the tile while fixing the joints.
Professional Tools Worth Considering
If you’re not ready to re-grout, you could consider:
- Electric grout brushes
- Steam cleaners (true high-pressure units)
- Grout colorant pens (for cosmetic fixes)
These aren’t always necessary — but for high-traffic kitchens or old bathrooms, they can make a visible difference.
Just remember: tools don’t fix structural damage. They only clean what’s still intact.
Final Takeaways — What Actually Works for Your Situation
Let’s simplify everything.
Here’s the decision map I’d use if this were my home.
Best for Light Grout Dirt
- Lemon + salt
- Baking soda + vinegar
- Weekly maintenance routine
Use these if grout is dull but not deeply stained.
Best for Deep Discoloration
- Hydrogen peroxide + baking soda
- Oxygen bleach soak
- Steam pre-treatment before scrubbing
These are your stronger restoration methods.
Best for Renters or Eco-Friendly Homes
- Steam method
- Lemon + salt
- Oxygen bleach (properly diluted)
These minimize harsh fumes and permanent alterations.
If you’ve made it this far, you’re serious about fixing your grout the right way.
Now I want to hear from you:
Which method are you going to try first — and what kind of grout are you dealing with?
Drop your experience in the comments. Your results might help someone else avoid the same frustration.
And if you want more practical, no-nonsense home improvement guides like this, visit Build Like New. I break things down the way I’d explain them to a friend — clear, tested, and actually useful.
Disclaimer: This guide is for informational purposes only and based on general home cleaning practices. Always test any method on a small, hidden area first and follow product label instructions carefully. Results may vary depending on grout type, age, and condition. If grout is damaged, crumbling, or heavily mold-infested, consider consulting a professional before attempting restoration.

