
7 Smart Hacks to Clean Under Kitchen Appliances Without Lifting Them
Let me guess — you clean your kitchen often. Counters wiped. Floors mopped. Appliances shining from the outside.
But under your refrigerator? Beneath the stove? That narrow gap under the dishwasher?
Most of us pretend it doesn’t exist.
I’ve pulled out enough appliances in my career to tell you this: what’s hiding under there is never “just dust.” It’s crumbs, grease, pet hair, lost food, and sometimes worse. And the longer it sits, the more it affects air quality, attracts pests, and even impacts how efficiently your appliances run.
Here’s the problem though — these machines are heavy. Moving them feels risky. You worry about scratching the floor, damaging a gas line, or simply throwing your back out.
That’s exactly why most online guides miss the real issue. They say “pull it out and clean behind it.” That’s not practical for most homes.
So I’m going to show you something better.
You don’t need to move your fridge.
You don’t need special tools that cost a fortune.
And you definitely don’t need a full weekend project.
There are smart, simple ways to clean under your refrigerator, stove, and dishwasher safely — without shifting them an inch.
Before we get into the genius methods, let me ask you something:
When was the last time you actually checked under yours?
Why Cleaning Under Appliances Matters (It’s Not Just About Looks)
I’ve seen kitchens that look spotless on the surface — and then you slide a light under the fridge and everything changes.
Let me ask you honestly.
When was the last time you actually looked under your refrigerator or stove?
Most people don’t. And when they finally do, the reaction is usually shock. I’ve read countless homeowner threads where people say they found layers of crumbs, sticky grease, pet hair, and even signs of pests hiding in that dark space.
Here’s why this matters more than you think.
1. It Can Attract Pests and Bacteria
Crumbs don’t just disappear. They break down. They rot. They smell.
Food particles under appliances create the perfect hidden buffet for ants, roaches, and even rodents. Once pests find a steady food source, they don’t leave easily.
And it’s not just bugs. Damp debris plus trapped heat can become a breeding ground for bacteria. That’s not something you want in the same space where you prepare food.
If you’ve ever wondered why you occasionally notice a faint, strange kitchen smell — this could be it.
2. It Can Affect Appliance Performance
Most people don’t connect dust buildup with appliance efficiency.
But here’s what happens.
Refrigerators and dishwashers rely on proper airflow. When dust and grease collect underneath, they can clog vents and coils. Over time, that forces the appliance to work harder.
Harder work means:
- Higher energy bills
- More wear and tear
- Shorter appliance lifespan
- Increased risk of overheating
While cleaning under your fridge, it’s a smart idea to check the fridge seal as a worn or dirty seal can trap debris and reduce efficiency.
A few minutes of cleaning under your fridge can actually protect a thousand-dollar investment.
3. It Builds Up Faster Than You Think
You sweep. You mop. You vacuum.
But gravity always wins.
Tiny crumbs slip into gaps every single day. Cooking grease settles in thin layers. Pet hair drifts and gathers. It doesn’t look dramatic at first — until one day it is.
And that’s why this isn’t about appearance.
It’s about hygiene, air quality, and appliance longevity.
Once you understand what’s really happening under there, ignoring it doesn’t feel smart anymore.
Basic Tools You’ll Need (No Heavy Lifting Required)
Now here’s the good news.
You don’t need to move anything. And you definitely don’t need professional equipment.
I prefer tools that slide under appliances easily and do the job in minutes.
Here’s what actually works.
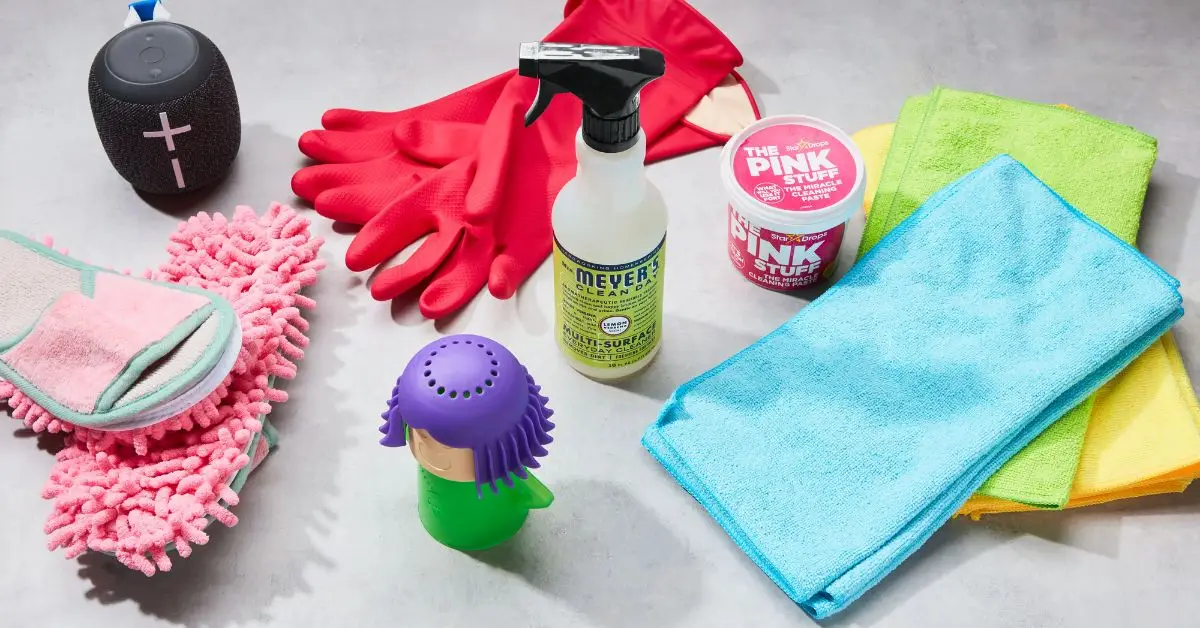
Must-Have Tools
- Vacuum with a long crevice attachment: This is your first line of defense. A narrow attachment can reach several inches under most refrigerators and stoves. It pulls out loose debris without spreading dust around.
- Retractable gap cleaner or under-appliance duster: These flat, flexible tools are designed specifically to slide into tight spaces. Some popular models reviewed by The Kitchn have thousands of positive ratings because they reach deeper than a vacuum alone. If you reference one tool, you can naturally cite their review.
- Microfiber mop head or long-handled duster: After vacuuming, I like to go in with something that actually traps fine dust and grease. Microfiber grabs what suction misses.
Smart DIY Options (If You Don’t Want to Buy Anything)
You can improvise — and it works surprisingly well.
- A wire hanger wrapped in a sock
- A yardstick wrapped in a microfiber cloth
- Even a thin ruler with a damp cloth secured around it
Slide it in. Pull it out. Rinse. Repeat.
Simple. Effective. Almost free.
Optional But Powerful
- Compressed air + vacuum combo: Some homeowners use short bursts of air to loosen stubborn debris, then immediately vacuum it up. It’s especially useful if you have pet hair buildup.
Just be controlled with it. You don’t want dust flying across your kitchen.
Genius Method 1: Vacuum + Crevice Attachment
If you do nothing else after reading this article, do this one thing.
Grab your vacuum. Attach the longest, narrowest crevice tool you have. That’s it.
You don’t need to move the appliance. You don’t need to crawl on the floor for 20 minutes. You just need the right angle and patience.
How I Do It (Step-by-Step)
- Turn off the appliance if you’re nervous about airflow (not mandatory, but it gives peace of mind).
- Lie flat so you can see the gap clearly with your phone flashlight.
- Slide the crevice attachment straight under the fridge or stove.
- Move slowly from one side to the other.
- Repeat from the front and, if accessible, from the sides.
You’ll probably hear crumbs and debris getting sucked up immediately. That sound alone is satisfying.
What surprises most people is how much comes out on the first pass. Hair, dry pasta, cereal bits, dust clumps — it builds up quietly over time.
Why This Works So Well
- It removes loose debris instantly
- It doesn’t spread dust into the air
- It takes less than 5 minutes
- It requires zero DIY setup
And here’s the real game changer.
If you vacuum under your appliances once a month, buildup never reaches that shocking stage. I’ve seen cleaning discussions where homeowners admit they only checked after years — and regretted it. A quick monthly sweep keeps things controlled and stress-free.
If you want to strengthen this section with authority, you can reference a vacuum attachment guide from a trusted home brand publication to validate tool choice.
Simple. Fast. Zero lifting.
Genius Method 2: Retractable or Flat Gap Cleaner
Now let’s talk about the tool that was practically made for this job.
A retractable or flat gap cleaner is a slim, flexible wand designed to slide under tight spaces. It’s much thinner than most vacuum attachments and reaches deeper.
I like this method when the vacuum can’t reach the back wall.
How It Works
- The tool has a flat microfiber head
- You slide it under the appliance
- It traps dust and debris instead of just pushing it around
- You pull it out, rinse, and repeat
It’s especially useful in:
- The narrow gap under dishwasher kickplates
- Slide-in stoves that sit almost flush with cabinets
- Around refrigerator rollers and corners
Some of these tools have thousands of positive user reviews because they solve a very specific pain point — tight spaces that vacuums miss.
If you want to add product credibility in the article, you can naturally reference a review like this one from Bon Appétit’s kitchen cleaning guide.
That gives readers reassurance that this isn’t just a random gadget recommendation.
When I Prefer This Over a Vacuum
- When dust is stuck, not loose
- When the gap is too low for bulky attachments
- When I want to wipe, not just suction
It’s controlled. It’s precise. And it feels thorough.
Genius Method 3: The DIY Sock + Hanger Hack
Now let’s say you don’t want to buy anything.
This hack costs you nothing.
And honestly? It works.
How to Make It
- Take a wire hanger and straighten it out.
- Slide a clean sock over one end.
- Secure it tightly (rubber band works great).
- Lightly dampen the sock if you want better dust pickup.
- Slide it under the appliance and drag it slowly.
Pull it out. Rinse the sock. Repeat.
That’s it.
This method became popular because it’s simple and accessible. People love it because it feels resourceful — and it actually reaches surprisingly far.
Why It’s Effective
- Completely free
- Customizable length
- Can be used dry or slightly damp
- Great for tight corners
The Trade-Off
It takes more manual effort.
You won’t get the suction power of a vacuum.
And if debris is heavy, you may need multiple passes.
But if you’re in a pinch or just like practical home hacks, this one delivers.
Now I’m curious — are you the “buy the right tool” type, or the “I’ll make it work with what I have” type?
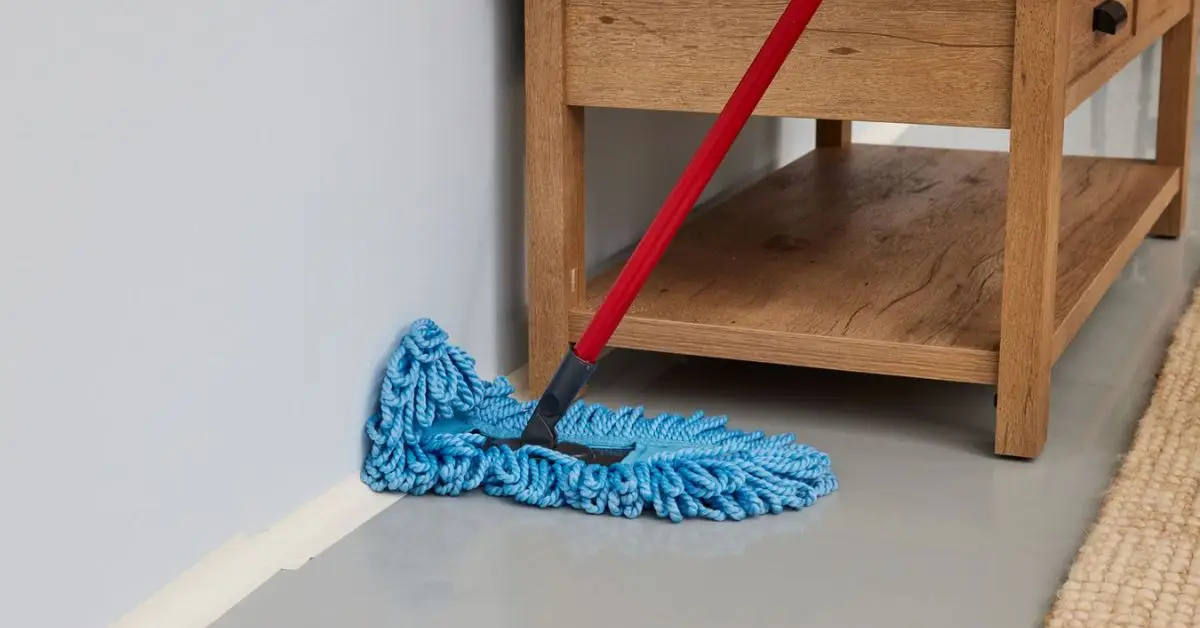
Genius Method 4: Microfiber Mop or Duster Heads
Sometimes suction isn’t enough.
You vacuum… and you still feel like something’s left behind. That’s because fine dust and grease don’t always lift easily. They cling.
That’s where a long microfiber mop or under-appliance duster becomes powerful.
Instead of just pulling debris out, it grabs and traps it.
How I Use It
- Vacuum first to remove loose crumbs
- Attach a long microfiber head
- Lightly dampen it (not dripping)
- Slide it under slowly from both sides
- Pull it out and check the cloth
You’ll often see gray streaks of fine dust and hair that the vacuum didn’t catch.
This method works especially well if you:
- Have pets
- Cook frequently
- Notice greasy buildup near the stove
- Want a true wipe-down, not just suction
Microfiber is designed to trap particles instead of spreading them around. That’s why it feels more “finished” when you’re done.
If your kitchen tends to collect pet hair or fine dust, this method is a must.
Genius Method 5: Wipe Through Kickplates or Removable Panels
Most people ignore this completely.
But many dishwashers and ranges have removable kickplates at the bottom. Manufacturers put them there for access — and you should use them.
Instead of struggling to reach blindly, you can open the panel and clean directly.
How to Do It Safely
- Turn off the appliance.
- Locate the screws on the lower front panel.
- Remove them carefully.
- Place the screws in a cup immediately.
- Gently pull off the kickplate.
Now you can actually see inside.
You’ll often find dust clumps, crumbs, and sometimes grease buildup. Use a vacuum and then a microfiber cloth to wipe surfaces clean.
Why This Method Is Smart
- Gives direct access without moving the appliance
- Allows deeper cleaning
- Reduces hidden debris around mechanical parts
And here’s a small but important tip: always put screws in a container. I’ve seen more cleaning sessions turn into “where did that screw go?” moments than I can count.
This method makes you feel in control instead of guessing what’s under there.
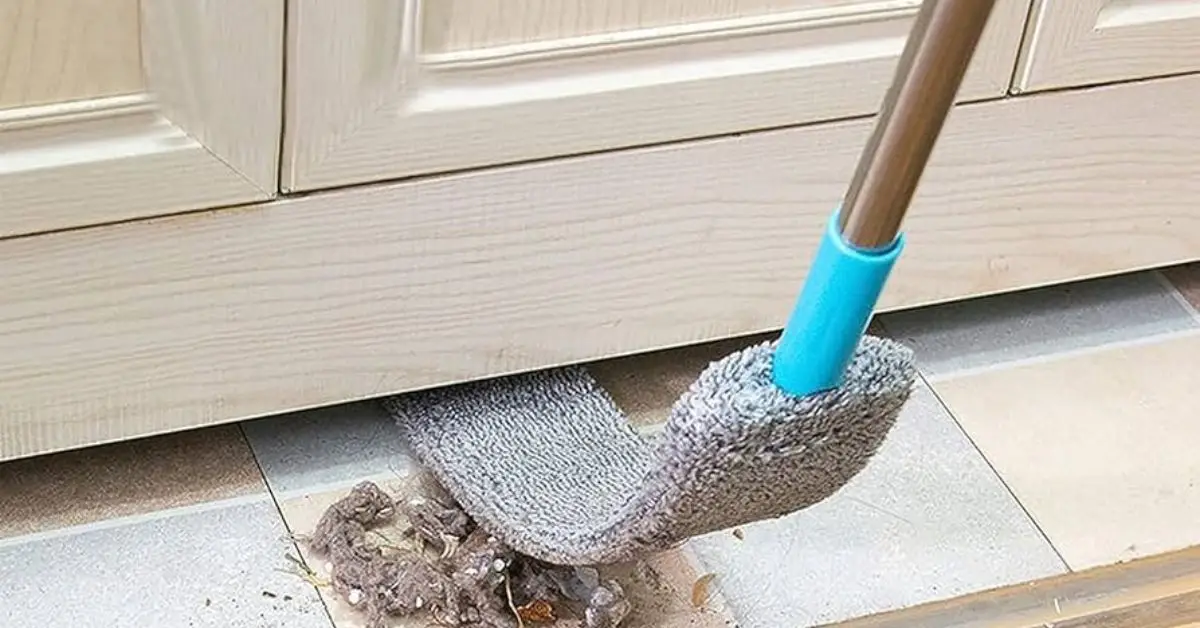
Genius Method 6: Flexible Brushes + Dryer Vent Tools
This is the method most guides don’t talk about.
Dryer vent brushes are long, narrow, and flexible. They’re designed to reach deep inside tight ducts — which makes them perfect for under-appliance gaps.
Why does this work?
Because rigid tools stop when they hit resistance. Flexible brushes bend and keep going.
When I Recommend This
- When debris is stuck near the back wall
- When pet hair has formed thick clumps
- When your gap is too tight for standard attachments
You gently feed the brush in, rotate slightly, and pull debris toward you.
It’s controlled. It’s targeted. And it reaches deeper than most flat tools.
Just make sure you vacuum immediately after brushing so loosened debris doesn’t resettle.
Genius Method 7: Air Compressor + Vacuum Combo
This one comes straight from real homeowners who were tired of stubborn buildup.
If dust and hair are packed tightly, suction alone won’t move them. So the trick is simple:
Loosen first. Vacuum second.
How It Works
- Use short bursts of compressed air to dislodge debris
- Immediately follow with a vacuum to capture everything
The air breaks apart packed dust. The vacuum removes it before it spreads.
But you need to be careful.
Safety Rules You Should Follow
- Wear a mask if you’re sensitive to dust
- Keep bursts short and controlled
- Don’t aim air toward wiring or gas connections
- Always vacuum right away
This method is especially useful if you have pets or haven’t cleaned under appliances in years.
It’s not the first method I suggest — but when buildup is heavy, it’s incredibly effective.
Extra Time-Saving Hacks (Small Tweaks That Make a Big Difference)
Once you’ve cleaned under your appliances, the real win is keeping them cleaner for longer.
I like solutions that reduce future effort. Not more work.
Here are a few that actually help.
1. Line the Back Wall
After cleaning, slide a strip of newspaper or aluminum foil along the back wall under the appliance (if space allows).
Why?
Because crumbs will fall again. That’s reality.
But instead of settling directly on the floor, they land on a removable surface.
Next time, you just pull it out, replace it, and you’re done.
It’s simple. Low-cost. And surprisingly effective.
2. Install Silicone Gap Covers
If crumbs constantly fall between your stove and cabinets, silicone gap covers are worth considering.
They sit flush along the edges and block food from slipping into narrow spaces.
I’ve seen plenty of homeowners say this one change drastically reduced buildup around their stove.
Less falling debris means less cleaning later.
3. Add a 60-Second Wipe Routine
Here’s what I personally recommend.
After your regular kitchen floor cleaning:
- Slide a microfiber duster under the front edge of your fridge
- Do one pass under the stove
- Check the dishwasher toe area
It takes under a minute.
But that one-minute habit prevents the “how did it get this bad?” moment.
Small maintenance beats deep cleaning marathons every time.
How Often Should You Clean Under Appliances?
Most people wait years.
That’s the problem.
You don’t need to deep clean monthly. But you do need a rhythm.
Here’s a realistic schedule:
- Every 3–6 months: Average household
- Every 2–3 months: If you cook daily
- Monthly light vacuum pass: Preventive maintenance
- Every 1–2 months: If you have pets or small kids
Pet hair and snack crumbs accelerate buildup fast.
If your kitchen is high-traffic, your cleaning frequency should reflect that. Keeping your appliances free of dust and debris can improve energy efficiency, much like how monitoring smart home devices use electricity helps cut unnecessary costs.
The goal isn’t perfection. It’s prevention.
If you vacuum lightly every month, you’ll rarely face heavy buildup again.
Safety and Appliance Care Tips Before You Start
Before you slide anything under your appliances, pause for a second.
Safety matters.
Here’s what I always tell homeowners:
- Unplug electric appliances if possible.
- Turn off gas supply before working near a gas stove.
- Avoid spraying excess liquid under appliances. Moisture can damage flooring and wiring. Many homeowners don’t realize that overusing sprays or harsh cleaners can cause damage — I explain this in my guide to common cleaning mistakes.
- Check your appliance manual for specific guidance.
You’re cleaning — not repairing.
There’s no reason to risk electrical or gas issues just to remove dust.
Be controlled. Be careful. Keep it dry unless you’re wiping a visible surface.
What Actually Works (And What You Should Do Next)
Let’s keep this simple.
If you want the easiest, lowest-effort solution:
Start with a vacuum + crevice attachment.
If you want deeper cleaning without moving anything:
Add a flat gap cleaner or microfiber duster.
If you don’t want to buy tools:
Use the sock and hanger hack.
And if buildup is heavy:
Loosen with air, then vacuum immediately.
None of this requires lifting your refrigerator.
None of this requires calling a professional.
It just requires awareness and 10 focused minutes.
Now I want to hear from you.
When was the last time you checked under your appliances — and what did you find?
Drop your experience in the comments. I read them.
And if you found this guide practical and no-nonsense, visit Build Like New for more real-world home maintenance advice that actually saves you time and money.
Your kitchen might look clean.
But now you know what’s happening underneath.
Disclaimer: This guide is for general home maintenance purposes only. Always follow your appliance manufacturer’s instructions and take proper safety precautions before cleaning. If you’re unsure about electrical connections, gas lines, or internal components, consult a qualified professional.

