
Popcorn Ceiling Looking Dirty? Try These 7 Mess-Free Cleaning Steps
I’ve cleaned more popcorn ceilings than I can count, and I’ll be honest—most people don’t mess them up because they’re careless. They mess them up because popcorn ceilings are far more delicate than they look. One wrong move, and suddenly you’re standing in a room full of white dust, flakes on the floor, and a cleanup job you never planned for.
If you’re here, you’re probably thinking the same thing I hear all the time: “I just want it clean—without turning my living room into a disaster.” That’s a fair concern. Popcorn ceilings trap dust, smoke residue, and grime faster than flat ceilings, but they don’t tolerate pressure, moisture, or rushed cleaning.
The real problem isn’t cleaning—it’s how and in what order you do it. Mess happens when dust is pushed instead of lifted, when moisture is used too soon, or when the room isn’t prepared for falling debris. Once that starts, damage feels unavoidable.
I’ll walk you through this the same way I would if I were standing in your home, looking up at the ceiling with you. Calm, controlled, and step by step. The goal isn’t just a cleaner ceiling—it’s finishing the job without stress, flakes everywhere, or costly repairs.
Before we get into the steps, tell me this: what’s stopping you right now—the fear of making a mess, or the worry of damaging the ceiling itself?
Why Popcorn Ceilings Get Dirty Faster Than You Think
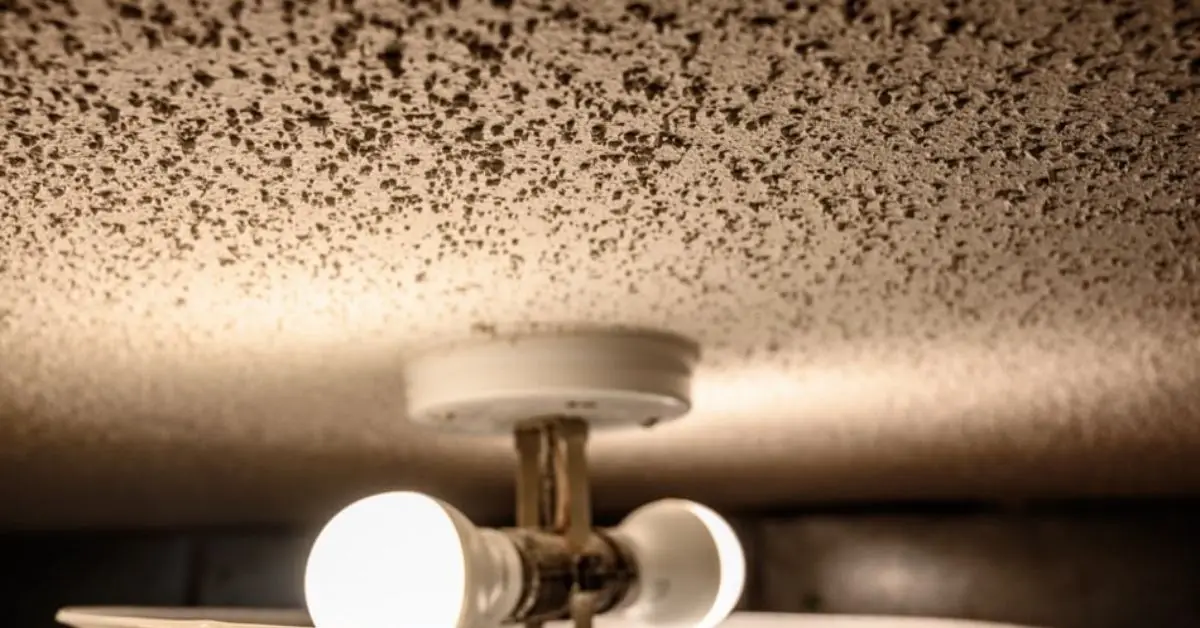
When you look up at a popcorn ceiling, it doesn’t look dirty—and that’s exactly why it tricks so many homeowners. I’ve seen ceilings that appear clean for years, but the moment you start working on them, dust comes down like snow.
The reason is the texture itself. Popcorn ceilings aren’t smooth. They’re made up of small bumps and crevices that catch and hold airborne particles instead of letting them fall away.
Over time, a few common sources quietly build layers of dirt up there:
- Dust from HVAC vents that constantly pushes air upward
- Smoke residue from cooking, candles, or fireplaces
- Kitchen grease particles that float and stick, especially in open layouts
Because this buildup happens slowly and unevenly, you don’t notice it right away. And that’s where the real problem starts.
When a popcorn ceiling is ignored for years, dust doesn’t just sit on the surface—it bonds with the texture. That’s when cleaning becomes harder and riskier. More effort means more pressure, and more pressure means flakes on the floor.
This is why the cleaning method has to be gentle from the very start. Even restoration experts at This Old House explain how textured ceilings naturally trap dust because of their uneven surface, which is why aggressive cleaning often leads to damage.
Once you understand why dirt sticks so easily, it becomes clear that popcorn ceilings don’t need force—they need control.
One Mistake That Makes Popcorn Ceiling Cleaning Messy
If there’s one mistake I see over and over, it’s trying to make the job faster than it should be. That’s usually when things go wrong.
Mess doesn’t happen by accident. It usually starts with one of these moves:
- Using moisture too early: Water feels like a shortcut, but on popcorn ceilings it weakens the texture before loose dust is removed. That’s when clumps start dropping.
- Pressing instead of lifting dust: Pushing up grinds dirt deeper into the texture. The goal is to lift dust off, not rub it in.
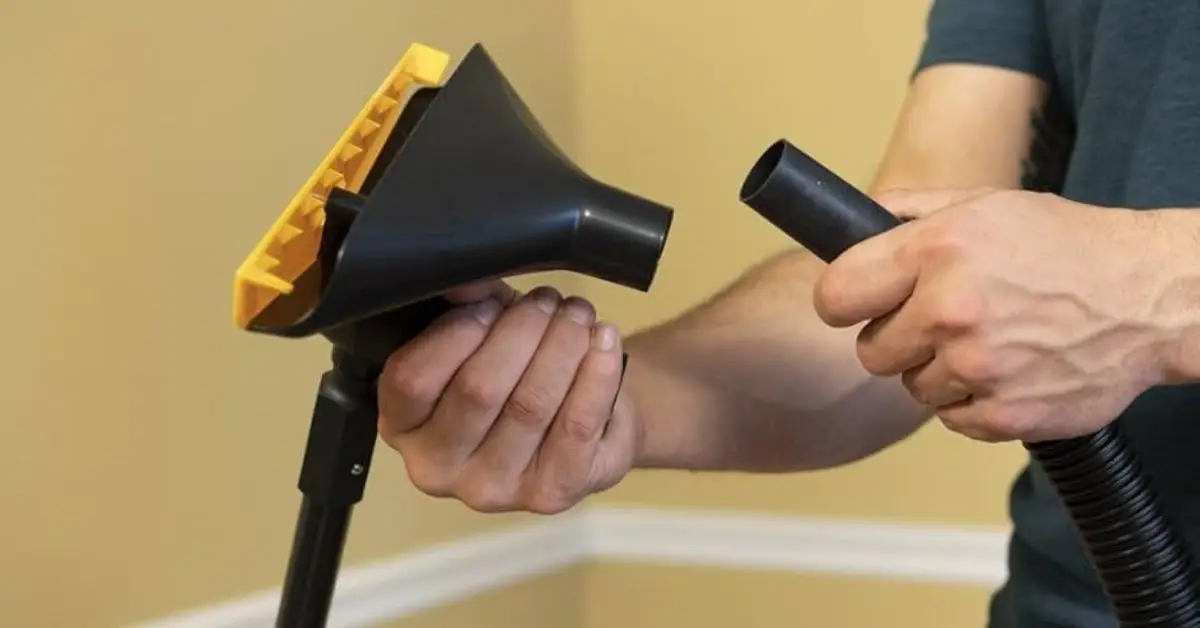
- Using the wrong vacuum attachment: Hard or narrow attachments pull at the ceiling instead of cleaning it, which leads to visible damage.
What I want you to know is this: when popcorn ceilings get messy, it’s rarely bad luck. It’s usually the result of one wrong step at the wrong time.
And once you avoid that first mistake, everything else becomes much easier to control.
Before You Start — Room Prep That Saves 80% of the Mess
Before I even touch a popcorn ceiling, I prep the room. Every single time. Not because I’m being extra—but because this is where most messes actually begin. If flakes fall and the room isn’t ready, you’ll spend more time cleaning the floor than the ceiling.
You might be surprised how much dust comes down even with gentle cleaning. Gravity always wins, so the goal is to control where that dust lands.
Protect the Floor, Walls, and Yourself
Here’s how I set things up so cleanup stays easy:
- Drop cloths go down first: I overlap them slightly and tape the edges where they meet the wall. This stops dust from sneaking underneath and spreading.
- Walls get covered too: Plastic sheets or even old bedsheets work well. I tape them lightly to the top edge of the wall so falling debris slides straight down instead of sticking.
- Goggles and a mask are not overkill: Fine ceiling dust gets into your eyes and nose fast. I’ve learned the hard way—this isn’t about comfort, it’s about finishing the job without irritation or coughing fits.
Step-by-Step: The Safest Way to Clean a Popcorn Ceiling

This is where most people rush—and that’s where damage happens. I follow these steps in order every time because popcorn ceilings don’t forgive shortcuts.
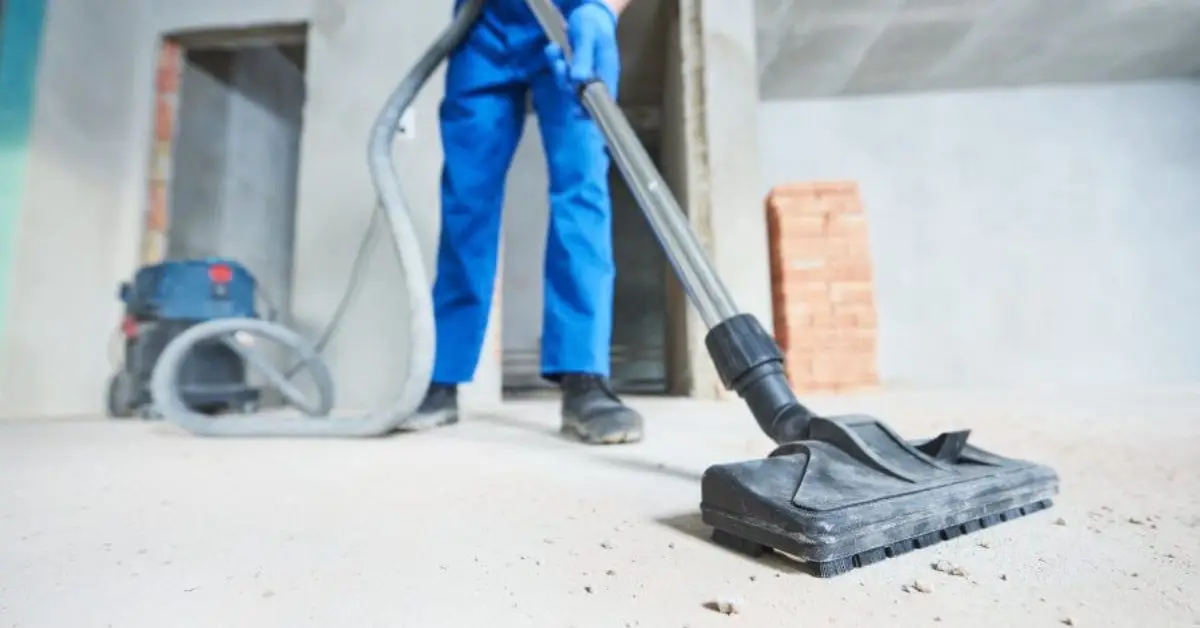
Step 1 – Start With Dry Cleaning Only
Before anything else:
- Turn off ceiling fans and HVAC airflow
- Attach a soft-bristle brush to your vacuum
- Work in one direction, slow and steady
I never go back and forth. One-way passes lift dust instead of grinding it into the texture. Most ceilings get noticeably cleaner at this stage alone—no moisture needed.
Why this matters: Dry cleaning protects the texture. In my experience, many ceilings never need anything beyond this step.
Step 2 – Use a Microfiber Duster (Correct Grip Technique)
If dust remains:
- Use very light upward pressure
- Let your wrist move, not your whole arm
Microfiber grabs dust instead of pushing it around. The moment you feel resistance, stop. Forcing it only creates flakes.
Why this matters: This step removes what the vacuum misses without stressing the ceiling.
Step 3 – Spot Test Before Any Damp Cleaning
If you’re thinking about moisture, pause.
- Test a small hidden corner first
- Watch closely for flaking or softening
If texture comes off, that’s your signal to stop immediately.
Why this matters: Once moisture damages popcorn texture, there’s no easy fix.
Step 4 – How to Handle Stains Without Soaking
Stains cause panic—and panic leads to over-wetting. Not all ceiling stains are surface-level—some come from leaks, condensation, or hidden issues, and if stains keep coming back, it helps to understand the real causes of ceiling stains before trying to clean them again.
Here’s what I do:
- Smoke stains: gentle blotting, never scrubbing
- Grease spots: light touch, minimal moisture
- Use mild soap mixed very lightly with water
Cleaning experts at Real Simple explain that stains on textured surfaces respond best to controlled blotting, not soaking or rubbing.
Why this matters: Over-wetting is the fastest way to destroy a popcorn ceiling.
Step 5 – Clean Around Light Fixtures & Vents
These areas hold the most grime.
- Turn power off first
- Clean using small circular motions
I slow way down here. Fixtures and vents loosen texture faster than open ceiling areas.
Why this matters: These spots get dirty first and damaged first.
Step 6 – Final Dust Check Using Side Lighting
Once you think you’re done:
- Shine a flashlight across the ceiling
- Or use window light at an angle
Side lighting reveals dust you can’t see straight on.
Why this matters: This is a professional trick that prevents missed patches.
Step 7 – Post-Cleaning Cleanup Without Re-Spreading Dust
Cleanup matters as much as cleaning.
- Fold drop cloths inward, trapping dust
- Vacuum the floor last, not first
If you rush this, dust goes right back into the air.
Why this matters: A clean ceiling means nothing if dust ends up everywhere else.
When You Should NOT Clean a Popcorn Ceiling Yourself
I’m all for DIY, but I’m also honest about limits. There are situations where cleaning a popcorn ceiling yourself isn’t smart—and pretending otherwise is how people get into trouble.
Here’s when I tell homeowners to stop and rethink.
- Homes built before 1980: Many older popcorn ceilings may contain asbestos. I’m not saying this to scare you. I’m saying it so you don’t take a risk without knowing. Asbestos isn’t dangerous when left undisturbed, but scraping, vacuuming aggressively, or using moisture can release fibers into the air. The EPA clearly explains why textured ceilings from that era need extra caution and testing before any disturbance.
- Ceilings that are already flaking or water-damaged: If pieces are falling off on their own or the ceiling looks soft, stained, or swollen, cleaning will only make it worse. If your ceiling is already cracking or shedding texture, cleaning won’t fix the real issue—in fact, it can make it worse, which is why it’s important to know how to repair ceiling cracks before they turn into bigger structural problems. At that point, you’re not cleaning—you’re breaking it apart.
- Rental properties: If you don’t own the home, pause. If the ceiling shows signs of long-term moisture or musty odors, cleaning alone won’t solve it—and in serious cases, mold becomes a bigger concern that can affect both health and resale value, especially if you’re planning on selling a home with mold. In the US, altering or damaging a ceiling—even accidentally—can become a lease issue. I’ve seen tenants charged for repairs they never expected.
Why this matters: Knowing when not to clean builds trust and protects you legally and physically. Sometimes the safest move is stepping back, not pushing forward.
How Often Should You Clean a Popcorn Ceiling?
This is where people overdo it. Popcorn ceilings don’t need frequent deep cleaning, and treating them like flat ceilings shortens their life.
Here’s the rhythm I recommend:
- Dust-only cleaning: once or twice a year
This is usually enough if you’re gentle and consistent. - Stain-focused cleaning: only when needed
Smoke or grease stains don’t follow a schedule. Clean them carefully when they appear—no routine scrubbing. - Seasonal triggers to watch for:
- Winter heating systems kicking up dust
- HVAC filter changes
- Fireplace or heavy candle use
If nothing looks dirty, don’t clean just for the sake of it.
Why this matters: Over-cleaning causes more damage than dirt ever will. Less really is more with popcorn ceilings.
Pro Tips Homeowners Swear By (From Real People)
Some of the best advice I’ve picked up didn’t come from manuals—it came from real homeowners and pros who’ve learned the hard way.
Here’s what consistently comes up:
- What homeowners say works
- Prep the room longer than you think you need
- Stop the moment texture starts to loosen
- Use light, repeated passes instead of force
- Painter-approved habits
- Always clean dry first
- Never scrub stains
- Treat ceilings like fragile surfaces, not walls
- What pros never do
- They don’t rush
- They don’t soak
- They don’t assume every ceiling can handle moisture
Why this matters: This kind of advice adds real-world credibility. It reflects what people actually experience—not just what sounds good on paper. Let me ask you this before we move on: after reading this, do you feel more confident cleaning your ceiling—or more aware of when you should step back?
Cost Comparison — DIY Cleaning vs Professional Help
I get this question a lot: “Is it worth paying someone, or should I just do it myself?” The honest answer depends on your ceiling’s condition and your tolerance for risk.
Here’s how the costs usually break down in the US:
- DIY cleaning cost: Typically between $20–$60. That covers basic supplies like drop cloths, a microfiber duster, and a vacuum attachment you may already own.
- Professional cleaning cost: Most pros charge $150–$400, depending on room size, ceiling height, and condition. Heavily stained or older ceilings cost more.
Now here’s the part people overlook. Pro help can actually save money when:
- The ceiling is already fragile or flaking
- You’re dealing with smoke or grease stains
- The home is older and mistakes could mean testing or repairs
I’ve seen DIY jobs turn into repainting or removal projects that cost thousands. In those cases, the professional fee would’ve been the cheaper option.
Common Myths About Cleaning Popcorn Ceilings
Popcorn ceilings suffer from bad advice more than dirt. Let’s clear up a few things I hear all the time.
- “Water always ruins it”: Not true. Uncontrolled water ruins it. Light, tested moisture used carefully can be safe on some ceilings.
- “You can just repaint instead”: Painting over dirt locks stains in and adds weight to the texture. If the ceiling isn’t clean, paint often makes it worse.
- “Vacuuming pulls texture off”: Wrong tools and high suction do. A soft brush with gentle passes doesn’t.
Why this matters: Believing these myths leads to fear or careless shortcuts. Clear information helps you act with confidence instead of guessing.
Final Safety & Responsibility Note
I want to be clear about something. This guidance comes from experience, not from a medical or legal standpoint. Every home is different.
Here’s what I always stand by:
- Always test a small area first
- Stop immediately if texture loosens
- When something feels off, don’t push through it
No ceiling is worth risking your health or causing permanent damage.
If you found this helpful, I’d love to hear from you. Have you cleaned a popcorn ceiling before—or are you planning to tackle it soon? Drop your experience or questions in the comments.
And if you want more practical, homeowner-first advice like this, visit Build Like New. That’s where I share real solutions that help you protect and improve your home—without costly mistakes.
Disclaimer: This content is for general information only. It’s not professional, medical, or legal advice. Always test a small area first, follow safety guidelines, and stop if the ceiling shows signs of damage or risk. When in doubt, consult a qualified professional.

