
10 Must‑Have Fire Safety Upgrades for Every Home in 2026
When I first started thinking about fire safety for my own home, I realized most advice out there focuses on vague “don’t panic” tips or generic checklists. The reality is harsher: wildfires are getting faster, hotter, and closer to our neighborhoods every year. If you live anywhere near a wildfire-prone area—or even just want to protect your family from accidental house fires—waiting until it’s too late isn’t an option.
I want to show you practical, high-impact upgrades that actually make a difference. Not the recycled advice or gimmicks that fill most blogs. These are improvements that can truly protect your home, reduce risk, and give you peace of mind. By the end of this article, you’ll know exactly which areas to focus on, how to prioritize your efforts, and why every upgrade matters.
Let’s start by understanding the real risks around your home and how small, smart changes can make a huge difference.
1: Assess Your Fire Risk Zone and Set Clear Goals
Before you start upgrading anything, you need to know the actual risk around your home. I remember looking at my property and realizing that not every corner carried the same level of danger. If you live in a wildland-urban interface area—where homes meet forests or grasslands—your priorities will be very different from someone in a city suburb.
Here’s how I suggest you start:
- Identify your risk zone: Check local wildfire maps or talk to your fire department to see how your area ranks. If you’re unsure how to prepare your home for bushfires in particular, I’ve put together a detailed guide on how to protect your home from bushfires that complements these upgrades.
- Evaluate defensible space: Look at the vegetation, tree proximity, and debris around your house—these are the first line of fire defense.
- Consider local climate: Homes in drier, windier regions face faster fire spread, so upgrades should focus on external barriers first.
- Set clear goals: Decide whether you want to minimize risk, protect property, or maximize survival chances. Not every upgrade will matter equally for your situation.
By doing this, you’ll know exactly where to focus your effort and budget, rather than making random changes that don’t move the needle.
2: Upgrade Your Roof to Class A Fire Resistance
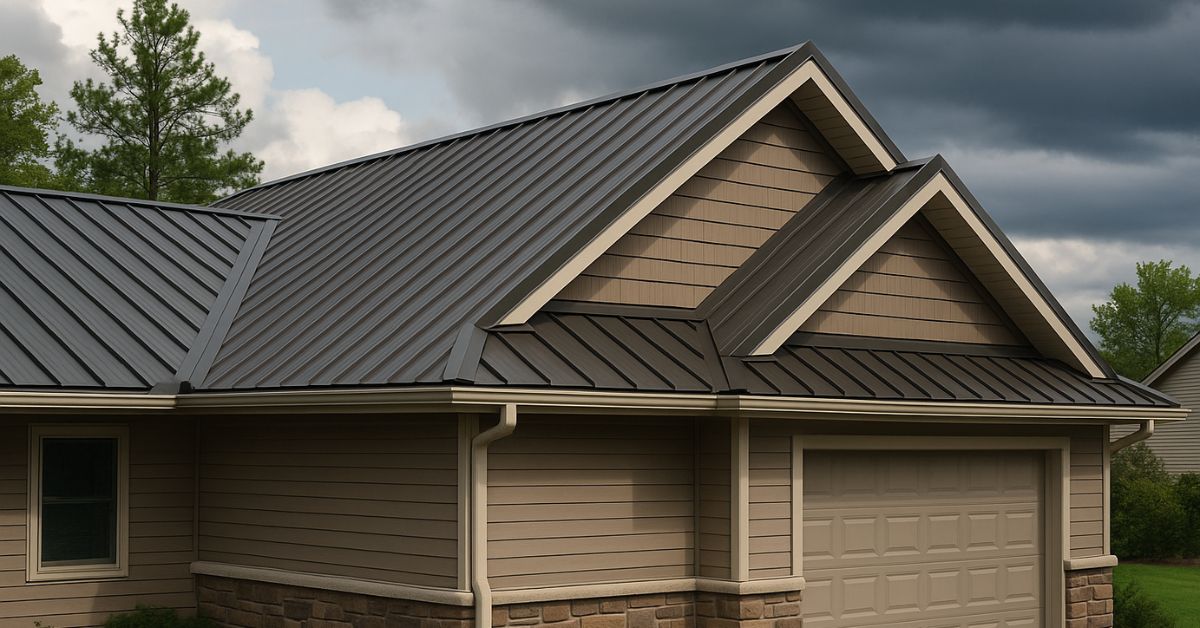
Your roof is the most exposed part of your home to embers and radiant heat. When I upgraded mine, I realized just how vulnerable older shingles can be. A Class A fire-rated roof drastically reduces ignition risk and is one of the smartest upgrades you can make.
Here’s what to consider:
- Class A fire rating explained: This rating means the roof can withstand severe exposure to fire without igniting. It’s the highest protection you can get.
- Best materials for fire resistance:
- Metal: Lightweight, durable, and fully fireproof.
- Slate: Extremely fire-resistant, but heavier and pricier.
- Concrete or tile: Excellent barrier, but installation can be complex.
- Roof maintenance tips: Regularly clear debris, inspect for damage, and replace any shingles or tiles that are cracked or worn.
I also found that survival studies from the Insurance Institute show roofs are often the first point of failure during wildfires, so investing here is critical. If you want a detailed guide on materials and fire resistance, I recommend checking this HowStuffWorks fireproofing guide — it’s practical and easy to understand.
3: Hardening Exterior Walls and Siding Materials
After the roof, your walls are the next most vulnerable surface. I learned this the hard way when I saw how quickly embers can ignite siding that isn’t protected. Choosing the right materials can literally stop a fire before it reaches the interior.
- Material choices:
- Fiber cement, stucco, or masonry are non-combustible and provide strong protection.
- Wood or vinyl siding can be treated with fire-retardant finishes to slow ignition.
- Seal gaps and joints: Even tiny cracks around windows, doors, or corners can allow embers inside. Caulking and sealing these areas is cheap but highly effective.
- Treated wood options: If you prefer the look of wood, fire-treated planks or boards significantly reduce risk.
Hardening walls isn’t glamorous, but it’s essential. When embers land, a non-combustible exterior can be the difference between minor damage and a total loss.
4: Windows and Doors — Strengthen Weak Spots
Windows and doors are often the weakest points in your home when fire strikes. I realized early on that no matter how strong your roof or walls are, embers can sneak in through glass or gaps. Strengthening these areas is one of the most cost-effective ways to protect your home.
- Upgrade to multi-pane tempered glass: It holds up much better under radiant heat than single-pane glass.
- Fire-rated exterior doors: Steel or solid-core doors reduce the chance of ignition from embers.
- Install mesh screens or shutters: Fine-mesh screens block embers while still allowing airflow.
When I upgraded my windows and doors, I noticed a huge drop in my home’s vulnerability. For an easy-to-follow guide on fire-resistant doors and windows, I found the NFPA home preparedness tips really useful—they break it down by materials and practical installation advice.
5: Ember-Resistant Vents, Soffits, and Chimneys
I used to think vents were just a small detail, but they can be major entry points for embers. During wildfire season, even the tiniest opening can allow sparks to ignite your attic or walls.
- Ember-resistant vent screens: Look for WUI (Wildland-Urban Interface) rated products designed to block sparks.
- Protect soffits and eaves: Box-in or shielded soffits prevent embers from sneaking under your roofline.
- Chimney caps and spark arrestors: These stop sparks from escaping and reduce fire risk when using fireplaces or wood stoves.
Adding these protections is often cheaper than you think and can save serious headaches down the line. Even small gaps left unprotected are a common reason houses catch fire during embers storms.
6: Fire-Resistant Insulation and Interior Barrier Upgrades
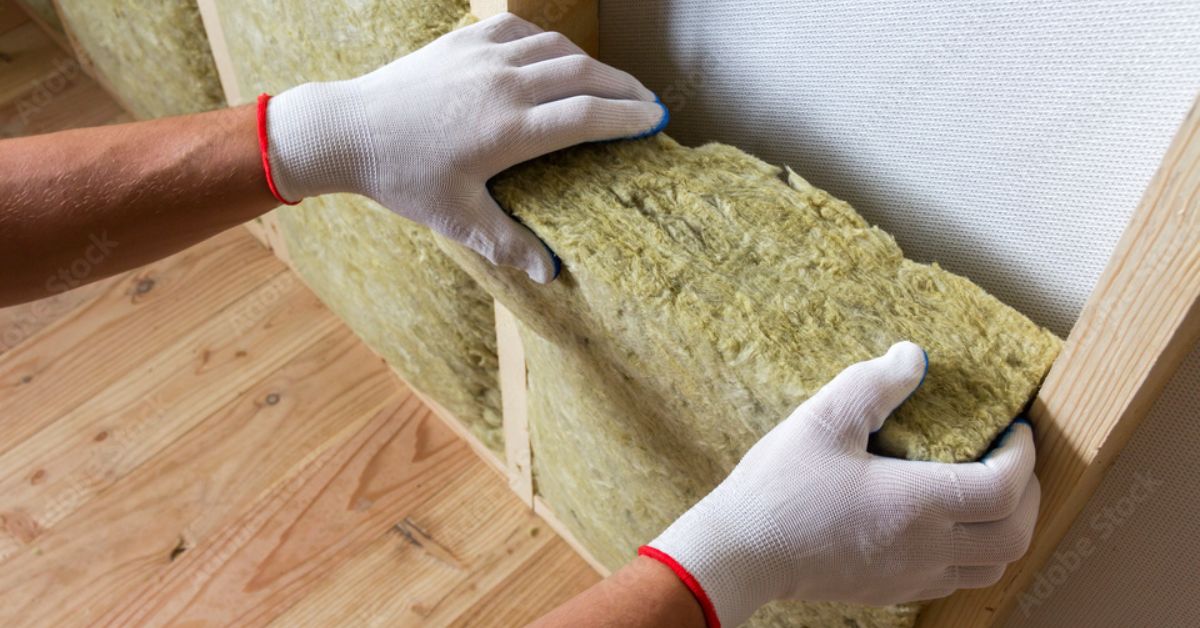
After you’ve hardened the exterior, it’s time to look inside. I can’t tell you how many people skip interior upgrades because they assume the outside is enough—but fire can still penetrate through walls if materials aren’t resistant.
- Use mineral wool or fire-rated insulation: These materials don’t ignite and help slow down heat transfer.
- Fire-resistant drywall (Type X): Installing this can give you extra minutes to escape or let firefighters control a fire.
- Seal gaps with fire-rated caulks: Every tiny crevice you seal reduces the chances of embers finding their way inside. Alongside fire-resistant insulation, it’s also crucial to ensure your home is safe from indoor hazards—like carbon monoxide or gas leaks—which I cover in this guide on CO and natural gas safety.
Making these upgrades gave me confidence that if embers somehow got past my exterior, my interior barriers would buy critical time. For more detailed guidance on materials and their fire ratings, Gharpedia’s fire safety upgrades guide is very practical and hands-on.
7: Create and Maintain a Defensible Space Around Your Home
I quickly realized that even the best upgrades won’t help if your yard acts like a fuel source. Creating defensible space around your home is one of the simplest ways to reduce fire risk.
- Clear vegetation and debris: Keep leaves, dead branches, and dry brush away from your home.
- Maintain distance from trees and shrubs: Trim branches at least 10 feet away from your roof and siding.
- Choose fire-smart landscaping: Use non-combustible plants, rock mulch, or gravel in key zones.
- Establish fuel-free zones near structures: This gives embers fewer places to ignite.
Making these changes around my property made me feel a lot safer, knowing that if embers landed, they wouldn’t have an easy path to my home.
8: Protect Decks, Fences, and Attached Structures
Attached structures can act like ladders for fire, so you can’t ignore them. Even a small wooden deck or fence can compromise everything else you’ve done.
- Use ignition-resistant decking materials: Composite, metal, or treated wood options reduce risk.
- Keep fences non-combustible near your home: Metal or masonry fences are safer than wooden ones close to the house.
- Maintain proper spacing: Avoid letting vegetation or debris touch decks or fences.
By addressing these, you can prevent flames from using these structures to reach your home.
9: Upgrade Gutters, Downspouts, and Outdoor Storage
It might feel minor, but gutters and storage areas are often overlooked—and they catch embers fast. I learned this watching homes ignite from clogged leaves.
- Install metal gutters with guards: Prevent debris buildup and reduce fire risk.
- Clear debris seasonally: Keep gutters, downspouts, and roofs clear all year.
- Relocate flammable items: Move firewood, propane tanks, and other combustible materials away from your home.
Small maintenance tasks like these can save you from a disaster later.
10: Fire Safety Systems — Sprinklers, Alarms, and Tools
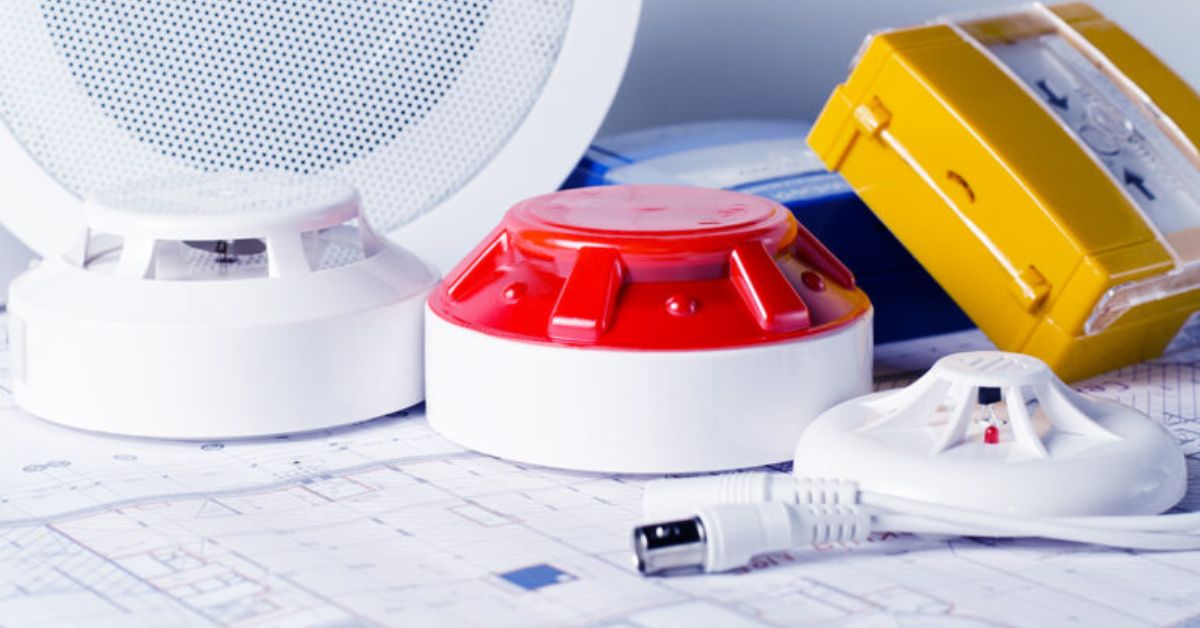
Finally, I’ve come to trust active fire-safety systems as my last line of defense. They don’t replace the upgrades you’ve made, but they dramatically increase safety if fire strikes.
- Interior sprinkler systems: Slow or control fire inside the home before it spreads.
- Smart smoke and fire detectors: Alerts you immediately and can connect to your phone for early action.
- Portable fire suppression tools: Keep hoses, fire extinguishers, and blankets handy for small spot fires. These systems work best when paired with basic home safety rules, especially if you have kids at home—check out our article on 10 essential home safety rules every parent should teach their kids to make your entire home safer.
Even if you do everything else right, having a proactive system gives peace of mind and a safety net for unexpected situations.
Wrap-Up Strategy: Cost vs Value and Insurance Impacts
I know the first question on your mind is probably: “How much is all this going to cost me?” Here’s the honest truth — fire-resistant upgrades range widely in price, but most deliver solid long-term value.
- Low-cost upgrades ($100–$1,000): Sealing gaps, clearing debris, adding ember-resistant vents, and installing fire-rated caulks. These don’t break the bank but reduce ignition points significantly.
- Mid-tier upgrades ($1,000–$10,000): Fire-resistant siding, treated wood, tempered windows, and metal gutters. These are more visible changes that protect major home components.
- High-end upgrades ($10,000+): Class A roofing, sprinklers, advanced fire-rated doors, and insulated concrete walls. These are big investments but can drastically reduce damage in a worst-case scenario.
From my experience, insurance companies often reward these upgrades with lower premiums. Even a few targeted improvements can improve your home’s rating for wildfire coverage and sometimes qualify you for rebates. Plus, they boost resale value — buyers notice when a home is thoughtfully protected.
At the end of the day, the best approach is to balance your budget with the upgrades that matter most for your home and your risk zone. Start small if you need to, but don’t delay — every upgrade counts.
I’d love to hear from you: Which upgrade do you think will make the biggest difference for your home? Drop a comment below and share your experience. If you want more tips, guides, and hands-on advice for building smarter and safer, visit us at Build Like New — we’re here to help you protect what matters most.
Disclaimer: This article is for informational purposes only. It does not replace professional advice from licensed contractors, fire safety experts, or local authorities. Always consult professionals before making structural or safety changes to your home.

