
7 Areas in Your Home Everyone Forgets to Clean
I’ve spent years deep cleaning homes, and yet, I’m still surprised at how often the tiniest, most overlooked spots collect a shocking amount of dirt. You might think your space is spotless after a weekend scrub, but let me tell you—I’ve seen dust bunnies hiding behind appliances, grime building up in window tracks, and fingerprints thickening on door handles you didn’t even notice.
These “forgotten” areas aren’t just a cosmetic issue—they can affect your health, air quality, and even how long your furniture and appliances last. In this article, I’m going to walk you through seven of the sneakiest spots that trap dirt faster than you think, and I’ll share practical ways to tackle them so your home truly feels clean.
Why These “Forgotten” Spots Matter More Than You Think
You might be thinking, “It’s just a little dust—does it really matter?” I get it. But over the years, I’ve seen how neglecting these hidden spots can quietly affect your home in ways you don’t notice until it’s a problem. Dust and grime don’t just sit there—they carry allergens, bacteria, and even pet dander. Over time, they can aggravate allergies, reduce indoor air quality, and make your cleaning efforts feel like a losing battle.
Here’s why paying attention to these forgotten corners is worth your time:
- Health impact: Dust trapped in tight corners often contains allergens and bacteria that can trigger sneezing, itchy eyes, and even respiratory issues.
- Efficiency loss: Appliances work harder if there’s grime underneath or behind them, which can shorten their lifespan and increase energy bills.
- Hidden buildup: Dirt in overlooked areas accumulates silently, meaning that what looks clean on the surface may not be truly clean.
Even trusted cleaning experts acknowledge the importance of tackling these hidden zones. According to Sparkling Homes, areas like behind fridges and under washing machines can hide shocking amounts of dust and debris that standard cleaning usually misses.
By understanding the real impact of these spots, you’ll start noticing them during your regular cleaning routine—and that’s the first step toward a genuinely healthier, more comfortable home.
1. Appliance Shadows: Behind & Under Heavy Machines
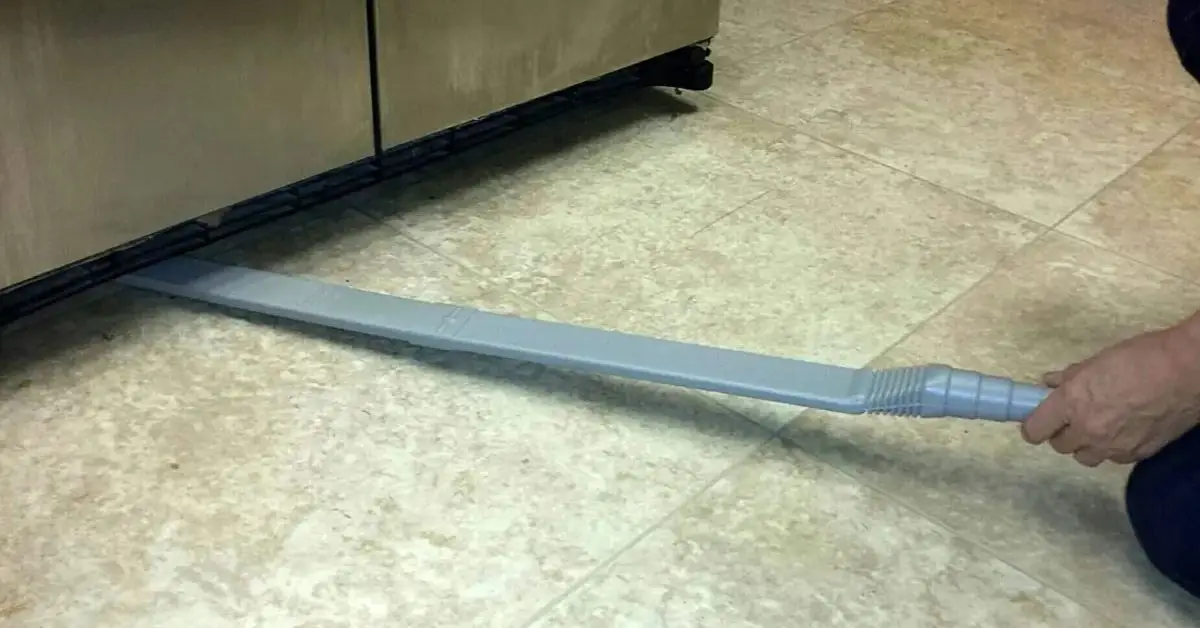
Let’s start with a spot I see neglected all the time: behind and under heavy appliances. Think of your fridge, washing machine, or oven. These areas are perfect dust magnets. Crumbs fall, pet hair drifts down, and moisture settles, creating the ideal environment for grime to thrive. I can’t tell you how many times I’ve pulled out a fridge and been shocked by the layer of dust hiding behind it.
Here’s how you can tackle it effectively:
- Use long vacuum attachments: Reach those tight corners without moving the entire appliance multiple times.
- Degreasing spray: For ovens or areas where food residue collects, a gentle degreaser makes cleanup faster and safer. When I tackle stubborn grease behind my oven or fridge, I often try these kitchen cleaning hacks with hydrogen peroxide that make deep cleaning so much easier.
- Lift or slide carefully: If the appliance allows, slide it slowly to avoid scratches or damage.
Cleaning behind appliances isn’t just about aesthetics—it can improve appliance efficiency and help prevent unpleasant odors. Once you make it part of your routine, you’ll notice a tangible difference in both air quality and how your kitchen or laundry area feels.
2. Light Switches, Door Handles & High‑Touch Surfaces
If you’re like me, you probably clean countertops and floors regularly—but how often do you think about light switches or door handles? I’ve learned the hard way that these high-touch spots silently collect fingerprints, oils, and germs.
Here’s why they attract grime:
- Constant contact with hands transfers oils, sweat, and dirt.
- Kids, pets, and guests contribute invisible layers of germs.
- These surfaces often get skipped because they don’t look dirty at a glance.
Pro cleaning tips you can use:
- Disinfect every high-touch surface at least 2–3 times per week.
- Use disinfectant wipes or a cloth with a gentle antibacterial spray.
- For stubborn grime, a soft toothbrush can reach edges and crevices.
A simple habit of wiping switches and handles regularly makes a big difference—not only does it reduce germs, it also keeps your home feeling truly clean every day.
3. Baseboards, Door Frames & Trim Work
Baseboards and trim are one of my personal “sneaky dust traps.” Many people think vacuuming or sweeping the floor is enough—but dust settles along the edges and on the trim, creating a subtle layer of dirt that gradually affects indoor air quality.
Common misconceptions I see all the time:
- “I dusted the floor, so the room is clean.”
- “Trim work doesn’t get dirty unless you spill something.”
How I tackle it effectively:
- Use a microfiber cloth or a soft brush to gently lift dust off baseboards and door frames.
- For stubborn buildup, a mild soap solution works wonders without damaging paint.
- Dust trim top-down: start with door frames, then move to baseboards.
According to Geaux Maids, these edges are some of the most commonly overlooked areas in homes—but addressing them instantly improves the visual and hygienic quality of any room.
4. Inside Window Tracks & Blinds

Window tracks and blinds are one of those spots I always forget until I pull them out for a deep clean—and then I wonder how I missed it for months. These hidden spaces trap pollen, dead insects, dust, and even rain residue, making them tiny dirt magnets that can spread allergens into your home.
Here’s a step-by-step approach I use:
- Remove blinds if possible, or tilt slats fully to expose tracks.
- Vacuum first to pick up loose dirt.
- Scrub with a brush and mild soapy water to lift trapped grime.
- Dry thoroughly to prevent mold or mildew.
Cleaning these areas isn’t just cosmetic—removing dirt from tracks and blinds reduces allergens, improves the way your windows open and close, and makes your entire room feel fresher.
5. Ceiling Fans, Light Fixtures & Upper Surfaces
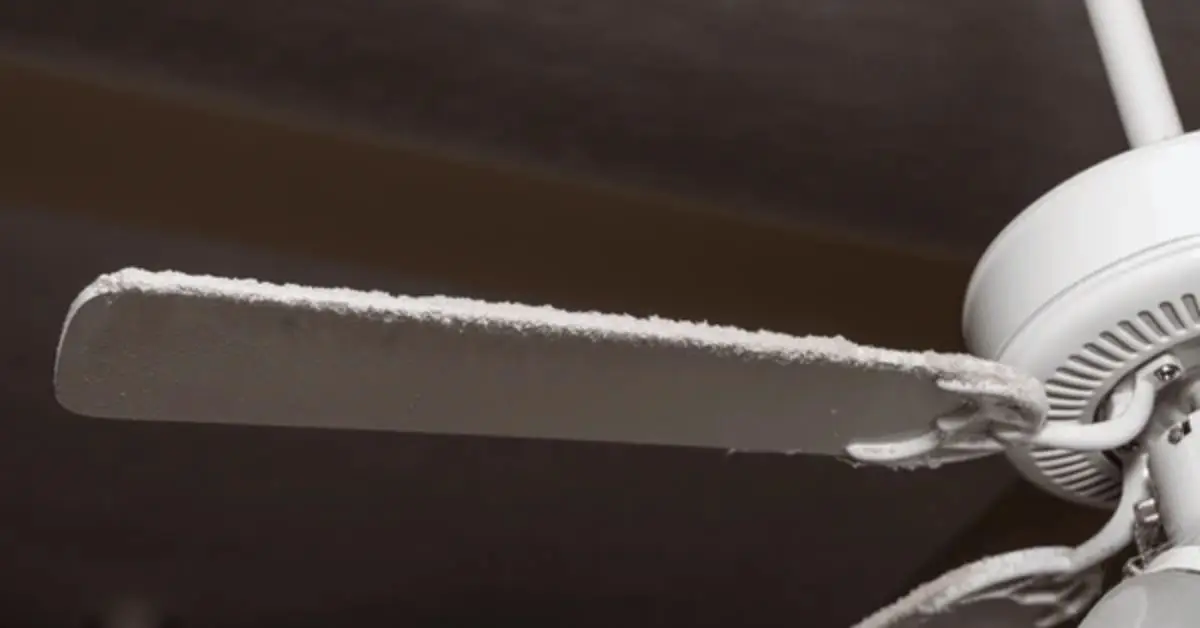
Ceiling fans and light fixtures are sneaky culprits in dust accumulation. I’ve learned that even if your floors and counters are spotless, these upper surfaces silently redistribute dust throughout the room every time a fan spins. That’s right—the dust you see on your floor often started on a fan blade hours earlier.
Here’s how I tackle them:
- Pillowcase trick: Slide a clean pillowcase over each fan blade and pull the dust inside, preventing it from falling all over your furniture.
- Extendable duster: For chandeliers or high light fixtures, an extendable microfiber duster reaches those tricky spots without needing a ladder.
- Routine check: Wipe down these surfaces at least once a month to prevent heavy buildup.
Neglecting these upper areas contributes significantly to indoor dust levels and can make your home feel less fresh—even right after a full cleaning session.
6. Upholstery Edges & Tight Fabric Spaces
If you’re like me, you vacuum your couch and think that’s enough—but the seams, under cushions, and chair backs often harbor the most dust, pet hair, and allergens. These tight spaces are easy to overlook, yet they can trigger sneezing, worsen allergies, and even affect the longevity of your furniture.
Here’s what I do to keep them clean:
- Couch seams & crevices: Use a vacuum attachment designed for upholstery to lift dust and debris.
- Deep cleaning: Steam cleaning works wonders for embedded dirt in fabric pockets.
- Professional help: For high-traffic furniture, a professional deep clean every 6–12 months can prevent allergen buildup.
7. Grout Lines, Tile Edges & Bathroom Tunnels
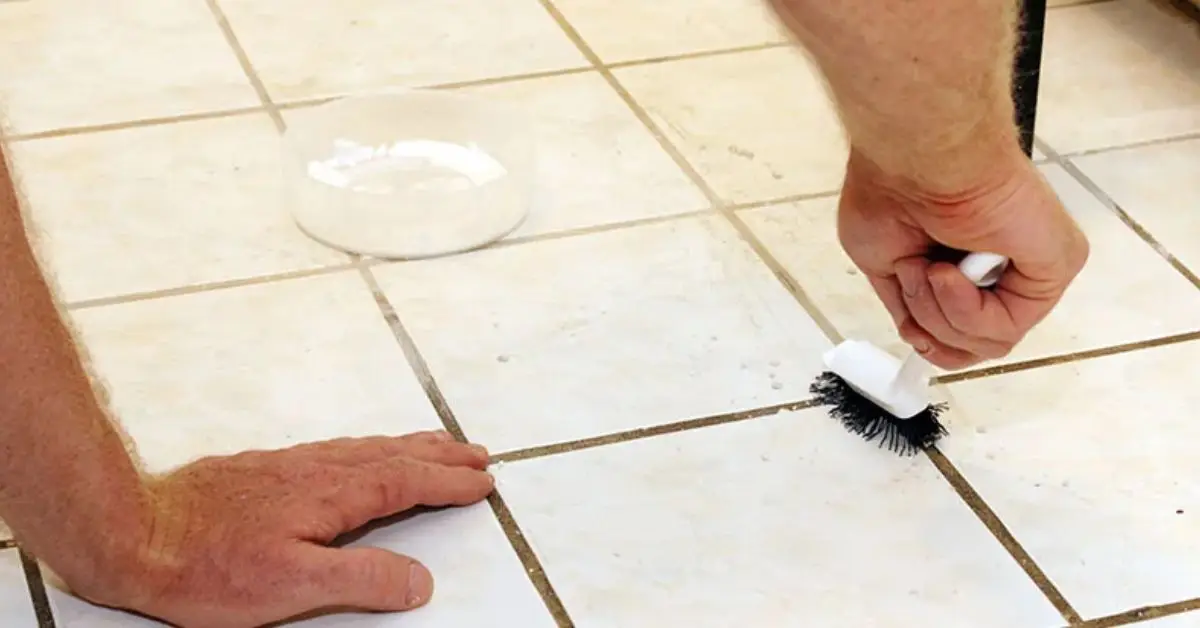
Bathrooms are one place I never underestimate when it comes to hidden dirt. Grout lines, tile edges, and the corners behind sinks and toilets can accumulate soap scum, mold, and mildew. These areas aren’t just unsightly—they can become health hazards if ignored.
Why you should care:
- Porous surfaces trap moisture: Grout and tile edges provide the perfect environment for mold and bacteria to grow.
- Visual impact: Even a clean-looking floor can feel dingy if grout lines are dark and grimy.
- Routine neglect: Many people skip these crevices because they’re hard to reach, but that’s exactly why they matter.
A step-by-step approach works best: scrub grout with a soft brush and a mild cleaner, rinse thoroughly, and dry completely. According to Tidyex, these hidden bathroom zones are often skipped in standard cleaning routines, making them some of the most critical areas to tackle for both cleanliness and health.
Bonus: Smart Cleaning Hacks From Real Users
Over the years, I’ve realized the best cleaning hacks often come from people like you and me—those who spend hours figuring out what actually works.
Here are a few of my favorites:
- Microfiber + soap method: A damp microfiber cloth with a small drop of dish soap picks up dust on shelves, blinds, and baseboards faster than a dry cloth alone.
- Frequent touchpoint checklists: Keep a short weekly checklist for light switches, door handles, and remote controls. It only takes a few minutes, but it keeps germs at bay.
- 10‑minute deep clean ritual: Pick one small zone—like the kitchen counters or bathroom sink—and clean it thoroughly for just 10 minutes. Doing this daily keeps grime from building up and makes weekly deep cleans feel effortless.
The key takeaway here is that you don’t need hours to make a meaningful difference. Little, consistent habits prevent those overlooked spots from turning into major headaches.
Quick Seasonal Deep Cleaning Checklist
If you’re ready to take control of your home’s cleanliness, a seasonal deep clean is a game changer. I like to break it down room by room and focus on high-impact tasks. Here’s the approach I follow:
High-impact tasks (repeat every season):
- Dust ceiling fans, light fixtures, and upper shelves
- Wipe down high-touch surfaces like switches and handles
- Vacuum and steam clean upholstery seams
- Scrub grout lines and tile edges
- Clean window tracks and blinds
- Pull out appliances and clean behind/under them
- Wash baseboards and door frames
- Empty and sanitize trash bins and recycling
- Deep-clean fridge, oven, and other major appliances
- Check and clean vents, air filters, and door mats
Room-by-room sequence:
- Kitchen: Appliances, counters, backsplash, fridge, and pantry
- Living room: Upholstery, ceiling fans, blinds, shelves
- Bathrooms: Grout, sinks, mirrors, fixtures, vents
- Bedrooms: Baseboards, furniture edges, windows
- Hallways/Entry: Door handles, trim, and high-touch surfaces
By breaking the cleaning into smaller, prioritized tasks, it feels achievable instead of overwhelming. Plus, it ensures nothing is missed—even the “forgotten spots” we talked about earlier.
Common Mistakes That Make Your Deep Clean Less Effective
I’ve seen it happen countless times—even experienced cleaners fall into these traps. The problem isn’t that you don’t want a clean home; it’s that a few small mistakes can make all your effort less effective. Here’s what to watch out for:
- Using the wrong cleaners on delicate surfaces: Vinegar on marble, bleach on colored grout—these can damage surfaces instead of cleaning them. Always match your cleaner to the material. I’ve learned the hard way that some cleaners can damage delicate surfaces, so I always follow the tips in the cleaning product guide I trust for safe alternatives before scrubbing anything fragile.
- Skipping pre-clean vacuuming or dusting: Jumping straight to scrubbing or wiping can push dirt around rather than removing it. Take a few minutes to vacuum or sweep first—it makes the rest of the clean easier and more effective.
- Not scheduling recurring deep cleans: It’s easy to think a one-time deep clean is enough, but dust and grime sneak back quickly. Setting a seasonal or monthly schedule keeps hidden spots from building up again. To make sure nothing gets overlooked, I follow a checklist of things to clean monthly for a healthier home, which keeps even the hidden corners in top shape.
Avoiding these common mistakes not only saves time in the long run but also ensures that all those overlooked spots actually stay clean and healthy.
Summary: What You’ll Gain By Targeting These Spots
Here’s the bottom line: when you pay attention to the hidden corners, crevices, and high-touch surfaces, your home doesn’t just look cleaner—it feels cleaner.
- Better hygiene: Reduced bacteria and allergens in the air and on surfaces.
- Improved air quality: Dust and pet dander don’t circulate as much, making your home healthier.
- Extended appliance and furniture life: Regular cleaning prevents buildup that can wear down appliances or stain furniture.
- Peace of mind: You know your home is truly clean, not just superficially.
I’d love to hear from you—what’s the most surprising “forgotten spot” you’ve discovered in your home? Drop a comment below and share your experience. And if you want more tips, practical checklists, and expert advice for keeping your home looking and feeling like new, check out Build Like New for step-by-step guides and resources you can use today.
Disclaimer: The cleaning tips and recommendations in this article are for general informational purposes only. Results may vary depending on your home, materials, and cleaning products used. Always follow manufacturer guidelines and take appropriate safety precautions.

