
Don’t Replace—Restore: Fix Rusty Cast-Iron at Home
I still remember the first time I pulled out an old cast-iron pan from my grandma’s kitchen. Rust had claimed almost every corner, and I honestly wondered if it was even worth saving. But as I learned—and you’ll see—the right approach can bring a rusty pan back to life, stronger and more reliable than before.
Restoring cast iron isn’t just about aesthetics; it’s about flavor, durability, and the joy of cooking on something that’s been loved for decades. In this article, I’ll walk you through exactly how to assess, clean, and season your pan, step by step. No fluff, no guesswork—just practical, proven methods that work whether your rust is light or heavy.
By the end, you’ll not only have a pan that looks and performs like new, but also the confidence to maintain it so rust never comes back. So, if you’ve got a rusty cast-iron pan staring at you from the shelf, let’s get it ready for your next meal.
Understanding Rust on Cast-Iron Pans
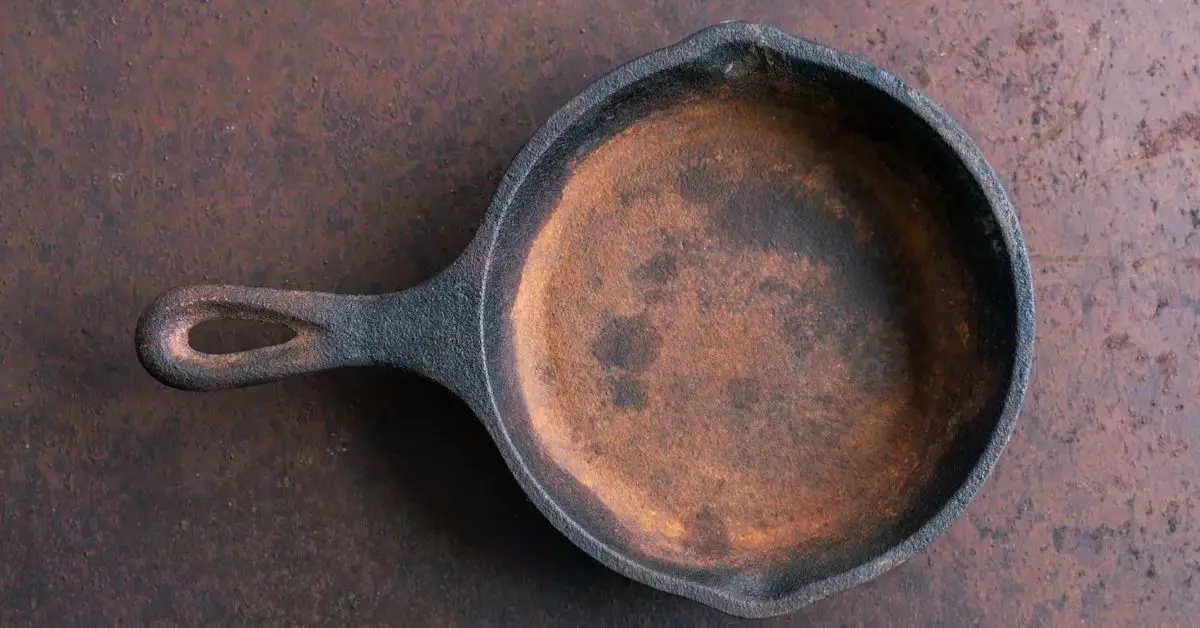
I’ve seen plenty of cast-iron pans slowly give in to rust, and it usually comes down to two things: moisture and air. When iron is exposed to water or even just humid air, it oxidizes—basically the metal starts reacting and forming that familiar reddish layer we call rust. Just like you need to check your water for iron content at home, keeping an eye on rust formation helps you catch problems before they get out of hand. It doesn’t happen overnight, but ignoring it can silently ruin a pan you love.
Here are some signs your pan needs attention:
- Reddish or brown spots forming on the cooking surface
- Rough or flaky patches when you run your fingers over it
- Uneven seasoning or sticky residue that never seems to go away
A quick fact I learned: even a small amount of rust can affect flavors and shorten the life of your pan. That’s why it’s worth catching it early instead of hoping it goes away on its own.
How to Check Your Cast-Iron Pan Before Restoration
Before diving into scrubbing or soaking, take a moment to really assess your pan. Not all rust is the same, and knowing what you’re dealing with makes a huge difference in how you restore it.
Here’s what I do when I check a pan:
- Light surface rust: Small spots that can usually be removed with a scrub or a quick vinegar rinse
- Heavy rust or pitting: Deep corrosion that might need sanding or more intensive restoration
- Old seasoning layer: Decide if it’s worth saving or if it’s too damaged to keep
One tip I always follow comes from Serious Eats: “A little rust is not the end; too much neglect requires more work.” I’ve found this to be true every time—I wouldn’t waste effort on a pan that’s beyond saving without knowing what I’m dealing with.
Choosing the Right Restoration Method
Once you’ve looked at your pan closely, the next step is deciding how much elbow grease it really needs. I won’t waste your time with fluff — it’s about matching method to damage.
Here’s how I break it down:
- Quick fixes:
- Scrub light surface rust with a sponge, steel wool, or a gentle brush
- Apply a thin layer of oil and heat it on the stove
- Works great when rust hasn’t taken over
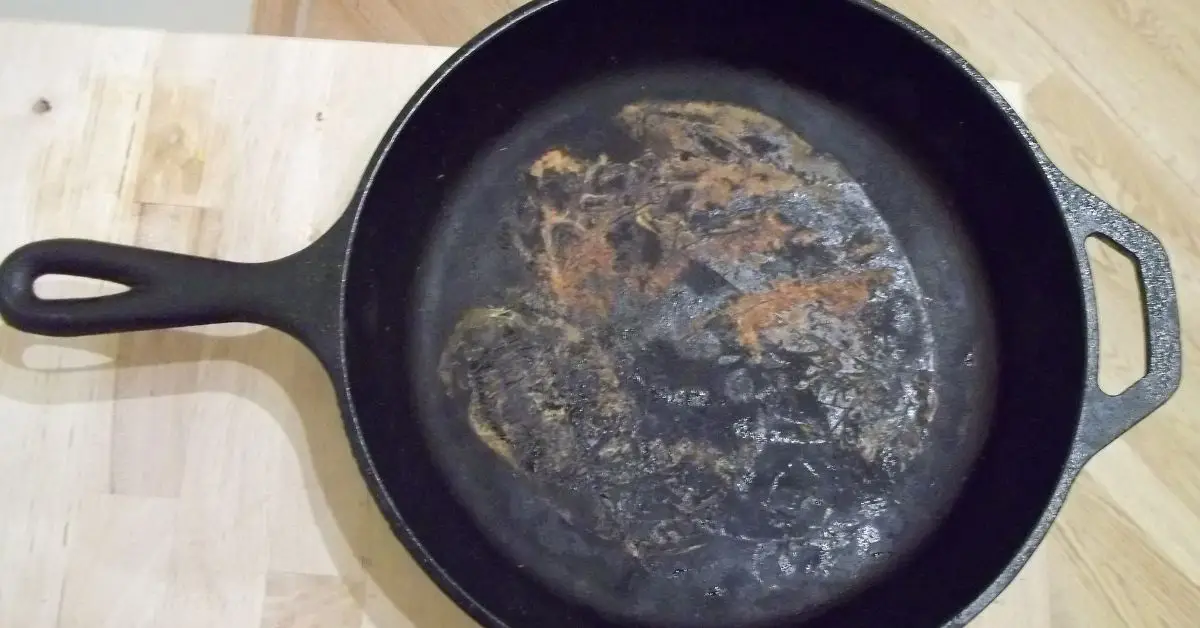
- Deep restoration:
- Vinegar soaks dissolve heavier rust — just don’t leave the pan in too long
- Sanding or stripping can remove damaged old seasoning layers
- Best when corrosion is aggressive or the pan has been ignored for years
A simple visual cue like a before‑and‑after rust removal photo not only motivates you but also shows exactly what you’re aiming for.
Bringing Your Cast‑Iron Pan Back to Life
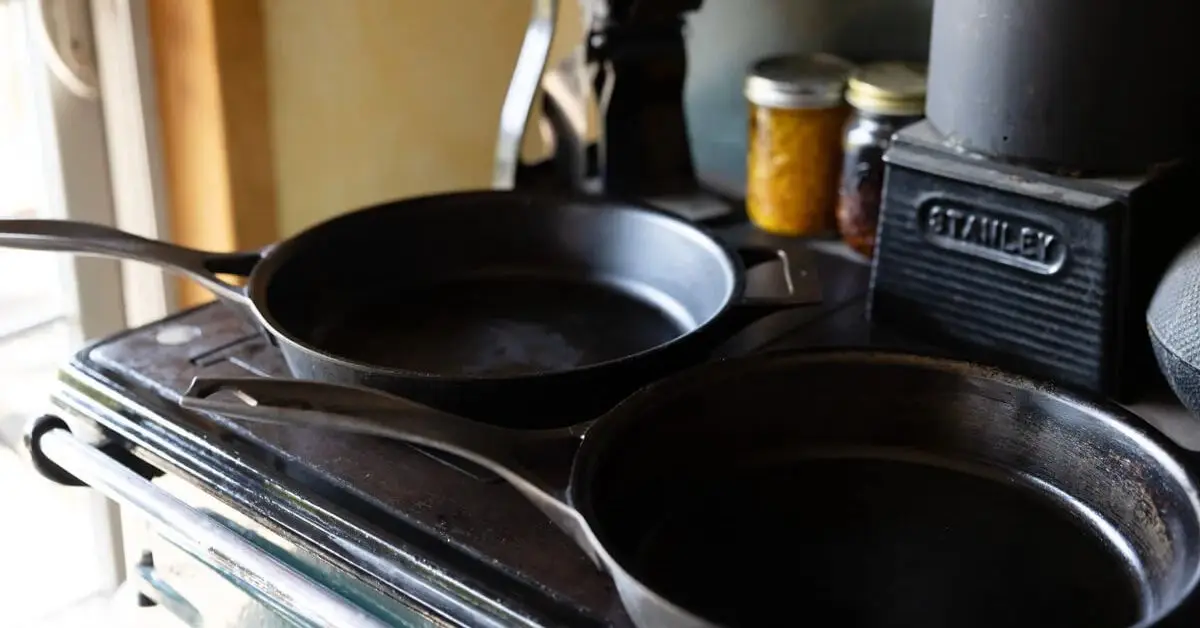
Homesteading Family
Now let’s get into the practical restoration process — step by step, without confusing expert jargon.
1. Removing Rust
- For light rust, steel wool or a wire brush usually does the trick
- Heavier rust calls for a vinegar soak — just monitor timing carefully. Just as vinegar can quickly tackle tough stains in other areas of your home, like cleaning a toilet bowl, it works wonders for dissolving heavy rust on cast-iron pans when used carefully.
- One of my favorite references for assessing rust and knowing when to strip versus preserve comes from the Serious Eats guide on restoring vintage cast iron cookware, which explains how experienced cooks approach this stage
2. Stripping Old Seasoning (If Needed)
- Use sandpaper or an oven–based method to remove flaky, damaged seasoning
- Leaving compromised seasoning behind makes it harder for new layers to bond
3. Cleaning & Drying
- Rinse thoroughly to wash away all rust particles and grit
- Heat the pan right after rinsing to evaporate every drop of moisture, because even a tiny bit can turn into flash rust
4. Seasoning the Pan
- Apply very thin layers of oil — thick globs just won’t polymerize right
- Oils with high smoke points like flaxseed oil, vegetable oil, or ghee work best
- Bake each layer at the right temperature and repeat for a few cycles
- One tip I always follow: “Several thin layers are stronger than one thick layer” — you get a smoother, tougher surface
Keep Your Cast-Iron Pan Rust-Free
Once you’ve restored your pan, the last thing you want is to watch all your hard work disappear. I’ve learned that maintenance is everything. A little daily attention goes a long way. Keeping your kitchen decluttered makes it easier to maintain your pans and notice rust or damage early, similar to how minimalists get rid of unnecessary items to simplify their space.
Here’s my routine:
- After each use: rinse with warm water, dry thoroughly, and wipe a thin layer of oil
- Avoid soaking or the dishwasher: prolonged water exposure is rust’s best friend
- Quick fixes for minor rust: scrape gently and reapply oil
Pitfalls in Cast-Iron Restoration
Even with the best instructions, it’s easy to slip up. I’ve made mistakes myself, and here’s what you need to avoid:
- Using acidic cleaners too often — vinegar is great for rust, but overdoing it can strip your seasoning
- Applying oil in thick globs — it won’t bond and can leave sticky patches
- Seasoning at the wrong temperatures — too low and it won’t polymerize; too high and the oil can smoke excessively
- Anecdotal examples from BBQ forums show people ruining pans by skipping the assessment step or over-scrubbing
Knowing common mistakes upfront saves you frustration, prevents wasted effort, and ensures your restoration sticks the first time.
Taking Your Cast-Iron to the Next Level
If you’ve mastered the basics, there are a few advanced tips that make your cast-iron even better:
- Outdoor seasoning: Using a smoker or grill can create deeper, more even seasoning layers
- Flavor-enhancing seasoning: Cook fatty foods like bacon or sear meats to gradually build a naturally non-stick surface
- Tracking seasoning layers and pan history: Keeping a simple log of what you cook and how many layers you’ve applied helps you understand how your pan ages
For deeper insights and a professional approach to advanced restoration techniques, the Lodge Cast Iron guide is an excellent resource. They explain step-by-step methods for both restoring and maintaining cast-iron like a pro.
Ensuring a Safe and Usable Pan
Before you fire up your newly restored pan, it’s important to make sure it’s fully safe and ready for cooking. I always take a final checklist approach — it saves headaches and keeps your food tasting amazing.
Here’s what I do:
- Check for residual rust: Run your fingers over the surface; if anything feels rough or flaky, repeat the cleaning step
- Assess seasoning shine and hardness: A well-seasoned pan should have a smooth, slightly glossy finish that resists sticking
- Tools & oil safety: Use heat-resistant gloves when handling hot pans, and make sure your oils are fresh and suitable for high temperatures
Taking these precautions ensures your cast-iron pan is not just beautiful but truly safe to use for years to come.
Your Turn!
Have you tried restoring a rusty cast-iron pan before? Or do you have any tips that worked wonders for you? Share your experience in the comments below — I’d love to hear how your pans turned out.
And if you want more expert tips, step-by-step guides, and actionable advice on bringing old cookware back to life, check out Build Like New for the full library of resources.
Disclaimer: The tips in this article are for informational purposes only. Always handle cast-iron cookware with care and follow safety guidelines. Build Like New is not responsible for any damage or injury resulting from following these instructions.

