
How to Remove & Prevent Mould: Step-by-Step Guide for Long-Term Protection
This post may contain affiliate links. For more details, please read our disclaimer
Do You Know How to Get Rid of Mold on Walls?
How to kill mold without doing too much damage to paint? What kills 100% of mold? Can you sleep in a room that has mold? What prevents it from coming back?
Mold not only looks unsightly, but it can also cause damage to the house and pose health hazards. Not recognizing it will not make it go away, and quick-fix measures are not permanent. We’ll guide you on how to remove mold safely while keeping your walls intact so it will stop coming back for good. So, let’s get started!
Say goodbye to mold with these proven methods: Read more
2. Understanding Mould and Its Causes
Mould-What Is It and Why Does It Grow on Walls?
Mould is a type of fungus that grows on walls, ceilings, etc. where dampness and high humidity are present. Mold not only looks nasty, but it can also act as an antagonist to our health by causing respiratory complications and allergies.
Common Causes of Mould Growth:
(i). Excess Moisture & Humidity
- High humidity provides excellent conditions for mould growth, particularly in bathrooms, kitchens, and basements.
(ii). Poor ventilation
- When air circulation is insufficient, moisture is trapped, thus promoting mould growth. Proper airflow keeps surfaces dry, thereby minimizing the accumulation of mould.
- Mould can also grow when leakage or pipe, wall, or roof water damage occurs.
(iii). A condensation issue
- Condensation occurs when warm air meets a cold surface, which is usually found on windows, tiles, and walls; this causes excess moisture for mould growth.
The Difference Between Mould and Damp
- Mould: In various colours-or black, green, or yellowish-it appears like patches, often with musty odors. It mostly grows in corners, on ceilings, or within damp walls;
- Damp: It refers to the absorption of moisture into walls or ceilings, giving it a damp and sticky appearance-on it or upon the area of contact-but without visible fungi growth.
3. How to Clean Mould Off Walls Without Removing Paint
Mould on walls not only looks unpleasant but can also be harmful to health. Cleaning it properly without damaging the paint requires the right tools and techniques.
Tools & Materials Required
Essential Cleaning Tools:
- Soft sponge or microfiber cloth
- Soft-bristle brush
- Spray bottle
- Protective gloves
- Face mask
- Bucket of clean water
Safe vs. Harmful Cleaning Solutions:
Safe Cleaning Solutions:
- White vinegar (natural and effective)
- Baking soda mixed with water
- Mild detergent with warm water
- Hydrogen peroxide (diluted)
Avoid Harmful Chemicals
- Bleach (can damage paint and produce toxic fumes)
- Ammonia-based cleaners (can worsen indoor air quality)
Step-by-Step Cleaning Process
Step 1: Prepare the Area
- Cover furniture and flooring with a plastic sheet or old cloth.
- Wear gloves, a face mask, and protective eyewear to avoid exposure to mould spores.
Step 2: Remove Surface Dust
- Use a dry cloth or vacuum (with a HEPA filter) to gently remove loose dust and mould particles before applying any liquid solution.
Step 3: Apply a Safe Mould Remover
- Natural Option: Spray white vinegar or a baking soda solution (1 tsp baking soda + water) on the affected area.
- Chemical Option: Use a mild detergent mixed with warm water for gentle cleaning.
- Let the solution sit for 5–10 minutes.
Step 4: Gently Scrub Without Damaging the Paint
- Use a soft sponge or a soft-bristle brush to scrub the area lightly.
- Avoid excessive pressure to prevent paint from peeling.
Step 5: Wipe & Dry the Area
- Use a clean, damp cloth to wipe off the residue.
- Ensure the wall is completely dry to prevent future mould growth.
- Improve ventilation in the room to keep moisture levels low.
How to Prevent Mould from Coming Back Permanently
Once you get rid of the mould, the next step is to make sure it does not return. Mould likes growing still further in wet, damp places, and controlling moisture and improving ventilation is the way to ensure it stays this way for good.
Invest in a Powerful Dehumidifier for Long-Term Mould Prevention
Controlling humidity is one of the most effective ways to prevent mould growth in your home. While simple solutions like ventilation and moisture absorbers can help, persistent damp conditions often require a more powerful approach.
For homeowners dealing with severe humidity issues, a high-performance dehumidifier can significantly reduce the risk of mould formation by maintaining optimal moisture levels.
Our Top Pick: Dri-Eaz LGR 6000Li Commercial Dehumidifier
- Removes up to 25 gallons of water per day – Ideal for large spaces, basements, and moisture-prone areas
- Advanced filtration to capture airborne mould spores and improve indoor air quality
- Automatic drainage system – No need for frequent water disposal
- Portable & easy to use – Built-in handles and wheels for hassle-free movement
For those struggling with constant dampness, this industrial-grade dehumidifier offers long-term protection against mould and moisture damage.
Check Latest Price & Availability
1. Beyond Opening Windows: Improve the Ventilation
Windows can create cross ventilation and better breathing space; however, it alone may not be enough. ventilation can be improved by:
- Installing exhaust fans in kitchens and bathrooms.
- Installing trickle vents or air bricks to guarantee a consistent airflow.
- Keeping all interior doors open to promote circulation.
- Use of an HEPA air purifier to filter airborne spores.
2. By applying various dehumidifiers and a combination of moisture-absorbing plants
Excess moisture makes the perfect breeding ground for moulds. You can lower the moisture by:
- Using dehumidifiers in highly humid places to maintain humidity levels below 50%.
- Finding space for the moisture-absorbing plants like peace lilies, aloe vera, and ferns.
- Placing moisture absorbers like activated charcoal or silica gel inside closed spaces.
3. Applying Additives before Repainting
If you are planning to repaint, take extra precautions by:
- Adding anti-mould additives to the paint (these fight fungi growth)
- Using moisture-resistant paint in humid areas (kitchens, bathrooms)
- Ensuring the walls are dried completely before painting
4. Use of Thermal Insulation to Avoid Condensation
Condensation usually occurs if the room is relatively damp and this encourages organisation and rapid growth of mould. To avoid this:
- Attach thermal wallpaper or insulated plasterboards to the cold walls and ceiling
- Put double-glazed windows to minimize temperature difference
- Maintain constant temperature in the room such that condensation does not commence
5. Regular Maintenance: What to Check Weekly & Monthly
Weekly Checks
- Dust windows and walls with condensation
- Examine the bathrooms and kitchens for any moisture build-up
- Leave the furniture a little bit away from the walls for airflow
Monthly Checks
- Check plumbing, roofs, and walls for any leaks
- Clean and change air filters in HVAC systems
- Check the dehumidifiers and empty water tanks
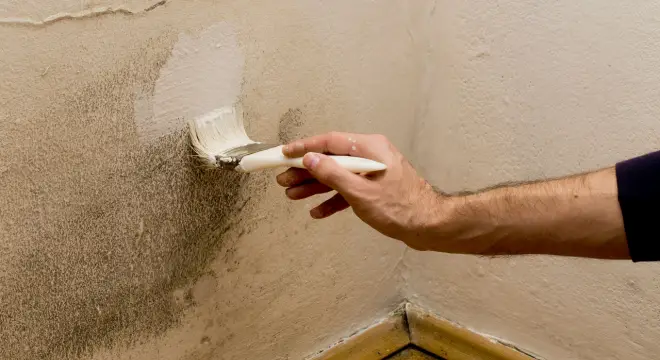
5. How to Treat Damp Walls Before Painting
Painting over damp walls without proper treatment can lead to peeling paint, mould growth, and further damage. To ensure a long-lasting and smooth finish, it’s essential to address the damp issue first.
Identifying the Type of Damp: Condensation vs. Rising Damp
(i). Condensation Damp
- Appears as water droplets or dark patches, mostly in colder areas (e.g., near windows, corners, or behind furniture).
- Caused by excess humidity and poor ventilation.
- Solution: Improve airflow, use a dehumidifier, and apply an anti-condensation paint.
(ii). Rising Damp
- Forms a tide mark at the lower part of walls, often with white salt deposits.
- Caused by moisture rising from the ground due to faulty or missing damp-proofing.
- Solution: Install or repair a damp-proof course (DPC) before any painting.
Fixing the Root Cause Before Painting
- Before applying paint, ensure the damp problem is completely resolved:
- Improve ventilation – Use exhaust fans, dehumidifiers, and trickle vents.
- Fix leaks – Repair any plumbing, roof, or wall leaks that may be causing damp.
- Dry out walls – Use a heater or dehumidifier to dry the affected areas completely.
- Treat mould (if present) – Clean the surface with a vinegar solution or a mould remover before painting.
Choosing the Right Mould-Resistant Primer & Paint
(i). Mould-Resistant Primer
- Use a primer that contains anti-fungal properties to prevent future mould growth.
- Look for primers labeled as “anti-mould” or “damp-seal.”
(ii). Damp-Resistant & Breathable Paint
- Use moisture-resistant paints like acrylic-based or anti-condensation paints.
- Avoid standard emulsion paint, as it may trap moisture and lead to further damage.
Final Steps Before Painting
- Ensure walls are completely dry before applying any primer or paint.
- Use a sealant on areas prone to future dampness.
- Apply at least two coats of anti-mould paint for better protection.
Natural vs. Chemical Mould Removal Methods
Cleaning the walls properly by selecting a cleaning method is essential for removing mold. Mild symptoms are treated with natural remedies; for stubborn or heavy mold growth, one may have to resort to a synthetic remedy.
Does Vinegar Remove Mould From Painted Walls? (Fact-Checking Common Remedies)
Yes, white vinegar does work as a natural mould remover. Mildly acidic, it helps break down mould spores and prevent regrowth. It penetrates more deeply than bleach, which merely removes surface mould.
How to Remove Mold with Vinegar
- Pour undiluted white vinegar into a spray bottle (do not mix with water).
- Spray directly on the affected wall and leave for 1 hour.
- Wipe with a damp cloth and allow the area to dry completely.
Myth: Some believe vinegar should be mixed with bleach for better results. Never mix vinegar and bleach as this creates toxic fumes.
Natural Mould Removal Methods
1. Baking Soda – One of those gentle mould destroyers which absorb moisture.
How to use: Mix one teaspoon of baking soda with water, spray on the mould, scrub gently and wipe clean.
2. Hydrogen Peroxide – A great disinfectant, it will kill mould spores.
How to use: Use 3% hydrogen peroxide, spray on affected area and allows standing for 10 minutes, scrub and dry wipe.
3. Essential Oils (Tea Tree Oil or Clove Oil) – Antifungal to prevent mould regrowth.
How to use: Mix 1 teaspoon of oil with 1 cup of water in a spray bottle. Spray on mould, let sit for a few hours, then wipe clean.
When to Use Chemical-Based Mould Removers (And Safety Precautions)
If natural methods do not fully remove mould or if the growth is widespread, chemical-based removers may be necessary.
When to use
- Large or stubborn mould patches that keep coming back
- Mould in high-risk areas like basements and bathrooms
- If natural remedies fail to stop regrowth
Common Chemical Mould Removers
- Mould-killing sprays (containing benzalkonium chloride or ammonia)
- Chlorine bleach (use cautiously as it can damage paint)
- Fungicidal wash (designed for deep-rooted mould problems)
Safety Precautions When Using Chemicals
- Wear gloves and a mask to avoid inhaling fumes
- Ensure proper ventilation (open windows, use fans)
- Never mix bleach with vinegar or ammonia—it creates toxic gas
- Test on a small area first to prevent paint damage
7. Removing Stubborn Mould from Different Surfaces
Different surfaces require different mould removal techniques to prevent damage while ensuring complete cleaning. Here’s how to tackle stubborn mould on various materials.
1. White Walls (Prevent Discoloration)
Mould on white walls can leave stains if not cleaned properly. The key is to use gentle but effective solutions that do not damage paint or cause discoloration.
Method:
- Use white vinegar or hydrogen peroxide (3%) in a spray bottle.
- Spray directly on the affected area and let it sit for 30–60 minutes.
- Wipe gently with a soft cloth or sponge.
- If stains remain, make a paste using baking soda and water, apply it, scrub lightly, then wipe clean.
- Dry the area completely to prevent future mould growth.
Tip: Avoid using bleach, as it can cause yellow stains on white paint over time.
2. Wooden Surfaces (How to Clean Without Warping the Wood)
Wood is porous, which means mould can penetrate deep into the surface. Cleaning should be done carefully to avoid damaging or warping the wood.
Method:
- Mix equal parts white vinegar and water in a spray bottle.
- Lightly mist the mould-affected area (do not soak the wood).
- Use a soft brush or cloth to gently scrub the mould away.
- Wipe dry with a clean, dry cloth immediately.
- Apply a wood polish or oil to restore moisture balance in the wood.
Tip: Avoid excessive moisture. For deep-set mould, sanding and refinishing may be required.
Tiles & Grout (Preventing Mould Regrowth in Bathrooms)
Bathrooms and kitchens are prone to mould due to high moisture levels. Grout, being porous, traps mould and requires deep cleaning.
Method:
- Mix baking soda and water into a paste and apply it to the grout.
- Spray hydrogen peroxide or vinegar over the paste.
- Let it sit for 15–20 minutes.
- Scrub with an old toothbrush or grout brush.
- Rinse with warm water and dry thoroughly.
Prevention:
- Keep the bathroom ventilated with an exhaust fan.
- Use an anti-mould grout sealer to prevent regrowth.
Fabric & Upholstery (Cleaning Mould Safely Without Ruining Fabric)
Mould on fabric can spread quickly and leave a musty smell. Cleaning must be done carefully to avoid damage.
Method:
- Take the fabric outside to prevent mould spores from spreading indoors.
- Brush off loose mould using a soft brush.
- Mix one part white vinegar with two parts water and dab it onto the mouldy area using a cloth.
- Let it sit for 15–20 minutes.
- Wash in hot water (if fabric allows) with laundry detergent and baking soda.
- Dry in direct sunlight, as UV rays kill remaining mould spores.
Tip: For non-washable upholstery, use a steam cleaner or professional cleaning service.
8. Can You Paint Over Mould?
Painting over mould might seem like a quick fix, but it does not solve the problem. If mould is not properly treated, it will continue to grow beneath the paint, leading to peeling, stains, and health risks.
Why Painting Over Mould Is a Mistake
- Mould continues to grow under the paint – It will eventually break through, causing discoloration and damage.
- Traps moisture inside the wall – Instead of eliminating the root cause, painting over mould seals in the moisture, making the problem worse.
- Health risks remain – Mould spores can still release into the air, affecting indoor air quality and causing allergies or respiratory issues.
Proper Way to Treat Mould Before Repainting
Step 1: Identify and Fix the Source of Moisture
- Check for leaks, condensation, or poor ventilation.
- Repair any plumbing or structural issues before proceeding.
Step 2: Clean the Mould Thoroughly
- Use white vinegar, hydrogen peroxide, or a mould remover (avoid bleach as it only removes surface mould).
- Scrub the affected area gently with a cloth or soft brush.
- Allow the area to dry completely before moving to the next step.
Step 3: Apply a Mould-Resistant Primer
- Use a fungicidal primer to prevent mould from returning.
- Ensure the primer is suitable for damp or previously mouldy surfaces.
Step 4: Choose the Right Anti-Mould Paint
- Use moisture-resistant, anti-mould or anti-condensation paint, especially in high-humidity areas like bathrooms and kitchens.
- Avoid standard emulsion paints, as they can trap moisture.
Step 5: Improve Ventilation to Prevent Future Growth
- Use exhaust fans, dehumidifiers, or moisture-absorbing materials in problem areas.
- Regularly inspect walls and ceilings for any signs of mould returning.
Best Anti-Mould Paints & Primers
Mould-Resistant Primers
- Zinsser B-I-N Primer
- Kilz Mold & Mildew Primer
- Ronseal Anti-Mould Primer
Anti-Mould & Moisture-Resistant Paints
- Dulux Easycare Bathroom Paint
- Zinsser Perma-White Mold & Mildew Resistant Paint
- Crown Steracryl Anti-Mould Paint
9. Myths & Misconceptions About Mould
Mould is a common problem, but many misconceptions surround how to deal with it. Here are some of the biggest myths debunked.
Does Bleach Kill All Mould? (Why It’s Not a Permanent Solution)
Myth: Bleach completely kills mould and prevents it from coming back.
Reality: Bleach only removes surface mould but does not kill the roots, especially on porous materials like walls, wood, and drywall.
- Bleach works on non-porous surfaces like tiles and glass but is ineffective for deep-set mould in walls and ceilings.
- Bleach contains water, which can seep into porous materials, making mould growth worse over time.
- A better alternative is white vinegar or hydrogen peroxide, which penetrate deeper and kill mould at the root.
Is Mould Only a Problem in Old Homes?
Myth: Mould only grows in old, damp houses.
Reality: Mould can grow in any home, regardless of age, if there is excess moisture and poor ventilation.
- New homes can also develop mould due to poor insulation, high humidity, or construction defects that trap moisture.
- Modern airtight buildings can suffer from condensation, leading to mould growth if ventilation is inadequate.
- Mould thrives in bathrooms, kitchens, basements, and poorly ventilated spaces, regardless of the building’s age.
Can You Just Scrub Mould Off and Forget About It?
Myth: Once you clean mould off the surface, the problem is solved.
Reality: Scrubbing mould off without addressing the root cause (moisture and humidity) means it will return.
- Mould spreads through microscopic spores, which stay in the air and on surfaces even after cleaning.
- Without fixing leaks, improving ventilation, or reducing humidity, mould will continue to grow.
- To prevent mould from coming back, use anti-mould paint, dehumidifiers, and regular maintenance.
10. Mould Removal for Renters: Legal & Rental Considerations
Mould in a rental property can be a serious issue, affecting both health and living conditions. Understanding who is responsible for mould removal and how to handle the situation legally is crucial for tenants.
Who Is Responsible for Mould in Rental Properties?
Responsibility for mould removal depends on the cause:
Landlord’s Responsibility:
- If mould is caused by a structural issue (e.g., leaks, poor ventilation, rising damp).
- If the property was already mouldy before the tenant moved in.
- If the landlord has failed to repair moisture-related issues.
Tenant’s Responsibility:
- If mould develops due to poor ventilation (e.g., not using exhaust fans, drying clothes indoors, failing to open windows).
- If spills or water damage are left unattended.
- If the property is not kept clean and dry.
How to Document & Report Mould Issues to Your Landlord
If mould appears, take these steps to protect yourself:
1. Document the Issue
- Take clear photos of the mould-affected areas.
- Note any leaks, condensation, or ventilation problems.
2. Report in Writing
- Send an email or formal letter to your landlord explaining the problem.
- Include photos and request necessary repairs.
- Keep copies of all communication for records.
3. Request a Professional Inspection (If Needed)
- If the landlord is unresponsive, ask for a mould inspection by a professional.
- A report from a mould specialist can support your claim.
When to Seek Legal Help for Ongoing Mould Problems
If your landlord refuses to address the issue, you may need legal action.
When to Consider Legal Help:
- The mould problem is making the home unsafe or unlivable.
- The landlord ignores repeated complaints.
- Health issues develop due to mould exposure.
What You Can Do:
- Contact local housing authorities – Many regions have regulations requiring landlords to maintain habitable conditions.
- Check tenant rights laws – In some areas, renters can withhold rent or break a lease if mould makes the home uninhabitable.
- Seek legal advice – A tenant rights organization or lawyer can help if the issue persists.
FAQs
1. What Are the 10 Warning Signs of Mould Toxicity?
Prolonged exposure to mould can cause health issues, especially for those with allergies or respiratory conditions. Here are 10 signs that mould may be affecting your health:
- Persistent coughing & sneezing
- Skin rashes or irritation
- Red, itchy, or watery eyes
- Wheezing or shortness of breath
- Frequent headaches or migraines
- Fatigue or brain fog
- Sinus congestion or runny nose
- Sore throat & hoarseness
- Worsening asthma symptoms
- Unexplained dizziness or nausea
2. Is It Safe to Sleep in a Room With Mould?
No, sleeping in a mouldy room is not safe. Even if the mould is not visible, spores can circulate in the air and affect your breathing.
Risks of sleeping in a mouldy room:
- Increased respiratory issues (especially for asthma or allergy sufferers)
- Possible long-term health effects from exposure to mycotoxins
- Sleep disturbances due to poor air quality
What to do
- Remove mould immediately and fix moisture issues.
- Use an air purifier to reduce airborne spores.
- Improve ventilation and humidity control to prevent regrowth.
3. What’s the Best Way to Stop Condensation?
Condensation is a leading cause of mould, especially in colder months. To stop condensation:
- Improve Ventilation – Keep windows open when possible and use exhaust fans in kitchens and bathrooms.
- Use a Dehumidifier – Keep indoor humidity levels below 50%.
- Insulate Cold Surfaces – Install thermal insulation to prevent condensation buildup on walls.
- Wipe Down Windows Daily – Condensation often forms on windows—wiping them down prevents excess moisture.
- Keep Furniture Away from Walls – Allow air to circulate behind furniture to prevent damp patches.
4. Can Black Mould on Walls Make You Sick?
Yes, black mould (Stachybotrys chartarum) can be harmful, especially if exposure is prolonged.
Health Risks:
- Triggers allergic reactions & asthma attacks
- Can cause skin irritation & breathing problems
- In rare cases, prolonged exposure can lead to toxic effects (e.g., neurological symptoms)
What to Do:
- Wear protective gear (gloves & mask) when cleaning.
- Use vinegar or hydrogen peroxide to kill mould instead of bleach.
- Fix leaks or moisture problems to prevent regrowth.
5. How Often Should I Check My Walls for Mould?
- Monthly Checks: Inspect walls, ceilings, and corners for any early signs of mould, especially in damp areas like bathrooms and kitchens.
- After Heavy Rain: Check for leaks or damp patches after storms.
- Seasonal Inspection: Before winter (to prevent condensation) and after winter (to check for mould buildup).
13. Conclusion & Final Tips
Mould can be stubborn, but with the right approach, it’s completely manageable.
- Best Cleaning Methods: Use vinegar, hydrogen peroxide, or baking soda instead of bleach for effective mould removal.
- Prevention Tips: Improve ventilation, reduce humidity, fix leaks, and use anti-mould paint.
- Regular Checks: Inspect walls, ceilings, and damp areas monthly to catch mould early.
Don’t wait—take action now before mould spreads. If the problem persists, consider professional mould removal services.
Feel free to reach out to me!

