
6 Easy Paint Brush Storage Tips to Prevent Bristle Damage
You don’t realize how expensive a ruined paint brush is… until you go to use it again.
I’ve seen it too many times. Someone finishes a long day of painting, tosses the brush in the garage, and thinks, “I’ll deal with it tomorrow.” The next morning? The bristles are stiff, bent, or permanently flared out. That clean edge you had yesterday is gone.
Here’s the thing most DIY guides barely explain: storing a paint brush isn’t just about keeping it from drying out. It’s about protecting the bristle shape, the glue inside the ferrule, and the balance of the brush itself. Once that structure is compromised, you can’t “fix” it with soaking or scrubbing.
And if you’re using quality brushes — the kind that cost $15, $20, sometimes more — improper storage turns into wasted money fast.
I’m going to walk you through six smart, practical ways to store paint brushes so they stay straight, soft, and ready for your next project. Whether you’re between coats or wrapping up for the season, the difference comes down to a few small habits.
Before we get into the methods, let me ask you — have you ever pulled out a brush you thought was fine… only to find the bristles fanned out like a broom?
Why Proper Brush Storage Matters More Than You Think
Most people think storing a paint brush is a small detail.
I don’t.
I’ve seen good brushes get destroyed not because of bad paint… but because of lazy storage. And once the bristles lose their shape, there’s no bringing them back to factory condition.
Let me show you what’s really at stake.
The Real Cost of Ruined Brushes
A decent 2–2.5 inch angled sash brush from major retailers like Home Depot or premium brands like Benjamin Moore easily runs between $15–$25. Higher-end options can go even beyond that.
Now think about this:
- If you ruin 2–3 brushes a year
- That’s $50–$75 gone
- And that doesn’t include the frustration of repainting uneven areas
What most guides don’t explain is this: When bristles splay (spread outward permanently), your paint lines stop being sharp. Edges bleed. Corners look messy. Cutting-in becomes harder.
You’ll notice:
- Uneven paint flow
- Streaking near trim
- Loss of control around edges
- Extra time spent fixing lines
And the worst part? You often blame your technique — not your damaged brush.
What Happens When You Store Brushes the Wrong Way
I’ve analyzed a lot of DIY discussions and SERP content. Most articles jump straight into “wrap it” or “hang it.”
But they skip what actually goes wrong.
Here are the biggest mistakes I see people making:
- Leaving the brush standing on its bristles in a jar or can
- Not fully drying it before long-term storage
- Sealing a damp brush inside an airtight plastic container
- Letting paint dry near the ferrule (that metal band)
When you store a brush on its bristles, the weight bends them. Over time, they stay bent.
When you trap moisture inside plastic, the glue inside the ferrule can weaken. That’s when bristles start shedding.
Even brands like Benjamin Moore emphasize proper cleaning and drying before storage because trapped moisture and dried paint are the biggest causes of permanent damage.
This isn’t just about neatness. It’s about protecting performance.
How to Store Paint Brushes During a Project (Short-Term Storage)
Let’s say you’re mid-project.
You’ve cut in one wall, you’re coming back tomorrow, and you don’t want to fully clean the brush yet.
This is where most people mess up.
Short-term storage is different from long-term storage. If you treat them the same, you’ll ruin your brush.
Here’s what I personally recommend.
Method 1 – Wrap Tightly in Plastic Wrap or Aluminum Foil
This is my go-to for overnight breaks.
After you finish painting:
- Don’t rinse the brush
- Gently remove excess paint
- Wrap the bristles tightly in plastic wrap or foil
- Squeeze out as much air as possible
- Seal it snug around the ferrule
Air is what dries paint. If you remove the air, you slow the drying process.
This method is best for:
- Overnight storage
- 12–24 hour gaps
- When you’re continuing the same color
Method 2 – Store in the Refrigerator (When You Can’t Clean Yet)
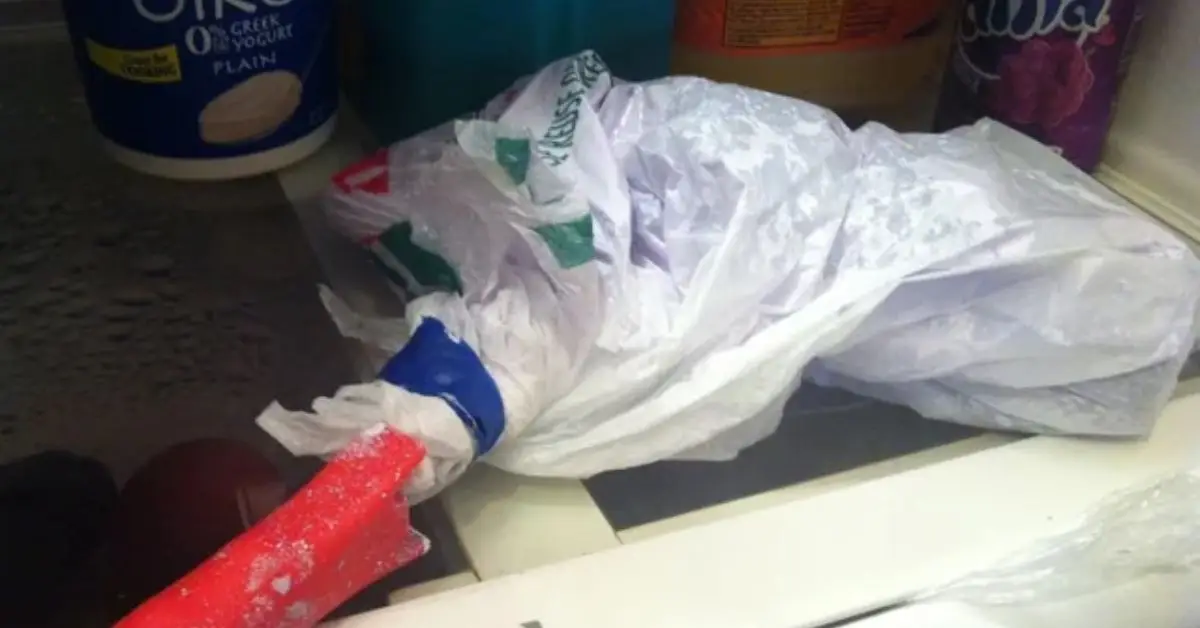
Yes, you can refrigerate a wrapped brush.
But let’s be clear:
- This works for latex (water-based) paints only
- The brush must be tightly wrapped first
- Don’t place it directly next to food
- Keep it in a sealed bag for hygiene
Cool temperatures slow down drying dramatically.
I only recommend this when:
- You’re stopping for 1–2 days
- You don’t have time to clean properly
- You’re using the same paint again soon
It’s not a long-term solution. It’s a delay tactic.
Method 3 – Keep the Brush in Paint (For Breaks Under 2 Hours)
If you’re just taking a lunch break or stepping away briefly, you don’t need plastic.
But you must do it correctly.
- Keep bristles fully submerged
- Don’t let the brush rest on the bottom of the can
- Use a brush holder or suspend it across the rim
If the bristles bend against the bottom, they’ll dry in that shape.
This method works only for short breaks — under 1–2 hours. Any longer, and surface drying starts. And if you’re still choosing your next shade before the second coat, you might get inspired by these throwback 90s paint colors designers can’t stop using.
How to Store Paint Brushes Long-Term Without Ruining Shape
Most people focus on getting the brush clean.
Very few focus on protecting the shape.
And shape is everything.
Once bristles dry bent, crushed, or flared out, your brush won’t cut clean lines again. Long-term storage isn’t about “putting it away.” It’s about preserving structure, airflow, and alignment.
Here’s how I recommend you do it.
Method 4 – Hang Brushes Vertically (Bristles Down, Not Touching Anything)
If you want your brushes to last years, hang them.
But hang them the right way.
- Bristles facing down
- Not touching any surface
- Completely dry before hanging
When brushes sit flat for months, gravity slowly shifts the bristles. When they stand on their bristles, they bend permanently. Hanging avoids both problems.
In my own garage setup, I use a simple wall-mounted hook strip. Some painters install a narrow wooden rail with cup hooks spaced a few inches apart. It keeps brushes separated, aired out, and protected.
This setup works best in:
- A dry garage
- A workshop wall
- Inside a cabinet with airflow
Air circulation matters. Trapped moisture is the enemy.
Method 5 – Use the Original Brush Sleeve or Cardboard Guard
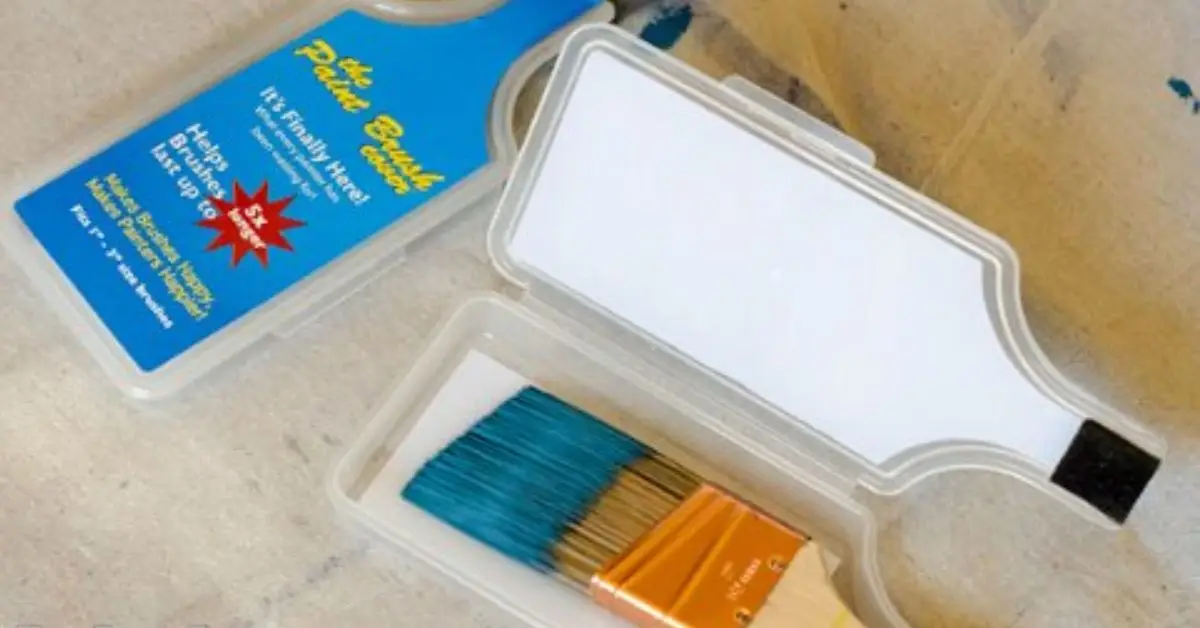
Most people throw this away the second they open a new brush.
That clear plastic sleeve or cardboard cover? It’s there for a reason.
It keeps the bristles compressed in their natural shape.
After cleaning and fully drying the brush:
- Gently reshape the bristles with your fingers
- Slide the original sleeve back on
- Store upright (not on the bristles) or hang
That guard prevents splaying during long storage periods. Without it, bristles slowly fan outward.
If you tossed the sleeve, you can make a simple cardboard wrap and secure it lightly with tape. Just don’t compress the bristles too tightly — you’re guiding the shape, not crushing it.
Method 6 – Store Flat in a Breathable Container
If hanging isn’t an option, storing flat works — but airflow is critical.
Avoid:
- Sealed plastic bins
- Airtight toolboxes
- Damp basement shelves
Instead, use:
- A ventilated toolbox
- A shelf in a climate-stable area
- A container that allows air movement
Humidity plays a bigger role than most DIYers realize. A damp garage can lead to softening glue inside the ferrule or even mildew in natural bristles.
Ideally, you want a dry environment with moderate humidity — not a freezing shed in winter or a humid, unventilated basement.
Long-term storage is less about convenience and more about protecting alignment and airflow. That’s where most online guides stop short.
Clean First, Store Second – The Step Most DIYers Rush
If you store a brush that isn’t properly cleaned and dried, none of the storage methods matter.
I’ve seen people wrap dirty brushes carefully… and still ruin them.
Cleaning is not just rinsing until the water looks clear. It’s removing paint from deep inside the bristles and near the ferrule. If you’re repainting stained ceilings or patched drywall, I’ve broken down the full process in this guide on how to paint over water stains so they never come back.
Let’s break it down.
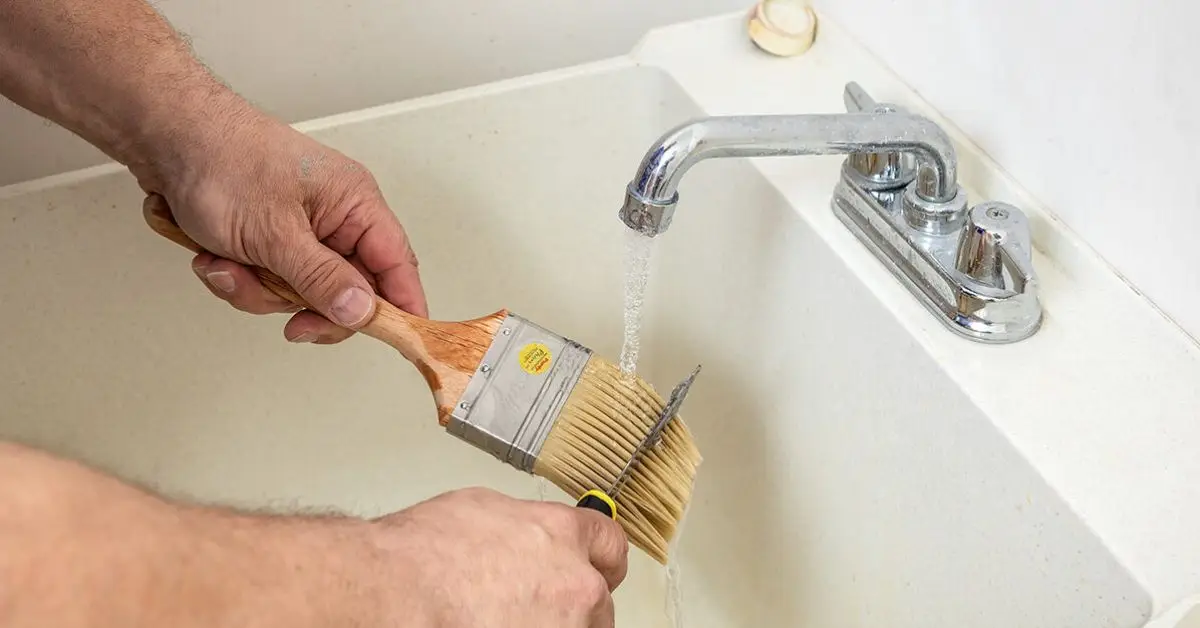
Latex Paint Cleaning Best Practices
For water-based paint:
- Rinse with warm water
- Use mild dish soap
- Work the soap deep into the bristles
- Rinse until water runs completely clear
Avoid hot water.
Hot water can weaken the adhesive inside the ferrule — the metal band that holds bristles together. Over time, that leads to shedding and loose bristles.
Take your time here. Paint hides near the base of the bristles. If you leave buildup there, it hardens and spreads the bristles apart permanently.
Oil-Based Paint Cleaning
Oil-based paint requires mineral spirits or paint thinner.
Here’s what I do:
- Pour a small amount of mineral spirits into a container
- Work the brush gently through it
- Repeat with clean solvent if needed
- Finish with mild soap and warm water
Never dump used mineral spirits down the drain.
For safe disposal guidance, you can follow the Environmental Protection Agency’s household hazardous waste recommendations.
That keeps you compliant and prevents environmental damage.
How Dry Should a Brush Be Before Storage?
Completely dry.
Not “mostly dry.” Not “feels dry.”
Completely dry.
After washing:
- Shake out excess water
- Spin the brush (a brush spinner works great)
- Gently reshape the bristles
- Let it air dry horizontally or hanging
If moisture remains trapped near the ferrule and you store it, you risk:
- Mold
- Glue breakdown
- Bristle loosening
Cleaning and drying properly is what separates a brush that lasts one season from one that lasts five.
Now I’m curious — where do you usually store your brushes? Garage shelf? Toolbox? Somewhere else?
7 Common Brush Storage Mistakes DIYers Make
I’ve fixed more ruined brushes than I can count.
Almost every time, the problem didn’t start with the paint — it started after.
If you avoid these mistakes, you’ll save time, money, and frustration.
1. Storing the Brush Upright on Its Bristles
This is the quickest way to bend them permanently.
When the brush rests on its bristles, the weight pushes them out of alignment. Even a few days like this can cause splaying.
If the tips aren’t straight, your paint lines won’t be either.
2. Letting Paint Dry Near the Ferrule
The ferrule is that metal band holding everything together.
When paint dries near the base of the bristles:
- It spreads them apart
- It stiffens the brush
- It permanently affects control
If you don’t clean all the way to the base, dried paint stays right where you don’t want it.
3. Using Airtight Containers While the Brush Is Damp
This one feels smart — but it backfires.
If a brush is slightly damp and you seal it in a plastic container:
- Moisture gets trapped
- Glue inside the ferrule can weaken
- Bristles may warp
Airflow matters more than most DIYers realize.
4. Leaving Brushes Soaking Overnight
I see this advice everywhere: “Just leave the brush in water until tomorrow.”
Don’t.
Too much soaking:
- Bends bristles
- Weakens adhesive
- Leads to a misshapen brush
If you need a break, use short-term methods — not a bucket of water.
5. Storing in Extreme Heat (Garage in Summer)
Garages can easily hit 100°F+ in many U.S. states.
High heat can:
- Dry out natural bristles
- Soften glue inside the ferrule
- Warp plastic handles
Temperature swings are hard on tools. Consistency wins.
6. Crushing Brushes in a Toolbox
Throwing a brush into a crowded toolbox is basically asking for bent bristles.
Pressure from other tools slowly flattens one side. Once dry, that shape stays.
If you’re storing in a toolbox, give the brush its own space.
7. Not Reshaping the Bristles Before Drying
This one is simple — yet almost no one does it.
After cleaning:
- Gently comb or smooth the bristles back into original shape
- Align the tips
- Let it dry in that position
If you let bristles dry in a messy shape, that becomes the new shape.
Small step. Huge difference.
Pro Painter Storage Tricks That Extend Brush Life by Years
When I started talking to contractors and digging into pro forums, I noticed something.
Pros don’t just clean and store brushes.
They maintain them.
That’s the real difference.
Use a Brush Comb After Every Cleaning
A brush comb isn’t optional if you want long-term performance.
It helps:
- Remove paint near the ferrule
- Separate stuck bristles
- Restore alignment
Even after following a thorough clean like the Family Handyman guide above, a comb gets paint out from deep inside where water alone can miss it.
This step alone can double the life of a quality brush.
Use a Brush Spinner Tool
A spinner removes excess water fast.
Instead of air-drying a soaking brush for hours, spinning:
- Forces water out from deep inside
- Speeds drying
- Reduces trapped moisture
Less moisture = less long-term damage.
Many contractors swear by this because it protects the ferrule area better than shaking alone.
Light Fabric Softener Rinse (Optional and Careful Use)
Some pros use a very diluted fabric softener rinse for synthetic bristles.
Important:
- Extremely diluted
- Only occasionally
- Rinse thoroughly afterward
It can help maintain softness — but overuse isn’t recommended. Treat this as a bonus step, not routine.
Dedicated Brush Storage Box
Instead of tossing brushes into general storage, many pros use:
- Slim ventilated storage boxes
- Wall-mounted hanging systems
- Dedicated compartments in tool cabinets
The goal is simple: No pressure on bristles, good airflow, preserved shape.
That’s what separates a brush that lasts one project from one that lasts five years.
Now tell me — which of these mistakes have you made before, and which trick are you most likely to start using?
Where You Store Your Brushes Matters (Garage vs Basement vs Shed)
Most DIYers think storage is just about “putting the brush somewhere safe.”
But environment plays a bigger role than you think.
I’ve seen perfectly cleaned brushes ruined simply because they were stored in the wrong place.
Let’s break it down.
Humidity Impact
Humidity is silent damage.
When you store brushes in a damp basement or unventilated garage:
- Moisture lingers inside the bristles
- The glue inside the ferrule can weaken over time
- Natural bristles may swell and lose stiffness
Even if the brush feels dry on the outside, trapped moisture can stay near the base.
If your storage area feels humid to you, it’s probably not ideal for your brushes either.
Mold Risk
Natural bristle brushes are especially vulnerable.
If they’re stored slightly damp in a humid area, mold can develop near the base. You may not see it at first — but you’ll smell it.
Once mold sets in, the brush is basically done.
That’s why airflow matters just as much as dryness.
Freezing Temperatures
A shed in winter? Risky.
Freezing temperatures can:
- Make bristles brittle
- Cause expansion and contraction in the ferrule
- Stress the adhesive inside
Extreme cold and extreme heat both shorten brush lifespan.
Best Temperature Range Suggestion
If you want your brushes to last, aim for:
- A dry area
- Moderate temperature
- Consistent climate (avoid big swings)
Think of it this way — if you wouldn’t store quality paint there, don’t store quality brushes there either.
A climate-stable garage cabinet or indoor utility closet is usually far better than a shed or exposed shelf.
This is one area most online guides barely touch — but it makes a real difference long term.
Quick Storage Guide Based on Your Situation
Sometimes you just want the fast answer.
Here’s a simple reference you can use anytime:
| Situation | Best Storage Method | Time Safe | Risk Level |
|---|---|---|---|
| Between coats (1–2 hours) | Keep bristles submerged in paint (not resting on bottom) | Up to 2 hours | Low |
| Overnight (same color) | Wrap tightly in plastic or foil, remove air | 12–24 hours | Low |
| 1–2 day break | Wrapped + refrigerated (latex only) | 48 hours max | Medium |
| Long-term (fully cleaned) | Hang bristles down with airflow | Months | Very Low |
| Toolbox storage | Flat with sleeve/guard in ventilated space | Months | Medium |
| Humid basement | Avoid if possible | — | High |
Use this as your decision chart. When in doubt, choose airflow and shape protection.
Signs Your Paint Brush Is Beyond Saving
Sometimes you’ve done everything right.
Sometimes you haven’t.
Either way, there comes a point when a brush isn’t worth fighting anymore.
Here’s how I decide.
Bristles Permanently Bent
If the bristles stay curved or flared even after:
- Washing
- Soaking
- Reshaping
- Drying properly
That’s permanent deformation.
It will never cut clean lines again.
Paint Hardened in the Ferrule
If you see or feel hardened paint near the base and it won’t break loose, the structure is compromised.
You’ll notice:
- Stiff inner bristles
- Poor paint flow
- Uneven spreading
At that point, performance drops significantly.
Uneven Fan Shape
A healthy brush has a clean, consistent edge.
If the bristles fan unevenly or look split into sections, you’ll struggle with:
- Trim work
- Cutting-in
- Clean corners
When precision is gone, replacement makes more sense than repair.
Sometimes replacing the brush is cheaper than wasting time fixing bad lines. Before you start your next project, especially in high-traffic spaces, make sure you’re not making one of these costly mistakes outlined in 5 kitchen elements you should never paint.
Safe Disposal Tips for Solvents and Old Brushes
If you’ve used oil-based paint, you’ve probably handled mineral spirits.
Don’t pour them down the drain.
Used solvents should be:
- Stored in a sealed container
- Taken to a local household hazardous waste facility
For old brushes:
- Let them dry completely
- Remove excess hardened paint
- Dispose of according to local waste rules
Proper disposal protects your plumbing, your environment, and your community.
Now I want to hear from you.
Where are you currently storing your brushes — garage, basement, shed?
Drop a comment and let me know. I read them.
And if you found this helpful, you’ll love the practical, no-fluff DIY guides we share at Build Like New.
If you care about doing the job right the first time, stick around.
Disclaimer: This guide is for general home improvement advice based on practical experience and industry recommendations. Always follow the specific instructions provided by your paint and brush manufacturer, and check local regulations for proper solvent disposal.

