
How to Paint Behind a Toilet Without Taking It Out (Complete Guide)
I’ve painted a lot of bathrooms over the years. And I can tell you this — the space behind the toilet is where most DIY confidence goes to die.
You roll fresh color across the walls, everything looks clean and updated… then you spot that thin strip of old paint hiding behind the tank. Now it stands out even more than before.
And you’re stuck wondering: Do I really have to remove the toilet for this?
Most guides either oversimplify it or quietly suggest taking the tank off like it’s no big deal. But if you’ve ever dealt with shut-off valves, old bolts, or brittle plumbing, you know that’s not always a quick Saturday project. One small mistake can turn a paint job into a plumbing repair.
Here’s the truth: in most bathrooms, you can paint behind a toilet without removing it. You just need the right approach — and the right tools for the gap you’re working with.
In this guide, I’ll walk you through exactly how to paint behind a toilet the smart way — without creating a mess, damaging the fixture, or overcomplicating it.
Before we get into tools and steps, let me ask you something: how much space do you actually have between your toilet tank and the wall? That detail changes everything.
Is It Truly Necessary to Paint Behind the Toilet?
Before you wrestle with rollers and awkward angles, let me ask you something.
Are you repainting the whole bathroom — or just freshening up one section?
I’ve seen people skip painting behind the toilet thinking no one will notice. Sometimes that’s true. But other times, that thin strip of old paint ends up being the first thing your eye catches.
When It Actually Matters
If you’re changing colors completely, especially from dark to light, that hidden strip can stand out more than you expect.
It matters most when:
- You’re doing a full bathroom color change
- The old paint is stained or yellowed
- The toilet sits slightly away from the wall
- You’re preparing the house for resale
A freshly painted bathroom with one visible old strip behind the tank can make the whole job feel unfinished. If you’re changing colors and still deciding on a direction, you might get ideas from these 5 throwback 90s paint colors designers can’t stop using — some of them look surprisingly good in compact bathrooms.
When You Can Skip It (Without Regret)
Now let’s be realistic.
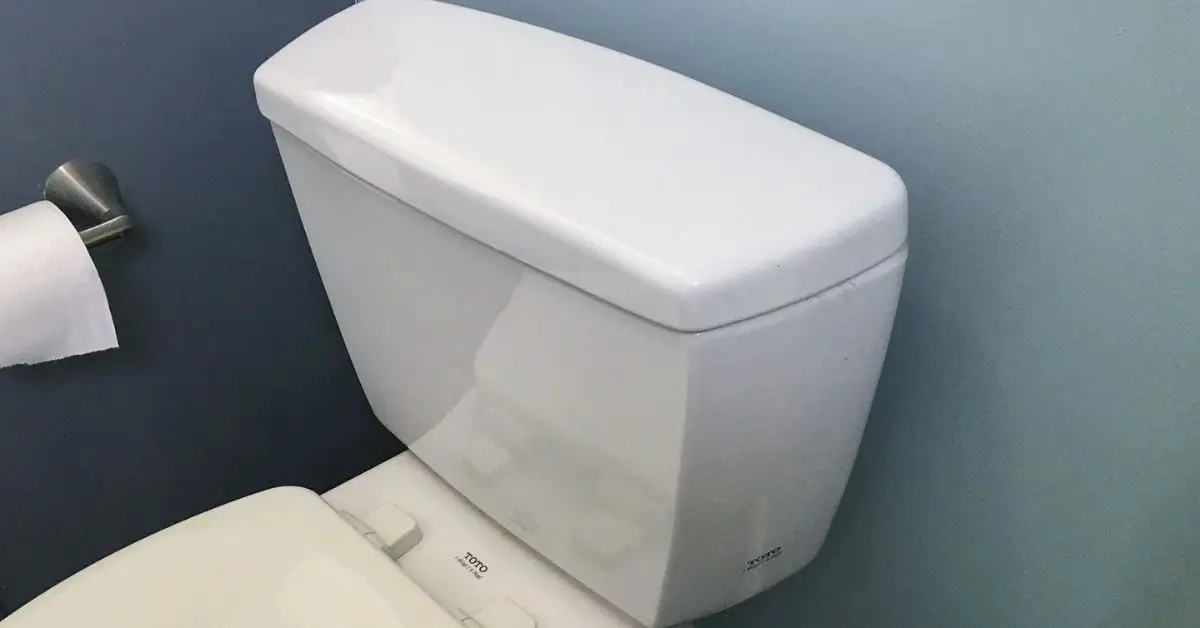
If the tank is fully flush against the wall and there’s zero visible gap, you may not need to stress about it — especially if:
- You’re repainting with the same color
- It’s a quick refresh, not a remodel
- The area is completely hidden from normal view
In tight installs, I’ve seen perfectly good paint jobs where that space was never touched — and it made no difference visually.
The Moisture Factor Most People Overlook
Here’s what I always think about in bathrooms: humidity.
Steam builds up. Airflow behind the toilet is limited. If the old paint back there is cracked or peeling, moisture can slowly settle in. If you’re already seeing discoloration or marks in that area, here’s how to paint over water stains so they never come back before you apply a fresh coat.
Over time, that can lead to:
- Peeling edges
- Minor mildew spots
- Musty odor in small bathrooms
If you already see wear back there, it’s smarter to handle it now while everything is prepped.
So the real question isn’t just “Do I have to?”
It’s “Will skipping it bother me later?”
Tools That Make Accessing Tight Spots Easier
Let’s be honest — this job isn’t hard because of painting.
It’s hard because of access.
I’ve learned the wrong tool makes this frustrating fast. The right one makes it simple.
Here’s what actually works.
Mini and Slim Paint Rollers
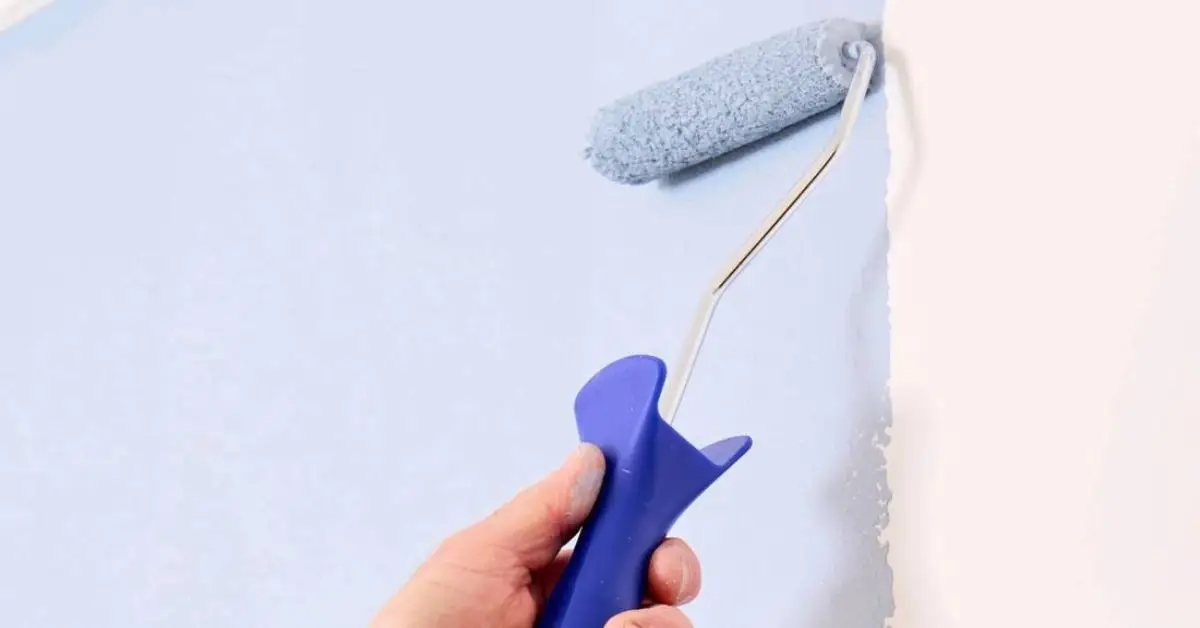
If you’ve got even a 1–2 inch gap, a slim mini roller is usually your best option.
These are narrower and thinner than standard rollers, so they slide into tighter spaces without scraping the tank.
Why they work:
- Compact width fits small gaps
- Low-nap covers reduce splatter
- Easier control in tight angles
Look for:
- 2-inch or 4-inch mini rollers
- Short nap for smooth bathroom walls
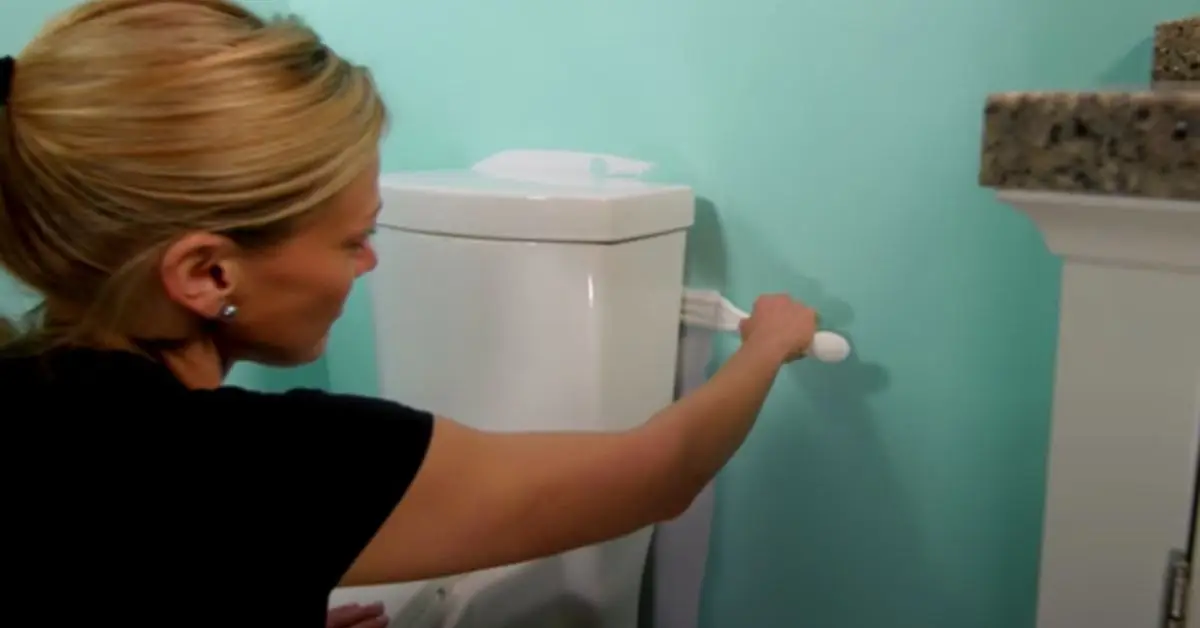
One trick I’ve seen shared in DIY communities is attaching a longer handle for better reach. Instead of twisting your wrist sideways, extend the roller and guide it from above. It keeps the paint where it belongs.
Paint Pads and DIY Pad Hacks
If your gap is under an inch, a roller might still feel bulky.
That’s when I switch to a flat paint pad.
They’re thin, flexible, and can reach spots a roller just can’t. I use them for:
- Extremely tight gaps
- Quick touch-ups
- Second coats behind tanks
And here’s a simple trick that actually works: tape a microfiber cloth or small pad securely to a paint stick. You instantly create a slim applicator that slides into narrow spaces.
Even professionals demonstrate creative versions of this method. For example, RepcoLite’s guide to painting behind a toilet without removing it shows how alternative pad setups can solve tight-access problems without disconnecting plumbing.
Sometimes simple beats fancy.
Narrow and Angled Brushes
Old-school tools still earn their place.
A narrow angled brush gives you precision that rollers can’t match.
I grab one when:
- The space is uneven
- I need to work around bolts or plumbing lines
- The wall has texture
Brushes are slower. But in ultra-tight spaces, control matters more than speed.
Specialized Tools Pros Use
There are also compact tools designed specifically for awkward spaces.
These include:
- Slim paint edgers
- Corner rollers
- Detail rollers with compact frames
Professional painters often carry smaller specialty rollers because they save time on jobs like this.
But here’s what I’ve learned after years of painting bathrooms: you don’t need something complicated.
You need something that fits your exact gap and gives you control.
Before buying anything, measure the space behind your toilet. Even half an inch changes your tool choice.
So tell me — how tight is the space you’re working with?
Step-by-Step Method to Paint Behind the Toilet (Without Removing It)
This is where most people overthink it.
You don’t need plumbing skills. You don’t need to dismantle half your bathroom. You just need a clean setup and the right sequence.
I always follow the same workflow — and it keeps things simple and controlled.
1. Prep: Clean and Protect
If you skip prep, you’ll regret it.
Start by cleaning the wall behind the toilet. That area collects more dust and residue than you think.
Wipe down:
- Dust buildup
- Spider webs
- Hair spray or product mist
- Any grime near the base
Let it dry completely before painting.
Next, protect the toilet tank. I usually slide a trash bag over it and secure it gently with painter’s tape. It takes 30 seconds and saves you from scrubbing dried paint later.
Cover the floor and baseboards too. A small tarp or drop cloth works. Tape off the trim carefully so you don’t rush edge work later.
If you want a good example of proper protection steps, this walkthrough from Side Dump Industries’ guide on painting behind a toilet without removing the tank shows a clean prep setup that prevents splatter.
Prep isn’t glamorous. But it’s what separates a clean job from a frustrating one.
2. Test the Space
Before dipping your roller into paint, measure the gap.
Don’t guess.
Use a tape measure or even slide a ruler behind the tank to see what you’re working with.
Here’s how I decide:
- 2 inches or more → mini roller works well
- Around 1 inch → slim roller or paint pad
- Less than 1 inch → flat pad or sponge stick
This step matters because forcing the wrong tool creates more mess than progress.
Once you know your gap width, your tool choice becomes obvious.
3. Painting Technique
Now for the actual painting.
I always start from the top and work downward. Gravity is not your friend — so control it.
Here’s what works:
- Insert the roller or pad gently at a slight angle
- Don’t overload it with paint
- Use slow, overlapping strokes
- Keep steady pressure without jamming it against the tank
Work in vertical passes.
Then lightly go back over the area to smooth it out.
To avoid drips:
- Use less paint than you think you need
- Roll off excess paint on the tray first
- Keep a small angled brush nearby for touch-ups
If you feel resistance, don’t force it. Pull back and adjust your angle instead of scraping the tank.
Slow and controlled always beats fast and messy.
4. Drying and Second Coats
Once the first coat is done, walk away.
Most bathroom paints need at least 2–4 hours before recoating, but always check the label. Rushing this step leads to peeling or uneven texture.
Before applying a second coat:
- Check coverage with a flashlight
- Look from different angles
- Feel for missed spots
The second coat should go on lighter and smoother.
I don’t rush bathrooms. Humidity already makes drying tricky. Giving the paint time to cure properly gives you that clean, finished look.
When You Actually Should Consider Removing the Toilet Tank
Most of the time, you can avoid removing anything.
But not always.
There are situations where access just isn’t realistic.
When It Makes Sense to Remove the Tank
You might need to remove it if:
- The tank is fully flush against the wall
- The gap is under half an inch
- You’re repairing damaged drywall
- You’re doing a full remodel
If the wall needs patching or heavy sanding, working around the tank becomes harder than just removing it.
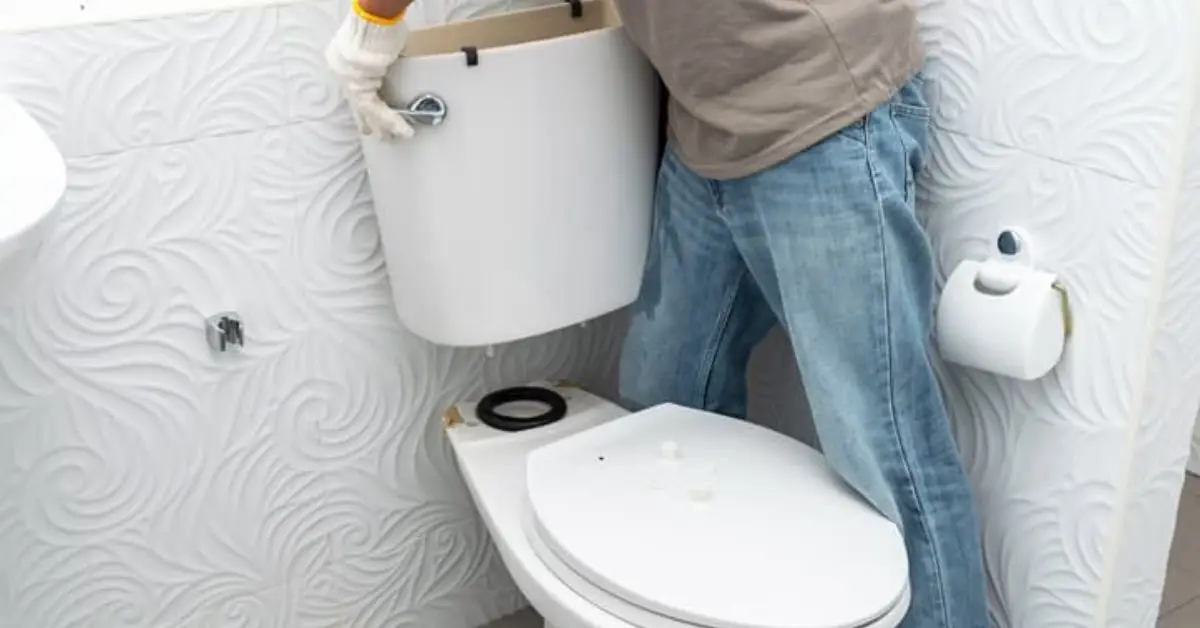
Quick Tank Removal (Not Full Toilet Removal)
You’re not removing the entire toilet — just the tank.
Basic steps include:
- Turn off the water supply valve
- Flush to empty the tank
- Sponge out remaining water
- Disconnect the water line
- Unscrew the mounting bolts
The tank lifts straight off once the bolts are removed.
It’s manageable — but only if you’re comfortable handling plumbing connections.
Safety Precautions
Before touching anything:
- Make sure the water valve fully shuts off
- Keep a towel nearby for drips
- Avoid overtightening bolts when reinstalling
If you’re unsure, it’s okay to leave it and work with tools instead.
I always tell homeowners this: if removing the tank feels stressful, it’s probably not worth it for a simple paint refresh.
Now let me ask you — after reading this, do you think your gap is workable, or are you leaning toward removing the tank?
Safety and Paint Selection Tips for Bathrooms
This part doesn’t get enough attention.
You can do everything right technique-wise — but if you use the wrong paint in a humid bathroom, it won’t last.
I’ve seen beautiful paint jobs start peeling within a year simply because the finish wasn’t made for moisture.
Choose the Right Paint for Humidity
Bathrooms deal with steam daily. That means your paint needs durability.
I recommend:
- Satin or semi-gloss finish for better moisture resistance
- Mold- and mildew-resistant formulas
- High-quality acrylic latex paint
Flat paint might look nice, but it doesn’t hold up well in damp environments. Especially in low-airflow spots like behind the toilet.
Spending a little more on bathroom-rated paint saves you from repainting sooner than you should. And before you grab a brush for everything in sight, it’s smart to know there are surfaces you should leave alone — here’s a breakdown of 5 kitchen elements you should never paint and why some materials just don’t hold paint well.
Ventilation Matters More Than You Think
Even the best paint struggles in trapped humidity.
While painting, I always:
- Turn on the exhaust fan
- Open a window if possible
- Keep the bathroom door open
Proper airflow helps with:
- Faster drying
- Better adhesion
- Reduced paint odor
- Lower moisture buildup
If the air feels heavy or damp, slow down. Let the room breathe before adding another coat.
Protect Floors, Fixtures, and Fittings
Behind-the-toilet painting is awkward. Drips happen.
Here’s how I minimize risk:
- Drop cloth or tarp under the toilet
- Painter’s tape along baseboards and trim
- Plastic wrap or trash bag over the tank
- Small angled brush for tight edge control
Protecting everything properly takes a few extra minutes — but it prevents hours of cleanup later.
Post-Paint Cleanup and Inspection Checklist

Most people stop once the paint dries.
That’s a mistake.
The difference between a DIY job and a polished finish often comes down to cleanup and inspection.
Removing Tape Without Smudging
Don’t yank tape off aggressively.
I remove painter’s tape:
- While the paint is slightly tacky (not fully hardened)
- At a 45-degree angle
- Slowly and steadily
If the paint has fully dried, lightly score along the tape edge with a utility knife before pulling. This prevents peeling.
Checking for Missed Spots
The space behind a toilet plays tricks on your eyes.
After everything dries, I:
- Shine a flashlight at different angles
- Kneel down and check from the side
- Step back and view from standing height
Different lighting reveals uneven patches you might miss at first glance.
Touch-Ups Without Repainting Everything
If you notice a small thin area, don’t panic.
Use:
- A small angled brush
- Light paint load
- Gentle blending strokes
Avoid heavy dabbing. Feather it out so it blends with the existing coat.
Small fixes are normal. Big re-dos usually happen when people rush.
Final Thoughts
Painting behind a toilet sounds harder than it is.
Once you understand your gap size, choose the right tool, and prep properly, it becomes just another small step in your bathroom refresh.
I’ve done this in tight powder rooms, full remodels, and quick weekend upgrades. And almost every time, the stress came from overthinking — not the work itself.
If you measure carefully, protect surfaces, and work patiently, you can get a clean, professional-looking result without touching the plumbing.
Now I’d love to hear from you.
How much space do you have behind your toilet — and are you planning to tackle it yourself?
Drop your experience or questions in the comments below.
And if you found this helpful, check out more practical home improvement guides at Build Like New. I break things down the way I’d explain them to a friend — simple, honest, and built to last.
Disclaimer: This guide is for general informational purposes only. Every bathroom setup is different, and plumbing components can vary by home and age. If you’re unsure about shutting off water, removing a tank, or working around plumbing connections, consider consulting a licensed professional. Always follow the paint manufacturer’s instructions and local safety guidelines.

