
9 Simple Household Tricks to Clean a Waffle Maker and Remove Stuck Batter Fast
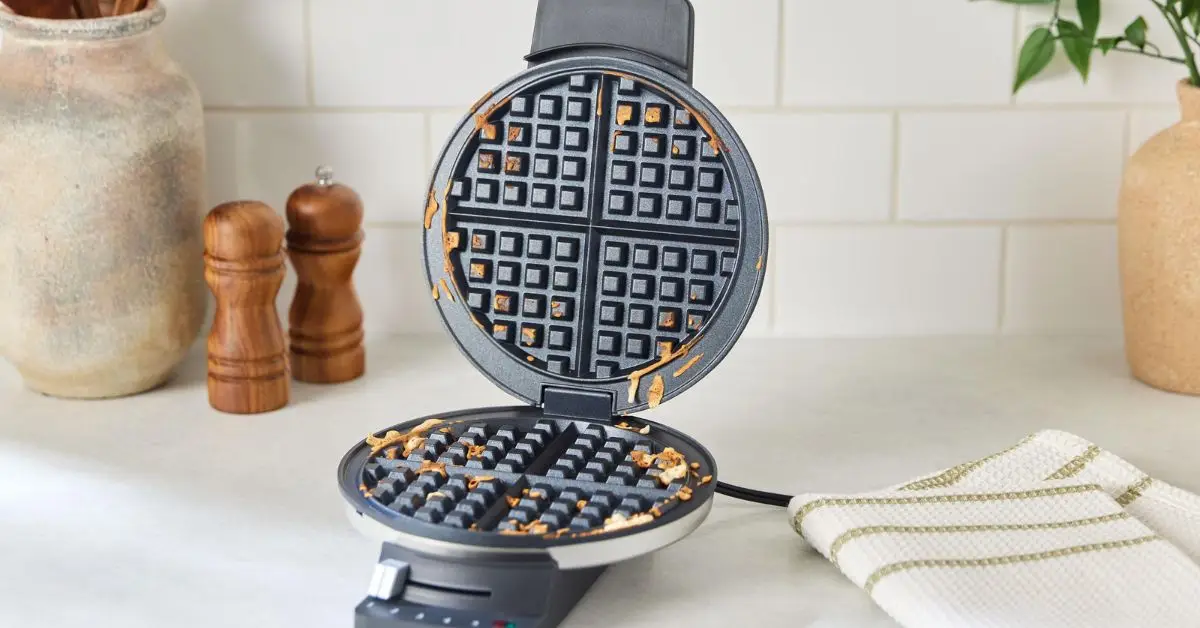
You open your waffle maker the next morning… and there it is. Hardened batter stuck in the grooves. Burnt oil smell. Crumbs welded into the corners. I’ve been there. And if you’ve ever tried scraping it off with a fork (please don’t), you know how quickly things can go wrong.
The good news? You don’t need special cleaners. You don’t need to soak the machine. And you definitely don’t need to damage the nonstick surface.
I’ll walk you through simple, practical ways to clean your waffle maker using items already sitting in your kitchen — baking soda, vinegar, dish soap, even a toothbrush. These are safe methods I recommend because they work on real, stubborn buildup… not just fresh spills.
And yes, even that stuck batter that feels permanent can come off.
Before we get into the step-by-step methods, let me ask you — is your waffle maker just lightly messy, or are we dealing with weeks of buildup?
Why You Should Clean Your Waffle Maker After Every Use
Let me be honest with you — most people don’t clean their waffle maker properly after using it. They close the lid, leave it on the counter, and promise to deal with it later.
That “later” is where problems start.
When batter and oil sit on hot plates, they harden. Old grease turns sticky. Moist crumbs create odor. And over time, your waffles stop tasting fresh — even when your batter is perfect.
Here’s what regular cleaning actually does for you:
- Protects your health – Old food residue can grow bacteria and mold if left trapped inside grooves. Basic appliance hygiene matters.
- Keeps flavors clean – Burnt oil changes the taste of fresh waffles.
- Prevents smoke and odor – Built-up grease heats up fast and creates that unpleasant burnt smell.
- Improves performance – Clean plates heat more evenly.
- Extends lifespan – Grease buildup strains heating elements over time.
Appliance care experts like Consumer Reports consistently emphasize that routine cleaning helps small kitchen appliances last longer and perform better.
If you invested in a waffle maker, even a basic one, it deserves two extra minutes of care after each use.
Trust me — cleaning right away is easier than scraping hardened batter tomorrow.
Prep Step: Cool Down, Unplug, and Loosen Crumbs
Before you touch anything, slow down.
I know it’s tempting to start wiping while it’s still warm, but safety comes first.
Here’s exactly what I do — and what you should do:
- Unplug the waffle maker completely.
- Let it cool down until it’s warm, not hot.
- Open the lid fully so steam escapes.
- Use a dry paper towel or soft brush to remove loose crumbs.
- Place a towel under the appliance to catch debris and protect your counter.
Never run water over the unit. Never submerge it. And never use metal tools — that’s how nonstick surfaces get ruined.
This step might feel basic, but it prevents burns, electrical damage, and scratched plates. Most online guides skip this and jump straight to cleaning hacks. I won’t.
Once it’s cool, unplugged, and crumb-free — now you’re ready to deal with the real mess.
Household Items That Safely Clean Your Waffle Maker
You asked for ways to clean your waffle maker with household items — not sprays from a hardware store.
So let’s talk about the stuff you actually have in your kitchen and why it works.
Common Kitchen Supplies (Baking Soda, White Vinegar, Dish Soap)
- Baking Soda – This is my go-to when batter has dried hard. It’s a gentle abrasive that lifts stuck food without scratching nonstick surfaces.
- White Vinegar – Great for cutting through grease and neutralizing odors. Mixed with water, it becomes a simple degreaser.
- Dish Soap – Perfect for light grease and fresh spills. A few drops in warm water make cleaning much easier.
These are the staples used in most good cleaning routines because they’re safe and effective. If you want a broader explanation of how to use everyday items for waffle maker cleanup, The Spruce has a solid breakdown of similar household techniques.
The trick isn’t having fancy products — it’s matching the right item to the mess.
Tools That Make It Easier (Toothbrush, Soft Cloths, Wooden Picks)
Cleaning supplies matter, but tools are just as important. Using the right one keeps your appliance in good shape.
Here’s what I rely on:
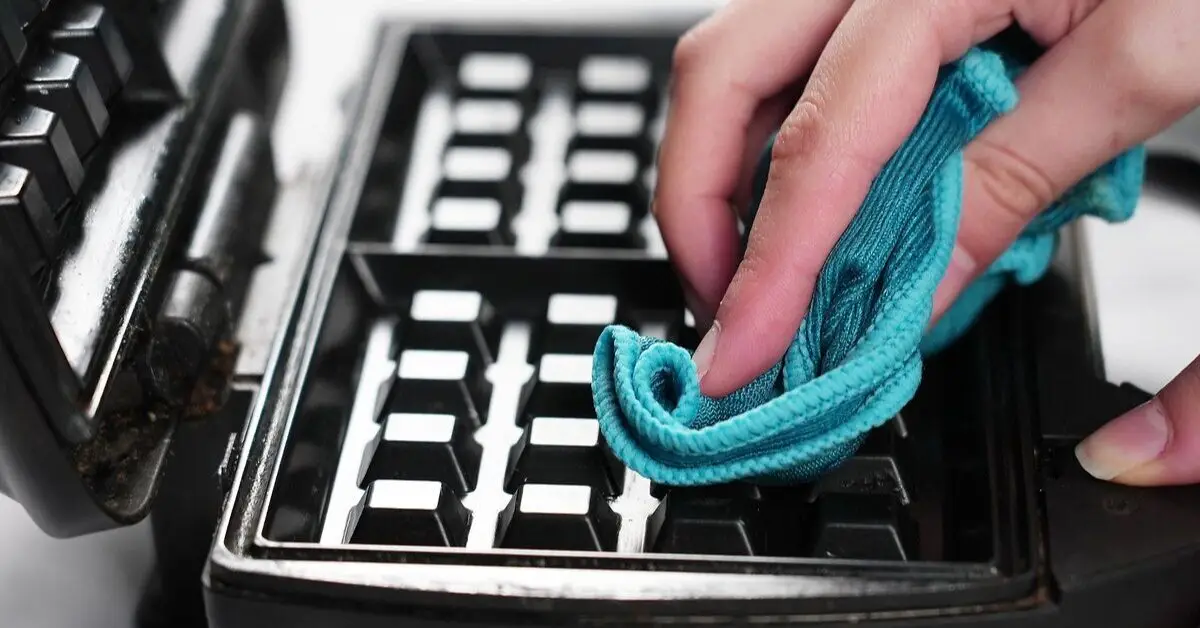
- Soft microfiber cloths – Gentle, lint-free wiping.
- Old toothbrush – Ideal for scrubbing grids and grooves.
- Wooden picks or bamboo skewers – Great for loosening crumbs in tight corners.
- Paper towels – Quick cleanup for loose debris and grease.
Stay away from metal utensils, steel wool, or anything hard. These will scratch the plates and ruin the nonstick coating.
Step-by-Step Methods to Remove Grease and Stuck Batter
Now that you know what to work with, let’s go through nine actionable cleaning methods. I organize them by mess type so you can pick the one that fits your situation.
1. Steam Clean With Hot Water and Cloth
Best for: Fresh spills and loose crumbs
- Dampen a cloth (not dripping) with hot water.
- Close the waffle maker and let steam loosen up the debris for 2–3 minutes.
- Open and wipe away loosened bits.
Safety tip: Keep water off electrical parts.
2. Baking Soda Paste for Stuck Batter
Best for: Dried, stubborn batter
- Mix baking soda with a splash of water into a paste.
- Spread it on the stuck areas.
- Let it sit for 10–15 minutes.
- Scrub lightly with a toothbrush and wipe clean.
Safety tip: Don’t scrub too hard — let the paste do the work.
3. Vinegar and Water Spray for Grease
Best for: Grease buildup and lingering smell
- Combine equal parts white vinegar and water.
- Spray onto a cloth, not directly on plates.
- Wipe down the greasy areas.
- Finish with a dry cloth.
Safety tip: Avoid oversaturating the unit.
4. Dish Soap + Warm Cloth
Best for: General cleaning
- Add a few drops of dish soap to warm water.
- Dampen a cloth and wring well.
- Wipe plates, hinges, and edges.
- Rinse with a clean damp cloth afterward.
Safety tip: Keep water away from electrical components.
5. Toothbrush Scrub for Grids
Best for: Deep grooves where batter hides
- Slightly wet the toothbrush.
- Gently scrub stuck bits in grid lines.
- Wipe up residue with a cloth.
Safety tip: Use soft bristles only.
6. Wooden Skewer for Tight Spaces

Best for: Corners and edges
- Slide a wooden pick along the edges.
- Lift out crumbs safely.
- Wipe clean after.
Safety tip: Never push hard — you’re aiming to dislodge, not damage.
7. Foil and Water Steaming Trick
Best for: Tough buildup that resists light cleaning
- Place a small piece of foil on the bottom plate.
- Add a tablespoon of water on top.
- Close lid and let steam build for 1–2 minutes.
- Wipe loosened residue.
Safety tip: Watch closely so no water seeps into electrical parts.
8. Heat and Wipe Technique
Best for: Slightly hardened grease
- Turn the waffle maker on for 1–2 minutes.
- Unplug, then wipe with a warm damp cloth.
- The warmth loosens stuck-on grease.
Safety tip: Cloth should never be hot enough to burn you.
9. Drying and Deodorizing With Lemon or Coffee Grounds
Best for: Removing smell after cleaning
- Rub a lemon slice over cooled plates.
- Or place dry coffee grounds inside, close lid for 30 minutes.
- Brush out and wipe clean.
Safety tip: Ensure plates are completely dry before storing.
These aren’t guesses — they’re practical, kitchen-tested methods that go beyond the generic “wipe it down” advice most guides stop at.
Which mess are you tackling first — old batter or just greasy buildup?
Troubleshooting Common Cleaning Challenges
Sometimes the basic methods don’t fix everything. And that’s where most guides stop.
If you’re still dealing with smells, stains, or awkward design issues, here’s how I handle them.
Grease Smells Won’t Go Away
That burnt oil smell can stick around even after wiping.
Here’s what I recommend:
- Warm the waffle maker slightly, then unplug it.
- Wipe plates with a vinegar-water solution.
- Follow with a dry cloth.
- Let it air out fully before closing the lid.
If the smell is stubborn, sprinkle a small amount of baking soda on cooled plates, leave for 20 minutes, and wipe clean.
When not to use water: If grease has seeped near hinges or wiring, avoid adding more moisture. Focus on surface cleaning only.
Black Residue Still Stuck
That dark buildup isn’t always burnt batter. Sometimes it’s carbonized oil.
Here’s what works:
- Apply baking soda paste directly on the residue.
- Let it sit longer — up to 20 minutes.
- Gently scrub with a soft toothbrush.
- Wipe clean with a damp cloth.
If it still doesn’t move, repeat the process instead of increasing pressure.
Do not scrape with metal tools. That damages the coating permanently.
When not to use water: If residue is deep near seams, use minimal moisture to avoid seepage inside the unit.
Non-Removable Plates
This is where people get frustrated.
If your plates don’t detach:
- Never run the appliance under the sink.
- Use damp cloths only.
- Tilt the waffle maker slightly while wiping so moisture doesn’t pool near electrical areas.
- Clean in sections instead of soaking everything at once. And if you’ve noticed weak water flow in your kitchen sink while cleaning appliances, it could be part of a bigger plumbing issue — this breakdown of 12 Common Causes of Low Water Pressure in US Homes explains what might be happening.
According to appliance safety guidance from the U.S. Consumer Product Safety Commission, small electrical appliances should never be submerged or exposed to excess moisture.
How to prevent rust:
- Always dry plates completely before storing.
- Leave the lid open for 20–30 minutes after cleaning.
- Store in a dry cabinet.
- Avoid excessive water near hinges.
Rust usually forms from trapped moisture, not normal use.
What Not to Do When Cleaning Your Waffle Maker

I’ve seen people ruin perfectly good waffle makers by trying to “deep clean” them the wrong way.
Avoid these mistakes:
- No metal forks, knives, or steel scrubbers. They scratch nonstick surfaces instantly.
- Do not submerge the unit in water. Electrical parts can short out. If you’re ever unsure whether something belongs in the dishwasher, you might want to read 7 Items You Should Never Put in the Dishwasher (Expert Tips to Avoid Damage) before risking expensive damage.
- Avoid harsh chemical cleaners or oven sprays. These can damage coatings and leave harmful residue.
- Don’t scrape aggressively. If something won’t come off, repeat a gentle method instead.
Cleaning isn’t about force. It’s about patience and the right approach.
Simple Daily and Monthly Maintenance Tips
If you want to avoid heavy scrubbing in the future, maintenance is everything.
Here’s what I personally do.
After Every Use
- Wipe plates once they cool.
- Remove crumbs immediately.
- Leave the lid open for air circulation.
- Dry fully before storing.
This alone prevents 80% of buildup.
Monthly (If You Use It Often)
- Lightly “season” plates with a small amount of cooking oil wiped thinly across the surface.
- Buff off excess oil with a dry cloth.
- Inspect hinges and corners for trapped residue.
You can also:
- Lightly oil plates before pouring batter to reduce sticking.
- Avoid overfilling — overflow causes most buildup problems.
Maintenance takes less than two minutes but saves you from dealing with hardened batter later. I’m a big believer in making the most of what you already have at home — just like repurposing dryer lint in smart ways, which I’ve shared in Dryer Lint Isn’t Trash – 8 Clever Ways to Reuse It at Home.
If you’ve been ignoring yours for weeks, don’t worry. Start fresh today.
Do you clean yours right after cooking, or does it usually sit until the next craving hits?
At-a-Glance Cleaning Methods and When to Use Them
Sometimes you don’t want to reread the whole guide. You just want a quick answer.
So here’s a simple reference table you can scan in seconds and pick the method that fits your situation.
| Problem | Best Household Solution | Time Needed | Tools Needed |
|---|---|---|---|
| Fresh crumbs | Steam with damp cloth | 3–5 mins | Soft cloth |
| Light grease | Dish soap + warm cloth | 5 mins | Cloth + mild soap |
| Stuck batter | Baking soda paste | 15–20 mins | Baking soda + toothbrush |
| Heavy grease smell | Vinegar + water wipe | 5–10 mins | Spray bottle + cloth |
| Black residue | Baking soda treatment (repeat if needed) | 20 mins | Toothbrush + cloth |
| Tight corners | Wooden skewer method | 5 mins | Wooden pick |
| Deep buildup | Foil steam trick | 5–7 mins | Foil + water |
| Slight hardened grease | Heat and wipe | 3–5 mins | Damp cloth |
| Lingering odor | Lemon rub or coffee grounds | 20–30 mins | Lemon or dry coffee |
Keep this section bookmarked. It saves time when you’re dealing with a specific mess.
Final Thoughts
Cleaning a waffle maker isn’t complicated. But doing it the right way makes a big difference.
When you clean it properly:
- Your waffles taste better
- There’s no burnt smell
- The nonstick coating lasts longer
- You avoid scraping and damage
You don’t need expensive cleaners. You don’t need to soak the appliance. You just need the right method for the mess in front of you.
If this guide helped you, I’d love to know — which method worked best for you? Or do you have your own kitchen hack?
Drop your thoughts in the comments and share your experience.
And if you enjoy practical, no-nonsense home care guides like this, check out more helpful resources on Build Like New. I regularly share real-world solutions that actually work in everyday homes.
Now tell me — is your waffle maker officially clean, or are we still battling stuck batter?
Disclaimer: This guide is for general informational purposes only. Always check your waffle maker’s user manual before cleaning, as manufacturer instructions may vary. Make sure the appliance is unplugged and completely cool before handling, and use these methods at your own discretion to avoid damage or injury.

